Dark Ride DSLR Photography for Beginners

abidale

DIS Veteran
Joined
Apr 9, 2013
Messages
1,514
Hi! I have a Nikon d3100. It's the first DSLR I've owned, before that all point and shoots. I have a basic understanding of how to use manual mode, shutter speed priority, and aperture priority, but what I'm trying to figure out now is which of those to use, along with what ISO and metering to use, on the slow moving dark rides. The lens is a 18-55 mm, the shutter speed range is from 30-1/4000, and the aperture range is from f/3.5-f/5.6. Basically what comes with the camera, don't want to purchase extra lenses, etc. until I get more familiar with the camera. So, I know that's not ideal for dark photography, but what can I do to get the best that I can working with what I have? Thanks!
 
Getting decent dark ride shots with the kit lens will be a challenge.

You'll need to stay zoomed out as far as possible in order to get the fastest aperture (F3.5) - as soon as you zoom it, the maximum aperture gets smaller which means less light comes in.

I would go with Shutter Priority mode - since you're in a moving ride, you need to keep the shutter speed as high as possible otherwise things will just be a blurry mess. You can try practicing but 1/30th is probably the slowest you'll be able to get away with, and even then, you'll want to take a few shots in a row and pick up the least shaky one. I'm not sure how the auto ISO behaves on your camera, but you'll want to set it to go up to minimally 3200, possibly even 6400.

Basically, the dark ride shots will most always be F3.5 and whatever shutter speed you pick and the ISO will vary depending on the lighting. If the ISO is too low, you will get an underexposed photo, which may be OK.

For metering, I'd go with spot metering - you want what you point at to be exposed correctly, otherwise it'll try to expose all the dark-ride darkness and make the photo too bright, and what you care about will be overexposed.

You also really owe it to yourself to shoot in raw mode, or raw+jpg if that's an option. Even if you're not prepared to work with raw photos now, you may be ready to in the future, and if so, you'll be able to go back and have a lot more flexibility to edit them in the future than with just the jpgs. This really makes a difference for challenging shots like dark ride photos.
 
I would like to give you some advice from one that became obsessed with the dark rides. Unless you are willing to invest money, time and effort, you will become frustrated trying to shoot the Disney dark rides. It is one of the more difficult shots in photography. You are shooting from a moving vehicle to a target that many times is moving in the dark without using a flash. To get those shots, I purchased the best APS-C camera my manufacturer produced and arguably the best lowlight lens available at that time. Retail value at the time was $1,700! Then I practiced a lot nights trying to simulate the dark rides. Was I successful, to some extent, yes. This is not saying you can't get a shot or two with an entry level DSLR and a consumer variable aperture lens, but it will be luck. The photographer's talent can make for some shortfalls in equipment, however with the dark rides, the equipment is paramount. You will need a high usable ISO camera body and a lens in the 30-35mm f1.4 to 1.8. I'm not all that familiar with the Nikon 3100, but a lens that is getting rave reviews is the Sigma 18-35mm f1.8. I know you stated you didn't want to spend any money on new equipment, so until you are able/willing to purchase a different lens you can play around but don't have high expectations. Here are a couple that you can look at the exif info on my Flickr page to see how they were taken.

PP Mermaid by Terry McGraw Photography, on Flickr

HM3 by Terry McGraw Photography, on Flickr

HM2 by Terry McGraw Photography, on Flickr

PotC 20 by Terry McGraw Photography, on Flickr

GMR 3 by Terry McGraw Photography, on Flickr

This one was taken with a consumer variable aperture lens because it is a WR lens and I was going to try to get water coming over the bow of the boat. My plan didn't work but I was able to get a few on Splash.
Splash Mountain 1816 by Terry McGraw Photography, on Flickr
 
This image was shot at f/4 and 1/60 but to get by with an aperture that small I had to go up to ISO 12800 and your camera just doesn't go that high. It's one of the brighter scenes on POTC.
i-Fw7d2Br-L.jpg


While some cameras can get the shot on a dark ride using a kit lens, yours isn't one of them. You'll either need a camera with a higher ISO capability than what you have or a faster lens to really get anything useable in most cases.
 

Thanks everyone! After a couple of trips just practicing, I'll invest in a better lens, etc. Great tips and also, great shots- hopefully I'll be able to work up to that!
 
You also really owe it to yourself to shoot in raw mode, or raw+jpg if that's an option. Even if you're not prepared to work with raw photos now, you may be ready to in the future, and if so, you'll be able to go back and have a lot more flexibility to edit them in the future than with just the jpgs. This really makes a difference for challenging shots like dark ride photos.

This probably sounds like a stupid question, but last trip I made a rookie mistake of shooting all my pictures in raw mode without first checking whether or not my computer had a program to convert them (it doesn't). I used the free trial of Photoshop so all was well, but considering I haven't actually bought Photoshop and the trial has expired, if I shoot in raw+jpg will I have access to the pictures in raw and jpg form, in case I get Photoshop later and want to edit? My computer will only load the jpgs right now. Thanks again, with all my beginner questions!
 
Yes, if you shoot RAW+JPEG, you can still access the JPEGS.

With an APS-C camera like the Nikon d3100 and the kit lens, I wouldn't expect to get any dark ride shots beyond some dark blurs. You may get a little out of the brighter dark rides, like Small World, which is pretty bright. But rides like Peter Pan, Pirates, etc... Truthfully, you may only get frustrated.
A fast lens isn't just "better," -- it's critical. You need either a very fast lens, or very high ISO, or potentially both. The D3100 is a mediocre high ISO performer.. so you need to make up for that with a very fast lens.

So even with the best possible settings, you're unlikely to get many even half-decent shots.

The good news is that there are cheap options: For instance, the Nikon 35mm f/1.8G AF-S DX is under $200, and would enable excellent low light shots. It's 2 stops faster than your kit lens on the wide end.
What that means -- Assuming you are using ISO 3200 (I believe that's the top regular setting on the D3100), a picture that is taken at a 1/60 shutter speed on the 35/1.8, would require a shutter speed of 1/15 on your lens. 1/15th of a second.. while moving.... Much too slow.
Or, assuming shutter speed is constant -- assuming you keep it set at 1/60 --- If you use ISO 3200 on the 35/1.8 lens, you will need ISO 12800 on the kit lens.
 
This probably sounds like a stupid question, but last trip I made a rookie mistake of shooting all my pictures in raw mode without first checking whether or not my computer had a program to convert them (it doesn't). I used the free trial of Photoshop so all was well, but considering I haven't actually bought Photoshop and the trial has expired, if I shoot in raw+jpg will I have access to the pictures in raw and jpg form, in case I get Photoshop later and want to edit? My computer will only load the jpgs right now. Thanks again, with all my beginner questions!

Use the Canon software to process your RAW photos if you don't have any other software. It's free.
 
Lightroom is $10 a month with the Adobe Creative Cloud so not too pricey and includes Photoshop, might be an option for you.


Shot with a Sony A55 and cheap Sony 35mm f/1.8
1/25th ISO 3200

Hitch Hiking Ghosts by Mike Sperduto, on Flickr


1/100th f/1.8 ISo 1600
Space Ranger Spin by Mike Sperduto, on Flickr


Shot with Sony A55
1/50th f/1.8 ISO 3200

Put Your Heads Together by Mike Sperduto, on Flickr


For an example same ISO but slower shutter on these next 4 pics. I really should have bumped up the shutter speed a little on both from the A99 but you can the difference in detail between the f/1.8 ad f/1.4 and how the 2 cameras differ

Shot with Sony A(( and Sigma 50mm F/1.4
1/25th f/1.4 ISO 3200
Haunted Mansion or Bust by Mike Sperduto, on Flickr

A55 f/1.8 1/50th ISO 320
Make a Wish by Mike Sperduto, on Flickr

A99 f/1.4 1/30th ISO 3200
Blow Out the Candles (Explored) by Mike Sperduto, on Flickr


One of my favorite dark ride shots
Sony A99
f/1.4 1/125th ISO 8000
Peter Pan (Explored 3-5-14) by Mike Sperduto, on Flickr
 
I mistakenly went all in on image stabilization vs lens speed when I transitioned to canon. I have since picked up a 22mm f2.0 lens and I'm wondering if that will be adequate on darker rides. Camera is a T3i and an eos-m (which is a t3i on the inside)
 
I mistakenly went all in on image stabilization vs lens speed when I transitioned to canon. I have since picked up a 22mm f2.0 lens and I'm wondering if that will be adequate on darker rides. Camera is a T3i and an eos-m (which is a t3i on the inside)

I think you'll be able to get some with an f/2 lens on a T3i. Maybe not really dark scenes but I'd think you'd catch some useable shots. With your sensor you have a useable range up to ISO 6400, that gives you a lot to play with.
 
I mistakenly went all in on image stabilization vs lens speed when I transitioned to canon. I have since picked up a 22mm f2.0 lens and I'm wondering if that will be adequate on darker rides. Camera is a T3i and an eos-m (which is a t3i on the inside)

You should be OK. I got these shots with my old Canon XSi and the 50mm f/1.8

Shot in shutter priority, anywhere from 1/40 - 1/60 depending on ride speed and available light. Used ISO 800 because 1600 is too noisy for my taste on my camera. With a T3i you will have better ISO options and performance so should be fine. Also, you''ll obviously be able to shoot wider than I am able to. I've had good luck on Haunted Mansion, Pirates, SSE, IASW, Splash, Ellen's Energy Adventure, Pooh, and Buzz. Pretty much out of luck on Peter Pan, though - the Holy Grail of dark ride photography ;)

Piglet.jpg


PiratesJack3.jpg


PiratesRedhead.jpg


BTW my sig photo is a crop from a pic of all four busts using same setup.
 
Good to hear. That eos-m with the kit pancake is just a pleasant camera to carry around.
HR_EOS_M_WHITE_EFM22_2_STM_TOP_CL.jpg
 
Another question: Will these settings be okay for taking pictures of Boo to You with the kit lens?

shutter speed 1/160
aperture f3.5
ISO Hi 1
AF-C
Spot metering
exposure comp -1
 
Another question: Will these settings be okay for taking pictures of Boo to You with the kit lens?

shutter speed 1/160
aperture f3.5
ISO Hi 1
AF-C
Spot metering
exposure comp -1

No one can tell you without being there using your camera and lens. However, if you're shooting with the 18-55, pulled wide to 18mm so you can use the f/3.5, you should be able to get by with a significantly slower shutter speed than 1/160. The rule of thumb is 1/focal length for stationary objects, but with crop cameras and individual steadiness that will vary.

Take your camera and shoot some still objects with the lens set at 18mm with any image stabilization turned off, lowering the shutter speed each time (use shutter priority so the shots will be well exposed so you can examine them later) Look carefully at the images (pixel peep at 100%) for the point where you can begin to see motion blur. Do the same with the lens zoomed all the way in to 55mm. This will tell you how slow you can get by when hand holding at both ends. Add a stop or two for moving objects, depending on how fast they are moving.
 
Another question: Will these settings be okay for taking pictures of Boo to You with the kit lens?

shutter speed 1/160
aperture f3.5
ISO Hi 1
AF-C
Spot metering
exposure comp -1

Nobody can tell you exact settings in advance. You start with testing those settings. If the picture is underexposed or overexposed, then you need to adjust it. And remember, you can only use the 3.5 aperture when zoomed all the way out.
 
Another question: Will these settings be okay for taking pictures of Boo to You with the kit lens?

shutter speed 1/160
aperture f3.5
ISO Hi 1
AF-C
Spot metering
exposure comp -1

You might want to look around Flickr for photos others have taken of the parade. It appears you are looking to go flashless, so be sure to use similar shots. Check the EXIF information for a starting point.

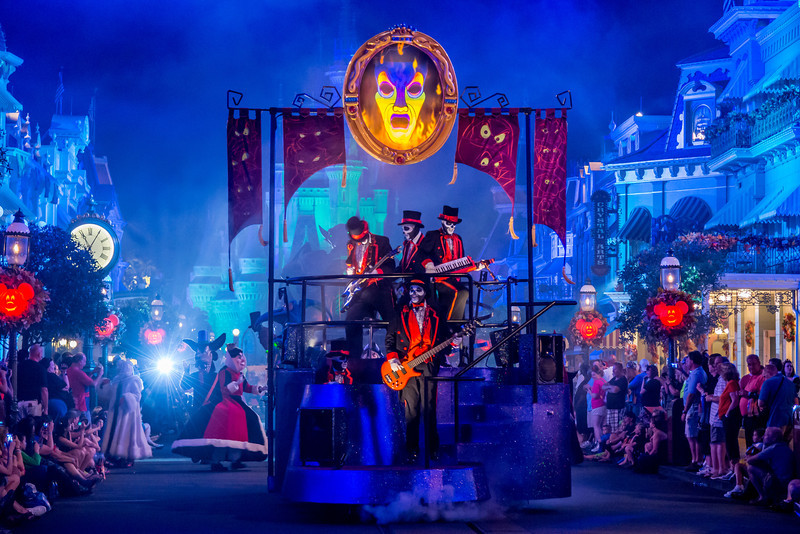
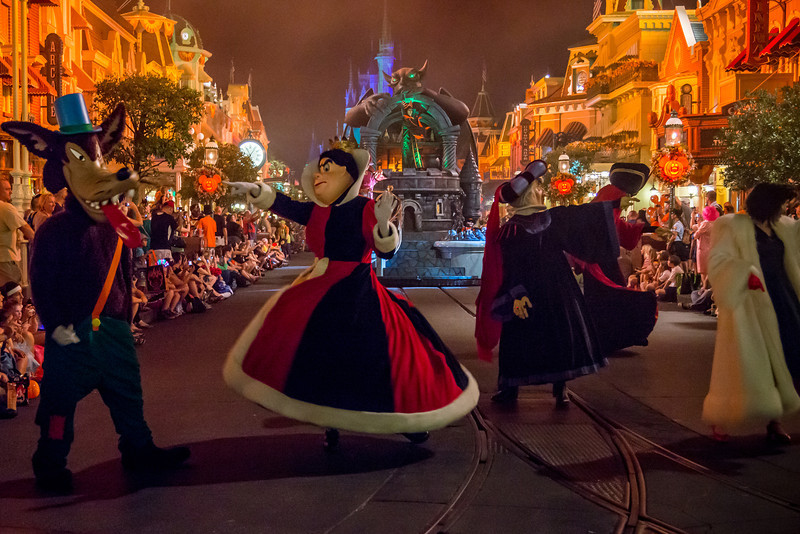
But honestly, some of the elements of the parade are very dark and have no lighting. I have had trouble shooting that parade and the MVMCP parade flashless with a 2.8 lens. Shooting the headless horseman flashless with a kit lens is going to be very challenging.

One of the important things you can do is evaluate your position. Some areas where you sit have a bit more ambient light (including some lights along the way on rooftops and such) and some are very dark. That will make a difference in your success.

Have you considered some shots with a flash, but with the exposure compensation dialed back to minimize the impact? I've shot the Christmas parade both with and without a dialed back flash. Truth is there are some elements of the parade I prefer with a touch of flash, and some I prefer without.
 
Another question: Will these settings be okay for taking pictures of Boo to You with the kit lens?

shutter speed 1/160
aperture f3.5
ISO Hi 1
AF-C
Spot metering
exposure comp -1

As everyone has mentioned, you will have to play with your settings when you are there. It's mainly based on where you are watching the parade from. The parade route lighting varies greatly, especially if you are in Adventureland. An area could have a super bright spot light, to no lighting at all. And unfortunately, you won't know what the lighting will be like until the parade starts.

I actually prefer shooting night time parades in manual mode, when you are in a well lit spot. Things like a dark sky, parade lighting pointing at you and other people's flash (especially cell phone LEDs) can fool with the camera's exposure. It seems like Disney made some effort to make sure all the characters on the floats are lit with the same amount of light. At least that was my experience on Main Street. You mileage may vary.
(Disclaimer: Manual mode may not be the best mode for a kit lens, since the aperture varies as you zoom in/out)

Both of these were in manual mode; ISO 3200, 1/60, f/4.


My advice - if you are just starting out trying to get into dark ride photography, be prepared to get in over your head very, very quickly from a complexity and cost perspective.

It is far more complicated than any type of vacation photography you can imagine due to:

- Minimal available light thus requiring fast (expensive) lenses and/or high ISO (expensive bodies)
- Variable shutter speeds due to the motion of the ride in question or the subject you are trying to capture
- Subject material that pushes the boundaries of dynamic range in that you need to expose for things that are in low light; but, often it's the bright spot lights that will cause overexposure due to dymanic range being compromised at high ISO. You really need to watch your color histograms as each channel can take a beating on different rides.
- Willingness to take advantage of spot metering and moving the focus point around to get a good exposure
- Great understanding of post processing to get the most out of every exposure (shooting in RAW helps signficantly)

and finally, a couple things that people seem to discount when considering if they want to start down the dark ride photography path

- A predictive understanding of each ride to know what is coming up and how to adjust your shutter speed, ISO, or spot metering to be prepared before the moment you are trying to capture is before you. This means you need many circuits on an attraction to get proficient at taking photos on it.
- Being prepared to discard MANY, MANY trash photos in order to get one keeper

With all that being said, time is money on vacation. If you are a frequent Disney visitor and don't mind sacrificing circuits on your favorite attractions as a passager and strictly enjoy the ride, you can dive into dark ride photography.

One trick that I've become a firm believer in over the course of the last several Disney vacations is to do much research in advance to determine the max ISO your camera can do before it stops applying analog gain to boost ISO and relies on digital gain. It is at this point, dymanic range begins to fall off considerably. At this cutoff point, it is better to shoot below this threshold and then use exposure boosting in post production as it gives much cleaner results and doesn't risk losing any highlight detail.

For my current workhorse camera, the Nikon D800e, this point is ISO 1600. Beyond this, it's all digital boosting which can be done better in post production.

Be advised that if you are serious about anything in photography, look at it all as a long term investment. Spend your money on buying pieces and parts that you can use over the long haul and won't need to replace. For example, don't buy a "faster" lens than your kit lens and get a f/2.8 only to turn around and buy an f/1.8 and then realize you need the most light possible and buy an f/1.4. Make smart choices more slowly. This always means buying better lenses and accesories (like tripods) that you can reuse forever than spending a ton on a state of the art body that loses half its value in a couple of years.
 
At this cutoff point, it is better to shoot below this threshold and then use exposure boosting in post production as it gives much cleaner results and doesn't risk losing any highlight detail.

For my current workhorse camera, the Nikon D800e, this point is ISO 1600. Beyond this, it's all digital boosting which can be done better in post production.

I'll respectfully disagree on this point. We have been discussing it in the high ISO thread. It is far better to expose to the right -- To overexpose with higher ISO, and then bring it down in post-production.
Increasing exposure in post-production adds a whole lot of noise.
I've done both.... I find it much easier to get a clean final image, shooting at ISO 12800 and possibly bringing it down a bit in post, as opposed to shooting at ISO 6400 and increasing it in post.


New Posts


Save Up to 30% on Rooms at Walt Disney World!

Save up to 30% on rooms at select Disney Resorts Collection hotels when you stay 5 consecutive nights or longer in late summer and early fall. Plus, enjoy other savings for shorter stays.This offer is valid for stays most nights from August 1 to October 11, 2025.
CLICK HERE


DIS Facebook DIS youtube DIS Instagram DIS Pinterest

Back
Top