To Infinity and Beyond - Becoming a Better DopeyBadger (Comments Welcome)

We plan to wear them at MNSSHP and then send the pics of us inside at the party about whether they are runDisney acceptable as well.
What is the reason you are waiting? I'm assuming you're expecting a more favorable answer if it's already been worn at Disney?

Due to volume, their response times will slow down once race season hits in November. If it were me, I'd prefer an answer sooner so that I could work on plan B if necessary.

We leave for MNSSHP in about 3 weeks. So I’ll still have a good 8-10 weeks for response and edits if necessary. But yea, I’m banking on a more favorable answer based on the costume already being worn on property for a different event.
 
Marty and Mike Wazowski - Costumes: Part 15
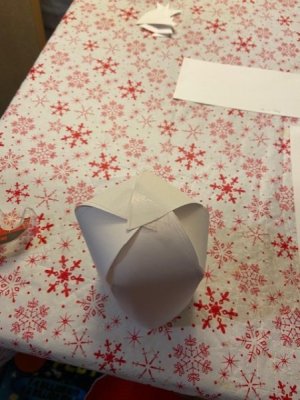
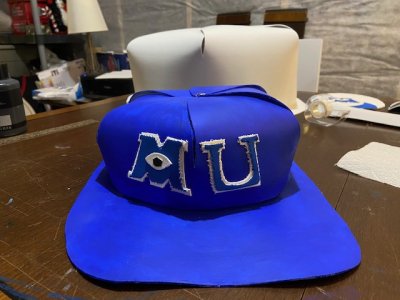
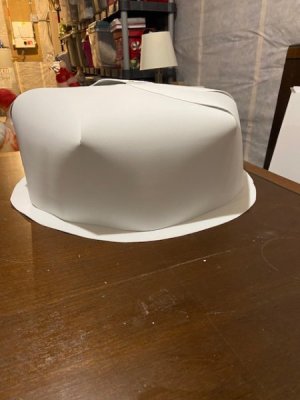
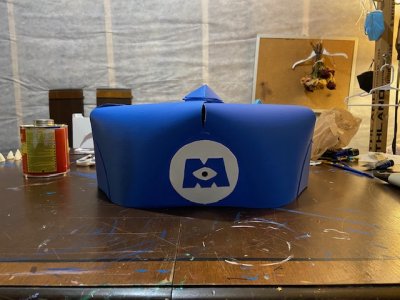
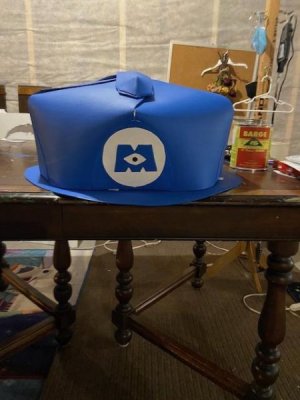
Let's talk hats! G and I wanted different hats for the two costumes. So for the Marty costume we're going with a MU baseball hat. For the Mike Costume we're going with the Monsters Inc. hard hat. If I wanted to take the easy way out I could have just purchases standard hats. Problem is, they wouldn't have been proportionally the correct size. So we decided to make our own. Here's the thing though. The hats to be proportionally correct in size need to be sizeable. G's hat was going to be like 11 inches wide and my hat was close to 17 inches wide. That's no small hat and that would be an issue for luggage transportation. So the goal was to make hats, but they needed to be in pieces that could be broken down and packed. I did some searching around the internet and found something that might be helpful (link). It's a tutorial on how to make a paper baseball cap with a neat folding technique. I thought this might be translatable to what I was trying to do. We'll start with the Marty MU baseball hat. Ahh look at Marty all grown up and in college, or is it that he's wearing his Uncle Mike's hat, or maybe just a fan of the MU sports team?

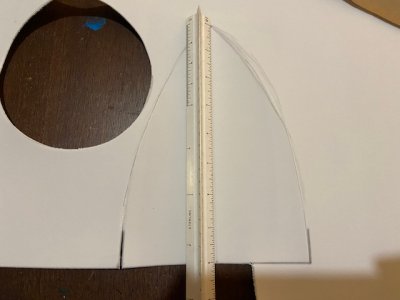
The first thing I needed to do was turn the concept from the paper hat tutorial into something big enough for us to use. The first thing is I did some math on a 11 inch diameter converted into circumference to determine how long the single piece of EVA needed to be. Second, I played around with adjustments on height of the foam panels to determine how that would influence the height of the hat.


thumbnail_IMG_6053.jpg

thumbnail_IMG_6054.jpg

We wanted it to be around 6 inches tall. It turned out having about 1-2 inches of connection between panels, and then panels of about 8 inches was around the right proportions.

thumbnail_IMG_6057.jpg

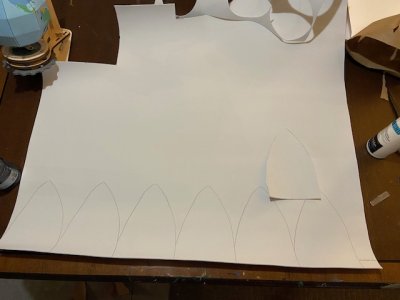
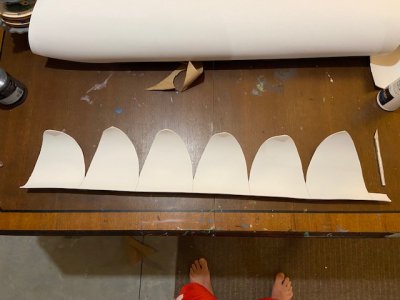
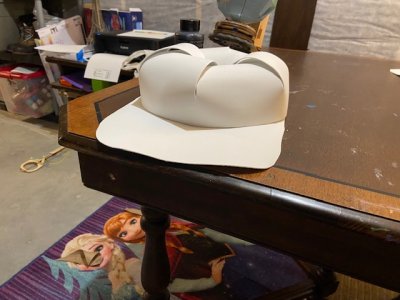
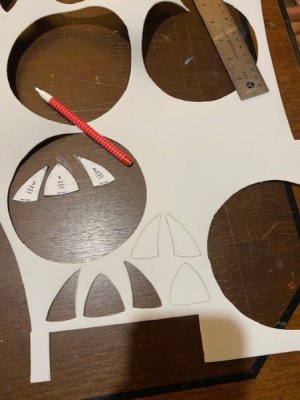
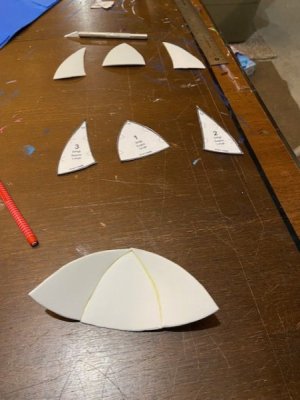
I learned that each piece of the 6 panel hat needed to be exactly the same shape. Otherwise when it folded onto itself things got a little goofy. So I cut a single panel and then traced it six times.

thumbnail_IMG_6060.jpg

I left a tab on the end so that I could attach the hat to itself to make a completed circle. The plan was to use velcro to attach the hat to itself. I used an exact knife to cut out the foam.

thumbnail_IMG_6061.jpg

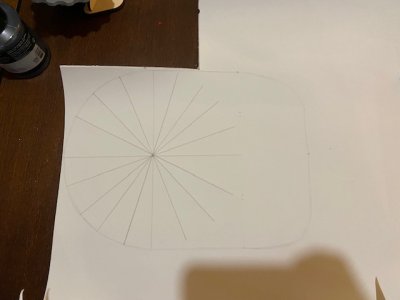
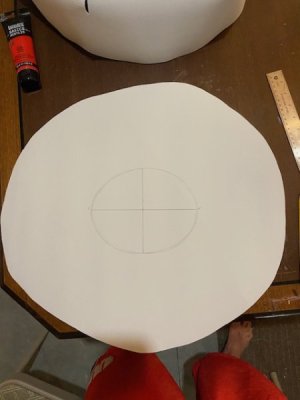
Next up was the base of the hat. I used the diameter of the hat as the basis to make a circular pattern for the second piece/base of the hat itself.

thumbnail_IMG_6062.jpg

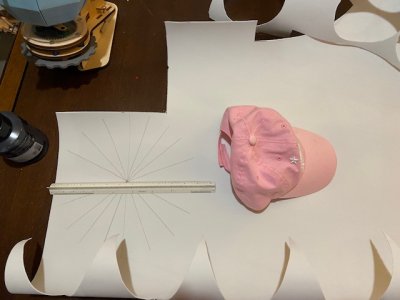
I pulled out a real hat to get an idea what the standard bill looks like, and tried to copy the shape.

thumbnail_IMG_6063.jpg

thumbnail_IMG_6064.jpg

I then place the top of the hat on top of this second piece base just to ensure I had things looked right.

thumbnail_IMG_6066.jpg

And then I cut the base out to give me the bones of the MU baseball hat.

thumbnail_IMG_6069.jpg

Next up, the hat needed some structure to help it hold its shape.

Next - Part 16
 
Last edited:
Marty and Mike Wazowski - Costumes: Part 16

I put a jar of paint inside the hat to hold up the structure and thought we were heading in the right direction.

thumbnail_IMG_6070.jpg

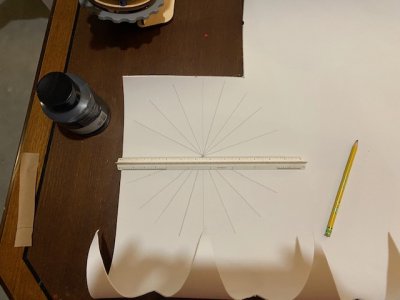
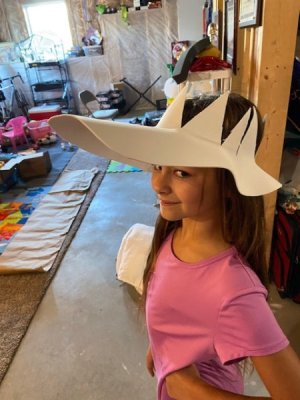
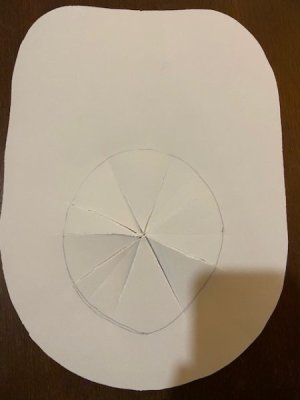
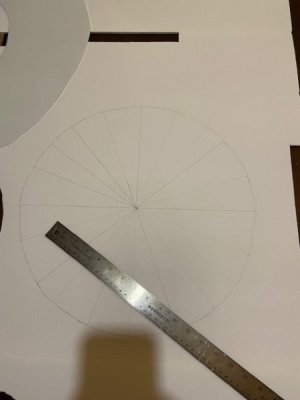
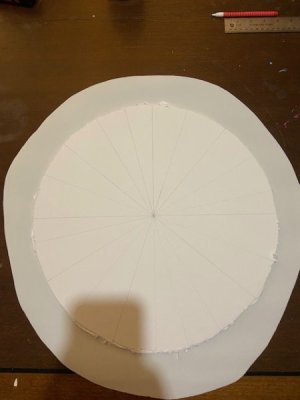
Now I needed to pivot a bit because the hat I was basing this on was a tiny paper hat. I needed this to fit G's head. So we took some measurements of her head and then I cut out a pattern emanating from the middle of the hat. We slid it over G's hat and we got this.

thumbnail_IMG_6078.jpg

I wasn't pleased with the outcome. The hat had too many waves in it to be acceptable. So we'd need to revisit how the base of the hat attaches to G's head.

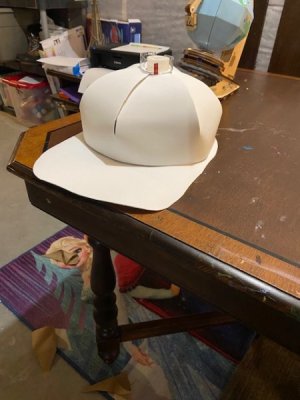
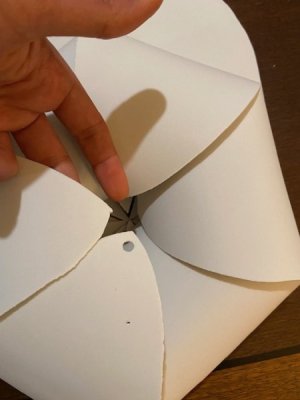
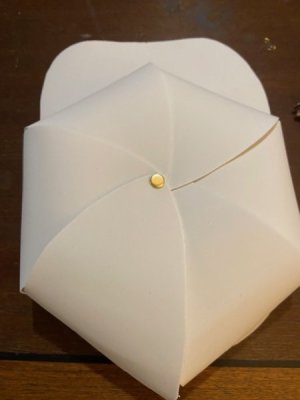
To hold the top piece of the hat together in a spiral pattern, I was to use a brad (as recommended by the tutorial). So I went through and did a hole punch on each of the six panels.

thumbnail_IMG_6116.jpg

Then I stuck the brad through and opened it on the other side.

thumbnail_IMG_6117.jpg

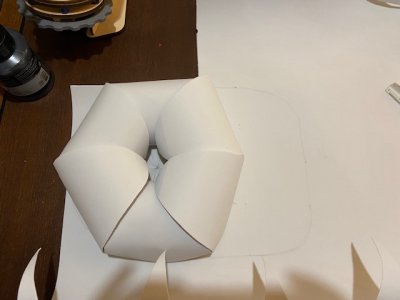
Similar to a pin wheel in some respects. This helped hold the hat up on its own without anything on the inside.

thumbnail_IMG_6118.jpg

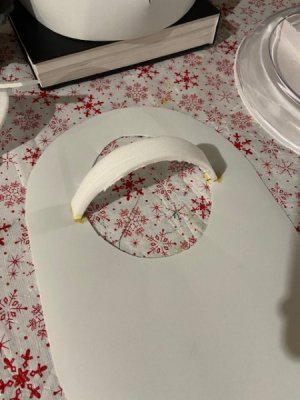
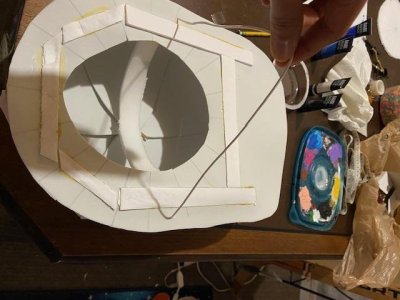
I then went back and worked on the base of the hat opening again. Instead of the sliced technique, I decided to go with just a full blown hole. I thought it might put less stress on the hat's base and maybe sit flatter.

thumbnail_IMG_6119.jpg

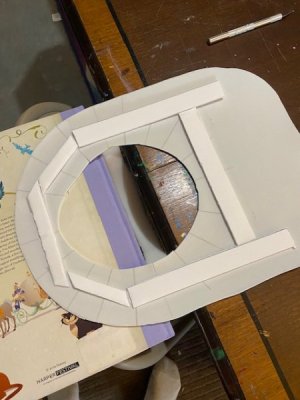
This worked to a point, but better than the previous version being used. But the hat still lacked structure. I went through several ideas before coming up with using some of the foam core board used in the eye piece to help add some structure.

thumbnail_IMG_6140.jpg

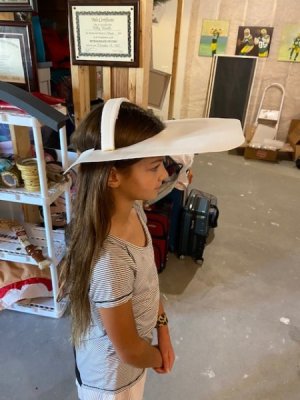
I then measured where the hat sat on G's head so that I could create a band on the base piece. This band would prevent the hat from being pulled too far down on G's head, and thus would sit in a comfortable place.

thumbnail_IMG_6120.jpg

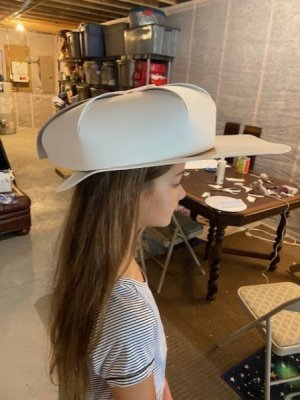
It worked, but the back of the hat seemed to be drooping just a bit.

thumbnail_IMG_6145.jpg

thumbnail_IMG_6147.jpg

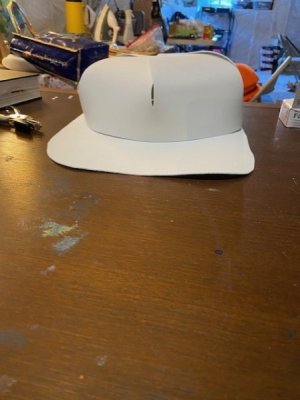
With the top of the hat sitting on the base of the hat, we seemed to be making good progress. Next up was figuring out a method for attaching the two that wasn't permanent.

Next - Part 17
 
Last edited:


Marty and Mike Wazowski - Costumes: Part 17

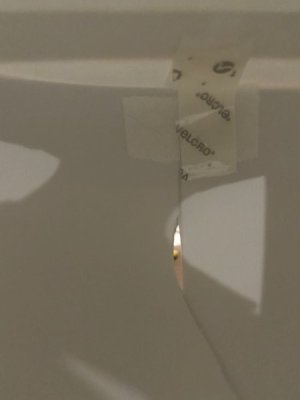
Like I mentioned briefly, I thought the best way to attach the base to the top of the hat was with velcro. I did this by attaching two pieces of the soft side (loop). One went in the base and then one went on the top. These were aligned in the same position. I did this multiple times around the hat so that there would be several connection points. I then took a single piece of the rough velcro (hook) and left the glue/tape on it. I would affix the hook across the two connections of loop on the base and top to connect them together.

thumbnail_IMG_6220.jpg

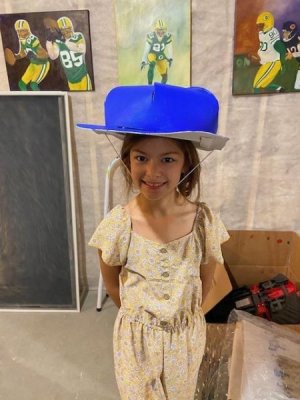
This was a successful strategy and kept the base/top together. I then attached an elastic string on either side of the hat to help keep it on G's head.

IMG_6221.jpg

We played around with it to get the fit just right. She's a very particular 9 year old.

IMG_6223.jpg

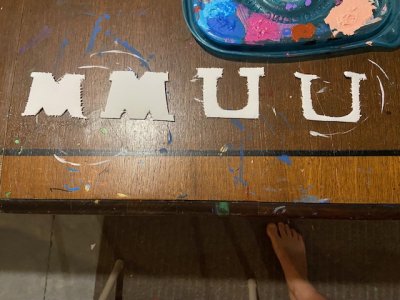
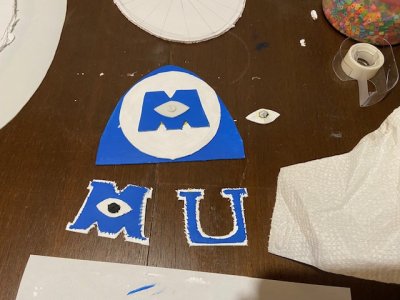
Once we got the fit to where we wanted it, we needed to create the "MU" for the front of the hat. I wanted the MU to be 3-D, so we decided not to paint it on. Secondly, we wanted to have it have a stitched looking effect. So when I cut the foam I placed my knife directly vertical so that it would tear the foam as I cut it.

IMG_6224.jpg

I'm pretty pleased with the effect. Next up was stacking the two "MU" pieces to pull off the 3-D effect.

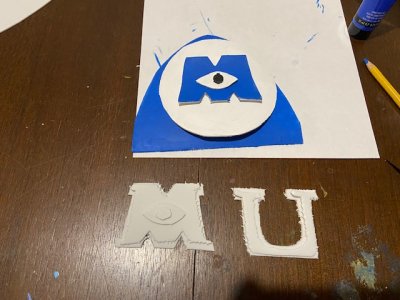
*Ignore the Monsters Inc logo for now.

thumbnail_IMG_6226.jpg

We used the Flexbond on the "MU" to keep it flexible after painting it. Then we painted each piece. The blue was "Cerulean Blue Hue" which we felt like was the closest to the images we could find.

IMG_6243.jpg

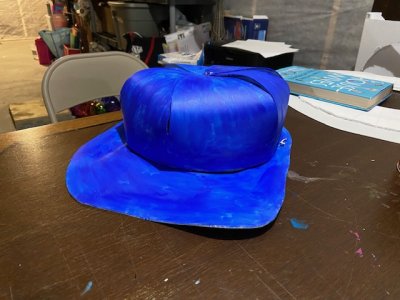
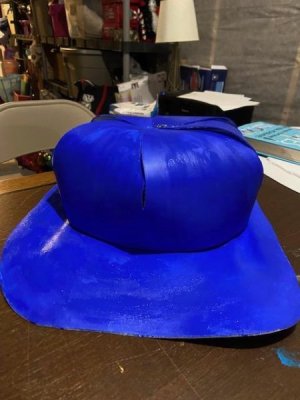
The hat itself was painted with "Cobalt Blue Hue" after a coat of Flexbond.

IMG_6244.jpg

It took two coats for the hat's paint to look clean.

IMG_6246.jpg

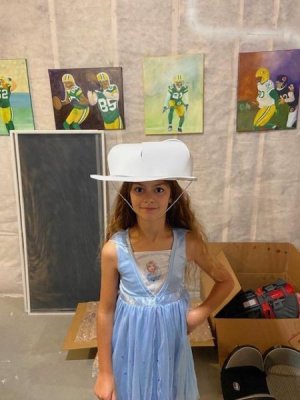
G tried it on.

IMG_6247.jpg

We painted the underside of the hat, and then cement glued the "MU" logo onto the hat.

IMG_6253.jpg

With that, the Marty MU baseball hat was finished. Next up was working on the Mike Wazowski Monsters Inc. hard hat.

Next - Part 18
 
Last edited:
Marty and Mike Wazowski - Costumes: Part 18

Time for the Mike Monsters Inc hard hat. I followed much of the same original procedure laid out for the MU baseball hat. First up was doing the math on the design. The hat needed to be much larger than the baseball hat and needed to be a bit taller. So I elongated the seams of the panels a bit and it made to a little taller before it started to fold in.


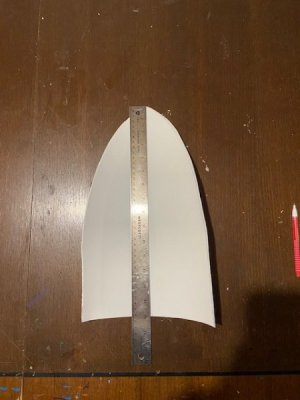
I cut out a single panel.

thumbnail_IMG_6206.jpg

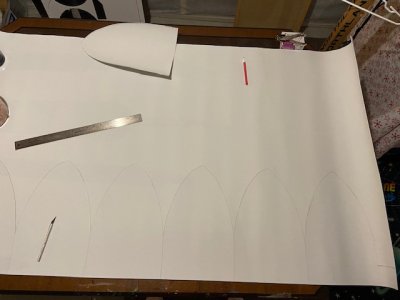
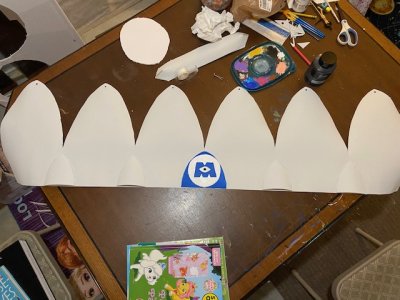
Then used it to make the 6 connected panels.

thumbnail_IMG_6207.jpg

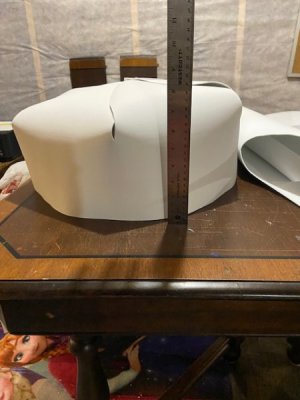
Cut it out and evaluated the height of the hat.

thumbnail_IMG_6209.jpg

It ended up being about 8 inches tall which is close enough to what I was hoping to hit. I then placed the top of the hat onto the foam and cut out a circular pattern that was roughly 1-2 inches wider than the top.

thumbnail_IMG_6210.jpg

I cut out the middle of the base of the hat based on an exact measurement of my head.

thumbnail_IMG_6213.jpg

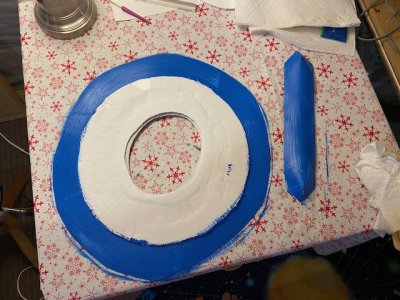
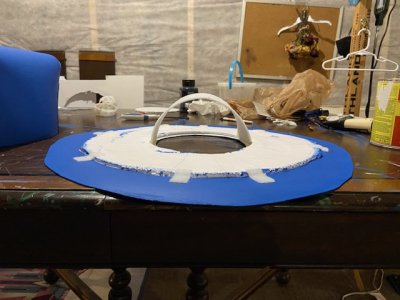
This obviously had no structure at all. So I used the same foam core board plan to sure it up. I measured a circle that would be just a little smaller than the top of the hat.

thumbnail_IMG_6215.jpg

I cut it out with the knife.

thumbnail_IMG_6216.jpg

I then cut out a circle on the foam core board just a bit bigger than the hole for my head. Just so the foam core wouldn't be rubbing up against my head all the time.

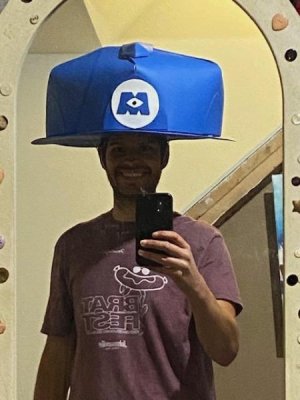
It ended up being a pretty good size, but let's be honest it's pretty big.

thumbnail_IMG_6218.jpg

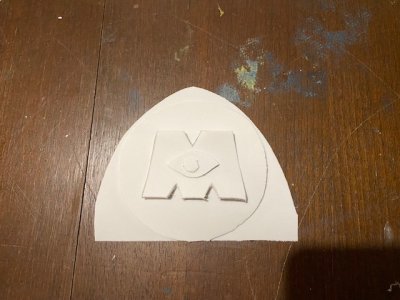
I started working on the Monsters Inc logo. I measured the distance from the seam of the hat to the base, so that I made the triangular shape correctly. I cut out each piece and then used Flexbond primer on them.

thumbnail_IMG_6214.jpg

Stacked the pieces and likes the look of the logo before painting it.

thumbnail_IMG_6211.jpg

Next up was working on the structure and paint of the hard hat.

Next - Part 19
 
Last edited:
Marty and Mike Wazowski - Costumes: Part 19
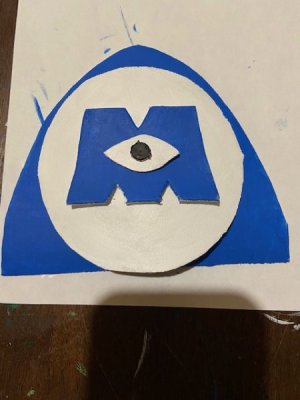
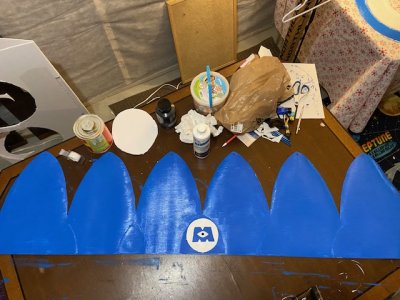
Just going back to the logo and we used the "Cerulean Blue Hue" paint.

thumbnail_IMG_6219.jpg

It looked good, but I thought it was missing some detail. So I added some smaller triangular shapes to act as structural support and extra designs.

IMG_6254.jpg

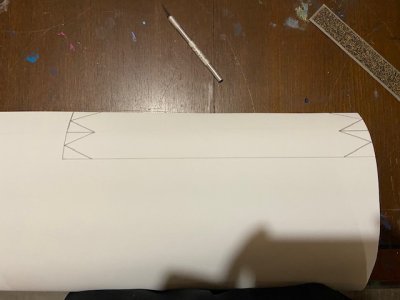
We also decided it could use a bump over the top of the hard hat it make it look less like a baseball hat. So I made a piece that looked like a small mohawk. I played around with some designs in paper and came up with the below that allowed me to pinch in the two triangles and create a raised 3-D structure. I then glued that together. I also set that piece once it was glue onto a full piece of EVA and copied the shape base so that I could create a bottom to it.

thumbnail_IMG_6250.jpg

I set all the pieces together to get a final look before I moved forward.

thumbnail_IMG_6251.jpg

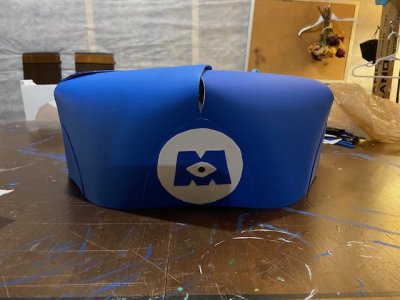
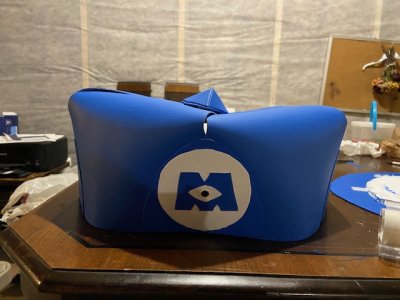
I liked the look and felt like I was heading in the right direction. I painted it with the Cerulean Blue Hue paint again (in this case the logo and hat are the same color).

IMG_6256.jpg

IMG_6255.jpg

G had a lot of fun with these because these were really big paint jobs. It took two coats again.

Next up was finishing the hard hat.

Next - Part 20
 
Last edited:


Marty and Mike Wazowski - Costumes: Part 20

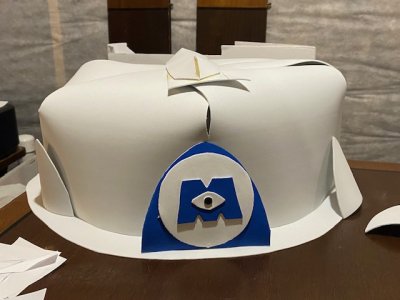
All that was left was putting the pieces together. First up was weaving the 6 panels together and putting the brad in.

IMG_6262.jpg

Looking good. Then I placed the middle mohawk on the hat.

IMG_6264.jpg

I left that overnight and then came back the next morning to this.

IMG_6268.jpg

The problem was that the paint was too heavy. It was pulling the hat down. I placed a stretch of velcro down on the 6 panels and mohawk to connect them. It helped some, but the hat was still deflated. I then placed the middle band to keep the hat from falling too far on my head.

IMG_6269.jpg

I added the velcro to the base/top just like the baseball hat.

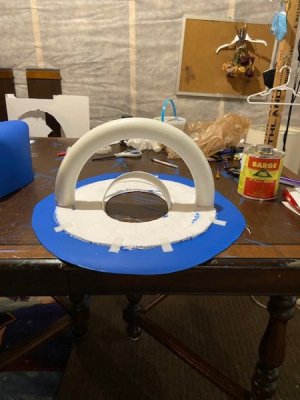
With as good as the hat was looking, if it remained deflated it would look off. So I knew I needed to figure out a solution. We took a good hour walk around Michaels. We thought about wire baskets, or a foam dome, or some velcro techniques. Just as we were about to leave Steph found this arch piece of styrofoam that was broken in the clearance section. It was only 50 cents and worth a try. Thankfully it was the perfect piece. I almost didn't need to cut it to size. I put two pieces of velcro on either end. On one side of the arch the velcro was vertical, and on the other side horizontal. Such that connections weren't in the same direction.

thumbnail_IMG_6282.jpg

I placed the top piece on, strapped it down with velcro and wa-laa.

IMG_6281.jpg

The hard hat looks full and stays inflated!

IMG_6287.jpg

With that the Mike and Marty hats are finished!

Next - Part 21
 
Last edited:
30 Weeks to go until 2024 Non-Cancelled M - Week 5/35
1696191942341.png

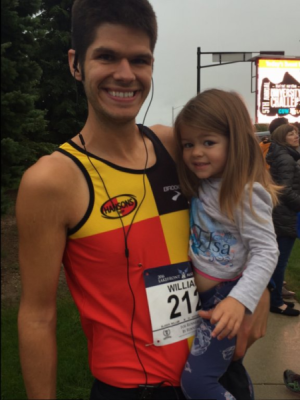
The 30th best performance was the 2016 Lakefront Marathon (link). I completed the race in 3:23:43 and had a VDOT of 46.2. Of my 17 marathons, this was my 5th fastest performance. This was a PR at the time. Overall, I finished in 195th place out of 2663 runners, and 31st in AG. I was on a hot streak at this point in my marathon performances. I had gone sub-4 for the first time at Lakefront 2015, and then followed that up with a solid Jan 2016 Dopey M, WI Marathon in 3:28, and then this one in 3:23. So I cut another 15 min off my time in a year's time, and was still making good progress. According to my notes, I went into the race aiming for around a 3:18 or so. The race ended up being a super challenge. Something in my left leg felt off in the warm up, but it really became a problem around Mile 16. That pain persisted to the finish line. Once I crossed the finish line I had trouble putting weight on the leg. It didn't end up being fractured, but I did develop what feels like a bone spur from that training cycle that has since persisted.


9/25/23-10/1/23
Tues (9/26): 10 x 15s @ Max on Paved Uphill (5-7% Grade)
Wed (9/27): OFF
Thurs (9/28): Canova Minutes (1 min 85% + 1 min HMT)
Fri (9/29): 7 miles @ 80% M Tempo (9:05 min/mile, 130 bpm)
Sat (9/30): 9 miles @ 85% M Tempo w/ Strides (8:28 min/mile, 135 bpm) + LIIFT More - Back/Triceps
Sun (10/1): 10 miles @ 80% M Tempo on Jack/Jill (8:45 min/mile, 133 bpm) + LIIFT More - Chest/Biceps

Total Run Miles - 40.8 miles
Total Run Time - 5:54 hours
Total Strength Time - 0:51 hours
Total Training Time - 6:45 hours


Tuesday
Conditions - ⛅ Overcast clouds, Wind 10mph to ?
Start: Temp+Dew = 65°F + 60°F; FL - 66°F
End: Temp+Dew = 65°F + 60°F; FL - 66°F

Another 10 x 15 sec uphill at max pace run. I adjusted the warm up to be longer to better match what I had originally planned in terms of duration/distance. I wouldn't say I felt as fast or clean as last week. But I still managed GAP in the 4:30-5:00 range. So no complaints from me.


Wednesday

No running. I had another pilar head cyst removal procedure. Thankfully this should be the last one for a while. So no running for at least 24 hrs after the procedure.


Thursday

Conditions - ⛅ Overcast clouds, Wind 6mph to ?
Start: Temp+Dew = 64°F + 59°F; FL - 64°F
End: Temp+Dew = 63°F + 59°F; FL - 64°F

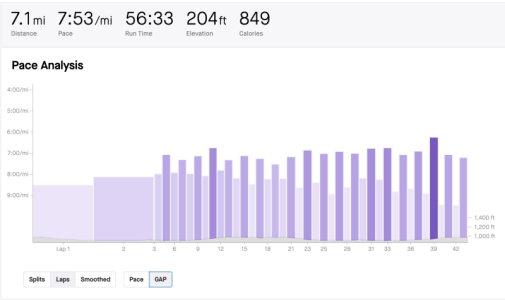
Canova Minutes! This was intended to be 20 sets of 1 min 85% M Tempo and 1 min of HM Tempo. First time I've done a paced training run since April. So it was good to see where I'm actually at since I've been on easy street for so long.
Screenshot 2023-10-01 at 3.37.55 PM.png

I was probably a little too jacked up for this one. I ran the warm-up in low 8s when I should have been in the high 8s. The goal for the 85% pace was 8:28 and the goal for HM Tempo was 7:02. I ran them at 8:30 and 7:06 actual pace. So about right on target. Overall, the HM Tempo pace felt harder than expected. I was pushing pretty good to hit the pace. Of course at one point that effort shifted the other direction and I ran a split at 6:14 GAP. All in all a good starting place. The next few Canova Minutes maintains the 20 min of hard running but extends the duration of the HM Tempo to 2 and 3 minutes. Not overly challenging relatively speaking, but it does provide me an opportunity to run around 7:30-7:45 pace.


Friday

Conditions - ⛅ Broken clouds, Wind 9mph to ?
Start: Temp+Dew = 75°F + 61°F; FL - 75°F
End: Temp+Dew = 71°F + 61°F; FL - 75°F

Nothing special. Just a nice and easy run. Ran into one of the neighbor kids who apparently refers to me as "the running man". So we introduced ourselves so that we knew each other's names.


Saturday

Conditions - ⛅ Broken clouds, Wind 6mph to ?
Start: Temp+Dew = 64°F + 59°F; FL - 64°F
End: Temp+Dew = 67°F + 61°F; FL - 64°F

Goal was a 9 mile 85% M Tempo run with strides. First time going beyond 8 miles since April. No real issues. I did the first 8 miles on my normal route and then did a mile of strides. Had some spectators during the strides and hit a quick 4:49 split. Body wasn't feeling great and sort of sluggish, but it definitely responded when the strides came.

I did a LIIFT More workout afterwards.


Sunday

Start: Temp+Dew = 77°F + 59°F; FL - ?°F

Garmin is having issues, so I don't have the visual data. The goal was 10 miles at 80% M Tempo. So a nice and easy run. And that's exactly how it felt. It wasn't hard in the least. I saw the neighbor kid a few times as today was a Jack/Jill run where I run up and down the same hill over and over and over. So I passed his house a few times while they were decorating for Halloween. It did feel kind of warm this morning. All I could think about was how this was the morning of the Lakefront Marathon in Milwaukee and how the temps just crept up this weekend compared to the last few weeks. What a sucky outcome for weather. Could have been low 50s, and instead we got mid-70s. Ick! Glad I wasn't racing Lakefront.

I did a LIIFT More - Shoulders workout afterwards.

Feeling good about where I'm at. Next week is 47 miles with a 10x15s uphill, a Canova Minutes (2+2), and a 12 mile 80% M Tempo run. Things are clicking for a few more weeks before heading to Disney World.
 
Marty and Mike Wazowski - Costumes: Part 21
Home stretch. Not many things to get finished yet, and that's good because we're running out of time before our first event! Let's talk about horns and toenails.

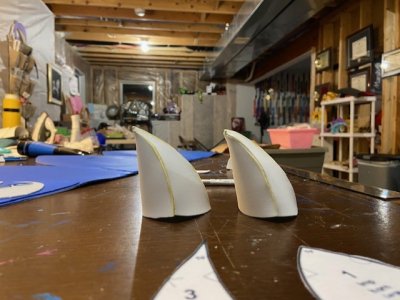
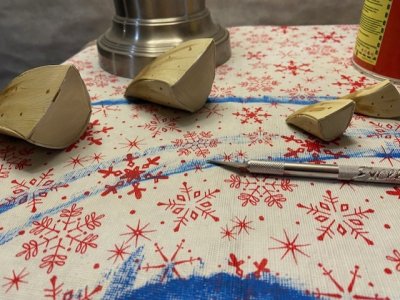
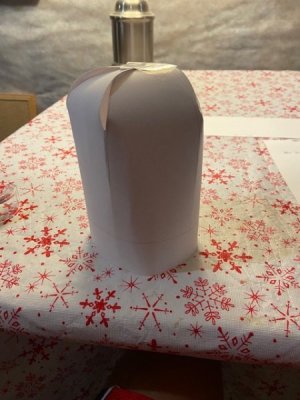
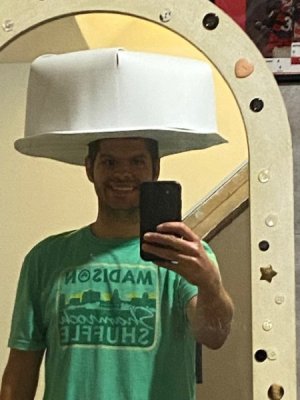
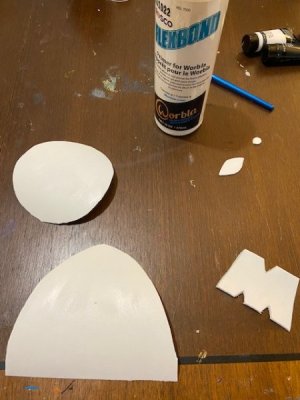
G and I went back and forth on how to approach the horns. In other Mike W. costumes I've seen they make the horns out of fabric, but I thought we might be able to give them more detail if we made them out of foam. So I dig some google searching for a basic 3-D horn (because Mike and Marty have pretty simple horns). I found a pattern that looked like it would work and went with that. The first step was cutting out the pattern on paper and then tracing it over to the EVA foam. According to online, it's best to work with 4-5mm foam, but I still had 2mm foam left over and went with that instead.
thumbnail_IMG_6258.jpg

In a youtube video I found of someone else making a similar but not the same horn, the recommendation was to use a light brushing of the Barge All-Purpose Cement, then blow on it, and then slowly press together to the two sides (each with cement glue on them). You work your way up the seal. The process is to attach the two wing pieces to the middle piece.
thumbnail_IMG_6260.jpg

It folds up into a 3-D like structure if done correctly. Give that a little time to dry, and then glue the two wings together.

thumbnail_IMG_6261.jpg

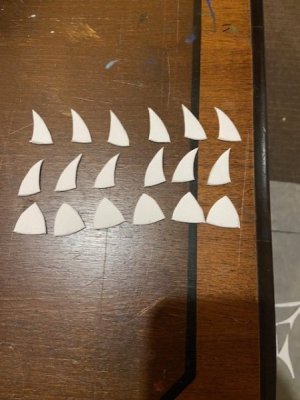
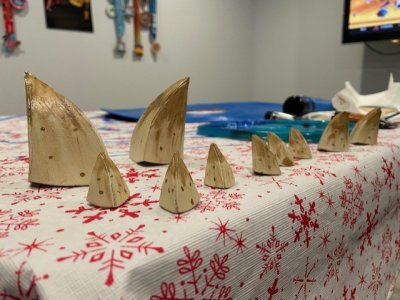
I adjusted the size of the horns for the different uses. I had the large size for the Mike shoulders, the medium size for Marty's shoulders and Mike's toenails, and smallest size for Marty's toenails. I used the excel file to adjust the size of the pattern to match the goal proportionality. Once things looked good, then it was time to mass produce them.

thumbnail_IMG_6263.jpg

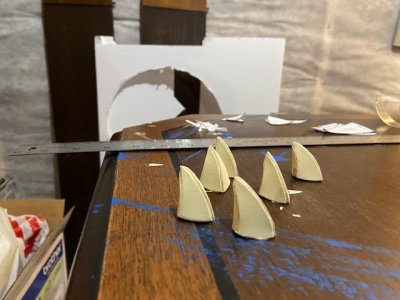
I went through my different Liquidtex acrylic basics color options and went with "unbleached titanium". This is the same color I used for Maui's hook. It has a real bone like color. I originally thought Mike's horns and toenails were white because that's what I see a lot of people use in costumes, but when looking at the movie still images it appears to be more of an off-white bone color.

thumbnail_IMG_6265.jpg

thumbnail_IMG_6266.jpg

The tricky part was the details Mike has at the tips of the horn. It's like a brown-ish grey color. Something I just don't have in my arsenal. So I played around with some light browns and greys and mixed them together to get something resembling the color he has. I think I missed it by a touch and it needed to be a bit greyer, but what it looks like on the palette and on the foam is always a little different. I went with a feather touch and then tried to add in the dots.

thumbnail_IMG_6267.jpg

I'm pleased with how the they turned out.

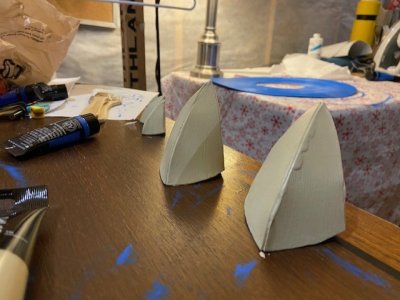
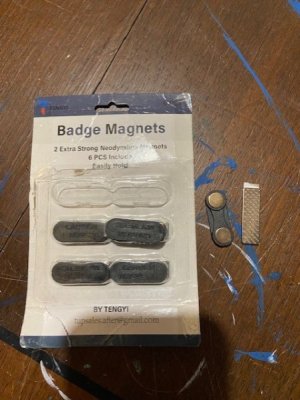
I thought for a bit about how to attach the shoulder horns to the costume. I settled on using the same badge magnets that I used for the Pizza Planet delivery truck driver costume (when I had Tsum Tsum on my shoulders).

thumbnail_IMG_6314.jpg

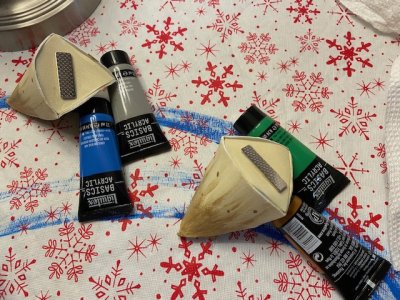
So in order to use these, I needed to add a base to the shoulder horns. So I did some tracing and then some finer detail cutting to get the 3-D shape of the base of the horn to fit the new piece.

thumbnail_IMG_6289.jpg

This gave me a place to attach the thin magnet, and then I'll place the other side of the badge magnet inside the costume once we're wearing them.

IMG_6354.jpg

So that wraps the horns up. Next up was working on the feet of the costume and using the toenails.

Next - Part 22
 
Last edited:
Marty and Mike Wazowski - Costumes: Part 22

The goal was to make a monster foot. But it needed to be made using a shoe that could be run in. So that eliminated making a giant foam filled shoe. Because that's not very practical. So instead, I wanted to use running shoes, and then retro-fit them into a monster foot. So G and I both chose some old shoes to use as the base of the monster foot.

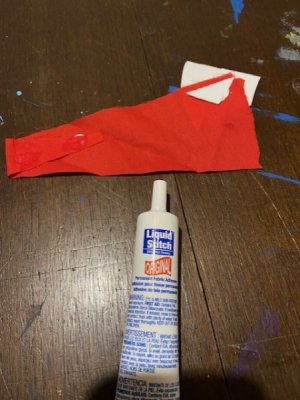
I went to Michaels and bought some Liquid Stitch. Since the hot glue and Barge All-Purpose Cement didn't work well when attaching fabric to fabric, I wanted to find something that would create a good seal between fabric and between a piece of fabric and foam.

thumbnail_IMG_6291.jpg

The test was positive. The fabric stuck together very well, and was good enough to the EVA foam. I could pull the EVA and fabric apart, but it took some effort and ripped the EVA. The 3M glue still ranks as the highest seal between two items.

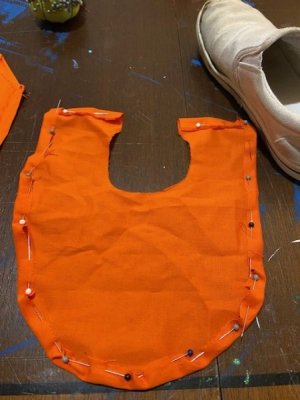
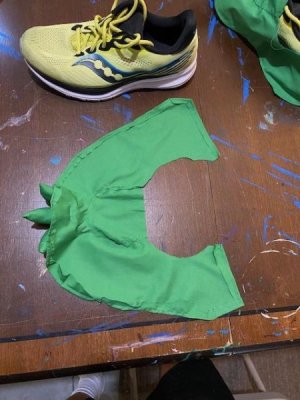
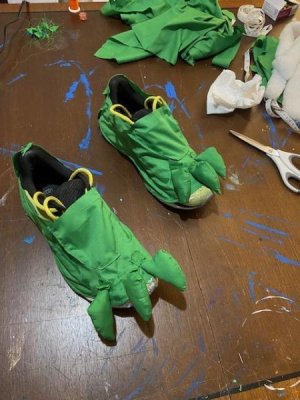
Next up was playing around with some patterns that would work with covering the shoes in the same fabric we used to make the base of the costume. G's shoes were slip-ons that don't have laces. So that changed how I approached the design a little from my shoes (detailed later). I went through a few iterations of a pattern, but ended up settling on something that looks like this.

thumbnail_IMG_6305.jpg

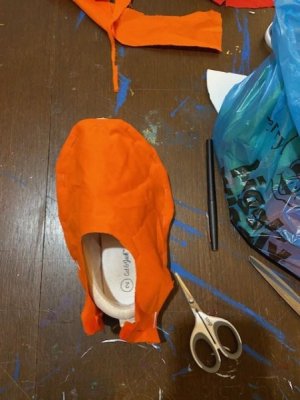
It'll sit on the top of the shoe, and then wrap around the back of the shoe. I sewed the edges so that it wouldn't frey. I laid it over the top of the shoe and liked how it looked.

thumbnail_IMG_6306.jpg

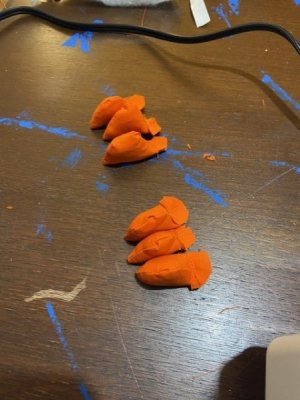
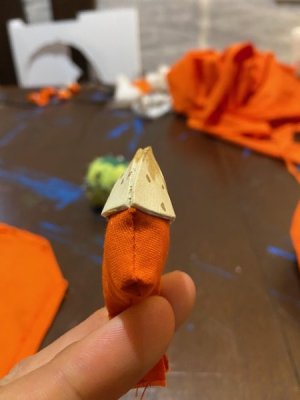
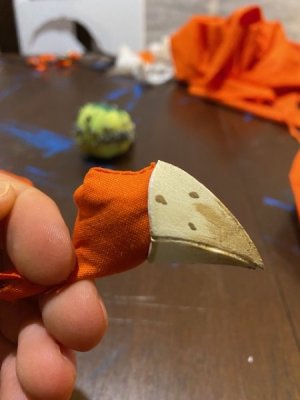
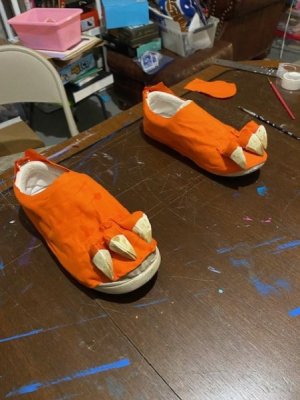
Next up was making the toes. It was important not to make the toes too long. G likes to walk/run on her toes, so if the shoes had the toes extended too far than it might be too stiff right where she normally bends her foot. So I made the toes really short. I went through a few iterations of toe design before I found one that works. I needed something that was short and yet filled in the toenail. It ended up looking like a mushroom, and then when folded in half it kind of looked like a musical note. I sewed the edges together and then turned it inside out. Then I filled it with some foam. I left an edge at the end of the toe so that I could sew it to the base of the fabric.

thumbnail_IMG_6309.jpg

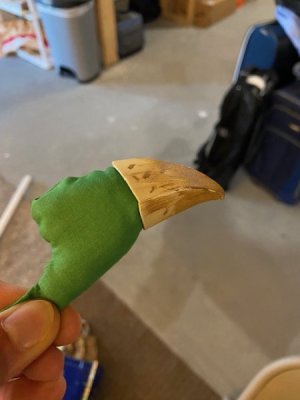
Then I placed a toenail on the toe just to see how it looked.

thumbnail_IMG_6308.jpg

thumbnail_IMG_6307.jpg

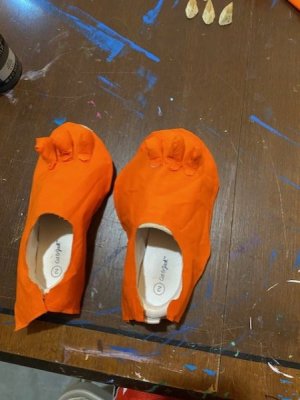
I was happy with the look. So I went ahead and sewed three toes onto each of the feet.

thumbnail_IMG_6312.jpg

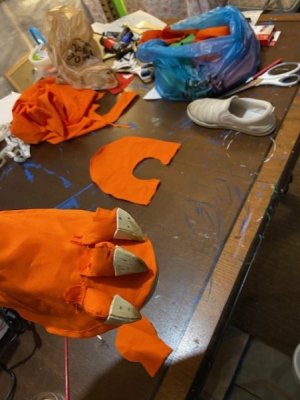
Then I placed the toenails on just to get one last look. The liquid stitch is pretty permanent. So I only get one shot at this.

thumbnail_IMG_6310.jpg

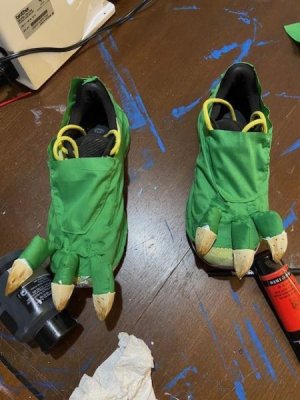
I felt good about it and so I went ahead and glue them down. I didn't take a picture of the glue design I used, but I did for my shoe, so you'll see it there. But ultimately, they turned out like this.

thumbnail_IMG_6313.jpg

Not pictured here, but I went ahead and painted the edges of the shoes in a matching orange color. So now everything blends together better. It was tough to get the fabric to match the shoe perfectly, but I was pleased with how it turned out.

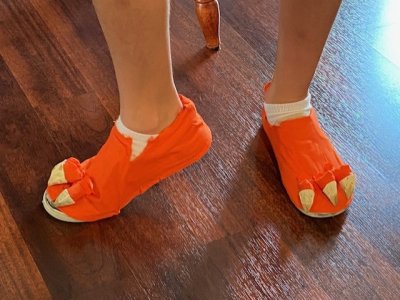
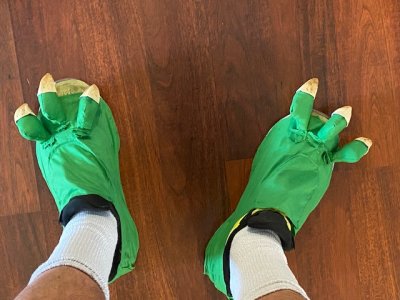
G did struggle to get the shoes on. So we cut some slits int he shoes and then she forced them on with authority and was finally able to get them to fit. A little bit of Cinderella's step sister vibes. But they did fit.

thumbnail_IMG_6318.jpg

She's happy with how they look, and the toes didn't bother her. So that's a victory. Next up was working on my feet. These were a little trickier because of the laces.

Next - Part 23
 
Last edited:
Marty and Mike Wazowski - Costumes: Part 23
Next up, making the Mike's shoes with a slight change from Marty's shoes. I did better taking pictures during this because it was less of a fishing expedition, and more of a repeat of what I did for G's shoes.

I had to make a trip to JoAnns because I was out of green fabric big enough to make these pieces. When I went I brought along a swatch of my fabric, but I wasn't finding a match. I found "sewable kelly green" and found "symphonic jolly green", but I wasn't finding "symphonic kelly green". So I picked up the sewable kelly green which was close in color but not the same. I was standing in line to get it cut, and then I saw out of the corner of my eye a roll of green fabric cut earlier in the day. So I was like, hey, is that symphonic kelly green? And it was! So I got that instead. The sales person asked me what I was working on. Told her about the Mike and Marty costumes. Admittedly I don't look like their normal customer, and I'm probably in a minority being a nearly 40 year old male who sews. So I think it was a bit of a surprise for her.

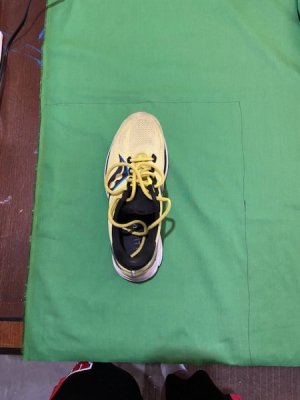
First up was determining roughly how big the shoe cover needed to be.

thumbnail_IMG_6319.jpg

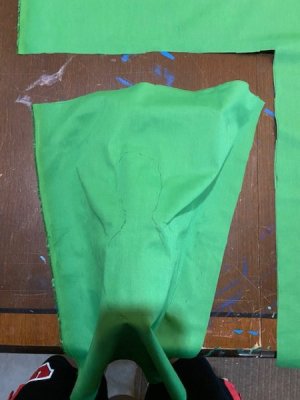
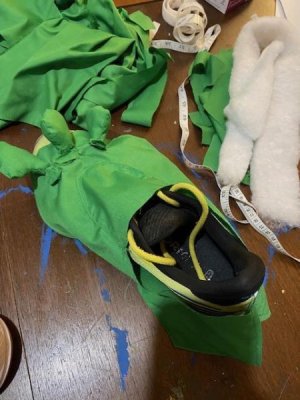
Then I wrapped the shoe to get an idea on size.

thumbnail_IMG_6320.jpg

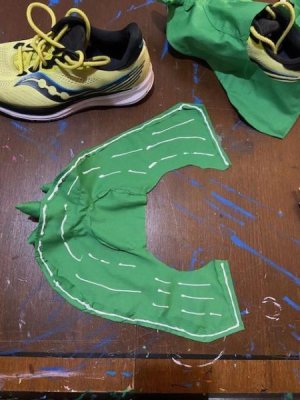
I kind of traced out what I was aiming for, and then cut it out.

thumbnail_IMG_6321.jpg

thumbnail_IMG_6322.jpg

The benefit of the pattern is that I can reverse it to the other shoe and then the pen marks end up on the inside of the fabric.

The big difference between my shoe pattern and G's is that I needed to leave room for the laces. I can't affix the fabric to the shoe such that it prevents me from tying the shoes on and off. So I came up with an idea of creating a tent. This meant I matched the shape of the opening, but I did so with extra fabric. Then instead of sewing the fabric size to size, I instead did it edge to edge. This gave me a nice tent effect.

thumbnail_IMG_6323.jpg

Then I needed to make the toes. I did the same mushroom shape as G's shoes, but just a little bigger.

thumbnail_IMG_6324.jpg

G was a big help with stuffing them with batting.

IMG_6331.jpg

It's a pretty small opening, so we used a thin paint brush to push everything in. It could get frustrating, but we did it. I lined it up with the toenails and confirmed it was the correct size.

thumbnail_IMG_6325.jpg

Now it was just a matter of putting all the shoe pieces together.

Next - Part 24
 
Last edited:
I'm curious, are you going to sacrifice a pair of running shoes for your costume? Or does the covering come on and off?
 
Marty and Mike Wazowski - Costumes: Part 24

Time to wrap up the Mike W shoes. I sewed the toes onto the base fabric.

IMG_6333.jpg

In retrospect, I wish I would have put the toes just a touch closer to the laces. They hang just a little over the edge of the shoe more than I'd want. But I can't change that easily now, so it is what it is.

Next up was gluing them down. I laid out the fabric.

IMG_6332.jpg

Then I did a glue pattern that would stay away from the laces and give the shoes enough give to be able to get my foot in and out.

IMG_6334.jpg

Then I did a wrap job with the shoe. I started at the back of the shoe and then rolled it into place.

IMG_6335.jpg

I filled each of the toenails with the LiquidStitch and then pushed them into place.

IMG_6336.jpg

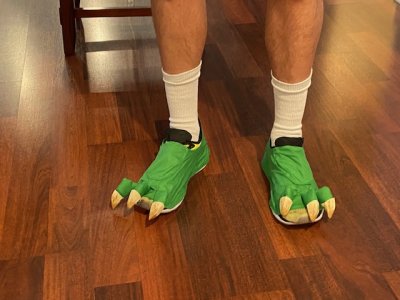
Moment of truth was finding out whether I could get the shoes on and off. I thought I left a ton of extra space with the tent, but in reality it was really close to being too tight to get it on, but I was able to get them on and tie them. So success!

IMG_6338.jpg

thumbnail_IMG_6337.jpg

Not pictured here, but I also painted the exposed parts of the shoes in a matching green color. It does help it blend in.

Overall, I'm happy with how they turned out. The toenails add a lot and I'm glad I went with EVA foam instead of sewing something. They remain really light. My only concern is the one toenail that hangs a little longer than I'd like and whether it might drag and become a tripping hazard. But I can fix that at a later time if needed.

@azrivest these are an old retired pair of running shoes. So it's a zero cost to me as they don't have any further use in my rotation and they were just sitting in the basement. The cover over the shoe is definitely permanent.

The only thing left on the list was to make a microphone for G.

Next - Part 25
 
Last edited:
I'll save these posts for later. J and I are going as Della and Dewey Duck for our 5k, so I was either going for a cloth covering like you, or buying silver spraypaint to paint over an old shoe to mimic Della's metal leg.
 
Marty and Mike Wazowski - Costumes: Part 25

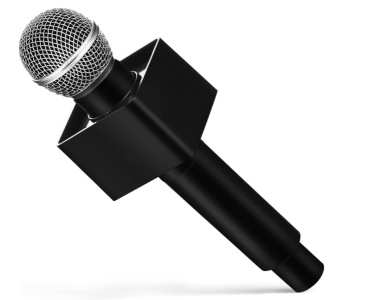
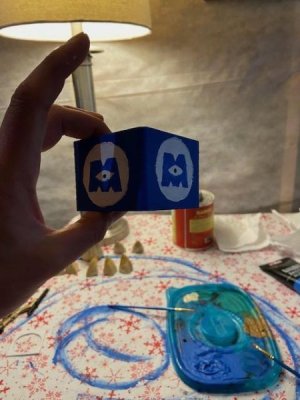
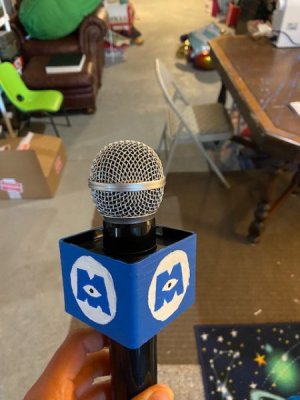
Last on the to-do list was to make Marty's microphone. We had an old Rock Band microphone that we had cut the cord off that G was able to play with when she was young. But despite looking all around the house we couldn't find it. G had a Trolls themed karaoke that has a microphone, but it's wired and hot pink. So that wasn't a good option in case we wanted to use it again. I started assembling pieces in an Amazon cart (dowels, styrofoam ball, etc.) to make one, but then once the cost got up to $30 I figured I must be able to find a cheaper prop microphone. And I did. I found one on Amazon for $7. The plan was to make a box of EVA foam around the microphone so that I could put the Monster's Inc logo on it. But then I did some digging and found this prop microphone that already had the box around it (link).

Screenshot 2023-10-01 at 5.47.23 PM.png

This made my job really simple. All I needed to do was draw the Monster's Inc logo onto that black box. Then we'd have a themed Monster's Inc microphone.

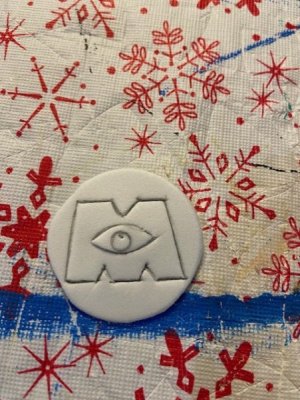
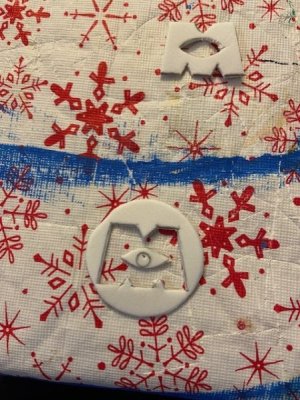
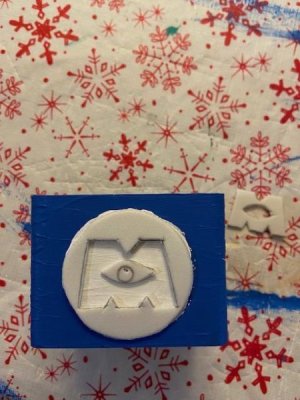
I first painted the box in the same cerulean blue we had used on my hard hat. It took three coats to get nice coverage. Then I cut out a 2x2 inch square and cut a circle from the middle of it to use as a stencil. I painted the circle in white. It took three coats again. Then I cut out a stencil for the Monster's logo.

thumbnail_IMG_6326.jpg

thumbnail_IMG_6327.jpg

I placed the stencil over the white circle and outlined the Monster's M.

IMG_6328.jpg

It took three more coats of cerulean blue hue, but then it finally had a cohesive color. I dotted the eye with black, and then it was done.

IMG_6329.jpg

I repeated the process on all four sides. I could only do two sides at a time since the paint needed to dry and I didn't want to accidentally touch anything. The final product looked like this.

thumbnail_IMG_6356.jpg

This was a really simple and quick project. Compared to most everything else it went by in a flash. But the nice part is it definitely adds to the total aesthetic of the costume.

AND with that we're essentially done! We've got some minor sewing on the elastic to do, but otherwise I think we've made it to the finish line. I can't wait until we put all the pieces together and get some pictures. And we definitely didn't leave much time to spare. We have our first event in less than a week. I started these costumes back in May. So in total it took most of my free time for the last five months. I had been keeping track of the total hours, but I definitely lost count at some point. But easily over a hundred hours. Even if it was just 8 hours every weekend for the last 22 weeks it would be 176 hours. And that doesn't even include any of the weekday work which was like 1-2 hrs at least three times per week. So we're looking at something close to 250-300 hrs when it's all said and done. I'm sure someone with more experience could have done it faster, but honestly this was my first costume project with sewing involved. And we certainly didn't make it easy on ourselves with this project. We went off script quite often, and I think those pluses made a big difference. If we had made the base of the costume as laid out in the Simplicity design, I don't think the eye/mouth would have been able to be snap sewed on. It would have been to heavy and dragged the fabric down. But the rigid pieces of outdoor seating batting is doing some work to help the costume keep it's form. Overall, I don't there's much I'd change about what we did. I'm very pleased with the final product. I'll make sure to have one more post with some final pics in the costume at next weekend's event. Thanks for reading, following along, and for any help along the way!
 
I'll save these posts for later. J and I are going as Della and Dewey Duck for our 5k, so I was either going for a cloth covering like you, or buying silver spraypaint to paint over an old shoe to mimic Della's metal leg.

I'm no expert, but you might get a better metal looking effect with some shiny fabric then you would with silver spray paint. In one case you'd have what looks like a grey shoe, and in the other you could make it look like a metal foot. Problem with the fabric though is I'm thinking it might not be very breathable. But we'll see.
 
I have been traveling and away from the boards for a few weeks, and this is the first thread I came back to as I had to check your progress. Congrats on a job well done! The costumes look fantastic and your hard work was definitely worth it. I'm only sad I won't see them until January, since my family decided on the Tuesday party the week we're there.

Everybody is going to love these!

Thanks!

I'll save these posts for later. J and I are going as Della and Dewey Duck for our 5k, so I was either going for a cloth covering like you, or buying silver spraypaint to paint over an old shoe to mimic Della's metal leg.

On second thought, definitely lean towards the fabric because then you could use the same fabric on the shoe as the leg and it makes it one cohesive image.
 

GET A DISNEY VACATION QUOTE

Dreams Unlimited Travel is committed to providing you with the very best vacation planning experience possible. Our Vacation Planners are experts and will share their honest advice to help you have a magical vacation.

Let us help you with your next Disney Vacation!


facebook twitter
Top