DopeyBadger
Imagathoner
- Joined
- Oct 15, 2015
- Messages
- 10,382
Ms. Marvel - Making the Top of the Fist
-Initial Design and Working on the Bracelet
-Fun with magnets
-Bengal Painting
Alright, so the bengal (bracelet) has mostly been finished to this point. So that meant it was time to go back to working on the fist. We last left off with having finished the fingers and were working on creating a magnet bond with the middle knuckle of the fingers. This middle knuckle would connect to the bottom half of the fist and the magnets we've already put together. Unfortunately, it doesn't look like I took any pictures in-between that step and the next. But you'll see it as we move on from there.
Now that the complete connection between the top half of the fist and bottom half of the fist is finished, I can now start working on completing the top half of the fist. I started at the wrist. So I needed to curve a piece of foam to connect the two ends of the top/bottom. But I also needed this curved piece to be roughly the same size and shape of the bengal. It took a little work, but eventually I got something I was happy with. Trouble is, it was hard to cement glue it in place. Essentially it took me holding perfectly still with it folded in place for about 20 min. Eventually the bond was made and the curve of the top of the wrist was done. Again, no pictures, but you'll see it.
From there, it was all about figuring out the best way to make a connection from the top of the knuckles down to the wrist. I also wanted to give each finger a little bit of definition coming off the knuckles, and all of the knuckles weren't perfectly aligned (as was the plan). So ultimately, I went with a pentagon shape similar to a baseball home plate. Thank G for the fabulous picture angle here (LOL!). Hey, at least I've got a picture!
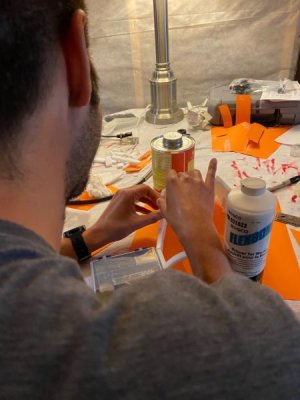
Below my right wrist you can make out the curved wrist piece. Once I place all four top knuckles in place, I got this:
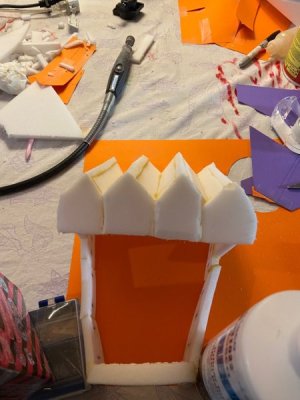
Then it was a matter of building in the sides to provide some structure:
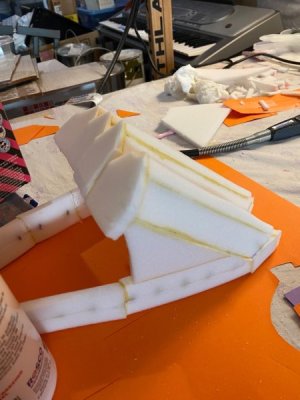
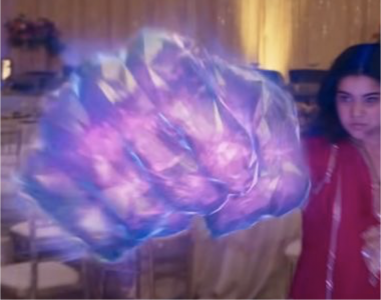
As the build continued the pieces were getting trickier and trickier. Mostly because I was working with a lot of 2-D shapes to align, but then the 3-D shapes needed to be matched up as well. Then it came for the bulk top of the hand section. Originally, our plan was to 3-D diamond build this piece to give it a geometric shape similar to the MCU fist seen here:
Problem is, it was becoming increasingly obvious how difficult it would be to match up all the pieces perfectly. So instead I opted for one large base plate. I felt like this would give me a more sturdy structure to work from, and would be far easier. I cut then cut in some lines if I so choose when the painting comes to give it the appearance of separate pieces coming together. So I got this:
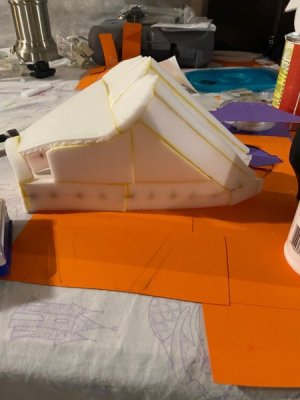
About this point is when I realized my proportions were slightly off. Originally the fist should have been about 60% hand and 40% fingers. But it ended up being more like 50/50. I think in the end the bengal will help keep it from looking too distorted. Next, we just had to continue to line up all the pieces along the edge line to fill in the gaps. So G helped me do some measuring, and cutting, and re-measuring, and re-cutting, and after several tries we eventually were able to get pieces to the right size to fit in the gaps.
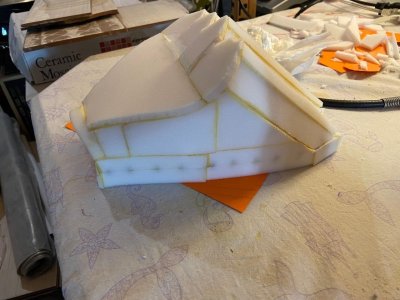
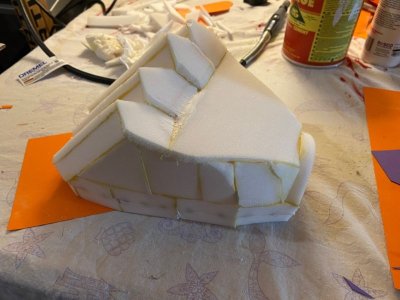
I did some shaving down of the jut outs, and then the top was mostly finished. Now it was time for the bottom half of the first.
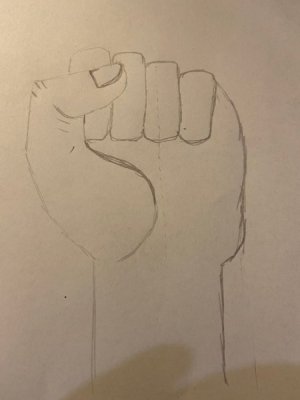
I had spent a lot of time working on the geometry of the top half. Fingers, knuckles, hand, proportions, that I hadn't done much work on what the bottom half would look like. I also re-checked my total height of the fist and saw we're closing in on the luggage size limit. So I was going to have to be careful that I don't overbuild it. So I did some measurements on my hand drawing and determined the best course of action.
Next was making the bottom half of the wrist. Same procedure as the top. Measure three times, cut it, and then cement glue it in place for 20 min holding perfectly still. Thankfully the shape of the wrist on the fist is roughly the same shape as the bracelet. So once the fist is done, then I can drill magnets into both pieces to make them one connected finished piece.
I chose to make the bottom of the fingers (in reality it's the top of them if you were to look at your hand) all one piece for one very important reason. If we choose to put lights in it, it would be really nice if we had a large flat surface to work with for batteries or computer components if necessary. So by having this large piece where the fingers are would give me some freedom later on. I also wanted to give ourselves a little room from the middle knuckle area, so I built it at a slant giving the appearance that the fingers were folded in on themselves. So we came up with this:
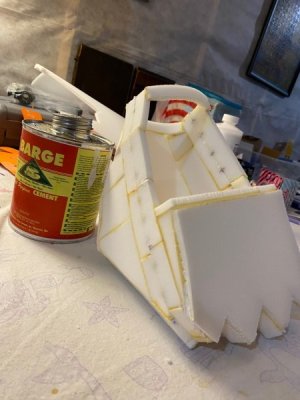
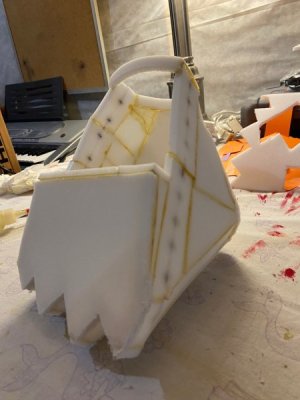
That's where we've gotten so far. The foam will be cut into along the finger lines to make it appear like separate pieces glued together. Next up is working on the thumb, and finishing out the rest of the bottom of the fist.
Next Post: Finishing the foam fist construction and painting (part 1)!
-Initial Design and Working on the Bracelet
-Fun with magnets
-Bengal Painting
Alright, so the bengal (bracelet) has mostly been finished to this point. So that meant it was time to go back to working on the fist. We last left off with having finished the fingers and were working on creating a magnet bond with the middle knuckle of the fingers. This middle knuckle would connect to the bottom half of the fist and the magnets we've already put together. Unfortunately, it doesn't look like I took any pictures in-between that step and the next. But you'll see it as we move on from there.
Now that the complete connection between the top half of the fist and bottom half of the fist is finished, I can now start working on completing the top half of the fist. I started at the wrist. So I needed to curve a piece of foam to connect the two ends of the top/bottom. But I also needed this curved piece to be roughly the same size and shape of the bengal. It took a little work, but eventually I got something I was happy with. Trouble is, it was hard to cement glue it in place. Essentially it took me holding perfectly still with it folded in place for about 20 min. Eventually the bond was made and the curve of the top of the wrist was done. Again, no pictures, but you'll see it.
From there, it was all about figuring out the best way to make a connection from the top of the knuckles down to the wrist. I also wanted to give each finger a little bit of definition coming off the knuckles, and all of the knuckles weren't perfectly aligned (as was the plan). So ultimately, I went with a pentagon shape similar to a baseball home plate. Thank G for the fabulous picture angle here (LOL!). Hey, at least I've got a picture!

Below my right wrist you can make out the curved wrist piece. Once I place all four top knuckles in place, I got this:

Then it was a matter of building in the sides to provide some structure:

As the build continued the pieces were getting trickier and trickier. Mostly because I was working with a lot of 2-D shapes to align, but then the 3-D shapes needed to be matched up as well. Then it came for the bulk top of the hand section. Originally, our plan was to 3-D diamond build this piece to give it a geometric shape similar to the MCU fist seen here:

Problem is, it was becoming increasingly obvious how difficult it would be to match up all the pieces perfectly. So instead I opted for one large base plate. I felt like this would give me a more sturdy structure to work from, and would be far easier. I cut then cut in some lines if I so choose when the painting comes to give it the appearance of separate pieces coming together. So I got this:

About this point is when I realized my proportions were slightly off. Originally the fist should have been about 60% hand and 40% fingers. But it ended up being more like 50/50. I think in the end the bengal will help keep it from looking too distorted. Next, we just had to continue to line up all the pieces along the edge line to fill in the gaps. So G helped me do some measuring, and cutting, and re-measuring, and re-cutting, and after several tries we eventually were able to get pieces to the right size to fit in the gaps.


I did some shaving down of the jut outs, and then the top was mostly finished. Now it was time for the bottom half of the first.

I had spent a lot of time working on the geometry of the top half. Fingers, knuckles, hand, proportions, that I hadn't done much work on what the bottom half would look like. I also re-checked my total height of the fist and saw we're closing in on the luggage size limit. So I was going to have to be careful that I don't overbuild it. So I did some measurements on my hand drawing and determined the best course of action.
Next was making the bottom half of the wrist. Same procedure as the top. Measure three times, cut it, and then cement glue it in place for 20 min holding perfectly still. Thankfully the shape of the wrist on the fist is roughly the same shape as the bracelet. So once the fist is done, then I can drill magnets into both pieces to make them one connected finished piece.
I chose to make the bottom of the fingers (in reality it's the top of them if you were to look at your hand) all one piece for one very important reason. If we choose to put lights in it, it would be really nice if we had a large flat surface to work with for batteries or computer components if necessary. So by having this large piece where the fingers are would give me some freedom later on. I also wanted to give ourselves a little room from the middle knuckle area, so I built it at a slant giving the appearance that the fingers were folded in on themselves. So we came up with this:


That's where we've gotten so far. The foam will be cut into along the finger lines to make it appear like separate pieces glued together. Next up is working on the thumb, and finishing out the rest of the bottom of the fist.
Next Post: Finishing the foam fist construction and painting (part 1)!
Last edited:
