To Infinity and Beyond - Becoming a Better DopeyBadger (Comments Welcome)

Amphibia Costumes - Darcy Armor - Part 14
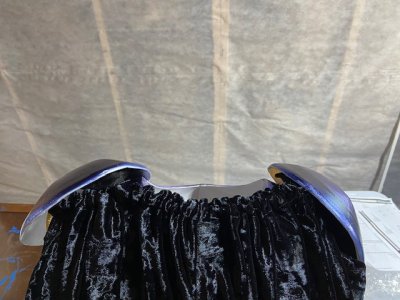
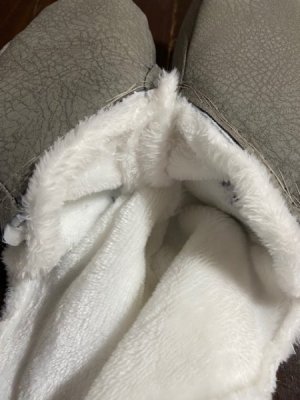
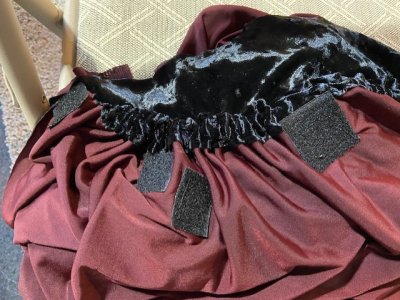
Next was attaching the cape to the back of the armor. As previously described, the cape is black velvet on one side, and a cotton like maroon material on the other. They were already fused together, so it made my job easier since I didn't have to combine them. I sewed the top of the cape over on itself to create a pocket. I took a black braided strand of fabric that I had and threaded that inside the pocket. Then I pulled on each side and it gave it a bunching effect. I sewed on velcro onto the maroon side (the inner side) of the fabric with matching velcro affixed to the armor.


thumbnail_IMG_7743.jpg

I messed up the placement of the velcro a few times, but that's alright since no one will see it anyways. I needed to stay closer to the pocket in my placement because otherwise the cape sags. But once I got that fixed, then I placed the cape onto the armor and it held up all on its own. It also means I don't have to tie it around my next or anything (similar to Darcy's which just seems to be floating onto the back of her armor).

thumbnail_IMG_7745.jpg

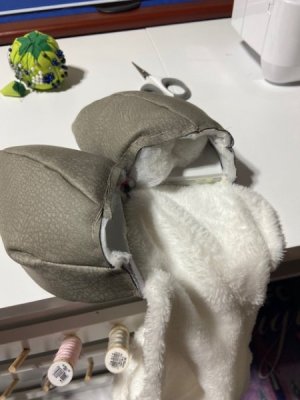
Here you can see the black cape and black pillows under the shoulder pads blend together and you can't really notice it anymore.


thumbnail_IMG_7747.jpg


thumbnail_IMG_7749.jpg

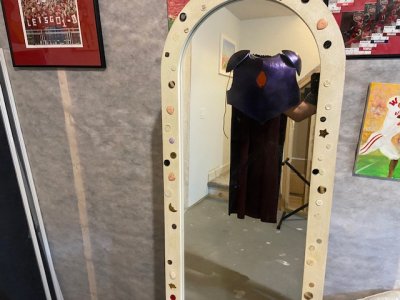
The black velvet looks nice for the back of the costume since there's a lot less going on back there. So it gives you something interesting to look at. Conversely the maroon red non-reflective fabric on the inside of the cape is nice because it doesn't take away from the rest of the costume. It just kind of accents and sits as a secondary or tertiary thing to look at. So overall I think the fabric was a great choice.

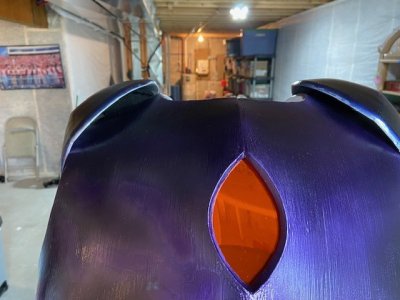
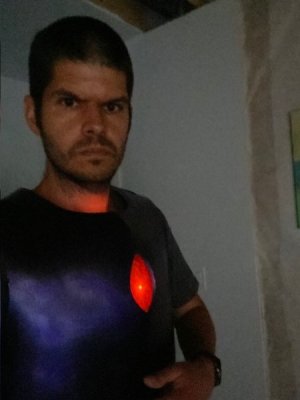
One of the last things to do was to install the orange LED in the chest armor. The method was the same as the Darcy helmet. I soldered a 5mm orange LED to a cheap CR2032 battery holder with on/off switch. I velcroed the battery holder to the armor. I lined up the orange LED in the center of the Kalevala visor piece, and then used masking tape folded onto itself to hold the LED in place. Because of the shape of the armor and how it comes away from my body and then folds back in, there was enough room to place a forward sticking LED between the armor and my own chest. Otherwise, I think it might have been more challenging.

thumbnail_IMG_7750.jpg

At first I thought I might have to put an LED on the top and bottom of the chest eye to better illuminate it, but the single LED in the center is plenty.

thumbnail_IMG_7753.jpg

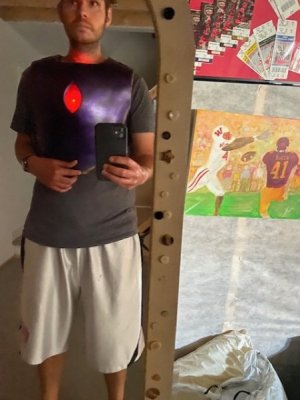
It does cause a glowing on my neck. Haven't decided if I'll try and tamp that down, or leave as is. But that should be an easy fix at a later time once I put the entire costume on.

So I think there are only two things left. The forearm armor is missing a tubing piece that we'll need to make. I'm not in a rush on this piece because I'll need more Alclad Indigo paint and will wait to see if I need any other paint for G's Anne armor to save on shipping. Lastly, I need to do some battery length testing on the uncanny animated eyes. I just want to double check because it would be a disappointment to turn them on during the daytime when they're barely visible and find out their runtime is something like 4hrs and then I'd miss out on evening illumination. Just running the math calculations suggests something around 4.5 hrs with a 2200 mAh battery and an estimated usage from the Hallowing M4 of 500 mAh. But according to online, the Hallowing M4's usage is dependent on how you use it and thus it could be more or less than 500mAh.

Otherwise, that's pretty much it. Which is good, because we're only 4-5 weeks from the Moana Jr. play needing finished costumes, only 3.5 months from Halloween. So it's time to start getting to work on G's Pua (the pig) costume. Then I've got all of G's armor, skirt, and cape to make. So it might seem like a lot of time, but time tends to move fast these days. G's hairpiece took from March 4th to May 4th (2 months), and the Darcy headpiece/armor took from May 5th to June 26th (1.75 months). So between Moana Jr, and the rest of G's costume, it'll take me right up to the deadlines.

Next update - -Anne Skirt - Part 1
Next Darcy armor update -
 
Last edited:
Moana Jr Costumes - Pua

See the final product - Link

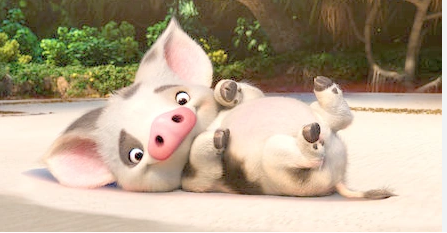
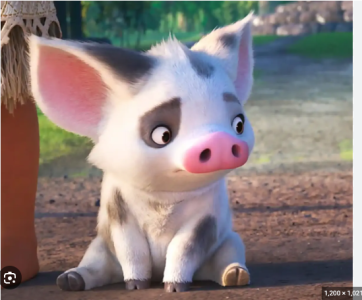
As previously mentioned, G has been cast in the theater stage performance of Moana Jr this summer. The play is in August, and practice starts in a few weeks. She's going to be playing Pua the pig companion of Moana.


Screenshot 2024-06-19 at 3.28.38 PM.png


Screenshot 2024-06-19 at 3.28.31 PM.png

In the Moana movie, Pua plays a relatively minor role. He is Moana's initial animal companion, goes on a small journey to overcome the island's barrier reef, and then becomes afraid of the water after him and Moana get capsized. Pua doesn't join Moana for the bulk of her journey to find Maui and return the heart.

In the stage play, Pua is a moderate role. He has a few singing roles in duets or trios with Moana/Hei Hei or villagers. But also still doesn't go on the journey with Moana. Interestingly, neither does Her Hei in the stage play, unlike the movie.

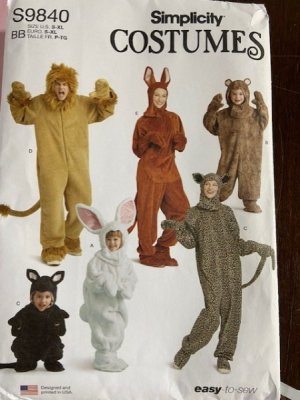
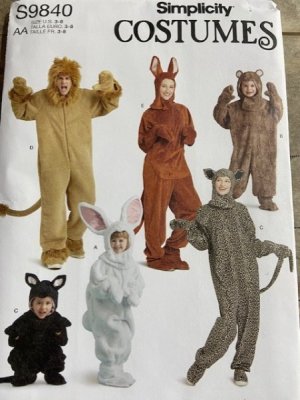
Once G was cast as Pua, I volunteered to make the costume for the stage performance. I initially started with trying to find a suitable sewing pattern. Thankfully in 2023 Simplicity released pattern S9840 which had several different animal costumes (lion, bear, cat, bunny, and kangaroo) in adult and children sizes.

thumbnail_IMG_7708.jpg

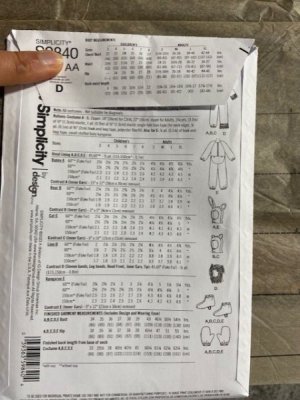
When we initially ordered the pattern off of Simplicity's website, we got the above pattern. I used it to find all of the necessary fabric sizes when we went to Jo-Ann's based on the back of the envelope.

thumbnail_IMG_7759.jpg

Based on G's measurements, I planned to make a Child's Size 7. So when I had all of my supplies and was ready to get started making the costume, it came as a surprise when I undid the contents and only found adult sizing patterns. Re-looked at the front, and it very clearly said S-XL, but made no mention of children's sizes. So Steph quick ordered from Amazon a children's pattern, and it arrived a few days later. Only for it to be an adult's size again. Contacted Amazon, got a refund, and had a new one sent out to us. Only for this second from Amazon, and third overall, to be ANOTHER adult size package. Got refunded and just went to my local JoAnn's instead. Thankfully the pattern had just come out in 2023, so it wasn't hard to find in their stock.

thumbnail_IMG_7758.jpg

I was pleasantly surprised when the retail price was $22 (had been paying 14-16 on Amazon), and it was discounted for only $2 at Jo-Ann's. So that felt like a major win after several days of delays and frustration.

Once we had everything, we decided to set some goals for the project:

1) To make it as movie accurate as we could.
2) To make it fluffy.
3) To get the headpiece to tuck into the costume instead of being on the outside.
4) To rework the hands and feet from the original pattern into something more movie accurate.

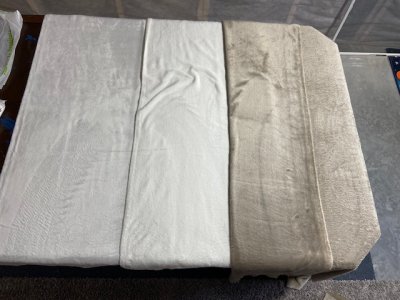
I don't have it written down, but I believe we purchased a lush fleece fabric for the majority of the costume.


thumbnail_IMG_7760.jpg

It was two sided with a slightly longer side and a shiny side. We opted for the slightly longer side as we felt Pua shouldn't be shiny. In addition, we purchased thread, single sided bias tape, and a zipper all in the same cream color. Pua's patches were harder to match. There was straight grey, and something with a little grayish with brown tones. So we went with the brown tone fabric, but once we got it home it was a tad browner and less grey than planned. But we stuck with it. The inner ear was made with a pink scuba diving fabric as it was the only thing close in desired color. We also found some upholstery fabric to make the mittens and shoes out of that looks like grey scaled hooves. At different points in the process we had to go back to JoAnn for the "mohawk" fabric (which was a white Husky faux fur fabric) and the tail tip (which was grey Husky faux fur fabric). I also needed to use some batting/stuffing for the tail which I already owned.

Once we had the materials, then it was time to map everything out to try and best nail the movie accurate look. After reviewing several other theater costumes, I felt like Pua's spots were the place that most people went off script. So I created a look book for Pua and took screenshots of every angle I could find of him. This gave me the opportunity to map out roughly where Pua did and didn't have spots. Pua also has a straight tail. Which saddened the theater director because she was really looking forward to a curly tailed G up there on stage. But after reviewing some literature Kune Kune pigs can have straight or curly, and Pua just happens to have curly. Lastly, Pua has a small mohawk shape to his head. So I wanted to try and capture that look as well, and the base fabric just likely wasn't going to nail that look exactly.

The pattern itself was very easy and straightforward. There is one front panel (and reverse it), one back panel (and reverse it), one front arm panel (and reverse it), and one back arm panel (and reverse it). That makes up the majority of the base of the costume.

So I started with the front of the costume, because I had been warned that a zipper can be tricky. At first I found it odd that the zipper was going to be on the front of the costume and not the back. But then it allows G to put the costume on without assistance, so I could see the benefit. I traced and cut out each of the front panels by pinning the pattern to the cream fabric. Always making sure I was working on the "right" side of the fabric. The zipper instructions weren't completely clear, but the Simplicity pattern included a QR code to additional learning modules, one of which covered invisible zippers. Personally, I figured attaching the zipper to one front panel, while aiming to get the closure as close to the fabric as possible, and then sewing on the second side was the easiest method. I can't remember at this point, but I also think I sewed the non-zipper seam up the front together before the zipper to get it in the right place. This is where it would have been nice to take more pictures during the making of this costume, but I didn't. Regardless, I didn't find the zipper too overly difficult, and felt like everything ended up in a good place. The hardest part was knowing where to the put the top of the zipper (which I ended up misplacing by just a touch. I then sewed each of the front arms to the front body panels, and had a one half costume.

The back of the costume was much the same, except no zipper, and there was a tail. The pattern had a kangaroo, bear, bunny, cat, and lion tail. But nothing was quite like the Pua pig tail. I figure my best bet was the lion tail but about half the desired length. So I cut the pattern out as is, and then truncated it in half by just copying the overall design of it. The tail design comes in two parts. The main part of the tail, and then a contrasting fabric for the tail tip. I used the Pua spot grey/brown for the contrast. The tip is sewn onto the tail piece. The combo is folded inside out and sew up the side, but the final edge is left open. It's turned inside out and then stuffed with batting/fluff. I went with a medium grade batting that had some rigidity, but not a ton. Then I sewed off the opening to have a completed tail. The instructions were a bit confusing on attaching the tail to the back of the costume, but it ended up being that you'd sew the tail to one half of the back panel, and then sew the other back panel such that the seam of the tail opening was pulled into the seam of the two back panels coming together. It took a few passes with the sewing machine, but eventually I got it to work. Then I sewed on the two back arm panels. Now I had the front half and back half complete.

Well, so I thought at least. Because once I took a good hard look at the tail I had created, it just wasn't going to work. Let's just say it resembled some anatomy WAY too closely. And in a stage performance with a bunch of elementary and middle school aged kids, I was getting flashes of extreme embarrassment. So that had to be fixed. Problem was, the tail was sewn over multiple times and wasn't coming out. Additionally, I couldn't just cut it away so easily, because of how it was pulled into the seam of the back panels. Plus, I needed to devise a method for making it less suggestive. That's when G and I went back to JoAnns and got the Husky fur in grey. Similar, but not the same color, but at least it would look more like Pua's tail, and far less suggestive.

So I lost a lot of material (which I would later cannibalize for other parts of the costume), and about 4-6 hrs of progress in remaking the back panels. But it had to be done. This was the second iteration of the tail.


thumbnail_IMG_7764.jpg

Next, there were patches along the costume. So like I said, I mapped out where the brown/grey patches were, and then did my best to replicate that on the costume. Some covered seams which meant I could only do them once two pieces were sewn together. So I had to be strategic about when to sew pieces together, and when to sew the patches on.

The neck hole was sealed up with single sided bias tape. Again, the instructions weren't crystal clear to me, but the QR code provided a video lesson that was more informative. So I followed that. Ultimately, I was just off by a little on the right side of the collar, and so I had to fold it down a second time to make the two sides even. You can see some extra stitching along the collar if you're looking for it, but otherwise, you'll probably never notice.

The arms and leg holes were closed with elastic. The pattern recommends measuring the wrist and ankle lengths, and then adding 0.5 inches to the elastic measurement. Cut that and then string it through a sewn folded over tip. I felt like it was really hard to get the elastic through there, so on a second attempt I just marked the correct length of the elastic, but left the entire strip in tact. This gave me lots to work with, and I felt like it was easier to maneuver it through the folds. When I finished with the first arm hole, I wasn't completely convinced. There's a lot of bunching, but the whole just felt really small. When I had G try on the costume, she felt like it was too tight. And I agreed with her when I attempted to stick my arm through one of the foot holes at roughly the same circumference as her ankle. So I ended up redoing the elastics to be 1.5 inches longer than measured, instead of 0.5 inches longer and this felt more comfortable to both of us. I'm not 100% convinced though that I liked the look of the elastic ends, but that's something to change later down the line once the whole costume comes together. This essentially wrapped up the entire base of the costume. So next up was the head piece.
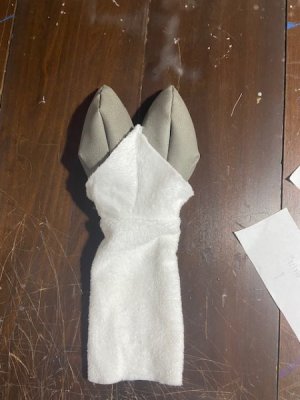
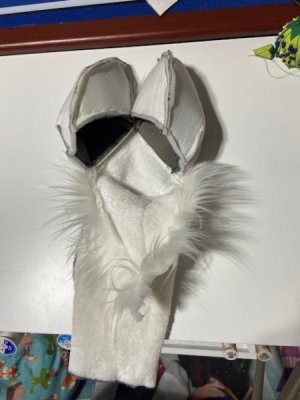
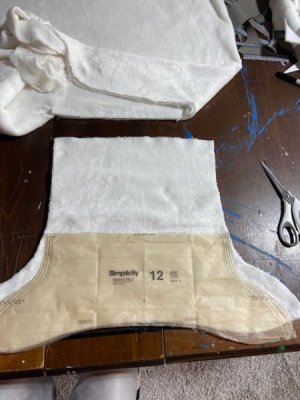
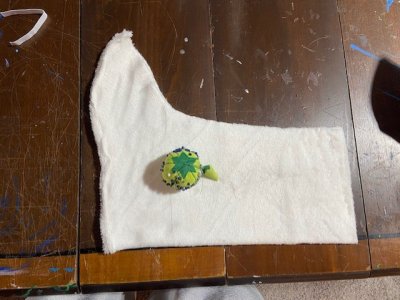
So Pua has a distinct "mohawk" or extra tuff of fur that goes down the center line of his head, and I wanted to try and recreate this. Which meant I needed to edit the pattern piece to fix this. The pattern headpiece is in three parts. The center front which is one piece that covers from neck, to head tip, to neck. And then two back panel pieces that are mirrored. So I took a couple pieces of scrap fabric and made a few different designs in the fabric sewing, and then tried to stuff in some of that Husky grey fur, and ultimately came up with an edit for the costume pattern. I needed to cut the center front piece in half (it was mirrored already see each 1/2 of it was exactly the same in the first place). Then when I laid out the pattern I would fold over the fabric to make it double sided. I placed the pattern on the folded edge so that it would remain attached. Then I slightly angled what was a mirror on the flat side of the center line into a triangle. So this would give me about 1-1.5 inches of extra fabric to work with on the top of headpiece. I also added the same amount to each of the back panel mirrored pieces. This way it would gradually get bigger as you moved from her eyes to the center of her head, and then get smaller as you worked your way backwards towards the back of her head. Additionally, since this head piece was suppose to be on the outside of the costume, it had a certain length to it. I couldn't be certain, but the neck hold seemed enormous to me, and unusually large. But since we wanted to tuck the headpiece into the base costume, I added an additional 3.5 inches on to the base of the headpiece to make it longer.

Once I had the headpiece and two back headpiece cut out, then it cut right down the center of the front head piece. This gave me a place to sew the mohawk fur into once I tucked the seam in. It worked reasonably well, but G's head is a tad lumpy. We'll fix that by putting her long hair in some Rey buns that'll hold up the costume a bit on the inside.

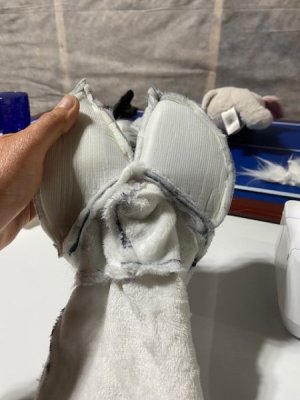
The next part was the ears. According to the instructions we should assemble each of the ears, then attach to the center front headpiece, and then sew on the back panels. But I wasn't convinced since I had altered the front headpiece, and because Pua's ears aren't quite like any of the ears in the costume patterns. So we made the cat ears, but then I didn't fold, pin them in on themselves. I also pinned the entire headpiece together, and then had G wear the pinned headpiece so that I could try and position the ears as desired. This is where I had a listen to dad speech with G. At this point I had spent probably 20-30 hrs making the costume. So when I asked her for 5 minutes of her time to try it on so that I could get the ear placement right, and she gave me lip service, I wasn't having it. I explained to her that I get that her friends want to play with her right now, but I'm spending tons of my free time making this costume for her. I could as easily be playing video games, watching tv/movies, or doing something else. She snapped back that no one was forcing me to make this costume at break neck speed and I could take a break until she was more available. To which I replied that I'm not only working on Pua, but Anne armor, Anne skirt, Anne tennis racket, Darcy dagger, and any other Moana Jr costumes stuff they request. So yes, Pua doesn't have to be done in a short period of time, but if I don't continue at the pace I'm working at, I fear I might have to sacrifice some other portions of our desired projects. I think it's at this point she understood me. She calmed down, and settled into helping me with trying on the costume.

Ultimately, we got the ear placement that we all liked, and then I took it to sew it. But I'd be lying if I said this was easy. Because there really wasn't any part of the pinned on costume that I could easily disassemble and then sew. So the whole thing was tough. And at some point the first ear shifted position and I was off by about 1 inch in two different directions (a tad too forward, and a tad too low). I quickly took it to Steph to see if we could fix it, because she had mentioned how easy it should have been to remove the tail from a few days ago, and then when she looked she agreed it wasn't an easy fix. So I just decided to roll with it and match the second ear to this new positioning. It's not quite where I wanted them, but it's not the end of the world either.

Once I got the ears sewn on, then I finished all of the other seams on the headpiece. I also sewed on a patch near the mohawk. This was a bit tricky because I had forgotten about this patch. So the whole headpiece was finished, and it didn't want to play well. I also happened to sew a pin into the costume at this point and had to cut it out. The pattern wants you to sew in a liner, but I left that off, and instead I just rolled over the edges along the headpiece and sewed it on itself to give it a finished look.

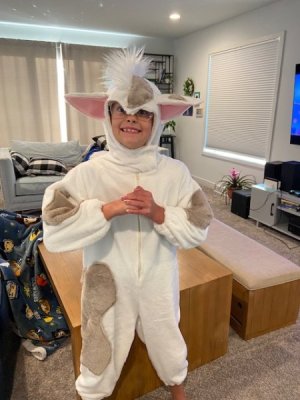
Lastly, since we were tucking it in, I wanted to place velcro on the headpiece and the base costume at the shoulders so it would stay put better. So we marked those spots while G was wearing it. I also marked spots for velcro on the front hood of the headpiece as it wrapped around G's neck so that I could velcro that closed as well (that's part of the pattern, but not quite as tight as desired). So to that point, I finally took a picture of the costume, and we had this look.

thumbnail_IMG_7765.jpg


thumbnail_IMG_7766.jpg

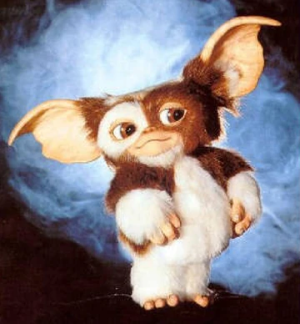
The mohawk is a little long, but I want a hairstylist to actually cut that, because I'll cut it too flat, and we only get one shot at it. Her arms and legs are longer than a Child's size 7 apparently, so I'll need to take that into consideration when making the hands and feet of the costume. And the ears are a little low. She's giving me Gizmo from Gremlins vibes.

1720209585615.png

But all in all, it looks pretty good.

The next step was the hands and feet. I wasn't a big fan of the looks of what the pattern had set out for me. A simple mitten for the hand, and a shoe that was all suppose to be the contrasting fabric. So I did some searching, and found something that I think is much better. But I'll cover that in a later update since that's still a work in progress.

Next Pua update -Pua - Part 2
 
Last edited:
Moana Jr Costumes - Pua
As previously mentioned, G has been cast in the theater stage performance of Moana Jr this summer. The play is in August, and practice starts in a few weeks. She's going to be playing Pua the pig companion of Moana.


View attachment 873872


View attachment 873873

In the Moana movie, Pua plays a relatively minor role. He is Moana's initial animal companion, goes on a small journey to overcome the island's barrier reef, and then becomes afraid of the water after him and Moana get capsized. Pua doesn't join Moana for the bulk of her journey to find Maui and return the heart.

In the stage play, Pua is a moderate role. He has a few singing roles in duets or trios with Moana/Hei Hei or villagers. But also still doesn't go on the journey with Moana. Interestingly, neither does Her Hei in the stage play, unlike the movie.

Once G was cast as Pua, I volunteered to make the costume for the stage performance. I initially started with trying to find a suitable sewing pattern. Thankfully in 2023 Simplicity released pattern S9840 which had several different animal costumes (lion, bear, cat, bunny, and kangaroo) in adult and children sizes.

View attachment 873883

When we initially ordered the pattern off of Simplicity's website, we got the above pattern. I used it to find all of the necessary fabric sizes when we went to Jo-Ann's based on the back of the envelope.

View attachment 873888

Based on G's measurements, I planned to make a Child's Size 7. So when I had all of my supplies and was ready to get started making the costume, it came as a surprise when I undid the contents and only found adult sizing patterns. Re-looked at the front, and it very clearly said S-XL, but made no mention of children's sizes. So Steph quick ordered from Amazon a children's pattern, and it arrived a few days later. Only for it to be an adult's size again. Contacted Amazon, got a refund, and had a new one sent out to us. Only for this second from Amazon, and third overall, to be ANOTHER adult size package. Got refunded and just went to my local JoAnn's instead. Thankfully the pattern had just come out in 2023, so it wasn't hard to find in their stock.

View attachment 873889

I was pleasantly surprised when the retail price was $22 (had been paying 14-16 on Amazon), and it was discounted for only $2 at Jo-Ann's. So that felt like a major win after several days of delays and frustration.

Once we had everything, we decided to set some goals for the project:

1) To make it as movie accurate as we could.
2) To make it fluffy.
3) To get the headpiece to tuck into the costume instead of being on the outside.
4) To rework the hands and feet from the original pattern into something more movie accurate.

I don't have it written down, but I believe we purchased a lush fleece fabric for the majority of the costume.


View attachment 873887

It was two sided with a slightly longer side and a shiny side. We opted for the slightly longer side as we felt Pua shouldn't be shiny. In addition, we purchased thread, single sided bias tape, and a zipper all in the same cream color. Pua's patches were harder to match. There was straight grey, and something with a little grayish with brown tones. So we went with the brown tone fabric, but once we got it home it was a tad browner and less grey than planned. But we stuck with it. The inner ear was made with a pink scuba diving fabric as it was the only thing close in desired color. We also found some upholstery fabric to make the mittens and shoes out of that looks like grey scaled hooves. At different points in the process we had to go back to JoAnn for the "mohawk" fabric (which was a white Husky faux fur fabric) and the tail tip (which was grey Husky faux fur fabric). I also needed to use some batting/stuffing for the tail which I already owned.

Once we had the materials, then it was time to map everything out to try and best nail the movie accurate look. After reviewing several other theater costumes, I felt like Pua's spots were the place that most people went off script. So I created a look book for Pua and took screenshots of every angle I could find of him. This gave me the opportunity to map out roughly where Pua did and didn't have spots. Pua also has a straight tail. Which saddened the theater director because she was really looking forward to a curly tailed G up there on stage. But after reviewing some literature Kune Kune pigs can have straight or curly, and Pua just happens to have curly. Lastly, Pua has a small mohawk shape to his head. So I wanted to try and capture that look as well, and the base fabric just likely wasn't going to nail that look exactly.

The pattern itself was very easy and straightforward. There is one front panel (and reverse it), one back panel (and reverse it), one front arm panel (and reverse it), and one back arm panel (and reverse it). That makes up the majority of the base of the costume.

So I started with the front of the costume, because I had been warned that a zipper can be tricky. At first I found it odd that the zipper was going to be on the front of the costume and not the back. But then it allows G to put the costume on without assistance, so I could see the benefit. I traced and cut out each of the front panels by pinning the pattern to the cream fabric. Always making sure I was working on the "right" side of the fabric. The zipper instructions weren't completely clear, but the Simplicity pattern included a QR code to additional learning modules, one of which covered invisible zippers. Personally, I figured attaching the zipper to one front panel, while aiming to get the closure as close to the fabric as possible, and then sewing on the second side was the easiest method. I can't remember at this point, but I also think I sewed the non-zipper seam up the front together before the zipper to get it in the right place. This is where it would have been nice to take more pictures during the making of this costume, but I didn't. Regardless, I didn't find the zipper too overly difficult, and felt like everything ended up in a good place. The hardest part was knowing where to the put the top of the zipper (which I ended up misplacing by just a touch. I then sewed each of the front arms to the front body panels, and had a one half costume.

The back of the costume was much the same, except no zipper, and there was a tail. The pattern had a kangaroo, bear, bunny, cat, and lion tail. But nothing was quite like the Pua pig tail. I figure my best bet was the lion tail but about half the desired length. So I cut the pattern out as is, and then truncated it in half by just copying the overall design of it. The tail design comes in two parts. The main part of the tail, and then a contrasting fabric for the tail tip. I used the Pua spot grey/brown for the contrast. The tip is sewn onto the tail piece. The combo is folded inside out and sew up the side, but the final edge is left open. It's turned inside out and then stuffed with batting/fluff. I went with a medium grade batting that had some rigidity, but not a ton. Then I sewed off the opening to have a completed tail. The instructions were a bit confusing on attaching the tail to the back of the costume, but it ended up being that you'd sew the tail to one half of the back panel, and then sew the other back panel such that the seam of the tail opening was pulled into the seam of the two back panels coming together. It took a few passes with the sewing machine, but eventually I got it to work. Then I sewed on the two back arm panels. Now I had the front half and back half complete.

Well, so I thought at least. Because once I took a good hard look at the tail I had created, it just wasn't going to work. Let's just say it resembled some anatomy WAY too closely. And in a stage performance with a bunch of elementary and middle school aged kids, I was getting flashes of extreme embarrassment. So that had to be fixed. Problem was, the tail was sewn over multiple times and wasn't coming out. Additionally, I couldn't just cut it away so easily, because of how it was pulled into the seam of the back panels. Plus, I needed to devise a method for making it less suggestive. That's when G and I went back to JoAnns and got the Husky fur in grey. Similar, but not the same color, but at least it would look more like Pua's tail, and far less suggestive.

So I lost a lot of material (which I would later cannibalize for other parts of the costume), and about 4-6 hrs of progress in remaking the back panels. But it had to be done. This was the second iteration of the tail.


View attachment 873886

Next, there were patches along the costume. So like I said, I mapped out where the brown/grey patches were, and then did my best to replicate that on the costume. Some covered seams which meant I could only do them once two pieces were sewn together. So I had to be strategic about when to sew pieces together, and when to sew the patches on.

The neck hole was sealed up with single sided bias tape. Again, the instructions weren't crystal clear to me, but the QR code provided a video lesson that was more informative. So I followed that. Ultimately, I was just off by a little on the right side of the collar, and so I had to fold it down a second time to make the two sides even. You can see some extra stitching along the collar if you're looking for it, but otherwise, you'll probably never notice.

The arms and leg holes were closed with elastic. The pattern recommends measuring the wrist and ankle lengths, and then adding 0.5 inches to the elastic measurement. Cut that and then string it through a sewn folded over tip. I felt like it was really hard to get the elastic through there, so on a second attempt I just marked the correct length of the elastic, but left the entire strip in tact. This gave me lots to work with, and I felt like it was easier to maneuver it through the folds. When I finished with the first arm hole, I wasn't completely convinced. There's a lot of bunching, but the whole just felt really small. When I had G try on the costume, she felt like it was too tight. And I agreed with her when I attempted to stick my arm through one of the foot holes at roughly the same circumference as her ankle. So I ended up redoing the elastics to be 1.5 inches longer than measured, instead of 0.5 inches longer and this felt more comfortable to both of us. I'm not 100% convinced though that I liked the look of the elastic ends, but that's something to change later down the line once the whole costume comes together. This essentially wrapped up the entire base of the costume. So next up was the head piece.
So Pua has a distinct "mohawk" or extra tuff of fur that goes down the center line of his head, and I wanted to try and recreate this. Which meant I needed to edit the pattern piece to fix this. The pattern headpiece is in three parts. The center front which is one piece that covers from neck, to head tip, to neck. And then two back panel pieces that are mirrored. So I took a couple pieces of scrap fabric and made a few different designs in the fabric sewing, and then tried to stuff in some of that Husky grey fur, and ultimately came up with an edit for the costume pattern. I needed to cut the center front piece in half (it was mirrored already see each 1/2 of it was exactly the same in the first place). Then when I laid out the pattern I would fold over the fabric to make it double sided. I placed the pattern on the folded edge so that it would remain attached. Then I slightly angled what was a mirror on the flat side of the center line into a triangle. So this would give me about 1-1.5 inches of extra fabric to work with on the top of headpiece. I also added the same amount to each of the back panel mirrored pieces. This way it would gradually get bigger as you moved from her eyes to the center of her head, and then get smaller as you worked your way backwards towards the back of her head. Additionally, since this head piece was suppose to be on the outside of the costume, it had a certain length to it. I couldn't be certain, but the neck hold seemed enormous to me, and unusually large. But since we wanted to tuck the headpiece into the base costume, I added an additional 3.5 inches on to the base of the headpiece to make it longer.

Once I had the headpiece and two back headpiece cut out, then it cut right down the center of the front head piece. This gave me a place to sew the mohawk fur into once I tucked the seam in. It worked reasonably well, but G's head is a tad lumpy. We'll fix that by putting her long hair in some Rey buns that'll hold up the costume a bit on the inside.

The next part was the ears. According to the instructions we should assemble each of the ears, then attach to the center front headpiece, and then sew on the back panels. But I wasn't convinced since I had altered the front headpiece, and because Pua's ears aren't quite like any of the ears in the costume patterns. So we made the cat ears, but then I didn't fold, pin them in on themselves. I also pinned the entire headpiece together, and then had G wear the pinned headpiece so that I could try and position the ears as desired. This is where I had a listen to dad speech with G. At this point I had spent probably 20-30 hrs making the costume. So when I asked her for 5 minutes of her time to try it on so that I could get the ear placement right, and she gave me lip service, I wasn't having it. I explained to her that I get that her friends want to play with her right now, but I'm spending tons of my free time making this costume for her. I could as easily be playing video games, watching tv/movies, or doing something else. She snapped back that no one was forcing me to make this costume at break neck speed and I could take a break until she was more available. To which I replied that I'm not only working on Pua, but Anne armor, Anne skirt, Anne tennis racket, Darcy dagger, and any other Moana Jr costumes stuff they request. So yes, Pua doesn't have to be done in a short period of time, but if I don't continue at the pace I'm working at, I fear I might have to sacrifice some other portions of our desired projects. I think it's at this point she understood me. She calmed down, and settled into helping me with trying on the costume.

Ultimately, we got the ear placement that we all liked, and then I took it to sew it. But I'd be lying if I said this was easy. Because there really wasn't any part of the pinned on costume that I could easily disassemble and then sew. So the whole thing was tough. And at some point the first ear shifted position and I was off by about 1 inch in two different directions (a tad too forward, and a tad too low). I quickly took it to Steph to see if we could fix it, because she had mentioned how easy it should have been to remove the tail from a few days ago, and then when she looked she agreed it wasn't an easy fix. So I just decided to roll with it and match the second ear to this new positioning. It's not quite where I wanted them, but it's not the end of the world either.

Once I got the ears sewn on, then I finished all of the other seams on the headpiece. I also sewed on a patch near the mohawk. This was a bit tricky because I had forgotten about this patch. So the whole headpiece was finished, and it didn't want to play well. I also happened to sew a pin into the costume at this point and had to cut it out. The pattern wants you to sew in a liner, but I left that off, and instead I just rolled over the edges along the headpiece and sewed it on itself to give it a finished look.

Lastly, since we were tucking it in, I wanted to place velcro on the headpiece and the base costume at the shoulders so it would stay put better. So we marked those spots while G was wearing it. I also marked spots for velcro on the front hood of the headpiece as it wrapped around G's neck so that I could velcro that closed as well (that's part of the pattern, but not quite as tight as desired). So to that point, I finally took a picture of the costume, and we had this look.

View attachment 873885


View attachment 873884

The mohawk is a little long, but I want a hairstylist to actually cut that, because I'll cut it too flat, and we only get one shot at it. Her arms and legs are longer than a Child's size 7 apparently, so I'll need to take that into consideration when making the hands and feet of the costume. And the ears are a little low. She's giving me Gizmo from Gremlins vibes.

View attachment 873969

But all in all, it looks pretty good.

The next step was the hands and feet. I wasn't a big fan of the looks of what the pattern had set out for me. A simple mitten for the hand, and a shoe that was all suppose to be the contrasting fabric. So I did some searching, and found something that I think is much better. But I'll cover that in a later update since that's still a work in progress.

Next Pua update -
That looks so freaking cute! Great job with the costume.
 
Moana Jr Costumes - Pua - Part 2

Alright, by now, you know me. I'm always looking for ways to "plus" things. So I wasn't completely satisfied with the Simplicity S9840 pattern when it came to the hands and feet. The hands were simple gloves, and the feet were just something you placed over your shoes, but hardly looked like feet. So I did a little bit of searching to try and find something that had the appearance of pig hooves, but stayed true to the Pua character. Ultimately, I settled on this pattern from Pseudocanid on Youtube and Etsy (link).


I really liked this pattern because of its appearance, but also because I was going to learn some new useful techniques.

-Sewable foam
-Using embroidery plastic as a stabilizer
-Hand sewing

The pattern is meant for an adult, so we played around with the printing settings to get it to be an appropriate size for G's hands. I think we ended up settling on something like 75%. It was all about taking the Pua image and finding the right ratios in terms of G's arm length.

The pattern itself was pretty simple, but very well designed.


thumbnail_IMG_7774.jpg

I ended up making only one hoof to start just to make sure everything worked out as desired. While the pattern was pretty simple, the print out lacked sufficient instructions. So the youtube video became a must as I kept slowing down what she was doing to ensure I stayed on track.

So coincidentally, I watched a youtube video of someone sewing EVA foam a few weeks back. They had done it with really cheap foam, and then their product, and it worked quite well. Something where you could sew fabric to foam to give the fabric shape. So when I saw this project using a soft sewable foam, I had to give it a try. The video and instructions don't say exactly what she's using, but I deduced that it was probably something similar to Pellon Flex Foam 1 sided stabilizer (link). It's $6 for 20"x36", which something comparable in EVA foam is about $18-20. So it's pretty inexpensive comparably. It does lack rigidity compared to EVA foam.

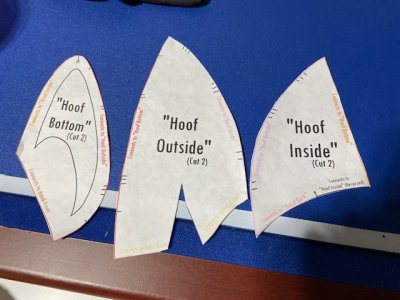
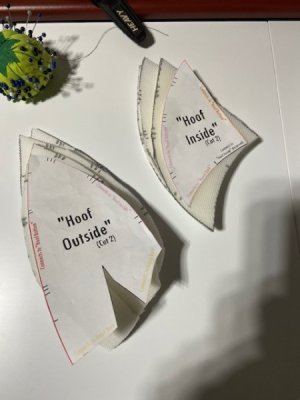
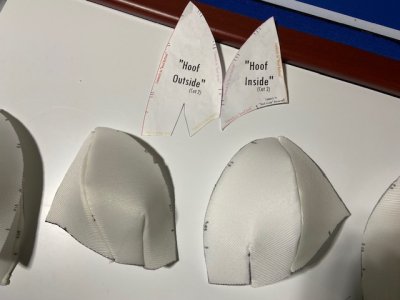
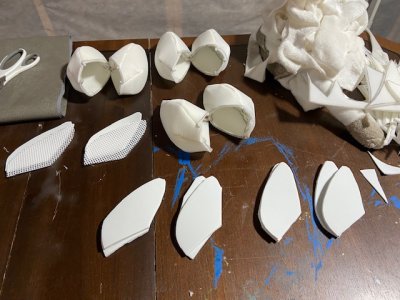
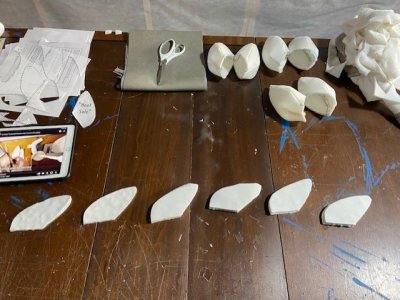
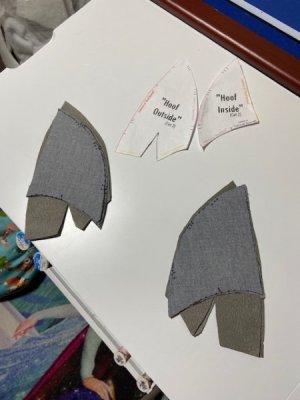
I traced out the patterns, and then cut them out.


thumbnail_IMG_7772.jpg

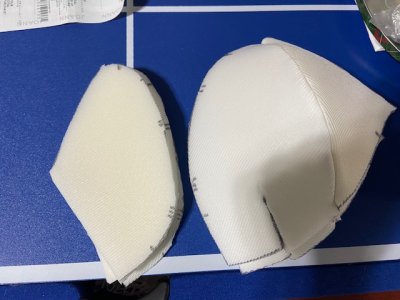
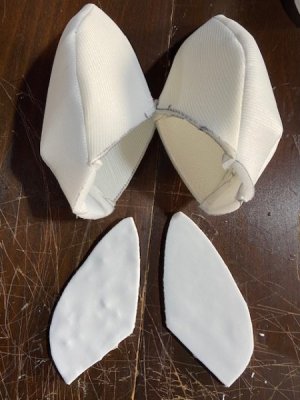
The hood outside and inside were sewn together.


thumbnail_IMG_7773.jpg

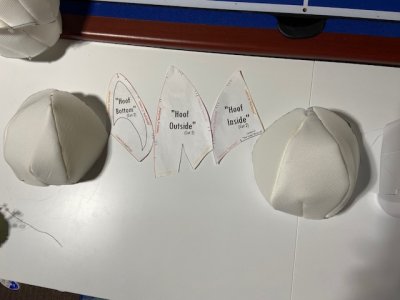
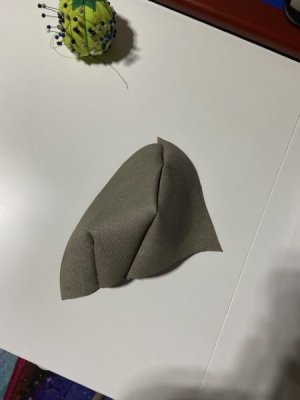
Then the combo was sewn to the hoof bottom.


thumbnail_IMG_7775.jpg

thumbnail_IMG_7776.jpg

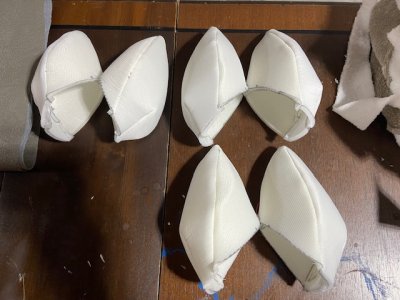
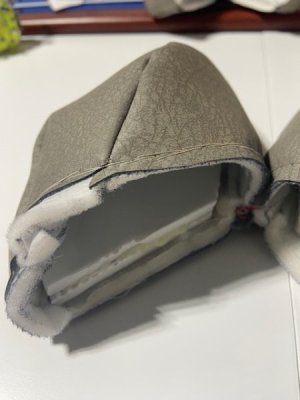
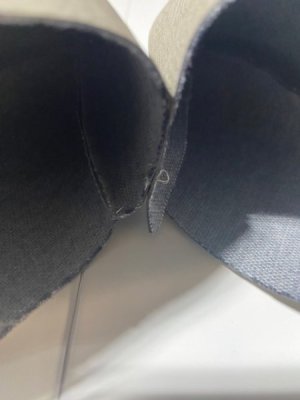
Then the final sew was done to make a completed hoof. All in all a pretty easy and quick process.

thumbnail_IMG_7777.jpg

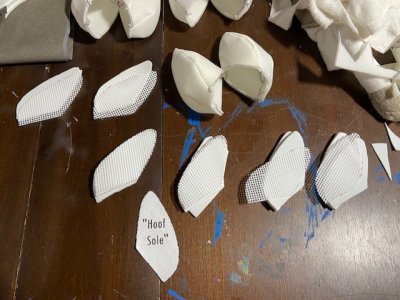
Next up was making the base inside the hoof. For this, Pseuocanid recommends using 2mm EVA foam for hands and 8mm EVA foam for feet. You are to cut out two pieces per hoof by using the hoof sole pattern (a slightly smaller version of hoof bottom).


thumbnail_IMG_7778.jpg

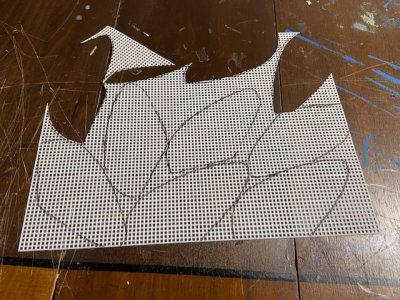
Then this was an interesting technique. She used a plastic mesh embroidery canvas to use as something that would help add some rigidity to the EVA foam. I used this one (link).


thumbnail_IMG_7779.jpg

The hoof sole was also traced out on this material, and then cut out.


thumbnail_IMG_7780.jpg

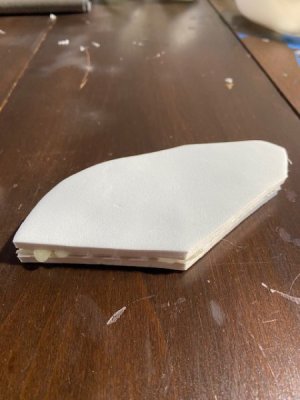
Then she used hot glue, and glued the plastic mesh to one of the EVA foam pieces. And then to the second piece. She did it by gluing the base of the plastic to the EVA foam, then glued the rest of the plastic to the foam, and then repeated that process on the second EVA foam piece. Essentially making a sandwich of EVA, plastic, EVA. This definitely stiffened up the EVA foam, and was a very useful technique. Pretty cheap too at only $2 for a 12x18" piece.


thumbnail_IMG_7781.jpg

Next Pua update -Pua - Part 3
 
Last edited:
Moana Jr Costumes - Pua - Part 3

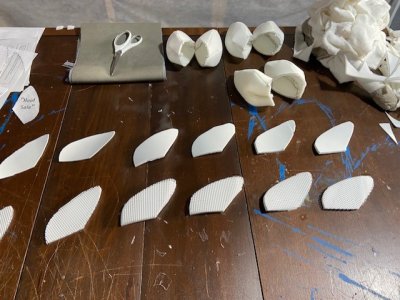
As detailed, I finished off the sole pieces of hot gluing the EVA foam into a sandwich of 2mm + plastic embroidery + 2mm.


thumbnail_IMG_7783.jpg

I went around the edges and trimmed off any excess.


thumbnail_IMG_7784.jpg

So here's a really important point that I learned only after the first one. Coming up is some hand-sewing. And hand sewing into EVA foam is not fun. So leave yourself a 1/8-1/4 inch ledge at the end of the sewable foam from the edge of the sole piece. This way when you start doing hand sewing, you can hand sew into the soft pliable foam, and not into the EVA+plastic. With that in mind, I hot glued the sole piece into each of the hooves.

thumbnail_IMG_7785.jpg

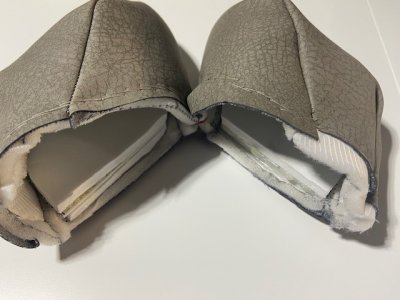
Lastly, she wants you to sew the two hooves together from the base up through the first 1/3 of the inside of the hoof. The first time I did this, I misinterpreted what she was doing in the video and just sewed the bases together. But I realized the error on the second run through because the pattern actually spells this out in a hard to read color. But I decided to go with the method I used the first time because this allowed the hooves when finished to have a little more mobility. Sewing them together would have made them hard to grip things, or move them much.

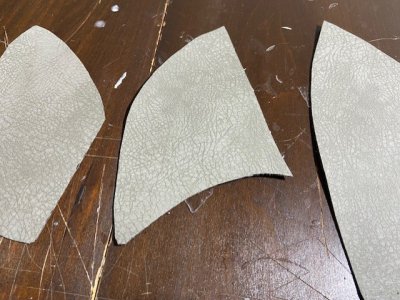
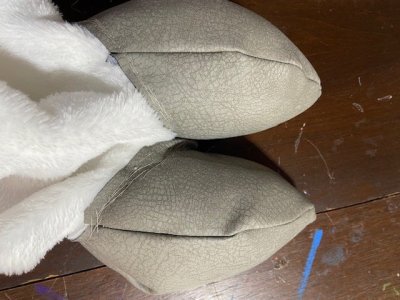
Next up was making the outside of the hooves. In the comments section of her Etsy pattern, the maker describes how choosing the outside fabric is important. It needs to be relatively flexible so that it can be stretched over the foam pattern. She describes how someone reached out after using something with less elasticity and how it didn't quite work. She recommends fleece. But I wanted to go with something with a little more textured appearance. I found this fabric (Richloom Kidd Stone Vinyl Fabric (link)). It's meant for high traffic barstools or upholstery, has the appearance of leather, but is relatively soft. So we felt like it worked well. The outer fabric is cut exactly the same as the sewable foam was. Like the sewable foam, just make sure to add a little allowance for the seams.


thumbnail_IMG_7786.jpg


thumbnail_IMG_7787.jpg

thumbnail_IMG_7788.jpg

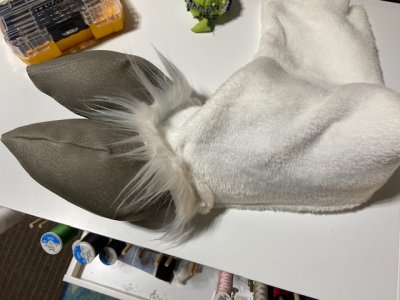
Once you have the two hooves finished, then just the same as before, you'll sew them together at the base. She used a blanket stitch.


thumbnail_IMG_7790.jpg

Then it's time to hand sew the outer fabric to the foam hoof.

thumbnail_IMG_7789.jpg

As you can see, I didn't leave myself a ton of room, but enough to sew into on this one. But the one prior the sole went all the way to the edge of the foam, and thus I had to hand sew into the EVA foam. This caused the needle to go into my finger on more than one occasion, which was a real annoyance. I learned a back stitch, and then used that technique to sew the outer fabric to the sewable foam. Once both were finished, then I sewed them together in the middle again.


thumbnail_IMG_7791.jpg

For the hoof hands, this left this portion essentially finished. Next up was making the base fabric pattern to make the hooves into gloves.

Next Pua update -Pua - Part 4
 
Last edited:
Moana Jr Costumes - Pua - Part 4

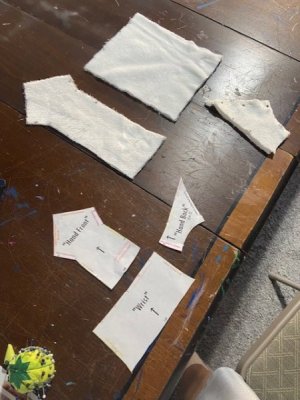
So the pattern also included the arm/glove portion. G's costume that was made thus far had shorter arms and legs than anticipated. She's the width of a child's 7, but length wise needed more fabric. So I'm making the hands and feet hooves patterns a little longer so that it covers the gap. I traced and cut out the patterns as laid out.

thumbnail_IMG_7792.jpg

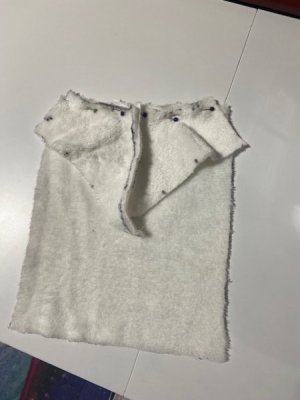
I sewed the two hand back pieces together, and then sewed that to the wrist pattern. All of this was machine sewn.


thumbnail_IMG_7793.jpg


thumbnail_IMG_7794.jpg

Then I sewed on the hand front pattern.


thumbnail_IMG_7795.jpg

I just made sure not to sew it closed, and not to sew the hand front to the back of hand.

thumbnail_IMG_7798.jpg


thumbnail_IMG_7799.jpg

It's actually a pretty useful pattern that I could see myself using for other projects. So I'm going to keep this one around. Same goes for the hoof pattern, as I could see a lot of different uses for it.

Next up was sewing the fabric pattern to the hooves.

thumbnail_IMG_7800.jpg

This is where I noticed a critical difference between my costume and Pseudocanid's costume. In hers, she's using a long pile fur fabric as the base of the costume (think shaggy dog). So the arm fabric will overwhelm, the seam gap between the hooves itself and the arm fabric. So the sewn seams will disappear nicely. But in my case, I don't have that long pile fur. So if I sewed these pieces together as is, the seams would show. So to fix this, I added 1/2 inches of the same fabric I used for the mohawk (Husky white long pile fur) to the inside edges of the arm fabric. This way once it was sew together and folded inside out, then there would be little stretches of long fur that would cover up the seams. And looking at Pua (and real Kune Kune pig hooves) this wasn't an unreasonable jump in logic. I felt like it would give the costume a better finished appearance.


thumbnail_IMG_7801.jpg

So I sewed on the white fabric. To sew the hooves to the arm fabric, I turned each of them inside/out. This was a really tedious process to hand sew these together. I made sure to fold all of the excess fur into the inside of the seam, so that once it was finished and turned the opposite direction, then the fur would be on the outside.


thumbnail_IMG_7802.jpg

Once these were sewn together, then I turned it back to normal. This was tough to do because the arm hole is relatively small, and the EVA soles are relatively rigid. But after some finagling, it worked.

This gave us this look.


thumbnail_IMG_7771.jpg

I think it looks a heck of a lot better than a mitten. I also added the auxiliary digits (not pictured above) just below the hooves themselves. I did this by cutting out in oval piece of the vinyl fabric. Then I cut two triangle wedges out of the ends of the oval. Sewed those triangle edges together, and then this gave me something like a nobbin (cone shaped object). Then I hand sewed those auxiliary digits onto the base costume fabric. I was going for that extra accurate look since you can see Pua has them as well next to his toes.

The final piece to the puzzle was figuring out a way to make hooves for the feet. This wasn't as straightforward as the hands were.

Next Pua update -
 
??? Weeks to go

6/3/24-6/9/24

Total Run Miles - 20.0 miles (4 runs)
Total Run Time - 2:56 hours
Total Strength Time - 0:30 hours (1 strength)
Total Training Time - 3:26 hours
6/10/24-6/16/24
Total Run Miles - 17.0 miles (3 runs)
Total Run Time - 2:33 hours
Total Strength Time - 1:13 hours (3 strength)
Total Training Time - 3:46 hours
6/17/24-6/23/24
Total Run Miles - 25.0 miles (5 runs)
Total Run Time - 3:41 hours
Total Strength Time - 0:59 hours (2 strength)
Total Training Time - 4:40 hours

6/24/24-6/30/24
Total Run Miles - 15.0 miles (3 runs)
Total Run Time - 2:15 hours
Total Strength Time - 0:24 hours (1 strength)
Total Training Time - 2:39 hours

7/1/24-7/7/24
Total Run Miles - 25.3 miles (5 runs)
Total Run Time - 3:42 hours
Total Strength Time - 0:24 hours (1 strength)
Total Training Time - 4:06 hours

Where does the time go these days? It's really been five weeks since the last running update. Oof-duh. For the most part, I've been able to squeeze 3.5-4.5 hrs per week. So getting closer to that 50% range and putting me close to being able to start actually training again. The endurance is still severely lacking though. My Garmin VO2max without adjusting any inputs has fallen from 56 to 51. Which means it hasn't fallen to a base level of fitness (20% drop), so that's a plus. For a period of time I was dealing with a sore arch in my left foot. But a few weeks of icing it post-run, and then icing it after I got up in the morning has put it back to near 100%. T+D wise we've been getting 130-150 most days. Which is pretty standard WI summer weather.

Since I'm getting closer to doing a training plan I brought back strides last week (only one day thus far). After nearly six months since the last time I tried to run fast, I wasn't sure how my body would respond. Good news is that I've still got it, but maybe just not as initially quick as I was. That could be attributed to a little extra weight I'm carrying. But I decided just to see how the strides went. and then end it 1-2 reps before I felt like I needed to end it. I started off with four flat-ish strides at 5:45, 5:35, 5:37, and 5:22 pace for about 16-18 seconds. I felt pretty good about how those felt. Relatively smooth with quick feet. So I decided to move over to the steep uphill (2 ft increase in 15s vs 11 ft increase in 15s). I then did four more strides progressively opening up the legs further on each attempt. Hit them at 6:39, 5:33, 5:08, and 4:28 pace. So despite the time off from real training, and what feels like a lack of good endurance at the moment, the raw power is still there.

I'm going to give it another 3-4 weeks of easy training with some strides before I move into something more structured. I'll aim for 5 days per week of running, but be happy with 4-6 days. And then strength wise I'm going to keep trying to get in 1-3 days per week when I can. Haven't decided on any running goals at the moment. Still considering either a mile or 5k given the lesser time commitment I can get away with. We'll see how things are going in life in a few weeks, and then try and put pen to paper at some point soon.
 
Moana Jr Costumes - Pua - Part 5

Alright, let's finish this costume up! Only thing left was to make the foot hooves which were slightly different than the hand hooves. As detailed earlier, the only part different for the hooves themselves was that the EVA foam sandwiches were made with 6mm foam instead of 2mm.

The pattern I used came from the Simplicity kit used for the rest of the pattern. It was just a simple shoe cover, that I planned to plus. One thing that was obvious from the creation of the base costume is that we undershot G's length of arms and legs based on the Child's Size 7. So as we did for the arms, I added extra fabric onto the foot patterns to account for the disparity. I also added a little extra fabric around the toe box to account of sewing the hooves to it and possibly needing it to have a little slack in it.

thumbnail_IMG_7803.jpg

I went through several mental exercises trying to determine the best way to sew the foot pattern onto the hooves. Ultimately, I settled on finishing the fabric off as planned, and then sewing the hooves to it. The pattern was folded on itself with right sides touching and then sewn together.


thumbnail_IMG_7807.jpg

I also hemmed the bottom edge.

Then I settled on a method for hand sewing the fabric to the hooves. I did the bottom portion first, tied it off, and then did the top portion separately. I did this because it was difficult to align the patterns to each other.

thumbnail_IMG_7804.jpg

Doing this also allowed me to stuff the hooves full of batting so that they would stay fuller, but remain light.

thumbnail_IMG_7808.jpg

Then I pulled up the fabric to meet the hooves and hand sewed the two together.

thumbnail_IMG_7805.jpg

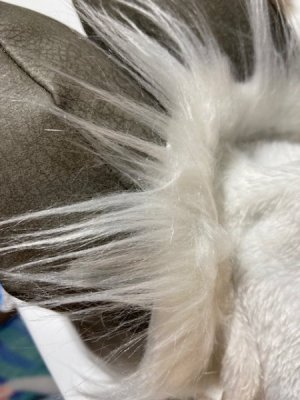
Then I went back and added a strip of the Husky white long pile fur along the edge of the hoof/fabric seam to cover it up.

thumbnail_IMG_7809.jpg

thumbnail_IMG_7810.jpg

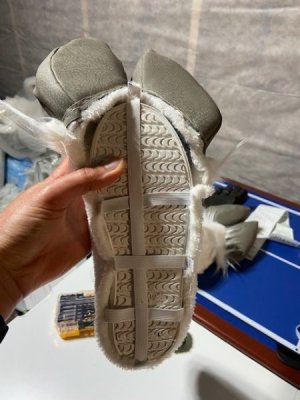
The last part was determining how to attach the shoe covers to the shoes. We bought slip on shoes so that it would be easier to get them on while attached to the foot hoof piece. I also labeled the bottom of the shoes so that she knew which was which. I originally tried using the Liquid Stitch which we used for the Monster's Inc shoes to glue the fabric to the shoes, but it didn't hold. So I ended up going with a series of elastic straps on the bottom of the shoe. I put one on, and then have G test it to determine whether she could notice it on the bottom of the shoe. When she said it was relatively unnoticeable, then I attached a series of them to hold the foot hooves piece in place.


thumbnail_IMG_7811.jpg

I weaved the long piece through the others and that helped hold it in place better. After she wore it for 10-15 min, it did slip off a little, so I may do an X-cross from the hoof through the middle to the other side. This may help keep it in place even better.

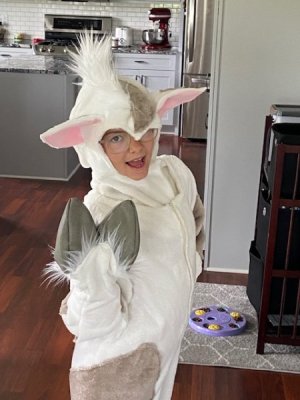
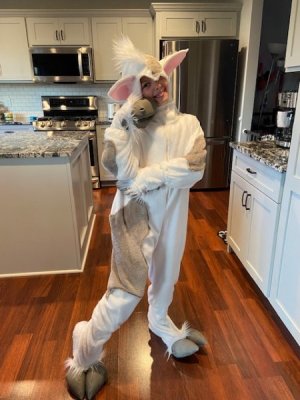
But with the shoes/foot hooves finished, I had G try on the costume in full.

thumbnail_IMG_7812.jpg


thumbnail_IMG_7822.jpg

I think it turned out great. We'll play with her hair a little bit to see how we can get the hood to sit, but otherwise we're all done. From start to finish, it took about 1.5 weeks. The base of the costume took about 4 days (maybe 20-30 hrs in total), and the hooves took about 9 days (also probably 15-20 hrs in total). The last three sets of hooves were a bit faster once I knew what I was doing and stopped jabbing myself so horribly with the needle, and left myself additional room on the sewable foam unlike the first where I had to sew into the EVA foam. All in all, a pretty quick and easy costume to make relative to some of the others we've undertaken. Now we'll see how it holds up on the theater stage.
 
Last edited:
Amphibia Costumes - Anne Skirt - Part 1

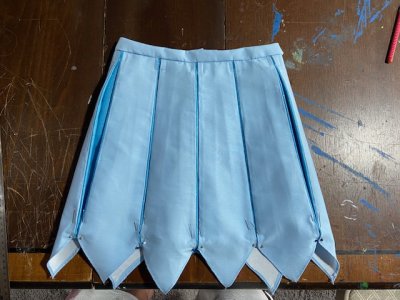
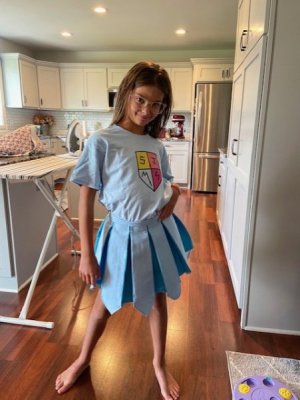
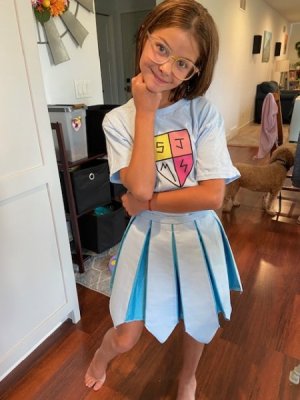
Time for the next phase of the Amphibia costume project - Anne's skirt! You can go back here (link) to see an image of Anne in calamity form and the desired skirt. I did a little searching on Etsy to see if I could find anything resembling the desired look. G and I went back and forth about the final design choices. The image clearly shows sleeves under the armor, and so we could either make a sleeved dress, or do a t-shirt and skirt. While it's never shown without a doubt, the assumption is that the sleeves are coming from Anne's Middle School shirt. The skirt is changed from her normal school uniform (usually purple with rectangular panels) because in the calamity form she was triangular tipped panels. So it's not a slam dunk what's underneath the armor. After perusing about 20 different options that I presented to G, we settled on Middle School shirt with a handmade skirt. We liked this idea, because then her costume can be two-fold. She can be wearing the armor when walking around Disney, but can also take the armor off and still be in character as she goes on rides.

The goal was to match the t-shirt and skirt to be the same color. The shirt we ordered from Etsy (link), and then used the color of fabric to match at JoAnn's for the skirt. The skirt itself came from a different Etsy vendor, GettingLoosey (link). If I come across another pattern from this Etsy vendor that aligns with my needs, then I'll definitely order again. It was top notch.


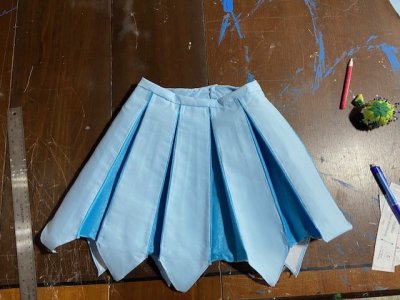
It's not an exact match, but when G saw the hidden panels in the box pleat design, she thought it was a must. I reached out to the maker about the sizing on the pattern because it was only in adult sizes. She said she's never transformed the pattern into children's sizes, and that given the way she made the pattern it might be difficult (since she took into account on the pattern itself the print area of standard printers). But I decided to bite the bullet and see if I could figure it out.

thumbnail_IMG_7828.jpg

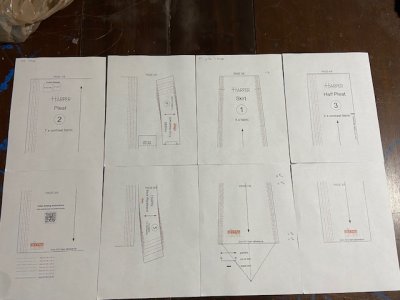
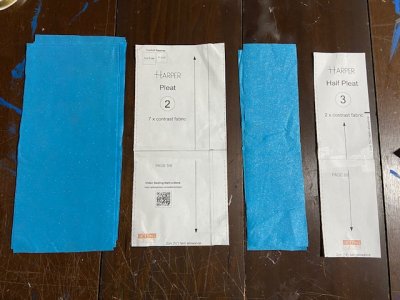
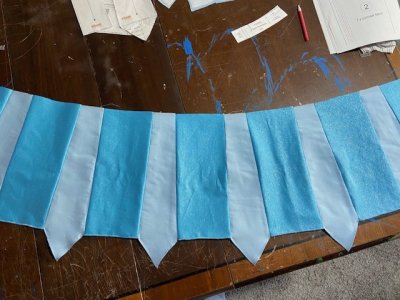
I ended up printing the skirt pattern at 100% and 75%. I measured many different locations on the "skirt 1" pattern to try and determine any patterns in the mathematical measurements. It's then I realized that the distance on "skirt 1" from the line drawn right at "Harper" when multiplied by 8 (the number of panels) was equivalent to the EU and US sizing for women's clothing. So using that information I determined what the width would need to be for a child's size 11. I used that measurement and compared a 1/8th size to the 75% printed off pattern and found a matching line to cut along. From there, I needed to take into account the length of the skirt. We measured some of G's current skirts and determined desired lengths of the pleats and then the triangle tip itself. So I drew extra onto the pattern for "skirt 1" to give it a triangle tip. Then since I printed at 75% instead of 100% I had to take into account the print area differences. The height was easy since I knew how long each pattern should be, but the width was hard on pattern "2" since I didn't have a good grasp. But I took a measurement on my iPad when I watched the youtube instruction video and was able to determine the ratio of the width of "2" compared to the top width of "1". So then I could accurately determine the correct width of "2" when printed at 75%. Then I cut everything out, and taped them together.

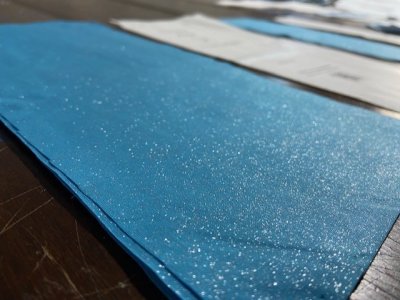
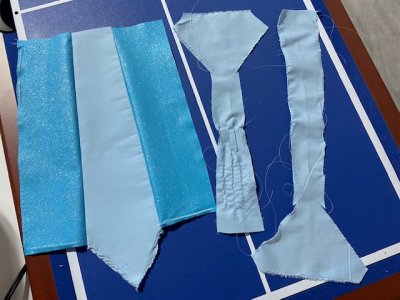
The patterns were well labeled, and the instructions were easy. The instructions made mention of different fabric choices to use for the different panel types. We ended up going with this Glitter Cotton (link) for the contrast fabric. Which I was not a huge fan of since the contrast fabric needed to be flowy (like satin) and not stiffer like this one was.

thumbnail_IMG_7832.jpg

thumbnail_IMG_7833.jpg

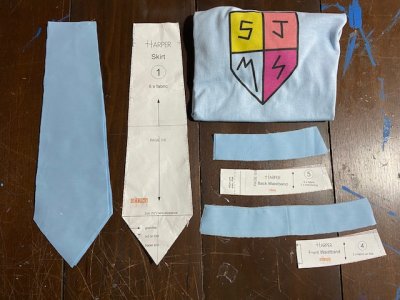
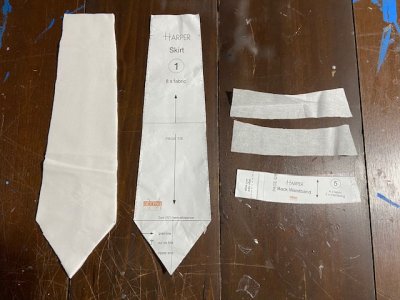
Contrast that with the main skirt panels should be a stiffer material, and they chose a fairly pliable cotton (probably this link). So I ended up buying some Pellon SF101 Shape flex to help stiffen the main panels (link).

thumbnail_IMG_7831.jpg


thumbnail_IMG_7829.jpg

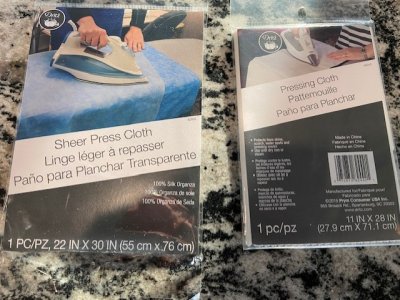
Once everything was cut out, then I had to iron everything out. I didn't have an ironing board, so I borrowed my SIL's. I also needed a presser cloth according to online instructions, so I went back to JoAnn's to pick one of those up.


thumbnail_IMG_7834.jpg

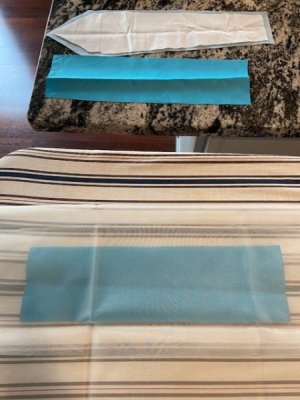
I ended up using the sheer press cloth and it worked great. I overlayed the cloth over the fabric and then ironed it at the appropriate setting.


thumbnail_IMG_7835.jpg

You can see how creased the original fabric was, and how not creased the ironed fabric was. Then I ironed on the Pellon SF101 to the appropriate pieces. Making sure that the glue dots were pointed in the right direction.

thumbnail_IMG_7836.jpg

It definitely stiffened the fabric compared to something without.


thumbnail_IMG_7837.jpg

But it did show through on the fabric we chose. So I had a moment where I was a bit concerned, but that didn't end up mattering.

thumbnail_IMG_7838.jpg

Next post - -Anne Skirt - Part 2
 
Last edited:
Amphibia Costumes - Anne Skirt - Part 2

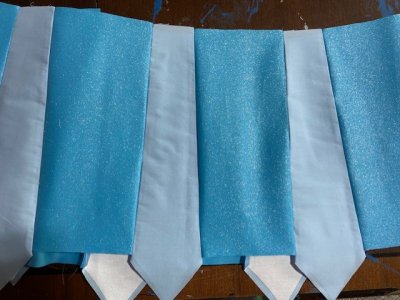
After everything was cut out, then it was time to sew the half pleats, skirt, and full pleats together in a sequence pattern. So I skipped ahead a little in the instructions and saw how the triangle tips might make things difficult. So I decided to sew together a test set of three just to work out the kinks before I made it to the real thing.

thumbnail_IMG_7839.jpg

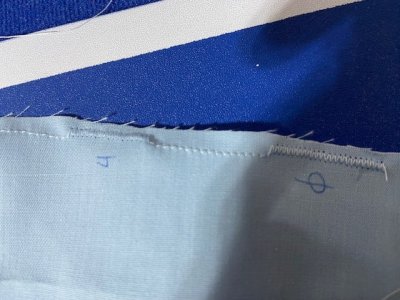
I tried sewing the pieces together with a 1/8 inch allowance and a 3/8 inch allowance to test the differences.


thumbnail_IMG_7840.jpg

thumbnail_IMG_7841.jpg

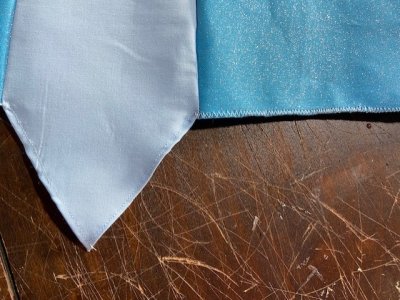
At this moment, I was leaning towards the 1/8th inch allowance because I felt like it flushed better with the triangle tip at the convergence point. But as I'll explain later, I ended up going with the 3/8th inch allowance because I would need to fold over the triangle tips. The other thing I'll point out now, is that because of the design of my skirt, I'd recommend making the pleats about 3/8th inch longer and then folding over and hemming the bottoms. This hem step comes at the very end, and it was too late for me to follow along since I didn't have a single edge like the real pattern is meant to be. But that's ok.

As you can see the 1/8th inch allowance only has enough space to do a standard one width stitch.

thumbnail_IMG_7843.jpg

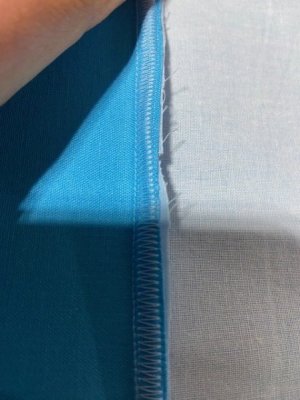
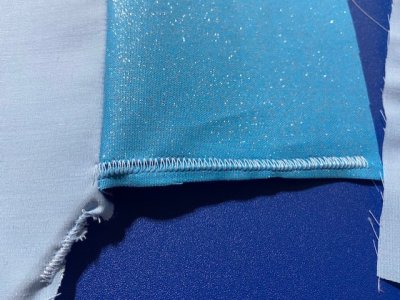
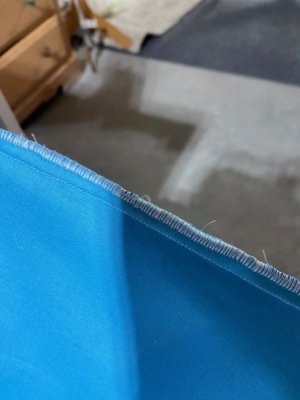
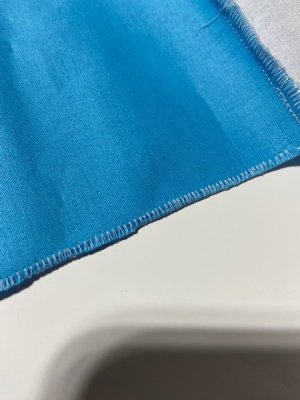
The pattern asked for a serger stitch here, but I don't have that type of machine. So I played around with several different types of stitches that my machine can do and settled on the zigzag stitch for the 3/8th inch allowance.


thumbnail_IMG_7842.jpg

I then did more playing around with stitches to figure out what would and wouldn't work for the contrast fabric and blue cotton fabric.


thumbnail_IMG_7844.jpg


thumbnail_IMG_7846.jpg


thumbnail_IMG_7845.jpg


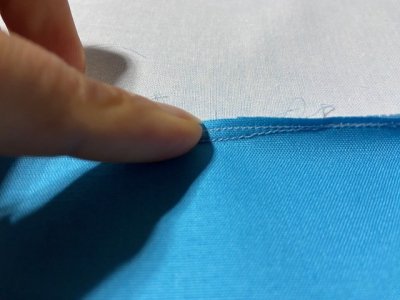
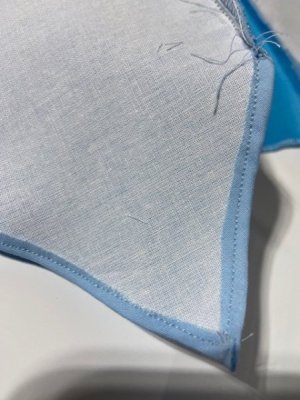
This is when it became apparent that the contrast glitter panels can tolerate the zig zag stitch, but the main blue panels can't. So I was forced to roll over the edges on the triangle tips and do a standard one line stitch. This is when I realized the 3/8th inch allowance on the inside seams was better for making the panels flush with each other.

Next post - -Anne Skirt - Part 3
 
Last edited:
Amphibia Costumes - Anne Skirt - Part 3

So once I had my sewing decisions made on the practice piece, then I moved to the real thing. I pinned all of the pattern pieces together in the desired sequence.

thumbnail_IMG_7847.jpg

Then I sewed them together with the 3/8 inch allowance, and then zigzag stitched the pieces together.


thumbnail_IMG_7848.jpg


thumbnail_IMG_7849.jpg

Then seams were ironed, and as well as the pieces themselves. So everything went from having a little bit of bowing to flat clean lines.

Then I used a zig zag stitch along the hem of the contrast panels, and then switched to a standard stitch when I came to the main blue panels.


thumbnail_IMG_7850.jpg


thumbnail_IMG_7851.jpg

This folding over the hem worked well, because then it covered up any color differences with the back Pellon flex shape that was an earlier concern.

Everything was ironed again, and it was clean lines all across the board.

thumbnail_IMG_7852.jpg


thumbnail_IMG_7853.jpg

While not perfect, I was satisfied with my transitions between the two stitch types. And then two pieces met in a really flushed manner. So I was pleased with it.

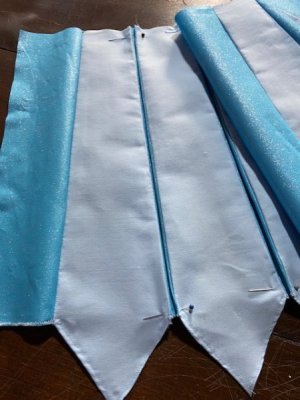
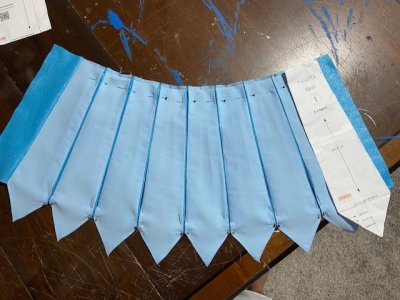
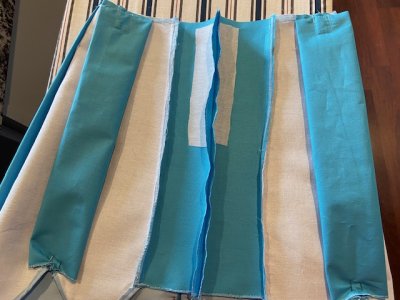
The next step was pinning the main blue panels together and then stitching at the tops.


thumbnail_IMG_7854.jpg


thumbnail_IMG_7858.jpg

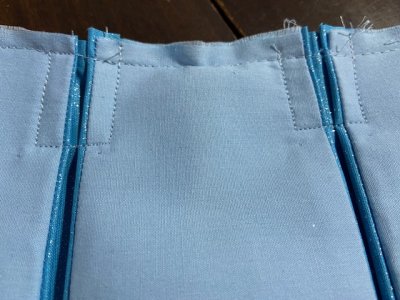
The pattern piece has a marking where the baste stitching should go, and then you do a box pattern stitch over the area to hold the main blue panels together. So the panels are stitched together at the top, but not the bottom.


IMG_7859.jpg

Next post - -Anne Skirt - Part 4
 
Last edited:
Amphibia Costumes - Anne Skirt - Part 4

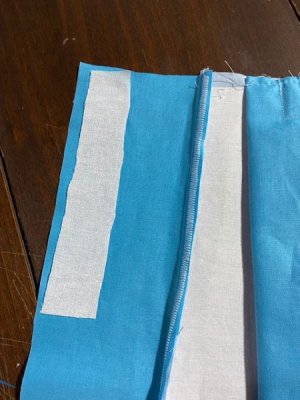
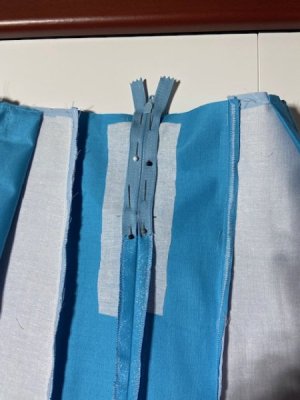
Once all the pieces were sewn together at the top, then it was time to do the zipper. The pattern recommends putting interfacing along the zipper edges, so that's what I did.


IMG_7860.jpg

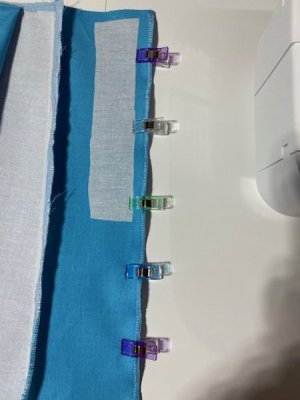
Then I found that the pinning was damaging the fabric, so I got some cheap sewing clips to help minimize the pin usage when I could.

thumbnail_IMG_7861.jpg

I sewed the two ends together, and then ironed everything flat. I also ironed up the seam since this is where the zipper was going to go.

IMG_7862.jpg

The instructions call for a 7 inch zipper, but since this was a children's size, I went with a 4 inch zipper.

IMG_7864.jpg

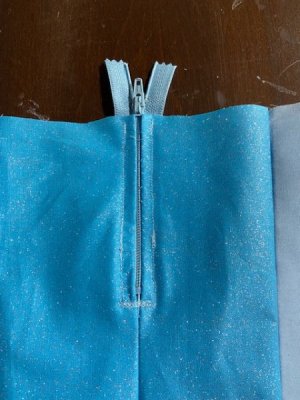
I placed the zipper into the seam. The top of the seam was only baste stitched, and then once the zipper stopped I used a standard stitch. I didn't quite follow the instructions on attaching the zipper. I found it easier to stitch this zipper one with the zipper open and doing one end and then the other. But either way, I was pretty happy with how it turned out. My MIL keeps telling me how hard zippers are, but count myself as 2/2 on not having issues with them yet.


IMG_7865.jpg

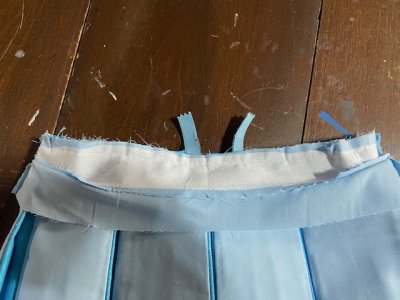
Once the zipper was finished, then it was time for the waist band. Before I made the waist band, I needed G to try on the skirt. The instructions had you pin the 1st and 8th main blue panels up to the zipper. But I was concerned the waist would get too small for G. And so I had her try it on, and then pinned in as far as I could on these two back panels. And I'm glad I checked, because I was right. I must have messed up somewhere in my seam allowances or in my measurements, because I was about 1-1.5 inches off on the waist length. Thankfully the design warrants some leeway, and so I just pinned the 1st and 8th panels a little less. It's not the end of the world, and still looks like it was intentional.

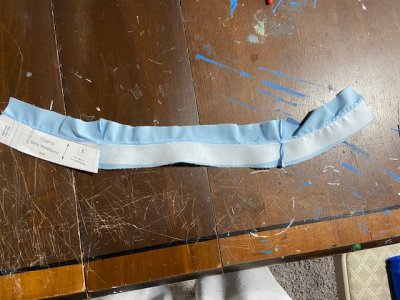
With that change in width, I had to double check the waist band width and increase it a little. But that just took some math, and then I was all good. One half of the waist band gets interfacing, and then you stitch everything together.


IMG_7866.jpg

Then you stitch down the seam between the two so that it doesn't pucker up. The ends are also sewn together, cut the tips, and then folded in. Then the waist is sewn onto the skirt itself.


IMG_7868.jpg


IMG_7869.jpg

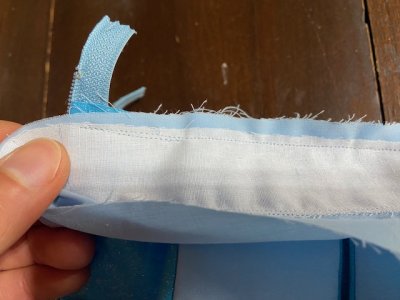
Then it's rolled over and sewn on the other side. The instructions recommend hand-sewing at this point, but I decided to machine sew. I sewed it from the right side of the fabric and followed as closely to the waist band seam line as I could. Since the wrong side waist band folded further than this, I knew it was catching it on the other side.


thumbnail_IMG_7870.jpg


thumbnail_IMG_7871.jpg

Next post - -Anne Skirt - Part 5
 
Last edited:
Amphibia Costumes - Anne Skirt - Part 5

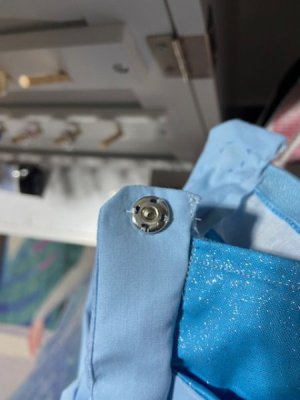
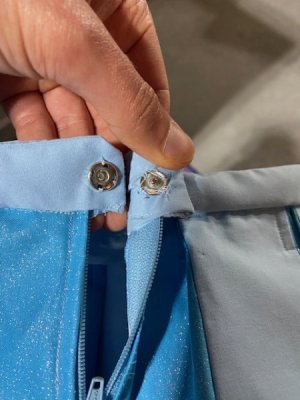
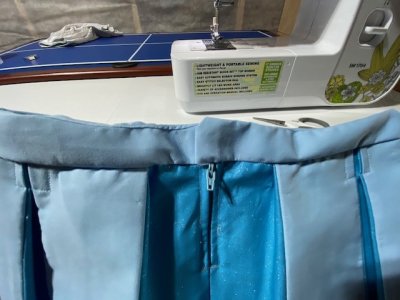
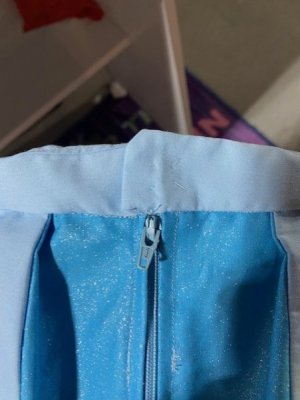
Once the waist band was attached, then it was a simple as sewing on the snaps. Well, it did take a while, but I got it done. Since the fabric was already folded over with hollow space between, then I could do an invisible snap. Only had one thread going to the other side.


thumbnail_IMG_7873.jpg


IMG_7874.jpg

thumbnail_IMG_7872.jpg


thumbnail_IMG_7875.jpg

So with that the main skirt was finished!


IMG_7876.jpg

This is when you're suppose to hem the ends, but was not possible on my edited design of the GettingLoosey pattern. I took the pins out and opened it up.

thumbnail_IMG_7877.jpg

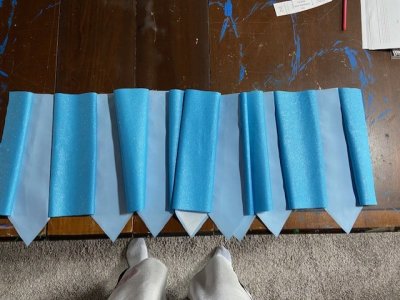
It's got a great look to it, but as mentioned, the stiff glitter cotton fabric doesn't allow it to open up as much as the video shows. But G was willing to make that sacrifice for GLITTER!

thumbnail_IMG_7880.jpg

IMG_7881.jpg

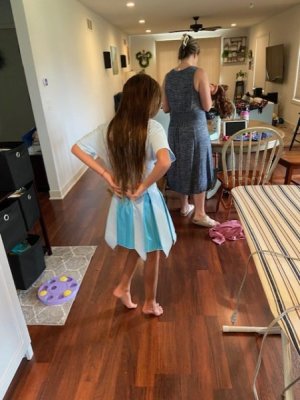
I think it turned out great! The pattern was phenomenal and wasn't all that hard. I'd say it took me about 10-15 hrs in total from beginning to end, and that includes all the testing and such. If I were to make this piece again, I'd make a few changes. One, I'd make the contrast panels a little longer and hem them before sewing the panels together. Two, I wouldn't use a stiff glitter fabric for the contrast panels because then it doesn't open up as much as desired. Three, I'd add maybe 1/3-1/2 inch in width on the triangle skirt pieces at the black line because I ended up being about 2 inches too small on the waist. The skirt is a good fit for G right now, so hopefully she doesn't grow a ton in the next 3 months. Thankfully, it was pretty easy to make, so I'd only need about 3-4 days to make a new one if need be. You can see the back panel in this picture.

thumbnail_IMG_7885.jpg

Next up was making the outer skirt.

Next post - -Anne Skirt - Part 6
 
Last edited:
Amphibia Costumes - Anne Skirt - Part 6

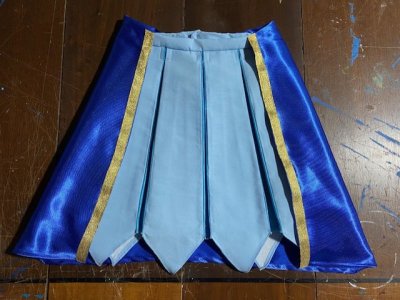
With the main skirt finished, I just needed to make the outer skirt.

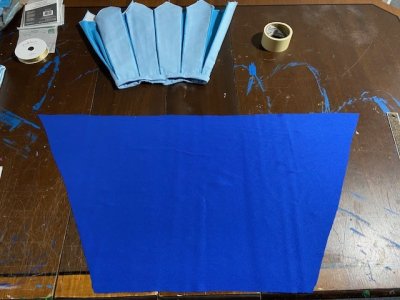
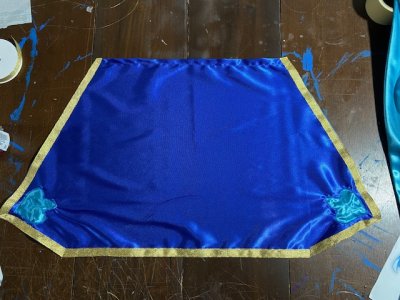
I measured the circumference of the skirt waistband, and then measured the circumference of the bottom of the skirt. To go from 1/2 of the left panel, and 1/2 of the right panel was 17 inches. So I measured the top of the outer skirt to be 18 inches (with seam allowance). And then I measured the bottom to be 36 inches, so I did 37 inches for allowance. I then drew a straight line between them to make a trapezoid shape.

thumbnail_IMG_7887.jpg

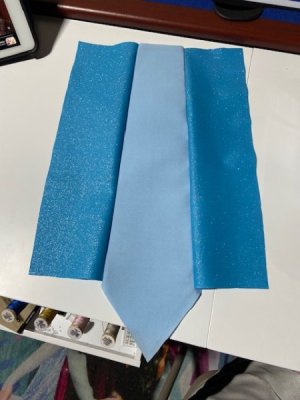
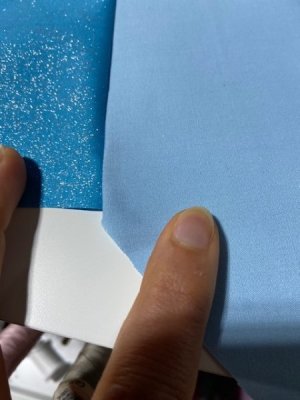
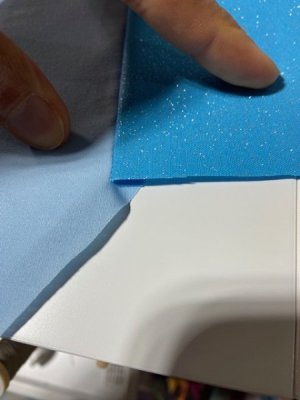
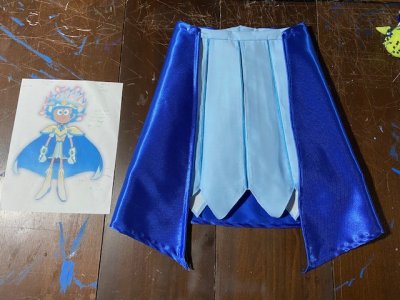
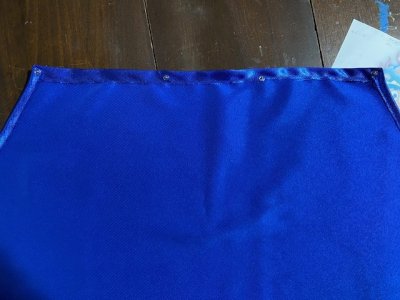
This blue fabric is awesome because it's different on either side. One side is a flat matte blue, and then the other side is super shiny reflective. Since the outer skirt is the same color as the cape, this looked like good cape material (more on that at a later time). Anyways, so then I had my trapezoid. I pinned it to the skirt to double check.


IMG_7888.jpg

Funny enough, it changes shape when folded on the pattern. It doesn't need to be a trapezoid, but rather some other weird type of conical cut up shape. So I cut the ends to match the back.

IMG_7890.jpg

Then I hem sewed all the edges.


thumbnail_IMG_7891.jpg

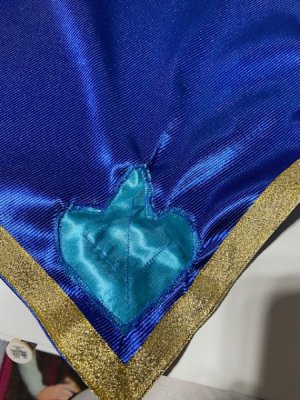
Then I sewed on some gold ribbon.

thumbnail_IMG_7893.jpg

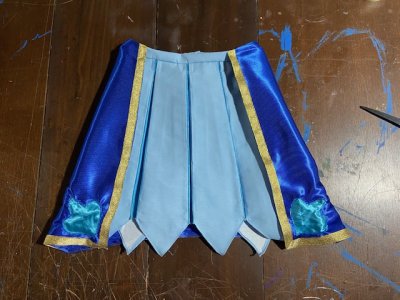
Then I sewed on four sets of snaps. Two on the front, and two on either side of the zipper.


thumbnail_IMG_7892.jpg

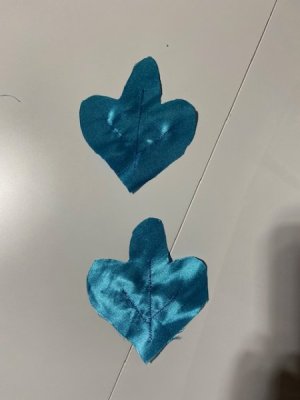
Then using a teal piece of shiny fabric, I made the leaf embellishments. I sewed with dark blue to make the veins of the leaves.

thumbnail_IMG_7895.jpg

Then I did a single stitch to affix the leaves to the outer skirt. And then followed that up with a zigzag stitch to make it look like a patch that was attached (G's request).


IMG_7896.jpg

I did that on both sides.


IMG_7897.jpg

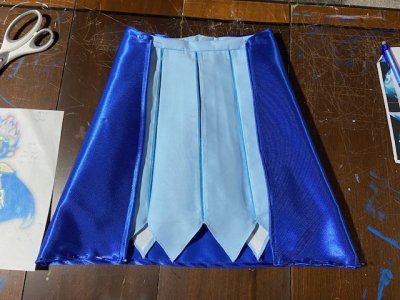
Then I attached the outer skirt to the main skirt, and we had a completed piece!


IMG_7898.jpg

The snaps were definitely the hardest part of the outer skirt, otherwise it was pretty easy all around. I'm quite pleased with the final completed skirt. The project wasn't overly difficult or time consuming. This is something that I think I could easily repeat again if G just wanted a skirt for the heck of it.

On to the next phase! Although with the new College Football 2025 video game dropping today (it's been 11 years since the last one), I'm going to be taking a little bit of a break from costuming. G wants to create a player, and then a coach, and then take them through their crucial decisions about college life. So who am I to stop her?

Next post - -Anne Cape - Part 1
 
Last edited:
The skirt is looking great! Just a note for the future - since you scaled the pattern down to 75%, the seam allowance was also scaled down proportionally, which is why the waist ended up being smaller. Next time, you can either manually increase the seam allowance, or use 1/4".

I can't wait to see the final product!
 
Wow. Your attention to detail is amazing. Huge congrats on the skirt 👏

Thanks!

The skirt is looking great! Just a note for the future - since you scaled the pattern down to 75%, the seam allowance was also scaled down proportionally, which is why the waist ended up being smaller. Next time, you can either manually increase the seam allowance, or use 1/4".

I can't wait to see the final product!

That's what confuses me though. Yes the pattern went from 100% to 75%, but that just meant what was a 32" waist became a 24" waist. I aligned three different adult sizes and all came out to the same measurement as the online equivalent for the waist measurement at the same measuring location (like Size 2, 8, and 14 matched the inches in that location albeit all at 100% printed size). So I assumed that if I reduced the pattern to match a 24" waist, it should also already take into account the seam allowance like the 32" waist already did. But maybe I'm missing something. Either way though, you're right as I was about 2 inches or so from the correct size and with 8 panels that's about 1/4 inch missing on each.


Save Up to 30% on Rooms at Walt Disney World!

Save up to 30% on rooms at select Disney Resorts Collection hotels when you stay 5 consecutive nights or longer in late summer and early fall. Plus, enjoy other savings for shorter stays.This offer is valid for stays most nights from August 1 to October 11, 2025.
CLICK HERE


DIS Facebook DIS youtube DIS Instagram DIS Pinterest

Back
Top