To Infinity and Beyond - Becoming a Better DopeyBadger (Comments Welcome)

I used Posca paint pens for the detail work and lettering on my WALL-E shirt for Springtime Surprise and they worked great. They come in a bunch of different sizes. You could do test writing on some clear plastic wrap so you can see how it would look on the canister before having to commit to it.

I'll look into those as well. I feel like I've seen those in G's collection of supplies. I was going to give a sharpie a try on some foam scraps, but the work on the project is nearing its completion for everything but the lettering so I'm not in a huge rush now.
 
Marty and Mike Wazowski - Laugh Canister Part 8 - Soldering the sound board!

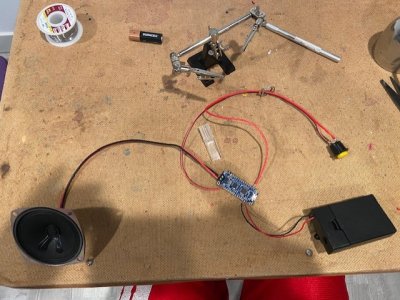
We now have a completely painted laugh canister, a lighting system that works in testing, and a sound board that works in testing. It's time to start combining all three into a final working system. The next challenge I was ready to tackle and made the most logical sense as the next step was soldering the sound board system together.

I'm a novice when it comes to soldering. My only experience comes from prior cosplay projects. And the extent of the soldering I've done to date is simply one wire to another wire. Soldering to a sound board or chip was a whole new experience. If you screw up soldering a wire together, then you just make a cut and try again. If you screw up soldering the sound board, then it's a little more complicated of a fix. Honestly, I don't actually know how to clean up a bad solder on a chip. So I was approaching this project as each solder to the board was a once off chance. No mistakes allowed... So let's see what happened.

To solder to the board, I'm using a few items:

-Heat Shrink Wrap Tubing
-Wire cutter
-Helping Hands
-20G wire
-Soldering Iron w/ solder wire
-Solder tip cleaner

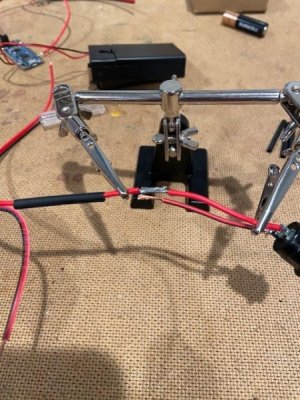
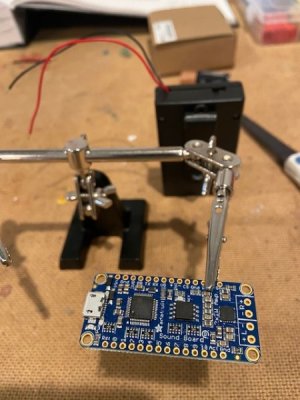
I attached the board to the helping hands.
thumbnail_IMG_5779.jpg

I then did some light reading and youtubing to get a general idea how to solder to a board. My very surface level knowledge was that I was suppose to put a fine tip on my soldering iron, warm up the soldering iron, then touch the iron to the board's pin of interest (for instance the "Gnd" gold ring), and then place the soldering wire close to the tip as to put a droplet of solder on the pin. The goal was to have a droplet that had a good 3-D smooth texture to it. It should also appear glassy and not cloudy. So since I've never done this before, I tried out the technique on some pins that I knew I wasn't going to be using.
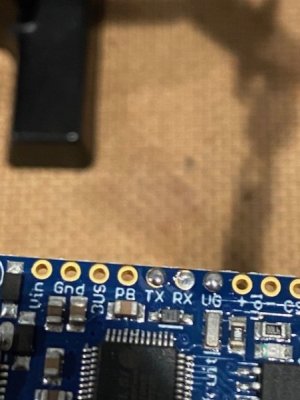
thumbnail_IMG_5780.jpg

Some where successful - see "UG". And some were utter failures - see "RX". I practiced several times on several different pins. It took a bit to dial in the soldering iron temperature such that it would melt the solder wire, but wouldn't cause it to be too hot and lose the glassy appearance. So if you're following along, test it out several times to dial in the right setting for you before moving onto the real thing.
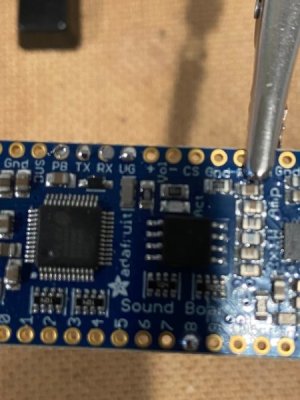
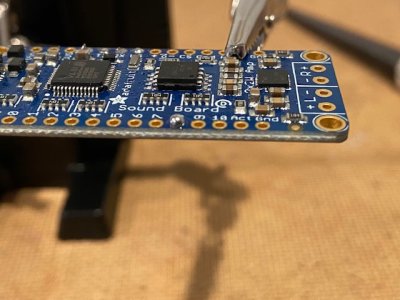
thumbnail_IMG_5781.jpg

thumbnail_IMG_5782.jpg

The above two pictures give a good view of a really good solder droplet on "8". Once I started to feel comfortable with the process it was time to do it for real.

My plan was to solder the wires of the battery pack directly to the board. The other option is to put the object (don't know what it's called) with prongs on it that can fill all the holes and then you solder to it. But my issue with that was that I needed the final product to be as flat as possible to save space inside the canister. So having something raised like that seemed like it may make it more difficult even though it would make the soldering process likely easier.

I tinned the ends of both wires of the battery pack by removing the ends of the wire housing using the wire cutter. I then placed a small film of solder over the exposed wires. Then I placed a droplet of solder on the "Vin" pin using the same technique I practiced. Using the helping hands I aligned the red wire from the battery pack to the "Vin" pin. I touched the solder droplet to get it to melt a bit and then attempted to conjoin the tinned wire to the droplet. I say attempted because I never got comfortable with this part. It would either melt too quickly and become a mess or felt like it never melted. If/when I ever do this again, this is a part I'm going to need way more practice at. But thankfully after a lot of swearing, I finally got the red wire connected to the "vin" pin. I did the same for the black wire and the "Gnd" pin. I removed the helping hands and confirmed the wires remained connected to the pins.
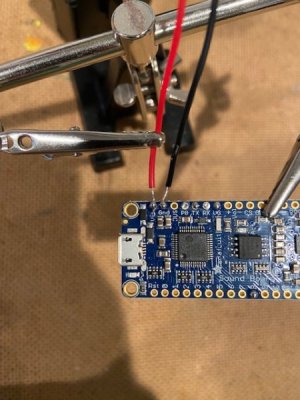
thumbnail_IMG_5783.jpg

Then I took a deep breath and flipped the battery switch.
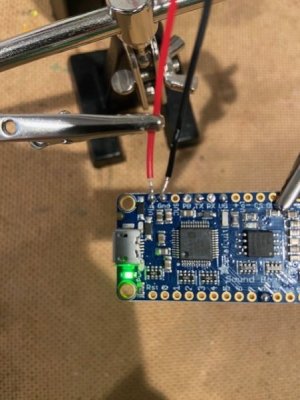
thumbnail_IMG_5784.jpg

Thank goodness for the green led light. Now we know the board has power and the solder connections are working!

Next up was the button. Because of the difficulty of the board, I decided just to loop the two exposed wires through each connection point on the button. As a reminder, the button doesn't have a "+" or "-" designated connection point. So either wire can go to either point. I looped the wire through and then soldered the wire to the connection point.
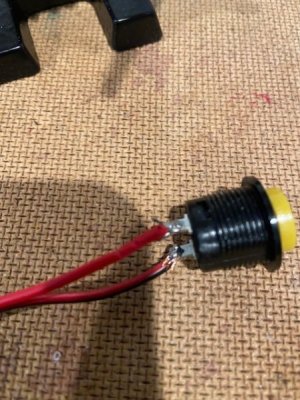
thumbnail_IMG_5785.jpg

I made sure to loop the washer and screw of the button onto the wire so that it could be held in place when I put the button into the canister. Flash forward - this is where a mistake was made and I didn't realize it until later.
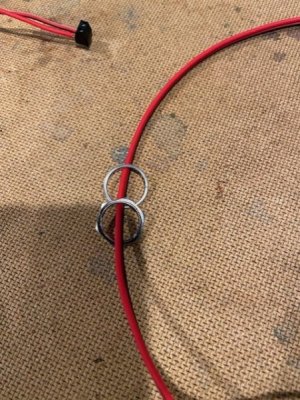
thumbnail_IMG_5786.jpg

I then connected one of the wires by just looping it through the pin to the "0" and "Gnd" pins. I just wanted to double/triple check that the board was recognizing the button being pushed before I soldered it down.
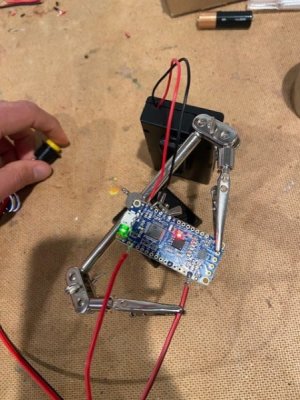
thumbnail_IMG_5787.jpg

Since I saw the red LED light illuminate, I knew I was good to go.

I soldered one wire to the "0" pin.
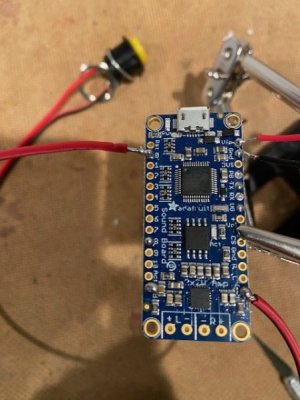
thumbnail_IMG_5788.jpg

And then attempted to solder the other wire to the "Gnd" pin which is just below the "0" pin in the picture above. Problem was I kept trying and trying and failing. So much so that my droplet of solder was starting to become a blob of solder. I was getting really concerned because the solder was starting to make contact with other "things" on the board so I wasn't sure if it was even going to work anymore. I swore a lot during this part of the process and it was very infuriating. Honestly, there has to be a more reliable way to do this, but I'm not well educated on the how to. Thankfully, the board has multiple "Gnd" pins so I soldered to one on the opposite side of the board. Ultimately, all the "Gnd" are the same. So it should still work despite not being connected to my original choice.

Next up was connecting the speaker and realizing my major (and for a moment I thought catastrophic) error.

Next - Realizing my error!
 
Last edited:
Marty and Mike Wazowski - Laugh Canister Part 9 - Realizing my error...

Soldering the speaker was pretty easy comparatively. The speaker itself does have a designated "+" and "-" on the underside. So I simply soldered the wire to those connection points, and then connected each appropriate wire to the matching connection point on the board in the little speaker house that came with the board.

thumbnail_IMG_5789.jpg

The wire just simply screws in, so if I had to I could remove the system from the speaker.

thumbnail_IMG_5790.jpg

I turned on the battery pack, I pressed the button, and... "Ba-Dum-Tss". We had success! It was pretty fulfilling to have it all come together. I was pretty nervous throughout the process that I'd make a mistake and the system wouldn't work once I finished putting everything in place. But here I was with a successful... complete... system. Now I just... need to... put the button into... the canister... and... OH *&%! I was suppose to weave the button wires through the canister before I soldered it to the board. Now it's sitting on the outside. *&^%! *&^%$^! Let me tell you, I was so unbelievably mad at myself for missing this. After some moments of reflection, I realized it wasn't the catastrophic error that I originally thought it was. All I'd have to do is cut each wire that goes to the button, weave the button through the canister, and then solder new pieces of wire in-between the cuts. Not that big of a deal.

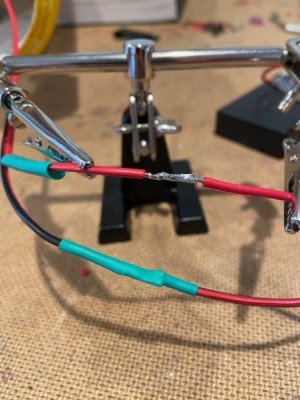
So I cut the wire, and then soldered a new piece of wire to a single end.

thumbnail_IMG_5791.jpg

I placed a piece of heat shrink wrap on one end such that when the wire was soldered together, then I'd shift the heat wrap shrink over the exposed wire, flame it, and then it would make a nice seal. No biggie. That's when I realized though, that my original mistake of not weaving the button was not only not catastrophic, it turned out it wasn't even a major error. In fact, it was a blessing in disguise. Because what I really needed to work on before soldering the sound board together was to determine exactly how I was going to get the LED battery back, and sound board system to stay in place inside the completed canister. Because I couldn't just leave either of those free floating and not expect a disaster within a few seconds.

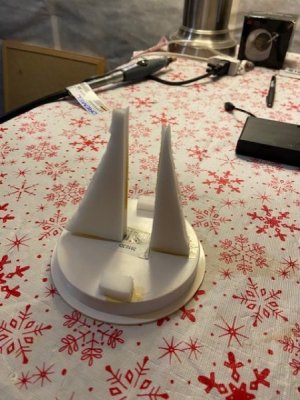
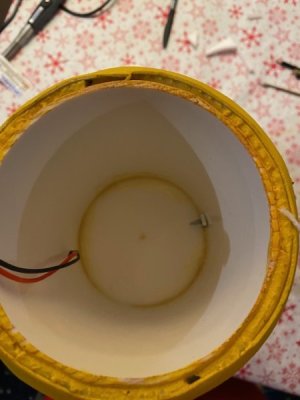
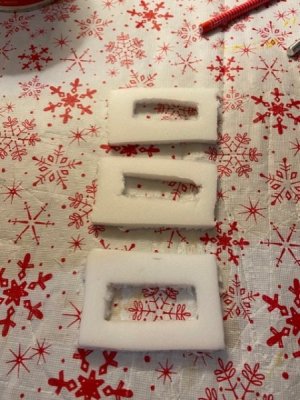
I ended up building a little stand out of some left over Plastazote scraps that I had and attached them to the bottom of the canister. This would be my holder for the LED battery pack.

thumbnail_IMG_5792.jpg

This would keep the battery pack from moving in the X or Y axis, but not in the Z-axis (vertically within the canister).

thumbnail_IMG_5797.jpg

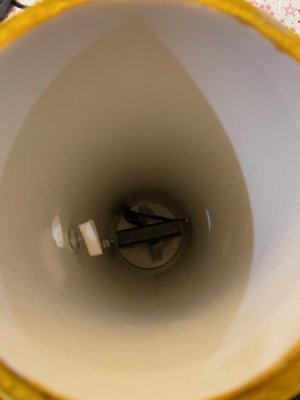
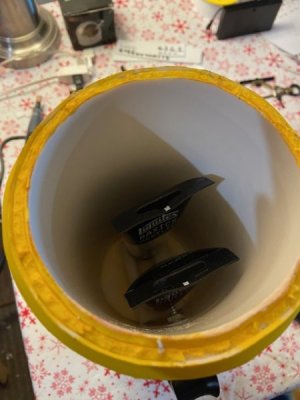
Side note - I had to put a small piece of foam on the end of the exposed screw from the handle because every time my hand when in and out it was cutting my hand open. Screws = sharp. Anyways, you can see the LED battery pack down there at the bottom of the tube. My solution for holding it in place was to create a platform inside the tube that the sound board battery pack could sit on. Then if the platform was held in place tight against the LED battery pack it would prevent it from moving in the Z-axis. Since I wanted enough room for the wires of the sound board to manuever, I ended up cementing (using Barge All-Purpose) together 3 pieces of 8mm Plastazote in a circular shape that exactly matched the inside circumference of the canister. After giving it an overnight to cement together, I then placed the platform into the canister with the LED battery pack in place and then cemented the platform in place.

thumbnail_IMG_5799.jpg

The LED battery pack was still accessible from the other end.

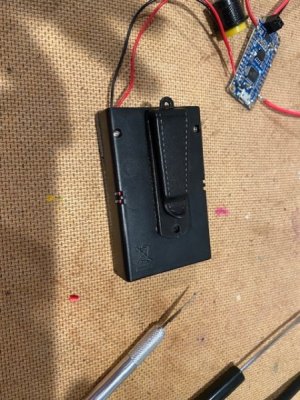
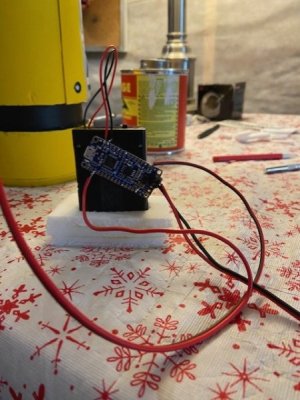
Then before I moved forward, it was decision time on how to keep the sound board safe. I ended up deciding I would attach the sound board directly to its battery pack.

thumbnail_IMG_5793.jpg

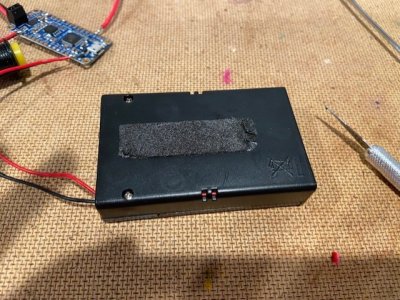
I was preparing to cement the board down to the belt clip when I realized the belt clip and pack were not all one plastic piece. Rather the belt clip was held on by some loose glue-ish material. So I took the belt clip off to expose a flat surface to work with.

thumbnail_IMG_5794.jpg

thumbnail_IMG_5795.jpg

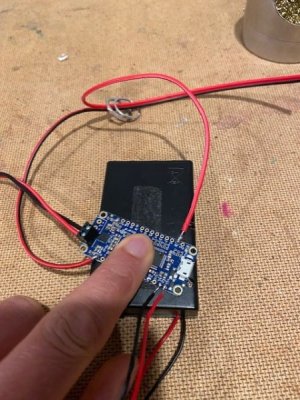
This gave me a better place to attach the sound board to. So, I placed cement onto the back of the sound board and onto the battery pack, and then held it down.

thumbnail_IMG_5796.jpg

The angle of it was purposeful because the battery wires preferred to have this angle to them. So in the interest of increasing my odds that the wire wouldn't just come loose because of tension on the soldering joint, I angled the cementing of the board. Additionally, the speaker connection point hangs off the edge a bit from the battery pack because it does have a little more 3-D structure to it than does the rest of the board.

Coming down the home stretch as I put the sound board in place inside the canister.

Next - Wrapping it up!
 
Last edited:
Marty and Mike Wazowski - Laugh Canister Part 10 - Wrapping it up!
Home stretch!

With the board cemented to the battery pack, and the platform inside the canister, it was all about finding a way to keep the battery pack and sound board in place. I decided to make a little holder for the pack, but made it short enough that it didn't contact the board.

thumbnail_IMG_5800.jpg

thumbnail_IMG_5801.jpg

Once I felt good about it, then I cemented it down onto the platform inside the canister.

thumbnail_IMG_5802.jpg

Then it was time to revisit completing the sound board by weaving the button through the canister.

thumbnail_IMG_5803.jpg

Joining the wire to the board.

thumbnail_IMG_5804.jpg

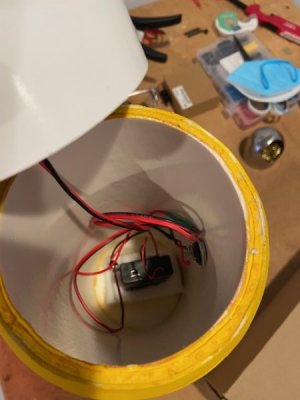
And then placing the whole system into the canister.

thumbnail_IMG_5807.jpg

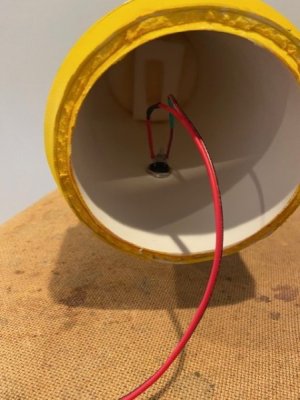
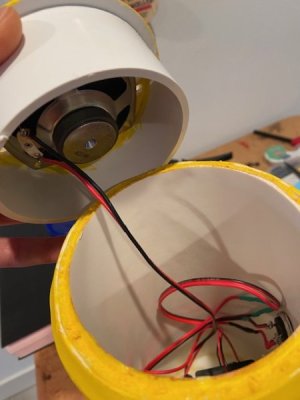
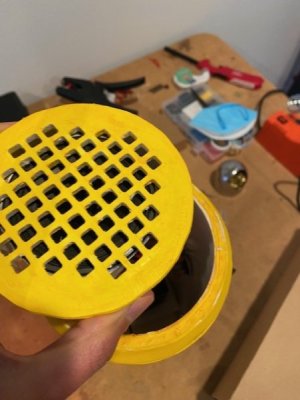
I did one last check of the sound board to confirm it was still working. Thankfully, it was. Then it was time to join the speaker to the cap (a drain cap for a PVC tube). I didn't even end up needing to cement it in place. The speaker and cap were essentially made for each other as I slid the speaker into place and it dug ever so slightly into the pipe to keep it in place.

thumbnail_IMG_5808.jpg

thumbnail_IMG_5806.jpg

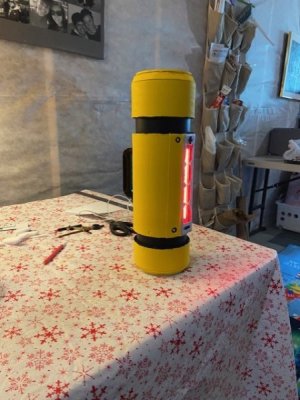
I turned everything on, and then I enjoyed my seemingly now completed laugh canister.

thumbnail_IMG_5809.jpg

Maybe some day I'll attach a video here to show it off in real life. So you can see the LED and hear the sounds. But this is what I've got for now. The caps are tricky as their fit are really tight. So I've got to be careful about how hard I push the caps on, because it took me a good 10 min to get the drain cap off when I wanted to turn the sound board off. I may attach a piece of velcro onto the walls of the canister and loop it over the sound board to 100% lock it in place in the Z-axis. But even with some good shakes, the board had no interest in moving. I also need to finalize decisions on the writing on the outside of the canister, but that's not a decision that has to be made quickly. But with that, the Monsters Inc. Laugh Canister with working LED lights and working sound effects is complete!

Next up is making the actual Mike and Marty Wazowski wearable costumes. I'm in the preliminary stages of learning how to sew and we're making a simple pizza slice costume to test out some 3-D sculpting techniques. But I'll leave the updates on that project for another day. Thanks for reading about the creation of the laugh canister from concept through creation to finished project. It represented my most complex prop to date.

Next - X


Soldering:
For future reference, when soldering a wire to a PCB hole, it is easiest to insert the wire into the hole first without any solder. Maybe tin the wire first, but no solder in the hole. Then, from the side of the PCB that has the free end of the wire (not the insulated wire side), touch the soldering iron to the wire and the plated part of the hole at the same time. Let it heat up for a little bit, and then touch the solder to the wire. When the wire is hot enough, the solder will wick into the wire and the hole. Hold the wire in place as you remove the soldering iron to prevent it from moving, and allow the solder to harden. The solder should wick through the PCB to the other side and kind of form a little cone/peak around the wire too.

Well funny enough, after multiple less than thrilling attempts doing it the other way that I had seen, I ended up doing what you're describing for the final "Gnd" connection. So gut instinct ended up being what you're saying. Glad to hear that's an accepted way to do it. No idea why the information I read prior had me doing it the other way. It just didn't make a whole lot of sense.
 
2023 Summer - LIIFT4, LIIFT More, and Easy Running - Halfway Point Check-in!
-Training Plan

Alright, so long term readers may have noticed a lack of running updates. It's just been so busy around here that something has to give. Thankfully, the exercise is still happening, but having time to sit down and write up weekly recaps comes and goes. Summer is hard because of G's play practice schedule (most evenings 6-9pm). I've still been dealing with the work issue, but things have eased off recently. I hope some day I'll be able to talk openly about what happened, but at this point it may still end up as a legal issue or perhaps a national story. So best to keep my mouth shut for the time being. Lastly, and probably the hardest news of the summer, Steph's mom was recently diagnosed with stage 4 breast cancer with metastatic growth in her lungs. It's still early, so we don't have a lot of details on the prognosis at this point. My MIL just lost her own mom only a few months ago, so everything is hitting her hard right now. She has played a pretty integral part in G's upbringing so it throws lots of things into flux at this point in time. Suffice to say, I'm glad I had pre-planned an "easier" summer training wise because other aspects of life have definitely ramped up in difficulty.

Unlike a "normal" training plan, I haven't been 100%-ing this one and have been more open to missing a day here or there. Without a race until November, really the goal is simply to maintain until it's ready to ramp up. We're still a good 8 weeks from the real training starting again. But to recap, I've been doing 4 days per week of running (keeping it around an hour a day), and then completing the whole LIIFT4 8 week routine that includes 4 days per week of about 30-40 min per day. Unlike when I'm in a run training plan, I've been doing the HIIT during all the workouts and Leg day. I have definitely made gains physically and strength wise over the course of the 8 weeks. So strength wise the plan remains a success. From a running standpoint, I'm in a good place. I'm not near as fast as I normally am, but I feel like I'm maintaining a sufficient base that I can build from when the time comes. Given my next "A" race isn't until January, I'm not really all that concerned.

So what's next? I'm starting LIIFT More this week which includes 5 days per week of lifting at 40-45 min per day. So an extra day per week, and each day has an extra 10 min or so on average. I'm looking forward to something new and am excited to use the new bench out. I'm hoping to find a certain workout type that I like and I can continue using that workout on a rotating basis on my weekends once run training resumes again. With the strength training increasing to 5 days per week, I plan to get creative with running and try to do short 30 min runs on non-HIIT days. So some weeks that means 4 days per week of running, and others 5 days per week. But the volume stays roughly the same as the first half of summer training.

Lastly, with 8 weeks until Disneyland training begins, I've started my reading process and gathering notes as I prepare to write my next training plan. I've got ideas I'm playing with, but everything will remain in flux over the next couple of weeks as we learn more about my MIL's prognosis and path forward.

Stats - May 1st through July 2nd, 2023
Running Miles - 197
Running Duration - 30:28 hrs
Avg Pace - 9:15 min/mile (about 2 min per mile slower than recent HM)
Avg HR - 126 bpm (about 20 bpm lower than recent HM)
Strength - 31 workouts
Strength Duration - 16:34 hrs
Total Training - 47:03 hrs (5:13 hrs per week)


2023 Hot2Trot 5k w/ G

Hey, remember Father's Day weekend like 2 weekends ago, well G and I ran the Hot2Trot 5k that weekend and we never did a recap. So I figured I'd try and write a short blurb about our time.

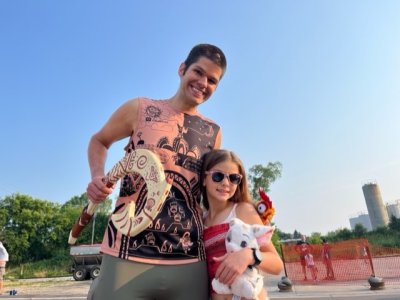
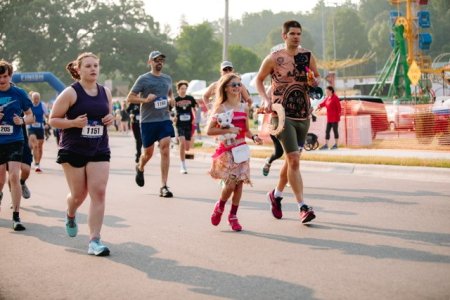
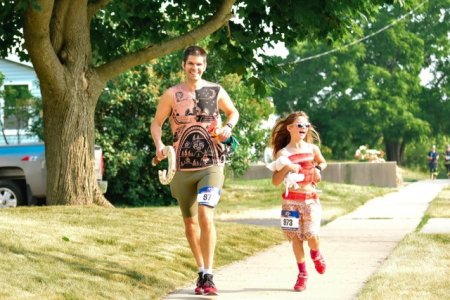
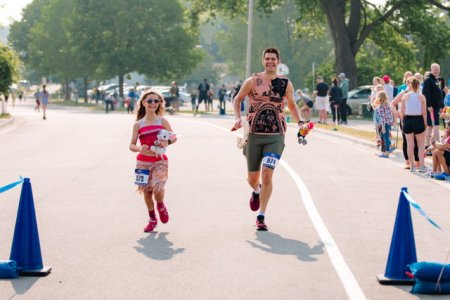
There wasn't anything unusual about the pre-race routine. The race is nice because it's in town and literally about a 5 min drive away. I've done this race weekend several times, but the temps are usually too brutal for me and I've stopped racing it. But the race weekend supports our local fire department, so I still get out there. Now it's become a nice father/daughter race over Father's Day weekend. G wanted to run in the Moana and Maui cosplay again. We also added in the Heart of Te Fiti (a rock painted green) and planned to hand it out to someone on course.

We got to the start line just in time to see the HM runners leave. Then we had the Kid's race start about 30 min after that, and then the 5k start at about 7:45am. Pre-race there was a little child that was enamored with the Maui hook. So I let him play around with it a bit. G and I posed for some pictures at the start line during the dead period.

thumbnail_IMG_8469.jpg

I really like this picture of the two of us.

thumbnail_IMG_8474.jpg

After seeing some friends of hers run the Kid's race, it was about time to get our race started. The weather actually wasn't all that bad compared to some other years.

Conditions - 🌫️ Mist, Wind 1mph to 4mph
Start: Temp+Dew = 59°F + 55°F; FL - 59°F
End: Temp+Dew = 63°F + 56°F; FL - 59°F

G and I decided to do our routine of unstructured run/walk, and see how the day goes. Could be a PR like day, or an easy day. No pressure.

thumbnail_IMG_5835.jpg

The run itself was good. We settled into the back and let the vast majority of other runners start ahead of us. We did see some people get tangled up not long after the start of the race and one woman took a massive fall. She did get back up and I did see her finish. So kudos to her on what was probably not the start she planned on having. We weaved through the local neighborhoods. As the run went along we talked about who we would give the Heart of Te Fiti too. About halfway through the race we saw two firemen running in full gear and G decided they deserved the heart more than any other. So with our run/walk we did our best to catch up to them. It did take a bit of time, but eventually we caught them. She gave the heart to one of the men and proclaimed she was passing off the heart to the strongest warrior she saw on course. She needed someone to complete the journey of handing off the rock to Te Fiti. Honestly, he was a good sport about it, but had never seen the movie so he was quite confused. He did gather based on our attire that it was Hawaii'an/Polynesian themed. He was going to Hawaii in a few weeks, so he decided he should see the movie before he goes.

As we crested the large hill, I informed G that we were making good time. If she wanted to try and push hard that she may be able to squeeze out a new PR. But the motivation wasn't there to push hard and so we just coasted down the hill.

thumbnail_IMG_5829.jpg

As we got close to the final turn towards the finish line, we saw one of her friend's dad (Jaren) finishing up the HM. We see him often and he runs quite a bit (runs more than me and is faster than me as well). We turned the corner and headed to the finish as well. As we closed on the finish another kid passed G and for a moment they seemed to challenge each other, but G said it was too soon for super boosts and backed off. When we were 20-40 meters from the finish we were running together and then I saw a spectator kid looking for a high five. So I veered off path to give the kid a high five and then G made her move to super boost to the finish without me. I had to quickly respond and actually start running myself to catch G as we came to the finish.

thumbnail_IMG_5834.jpg

We finished in 43:54.

Overall another good race for us. I think that makes 7 total 5ks now for G. We're having a blast with it and are looking forward to our next one.
 
Marty and Mike Wazowski - Intro to Sewing
Just a short update on my introduction to sewing. Instead of starting with the Marty and Mike costumes as my introduction to the whole sewing thing, we decided to try a "throw-away" costume first just to try some things out. Like I know I want to do some 3-D work on the mouth sections of Marty and Mike, and thus wanted to try out some techniques on this other costume just to get an idea of what I want to do.

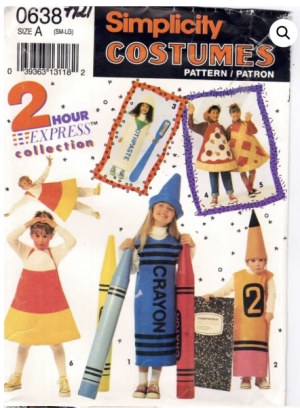
To try this out, we went with Simplicity 0638 - the pizza slice.

Screenshot 2023-07-02 at 2.12.27 PM.png

Overall, it's a fairly easy sew job, has a couple of things to cut out, and then has some smaller details with the pizza toppings. So we thought this was a good costume to practice with.

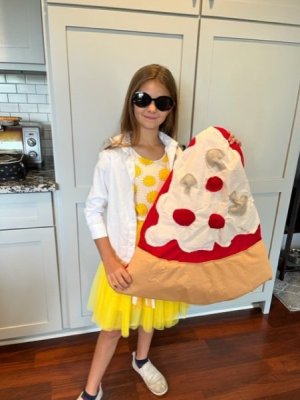
My MIL, Cyndi, trained me up on how to use the new Brother SM1704 sewing machine. She taught me how to string the thread around it. She taught me how to use pins to hold fabric in place. She taught me how to lead the fabric away from me to sew it. We tried out some fusing paper, but I wasn't overly impressed with the particular item we got. So not planning on using that again. We had some backing we used for 3-D effects as well, but the thinner backing (maybe 0.5 inch thick) wasn't all that impressive from a 3-D effect. I found some thicker (maybe an inch) thick backing and it did a better job. I'd say for the most part, my lines were pretty good. Definitely had some hiccups here and there. I think I definitely want thicker backing or doubled over backing for the Marty/Mike costumes because I want it to look "full" and the 3-D effects to really stand out. That was probably lesson #1 from the whole experience. I was actually also quite surprised how easy the whole thing was. Like we sat down, and within a few hours went from cutting some fabric out into shapes to having a finished costume. Far far easier than props from a time standpoint. While I wouldn't call myself good at sewing, I definitely see it as something I think I'll be able to handle. Here's the final pizza costume (minus the straps).

thumbnail_IMG_8525.jpg

You can see some 3-D effects on the mushrooms, but I want more. The crust has backing as well, but it just wasn't enough. I want the lips/teeth of the Wazowskis to really pop. I'm thinking for the lips of maybe rolling the backing into a tube like structure. That way it presses outwards on the fabric as it tries to go back to the desired shape and gives it a fuller appearance. But I'm open to suggestions if someone else has done something similar before and has some tips. All in all, I'm pleased with my first sewing experience and am looking forward to starting to put the pieces together on Marty and Mike.
 
Sending good vibes for your family.

I'm thinking for the lips of maybe rolling the backing into a tube like structure. That way it presses outwards on the fabric as it tries to go back to the desired shape and gives it a fuller appearance. But I'm open to suggestions if someone else has done something similar before and has some tips.
Nice job for your first project! You've already learned that picking the right materials will make or break it, so you're in a good spot. You can also play with different threads, needles and tension on the machine. Always test a scrap of fabric to get things set up before you go for the "real" seams.

For fullness, creating a tube would work but could be difficult to tack down and shape. I would give those elements you want to pop a bit more fabric (ie make them maybe a quarter to half inch bigger all around and sew them on close to the edge), then stuff them with batting. Just leave about half an inch open on the seam, use a stick or pencil to really pack the batting in, then sew it closed by hand.
 
For fullness, creating a tube would work but could be difficult to tack down and shape. I would give those elements you want to pop a bit more fabric (ie make them maybe a quarter to half inch bigger all around and sew them on close to the edge), then stuff them with batting. Just leave about half an inch open on the seam, use a stick or pencil to really pack the batting in, then sew it closed by hand.

That's what I was thinking. Sewing the fabric together leaving a hole, and then shoving the tube of batting into the hole. But maybe that'll end up being more difficult than I thought and just having loose batting would work better.
 

Thanks for sharing. It's pertinent that you posted these because over the last three days I've been reviewing my Canova material. I had an international runner friend reach out to me several months ago to pass along to me a treasure trove of Canova material. It included the IAAF book which had been translated from Russian into English, a ton of Elite training plans, quite a few of his powerpoints, and several previous posts he's made on a large variety of topics (I suspect from when he used to post on LetsRun regularly). So I actually just finished reading the IAAF book this morning. The link you posted does a fantastic job of summarizing most of the material Canova covers in the book, and I don't really have any qualms with his summarization of the material. I like the table format your linked offer provides for the different workouts (better than the ones found in the IAAF book). So for anyone that's looking for a distilled read of Canova's book, the link you provided does a fantastic job.

The follow-up link is good as well. That's the Valenica speech he gave in 2017 that I watched prior to doing the Canova plan I did last year. While at that time I wasn't aware of the 1999 IAAF book's teachings, so I based my 2022 Madison M training plan moreso off of the 2017 speech. So your second link better reflects what I attempted to mirror for my previous attempt. I also now have the actual powerpoint from that 2017 speech which provides some better context that was hard to catch since the camera didn't always stick with the slides.

Admittedly, after reading almost all of the treasure of new Canova information I was given, I didn't come away with many new thoughts on how to apply his methods. It was well covered in the 2017 speech, and through a few summary articles I had found in 2022. So I'm not ready to say I'll make a bunch of changes to my method from 2022, except for the addition of more sustained M Tempo runs which I felt like were lacking. But otherwise, I have a strong suspicion that the 2022 Madison M plan put me in some of the best shape of my life, but a less than stellar race strategy/execution harmed the outcome. I'm just about to sit down and start mapping out the Disneyland HM (Jan 2024) and Non-Cancelled M (Apr 2024) training plans.
 
Curious what changes would you make to your race strategy/execution?

-Change the race. I like the Madison M course because of its historically cold temperatures. But the rolling hill nature of it does me no favors. I'm switching the goal race to the Non-Cancelled which happens at the end of April because it's a flat course. It doesn't come without some risk because the temps are likely to be cold, but we could see a warm streak (like the 2023 Parkinson's HM which was 2 weeks earlier than Non-Cancelled and significantly warmer). To counteract that and the possibility of warm weather derailing the whole training plan, I'll pivot to the Wisconsin Marathon which is usually the weekend after Non-Cancelled.

-One reason I like the Non-Cancelled M is because of the looped course. During a normal training run (hit the house every 4 miles), I consume about 40-48oz of water per hour. During a normal long training run on my hilly course (hit the house every 5 miles), I consume about 35-40oz of water per hour. There were six aid stations in the first 8.3 miles of the course (roughly an hour into the race for me). To drink 35-40oz of water at those 8.3 aid stations, I would have needed to consume about 4-5oz per station. Anything less and I was under consuming water compared to my normal routine. It's hard for me to say whether I was or wasn't on point with this, but given the looped nature of the Non-Cancelled course I can better ensure I'm getting adequate water consumption.

-Not wear the Alphafly. They didn't work for me.

-Be more realistic with my goal setting. The Madison M was November 2023. In the year prior to that race, my best VDOT performance was the warm 2022 Princess 10k (42:11). In the two years prior to that race, my best VDOT performance was the Run Wild 10k in Sept 2021 (42:03). It had been since May 2020 (3.5 years) since I had run something indicative of a sub 3:10 M (the 5:42 mile time trial). So when I hit a 7:02, 6:54, and 7:00 split (GAP split of 6:58, 6:50, and 7:02) in the first six miles of the M, I was probably way overdoing it when compared against what I had done recently. So (and hold me to this when the time comes) I'm only setting a pace goal based on what I accomplish from my April Non-Cancelled HM of 1:32:25 through the 2024 Disneyland HM. So at best I should be aiming for a 3:12:35 unless I prove it differently at any of the Fall/Winter B races. I know I can be faster, but it's been years since I've put up my 1:28:40 HM (Nov 2019), 5:42 mile (May 2020), 39:54 10k (Jan 2018). I'm not saying I can't get back there, but I need to see it. At this point I have only one goal for the Non-Cancelled M. Run a M in less than 3:14:05 (PR from Oct 2017). By the time the race comes, it'll have been nearly 7 years since I set that PR. But I'll only set that goal if the data supports it.

-I'll pair that better goal setting with the strategy I used at the 2023 Non-Cancelled HM. I'll set a max HR alert at 145 bpm since that was my average HR for the 2021 Madison M. Hopefully that'll keep me in line in case my body isn't responding well to the goal set on that day.
 
-One reason I like the Non-Cancelled M is because of the looped course. During a normal training run (hit the house every 4 miles), I consume about 40-48oz of water per hour. During a normal long training run on my hilly course (hit the house every 5 miles), I consume about 35-40oz of water per hour. There were six aid stations in the first 8.3 miles of the course (roughly an hour into the race for me). To drink 35-40oz of water at those 8.3 aid stations, I would have needed to consume about 4-5oz per station. Anything less and I was under consuming water compared to my normal routine. It's hard for me to say whether I was or wasn't on point with this, but given the looped nature of the Non-Cancelled course I can better ensure I'm getting adequate water consumption.
Is this how much water people consume while running/racing???? I take like 2 of the little cups every 40 minutes or so in a race. How is this even possible? Teach me Billy!
 

GET A DISNEY VACATION QUOTE

Dreams Unlimited Travel is committed to providing you with the very best vacation planning experience possible. Our Vacation Planners are experts and will share their honest advice to help you have a magical vacation.

Let us help you with your next Disney Vacation!


Latest posts


facebook twitter
Top