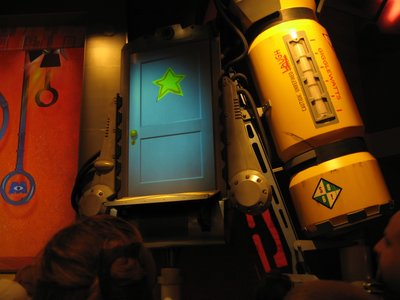
Marty and Mike Wazowski - Laugh Canister Part 3 - Sound!
Alright, full disclosure, I had/have no idea what I'm doing on this part. This is all new. So with that I'm going to include not just the path to how it works, but the full process I went through. Which means lots and lots and
lots of troubleshooting. To the point that I was several hours into troubleshooting and almost gave up. I'm not an electrical engineer, and these things are designed by Adafruit to be user friendly, but there's a lot that can go wrong. So with that let's dive into sound engineering.

Let's cover the components:
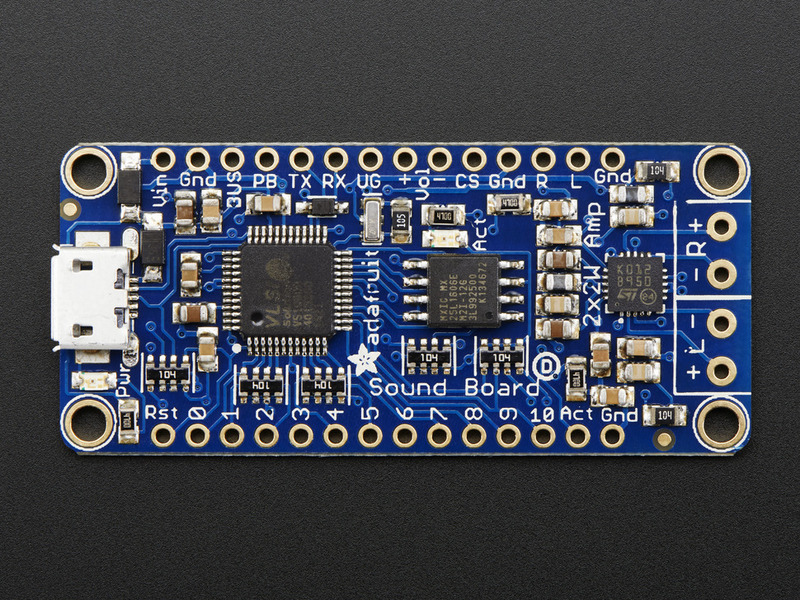
1 x Adafruit Audio FX Sound Board + 2x2W Amp - WAV/OGG Trigger -16MB (
link)
1 x Speaker - 3" Diameter - 4 Ohm 3 Watt (
link)
1 x 3 x AA Battery Holder with On/Off Switch, JST, and Belt Clip (
link)
Not much to it. The Adafruit sound board includes an Amp on board so that makes things easier. This PDF was a super helpful tutorial (
link). It didn't cover
everything, but it covered most of the basics necessary to get it to work.
First up was choosing some audio to use. The most obvious sound was the classic joke sound "Ba-dum-tss". I found this website called "Pixabay" which had tons of royalty free sound effects. So this is where I found most of the effects. In addition to the "Ba-dum-tss", we also went with two other sounds when the button was being pressed. These sound effects would occur in a normal non-random pattern. A sequence upon each press of the button.
1) Ba-dum-tss
2) A sound for powering up the device after hearing laughter
3) An air-hiss and "escaping" laughter from the canister
This would represent the totality of our "show". A joke, their laughter, and then our exit because the canister leaked and we needed to gather more laughs.
I wanted a verbal confirmation of the powering up of the device. So I found a website that would convert text to voice for free (Narakeet). You could get 20 free conversions before you had to start paying. I typed in "Laugh detected. Laugh detected" and then went through the different voice options. I had a preference, but the other members of the house thought it was less clear what exactly it was saying. So we went with something that was robot adjacent, but not too tough. If you want to hear for yourself what it sounds like, type in "Laugh detected" into Narakeet and choose option "Robovoice". I found the air hiss and laughter sounds on the "Pixabay" website.
I had the sounds, but for effects 2 and 3 I had multiple sounds that needed to be overlayed with each other so that it would be a single button push. To do this, I used Audacity which is a free to use sound program.

I have limited use with Audacity in a work capacity when we were capturing sounds for analysis for my research. But I wouldn't call me an expert or even an intermediate user by any stretch of the imagination. I could however open one file, click and drag the second file on top of the other, and then save it as a single file. Wa-laa we've got them combined. Next up was taking the sounds from the computer and getting them onto and working on the sound board. But before we get there, we've got to get the sound board working!

I'm a noob when it comes to electrical/sound engineering, and I really should buy a breadboard so that all my testing work is up off the benchtop. But for now, I'll stay a noob and do my work the dirty way. I cut off the end of the battery pack wire which was in a nice plug form and exposed the red and black wires. The red wire connects to the "Vin" and the black wire connects to the "Gnd".
I turned on the battery pack, and hooray there was a small illuminated green LED. That means we've got power! Next up was connecting the pushbutton.

The pushbutton itself has two connection points, and thankfully they're interchangeable. It doesn't matter which is connected to which pin. One of the points needs to be connected to the numerical pin (0 through 10), and the other needs to be connected to "Gnd". You can see another "Gnd" to the right of "Act" after the "10" pin. That's the one I used for the pushbutton. You could use any of the numerical pins for the button, but "0" will be the first searched, thus it will be the fastest to make sound upon depressing a button. But I could have chosen "5" or "7" instead. Just make sure you know which you've chosen so that you can properly name your files. To confirm it was working, I pressed the button down, and a red LED illuminated indicating a connection!

Next up was connecting the speaker. The speaker I chose does have a positive and negative connection point on the underside. So I had to make sure that red was positive and black was negative.

These were connected to the speaker, and then to the sound board where it says "- R +" on the vertical axis of this picture. I did confirm before purchasing this sound board that it is possible to run this with only one speaker (mono) and two speakers (stereo) was not necessary.
Now it was time to load some sound effects onto the board! Here came the first real hiccup!

I plugged in the micro USB to the sound board, and then connected that to a USB to lightning converter which plugged into my Macbooks lighting port. And... nothing. The board was illuminated green, but nothing was happening on the laptop. I thought it should come up as a USB drive, but it didn't. So I thought maybe I got a dud. We pulled out a second cord and tried again, and... nothing. Now I was getting a bit disappointed. Was our journey of sound over before it even really started? I did some googeling and found that some USB cords are only meant for charging and can't do data transfers. So I grabbed a ton of different cords and kept trying to find the right size hoping one was a data transfer cord. And after several attempts... success! I found a USB cord that worked! Huzzah!

The sound board showed up as a USB drive labeled "ADAFRUITFX" and came preloaded with a sound on it. The files need to be in .ogg or .wav format, so I made sure to save my Audacity files in .ogg format. The .wav file is better, but I started with .ogg. The naming convention is such that it is labeled Tnn.ogg or Tnn.wav. The "nn" is the pin you selected for the pushbutton with a leading "0" if it's anything but "10". So since I was going with pin "0", then I put "T00" as my file name. With this destination, the board would recognize this single sound effect should be played every time the button "0" is pushed. There are other naming conventions available such as "Random", "Hold", "Next", and "Latch" but for testing that it worked, I just went with something simple.
So I loaded my file onto the board. I then disconnected the board from the computer's lightning port. This is an important step. The board can't be hooked up to the computer and make sound from the button pushing. So if you're not getting a response from the board, make sure you're not still plugged in. However, I learned after several hours of troubleshooting (we're getting there) that you can leave the board plugged into the micro-USB as long as it's not connected to the computer. Since the board felt fragile, it was good to learn I didn't have to keep plugging and unplugging from its port to test it out.
And with that, G and I headed back to the sound board, battery, speaker and button setup and pushed the button. And the moment of truth... it said... "Right". Huh? Was I hearing that right? Was it really saying "right"? Why was it saying "right"? Why not "ba-dum-tss"? It was making sound, but not the right sound. That led me down a path of googleing trying to figure out why it was saying "right" and you know what, it was no where to be found. Nothing explained to me why it was saying the word "right". After some time passed, I was watching a Youtube video of a different person using this board and setting it up. He got to this step, but he hadn't preloaded any sound onto it yet, and then when he tested his system he heard, "Right". And right then is when it dawned on me. It's saying "right" because it's the right speaker, but it doesn't recognize the audio file. So the system is working, but something is wrong with my audio file. But what's wrong? It's got the right name. It's got the right file extension (.ogg or .wav). What's wrong with it? Is it copyright protected in some way? Was something in Audacity to blame?
In the instructions is a downloadable zip file that contains a bunch of test sounds. So I deleted my sound effect and loaded those on. I touched the button to each of the 11 pins and confirmed through the test sounds that the board was working. So that let me know it was a me issue, and not a board issue. It could recognize
their sound effects, just not the one I made.
After several hours and several Youtube videos of monkeying around, I found a snippet at the bottom of the instructions talking about the KHz and bit rate, and stereo vs mono.
"The absolute biggest files you can generate and play are CD quality uncompressed stereo WAV files, at 44.KHz/16 bit. Stereo WAV 44.1 KHz 16 Bit - (2 bytes * 2 channels * 44100) = ~175 KB per second, so 2MB can hold 12 seconds, 16MB can hold 90 seconds Mono WAV 44.1 KHz 16 Bit - (2 bytes * 1 channels * 44100) = ~88 KB per second, so 2MB can hold 23 seconds, 16MB can hold 180 seconds (3 minutes) Stereo WAV 22 KHz 16 Bit - (2 bytes * 2 channels * 22050) = ~88 KB per second, so 2MB can hold 23 seconds, 16MB can hold 180 seconds (3 minutes) Mono WAV 22 KHz 16 Bit - (2 bytes * 1 channels * 22050) = ~44 KB per second, so 2MB can hold 45 seconds, 16MB can hold 6 minutes Stereo WAV 11 KHz 16 Bit - (2 bytes * 2 channels * 11025) = ~44 KB per second, so 2MB can hold 45 seconds, 16MB can hold 6 minutes Mono WAV 11 KHz 16 Bit - (2 bytes * 1 channels * 11025) = ~22 KB per second, so 2MB can hold 90 seconds, 16MB can hold 12 minutes"
-Adafruit PDF instructions linked earlier
That's all to say, it wasn't as simple as grabbing the sounds from the internet and converting them to a .ogg or .wav file. They needed to be a specific format as well. So back to Audacity I went and mucked around trying to get the files converted to meet the above specifications. I'd make a change, load it to the board, and "Right". I'd make another change, load it to the board, and "RIGHT". I'd make
another change, load it to the board, and "
RIGHT". I'd make
another change, load it to the board, and "
RIGHT".
RIGHT
RIGHT
RIGHT
RIGHT
Needless to say, I was getting VERY frustrated. I spent hours making changes and over and over and over it failed to work. I read forum posts. I watched Youtube videos. Everything. And then I found a section of the PDF instructions talking about an alternative website to use for converting the files instead of Audacity. This free to use site (
link) also did conversions of mp3 to ogg or wav files. It also let you choose bit rate and KHz. So I converted my "ba-dum-tss" mp3 sound effect into a 8000 Hz mono .ogg file. I loaded it on to my sound board with the file name "T00.ogg" and... and... and... "BA-DUM-TSS"!!! It worked. Oh man, I can't describe to you how elated I was when that worked. I was honestly so close to throwing in the towel on this one. But I'm glad I didn't.
With the sound effect working, it was time to load the other two sound effects. Since I wanted all the sound effects to play in order from a single button (pushed three separate times) I was going to use the "Next" feature. So I named my files "T00NEXT0", "T00NEXT1" and "T00NEXT2". You must start with "NEXT0" otherwise it won't see the other files. I loaded them onto my computer, and... "RIGHT".
You've got to be kidding me!
Alright, so "Ba-Dum-Tss" worked by itself, but not with the others. So I reloaded each sound individually and could get each to work on their own, but when I put them together, no luck.

Why, why, why, why? Clearly something with the naming convention, right? So this sent me down another few hours searching for any tips I could find in the Adafruit forums. And finally after a long search I came upon a little tidbit that was seemingly unrelated to me, but possibly useful. Sometimes, but not all the time, the sound board can get confused by what is in your laptop/computer's recycling/trash. If you have old files in there, despite them not being connected to the sound board in anyway, it apparently is capturing those in it's directory or something and when it comes time to read "T00NEXT0" it gets confused. So when you upload your files, make sure to empty your recycling/trash as well on the laptop itself. This will make the board not confused, apparently. So with that, I did that, I plugged it in, I pressed the button, and...
It worked! All three sound effects with three pushes of the button. Man, G and I were jumping for joy on that one. I quickly disconnected the sound board from anything, and then prayed it'll stay working from here on out. It sounds great. The audio volume is good. Not too loud and not too quiet. I put finishing the sound on the back burner, because now we get into the fun foam part!
Next up -
Foam construction Part 1!

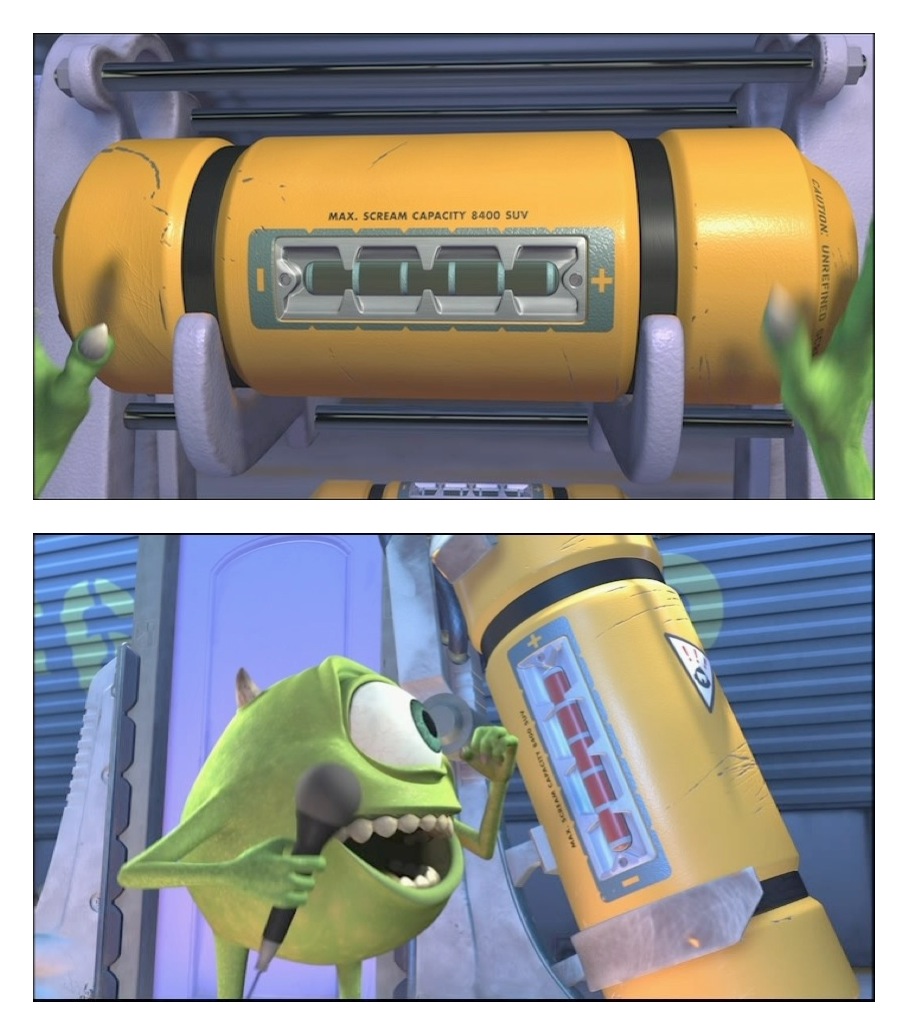


 ) as well as "Gigglewatts". The question was,


") ) It looks awesome nonetheless!
) It looks awesome nonetheless!