External flash help...Please!~

jenseib

Mommy to Claire
Joined
Oct 28, 2006
I have a Canon 430EX external flash. I have had it for at least 3 years and I am still clueless on how to use it. I have read the manual a few times. But I honestly don't know what a lot of it means or how to use it.
I shoot mainly in manual, but I can change for the flash if needed. I just can't get a good picture when I use it.
I guess what I need is a flash course for dummies. Can anyone help? Or isthere a good book that can help those like me?
The manual talks about high speed sync and second curtain sync and ZOOM. How do I know when to use these? Or to use one or the other all the time when using the flash.
 
If you're shooting indoors and your subject is relatively slow moving, set your camera to Manual, ISO 400-ish. Shutter speed about 1/60 or 1/80, aperture about 7.1. Keep the flash on automatic (it's been a while since I used a 430, but I'm pretty sure it has an auto setting).

Now - adjust your flash so the head points up and the light bounces off the ceiling. This should give you pretty good indoor shots. A few things to consider:

If you want the background to be brighter, make your shutter speed longer (like 1/40 or so - or increase your ISO to 800).

Outdoor shots are a bit trickier. I will expose for the background and then recompose and focus on the subject - the background will then be properly exposed and the flash will take care of the subject. Outdoor typically is where you get into hi speed sync etc., so make sure you have this enabled (hi speed sync allows you to use the flash at shutter speeds that are shorter than it normally "likes" - the tradeoff is that the flash range is reduced).

Hope this helps!
 
I just got my first external flash a couple of months ago; and it definitely takes some learning. And i've barely scratched the surface. You're right about a lot of sites that get suggested. They seem to be more focused on the off-camera setup. With a little digging, there is some basic info there though.

What don't you like about your flash pictures???? Just for basic learning, probably set your camera to Auto mode, and see if you like those results. If so, take note on what settings the camera chose, and the relationship of the scene you shot (i.e. Daylight Outdoors, in your living room, at night, etc). That will at least help out a little. I do that often; and sometimes have better results than when I'm full Manual.... For now anyway ;) And a basic technique is bouncing the flash (like off a wall or ceiling). That will really show the difference of an external flash versus the on-camera pop-up.

You can also just google specific settings, like 2nd curtain sync or TTL, to narrow down your hunt.
 
Thanks for the info.
Now for the tricky places, like CRT. Thats where I used my flash this past trip.
The pics are horrid. The ceiling is too high to bounce off of. The pictures are just awful from there.
Also, I like to take pictures of my DD at her dance studio every so often. the ceiling is BLACK and two walls have mirrors. I have yet to figure out how to use the flash there. So I usually go with a high ISO, wide open aperture and no flash and get grainy pictures.
Let me see if I can find the disc with my CRT pictures and I'll post one.

Yes, those are pretty tricky places for flash photos.

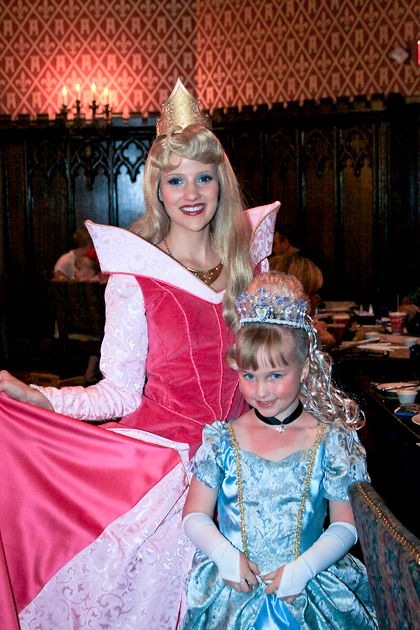
For Cinderella's Royal Table (CRT), first, set your camera settings to the overall ambient light. Unfortunately, this will probably mean a high ISO (minimum ISO 1600, perhaps ISO 3200?). For aperture, you might start with a large aperture like f/2.8, but you'd run the risk of a narrow depth of field. If you can get away with a slightly smaller aperture (say, f/4 or f/5.6), I'd try that. I assume that you'll be taking pictures of people holding still & posing, so you can get away with a slower shutter speed, like 1/60 sec. If you can, though, see if you can do a slightly faster shutter speed, like 1/100 or 1/125, to prevent minor motion blur.

Take the test shot inside CRT with these settings. Adjust as necessary. You can probably get away with slightly underexposing the background (ie. use a smaller aperture (larger f-number), a faster shutter speed, or lower ISO). The reason you'd slightly underexpose the background is so that your foreground flash subject can "pop" out, leading your viewers' eyes toward the subject.

Then, add the external flash. You can keep the external flash on TTL mode (TTL is the flash's "Auto" mode). At high ISOs like ISO 1600 & 3200, you'll probably have to dial down the flash power so that your foreground flash subject doesn't get overexposed. On your flash, you'll probably have to dial down the Flash Exposure Compensation (FEC) to about -1 or -2.

As you mentioned, the ceilings at CRT are way too high for ceiling bounce flash. However, if you're seated next to a wall (or window at night), you can try doing wall bounce flash, which would give you a nice, directional light, similar to off-camera flash. Otherwise, if you have no other choice, then just point the flash directly at your subject.

To practice these techniques before your next CRT visit, try going to a local restaurant with similar lighting (Red Robin? McDonald's?) or test it out at home with similar lighting conditions.


For the dance studio, I would guess that studios would frown upon using flash inside the studio, especially during practices or performances. Maybe you can use flash before or after class, with your daughter posing for you?

Otherwise, you're doing the right thing using high ISO and larger apertures (smaller f-numbers). What lens are you using for this? If you're using one of the large-aperture prime lenses (like 30mm f/1.4, 50mm f/1.4, 85mm f/1.8, etc), then you can try using lower ISOs for less-grainy photos.

You can also try noise-reducing software, like Noise Ninja or Neat Image or a bunch of others. If you use Lightroom, it actually does a pretty good job at reducing noise, too.

Hope that helps.
 
These are straight from the camera. I just reduced the size.

IMG_8150.jpg


IMG_8156.jpg


IMG_8162.jpg
 
For the dance studio we are allowed certain times to go in and take pictures...flash and all. My 50mm prime just doesn't work. I can't get far enough back to capture her whole body. The lighting is awful in the whole place. I'm not sure about noise recition soft ware. I have lightroom one, but unistalled it ...twice now. I just don't get it. And I didn't see any reduction in noise from it. I use CS3 photshop mainly for all my editing.
 
Those 3 pictures are all really really cute. :)

Did you use your external flash on these pictures? The flash doesn't seem to light up the princesses & your daughter (ie. the flash exposure seems a bit underexposed).

I checked your EXIF data. Looks like you were using Program mode, which chose a shutter speed of 1/60 sec, aperture of f/4.5, and ISO of 800. It also gave you a -1/3 exposure compensation, too.

I'm not sure why the -1/3 exposure compensation. That probably made your photo slightly darker.

Based on these settings, I'd probably increase the ISO to 1600. This would brighten both the background and the overall photo. I'd return the Exposure Compensation (EC) back to 0 (or, based on these photos, maybe add a little bit of EC, perhaps +1/3).

If that still didn't make the photos bright enough, I would have tried to increase the aperture, if possible. Again, I don't know what lens you were using, but I'd try to go with f/4 or maybe a tiny bit larger. This would also help brighten the overall picture.

I'm not sure what happened with the first photo (with Snow White). It looks like the flash only lit the left half of the photo! :confused3


You can actually brighten all 3 of these photos in post-processing. Based on the EXIF data, it looks like you're using Photoshop CS3. You can brighten these photos using Photoshop. Or, if you have Lightroom, you can brighten the photos there, too.

For the 1st photo with Snow White, you can add a gradient and brighten just the right side of the photo. A gradient will gradually lessen the brightening effect as it moves toward the left of the photo.

Hope that helps.
 
I did use the external flash. I just basically turned it on and let it go. I usually either get it too dark, or a total blown out face, or the one like snow white.
I did try editing some of them a bit ago, but I just don't know enough to get them to look much better.

Auroraandclairecrt.jpg
IMG_8162.jpg
 
For the dance studio we are allowed certain times to go in and take pictures...flash and all. My 50mm prime just doesn't work. I can't get far enough back to capture her whole body. The lighting is awful in the whole place. I'm not sure about noise recition soft ware. I have lightroom one, but unistalled it ...twice now. I just don't get it. And I didn't see any reduction in noise from it. I use CS3 photshop mainly for all my editing.

If the 50mm prime lens gets you "too close", then you can try buying the Sigma 30mm f/1.4 lens (link to B&H).

Actually, review your current photos of your daughter, and see what focal length you typically use. If your focal length is typically around the 30mm range, then maybe that 30mm f/1.4 lens would work out for you.

People also use this lens for dark rides at Disney World.

The noise reduction slider in Lightroom 1 wasn't too good. It actually improved substantially in Lightroom 3 (the current version). You can download a free 30-day trial of Lightroom 3 from the Adobe Web site, just to test it out.

The other noise reduction software I mentioned above act as plug-ins to Photoshop. While you're in Photoshop editing your photos, you pull up the noise reduction program, and perform your noise reduction on your photos. Noise Ninja and Neat Image are 2 of the best-known noise reduction programs. There are others out there, as well. Again, they plug-in directly into Photoshop.
 
I did use the external flash. I just basically turned it on and let it go. I usually either get it too dark, or a total blown out face, or the one like snow white.
I did try editing some of them a bit ago, but I just don't know enough to get them to look much better.

Auroraandclairecrt.jpg
IMG_8162.jpg

Actually, looks like you did a pretty good job brightening the photos, given what you had to work with.

Your next step will be to remove the color cast in the photos. The Sleeping Beauty photo looks a bit too blue. The Ariel photo looks a bit too green.

One more thing. Even though you were able to brighten the entire photo, one of the unintended effects was that it "blew out" the details of Sleeping Beauty's dress, especially her collar and sleeve.

In Photoshop, select the Dodge and Burn tool, and very gently "burn" her collar and sleeve. "Burning" makes part of the photo darker. Dodging makes part of the photo brighter.

And finally, look into the noise reducing programs I mentioned earlier.
 
Jen, if you decide to try the LR3 free trial and like it, they offer a great student discount at places like journeyed.com. I don't know if there is a minimum age for the student, but it might be worth checking out. And I just got some sort of email for $200 off LR3. Not sure if it's transferable, but could check if you had any interest.

Post the results if you adjust them further, will you? I think you already made some big improvement!
 
OK,thanks. I do know how to use the dodge and burn tools, but I forget about them often.
 
For places like CRT where bouncing off a ceiling or wall isn't an option, you could try a light modifier like the Gary Fong Lightsphere or a Joe Demb Flip It (my personal favorite). Those really help to soften the light.
 
I took the liberty of playing with your Aurora (Sleeping Beauty) photo. I hope you don't mind.

Here's the original (on the left) & what I did (on the right) :

IMG_8162.jpg
5718811974_021c4a36cd_o.jpg


Here's what I did. In a separate layer using Curves (ie. a Curves adjustment layer), I brightened the photo. However, because the lower left portion of the photo was too bright, I added a layer mask and created a gradient (like I mentioned earlier), so that the bottom left part wasn't as bright.

In the same layer mask, I also darkened Aurora's collar, like I mentioned earlier. It's just another way of "burning".

There was actually a slight green color cast when I worked on the photo. So in the same Curves layer, I slightly decreased the "green" curve.

I also created a separate Vibrance adjustment layer (available in CS4 and CS5), and I increased the vibrance of the photo, making the colors richer.

There was also a bright "hotspot" in the wall behind Aurora's head, from the reflection of the flash. I "burned" (ie. darkened) the hotspot using the Burn tool.

I also gently brightened the left side of Aurora's face (her left) and her eyes using the Dodge tool.

I also cropped the top of the photo to remove the "dead space" there.

Well, just a quick amateur attempt at playing around in Photoshop. I'm sure there are others who can do much better than I. But at least you can see what's possible with Photoshop.
 
Amateur!! LOL! The whole gradient thing had me lost...and I don't understand curves myself, so I never use it either. I start out in camera raw, even with my jpegs and then go from there. I always totally mess up in curves, though so many people use it and love it, I haven't caught on to it yet.

Thanks. I think once I get my desktop back, I'll do some more playing.
I still need to get this whole flash thing down though.
 
Amateur!! LOL! The whole gradient thing had me lost...and I don't understand curves myself, so I never use it either. I start out in camera raw, even with my jpegs and then go from there. I always totally mess up in curves, though so many people use it and love it, I haven't caught on to it yet.

Yes, Curves can be pretty intimidating, but once you take the time to learn about it, it's actually pretty powerful.

Actually, each of these adjustments I did can also be done within Camera Raw. No need to learn about Curves, adjustment layers, or layer masking. However, that gradient thing comes in very handy sometimes. Camera Raw should also have the same gradient feature, where one part of the photo is dark, the other part of the photo is bright, and you gradually transition from the dark to bright parts. That's what the gradient is for.

Oops! This thread turned into a Photoshop thread, huh? Sorry.
 

GET A DISNEY VACATION QUOTE

Dreams Unlimited Travel is committed to providing you with the very best vacation planning experience possible. Our Vacation Planners are experts and will share their honest advice to help you have a magical vacation.

Let us help you with your next Disney Vacation!


facebook twitter
Top