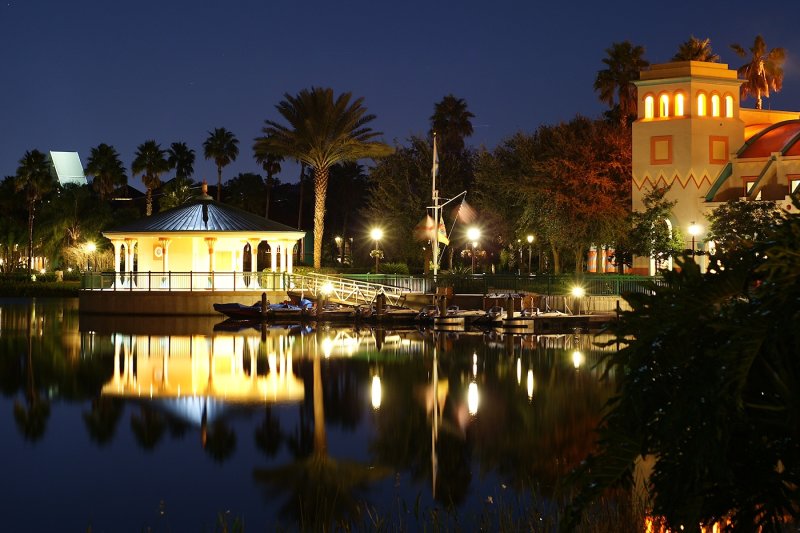
Generally, there are two ways to take night shots without a flash.
1. Open the camera's aperture as big as it will go (represented by the 'F' number, with a smaller number being a bigger opening...such as 'F2.8'). Raise the ISO number as high as you can stand (when you raise the ISO, you are turning up the sensitivity on the sensor - like raising the gain on a CB radio...the result is you get more statis, or noise, in your shot. How high you go with the ISO depends on how much noise you are OK with seeing in your shot, or how much loss of detail you can deal with when the camera's noise reduction smooths it all away to try to remove that noise). This will allow the camera to use a faster shutter speed - so that you can hand-hold the camera. Downside? Dark photos, lots of noise, and unless you have a very big aperture lens (not usually present on P&S cameras), you'll probably STILL not have a fast enough shutter to freeze all motion. Example: ISO800, with a lens that could only go to F3.5, handheld, straight from camera:

See all the 'texture' in the shot? Noise. It's badly underexposed, too dark, and the ISO is way up, so the noise came out.
Sometimes though, you need to get the shot, and this is the only way.
2. The other way to get a night shot without flash is to use the slow shutter technique. Use the lowest ISO setting your camera has, put the camera on a tripod or level surface, use the self-timer, press the shutter to line up the shot, then hands OFF and let the timer take the picture. Note that the camera could take many seconds to complete the shot - and it cannot move even a hair's breath during this exposure. The advantage to this kind of shot is that there will be little or no noise, the colors will be nice and rich, the camera will pick up more light than you could see with your own eyes, and things should come out nice and sharp. Example:

OK...so the second method is always better...right? Well, not necessarily. If anything moves through or in the frame while taking those longer shutter shots...it will be a blur. That could be cool...but maybe you didn't want that. It's up to you which method to use. Example...here's a shot taken with method #2, where people were moving through the shot as it was exposing for the buildings in the background:
See the ghost streaking through on the right? Someone moving. Not a totally uncool effect for me, and it didn't bother me. But what if I wanted to freeze the people in motion so they weren't streaky? Then I'd have to use method #1 - high ISO:
I didn't want the band to be a blur...because they were what I was taking a shot of. At night, the only option was high ISO.
Now...as for the 'scene' modes on your camera: everyone has been right in describing most night modes to be designed for taking a low level flash portrait of a person. However, some cameras may be different, and you really should check yours out. See, Sony has night modes on their P&S cameras...and there are two different kinds...Night Portrait, and Night Scene. Night Portrait has a moon icon with a flash icon...it is for taking a flash photo of a person at night and trying to expose mostly for the person and some background lights. Night Scene on the other hand is a slow-shutter mode that attempts to leave the shutter open as long as needed to get a nicely exposed landscape or scenic shot at night. It's the simple version of what skilled photographers do in Manual or Aperture Priority modes. Your camera may have a night mode like this, in which case it would be a very good, easy option for you. Of course, it would still require you to tripod the camera, or place on a level surface...and you'd still do better to take the shot with the self-timer.
I hope that helps - feel free to ask any other questions and we'll see if can help!


