After several requests I have finally gotten around to writing the directions to how I did it. What I did is very similar to the directions on earlier posts so those provided great guidance.
Supplies:
2 yards of fabric (two colors one yard each)
Double fold bias tape
Dowell Rod
Iron-On Patches
1 Package of Iron-On Interfacing
1 Package of Heat-n-Bond No Sew Ultra Hold 7/8 in. hem
1 Package of Heat-n-Bond No Sew 1 Yard
Various Colors of Ribbon
1. Cut fabric to be used as the body of the FE to be 8 in. wide by 58 in. in length. When folded the FE will be 29 in. in length.
2. Cut fabric for the three pockets, cut each pocket 11 in. wide by 12 in. in length. When folded each pocked will be 6 in. in length.
3. On the inside of the FE body piece and each pocket iron on the interfacing. Once cooled completely I ironed on the sheet of Heat-n-Bond cut 8 in. by 29 in. to the inside of the body of the FE.
4. On each of the 3 folded pockets I made pleats so that the pockets were 2 in.-pleat-4 in.-pleat 2 in. To secure the pleats I used the Heat-n-Bond Ultrahold hem. This was done on the cut side so that the top edge would be folded and clean.
5. Next I used the heat-n-bond hem to add 8 in. strips of the double fold bias tape to the bottom of each pocket.
6. Next I lined up the pockets on the body of the FE starting 8 in. from the top and then about 1 in. apart. I market the spots with a pencil and secured the bottom and sides of the pockets using the heat-n-bond hem.
7. Once all cooled. I used the double fold bias tape for the perimeter of the body of the FE which again was secured using the iron on hem.
8. Once cooled I ironed on the patches to each of the pockets.
9. I then folded down the top of the FE about 2 inches and secured to the back of the FE by the iron-on hem creating a little opening to insert the dowel rod.
10. Using the multicolored ribbon I made it long enough so that the FE would hang approximately 7-8 in. from a hanger.
11. For our names I bough iron-on computer paper and printed the names on the computer. Then I cut and surrounded the paper with double fold bias tape attached using the iron-on hem. Finally I ironed on the name piece.
I think thats all. Ive never tried to write directions for anything like this before. Everything I used I bought from either Wal-Mart, Michaels, or Joanns Fabrics.
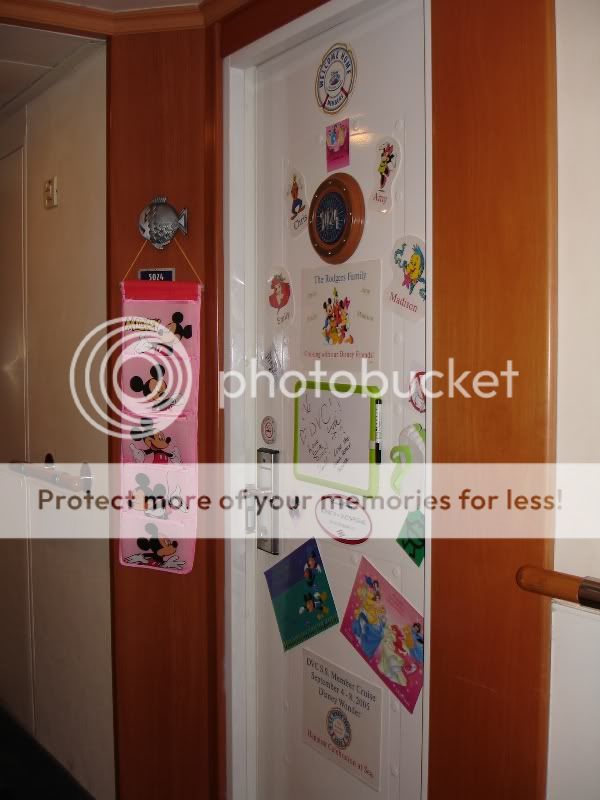
Here's the picture again of the final result.


")
 This thread has been quiet and I'm trying to start planning our next trip!!