ISO Disney Cruise Line Lanyards

To those that I was going to do luggage tags- look at the 3 pictures on page 5 and see which style you prefer. (Of course the level would vary) Also still open to other ideas.

Thanks.

Sent from my iPhone using DISBoards
 
gerberdaisy1234 said:
Ok. I have been playing around with the luggage tag idea. Trying to go with the repurpose theme I tried using the part of the lanyard that has a plastic split thing and Velcro on one end. But I think it is too long.
After trying several options my favorite was simply threading ribbon through tag and tying a tight know on handle.
What do you think? Any other ideas? When I made the loop shorter, you couldn't see any of logo. This way, you still can see ribbon. I am going to buy some no fray stuff to put on ends.

Any thoughts welcome.

NOT sure why photos are not showing

Sent from my iPhone using DISBoards

They both look good
 
Thanks. :). I plan on making a tutorial for drink holder. I will let you know when I finish and post. People were asking where I got it:)

Sent from my iPhone using DISBoards

I just love your key fobs, luggage tags but especially your drink holders!!!! Would love to see the tutorial when you get around to it!!!!


Thanks for all the lanyards! I mailed out 6 envelopes this week :)

For those that wanted a tutorial for the drink holders- I hope to have that completed by the weekend.

Sent from my iPhone using DISBoards
 
Thank you to those who have sent me PMs to let me know you received your keychains. I will try to reply soon. I was using my extra time to work on making a drink holder so I can make a tutorial. Pictures done, now to write it all up.

Sent from my iPhone using DISBoards


Thanks for the luggage tags!! Love them!!
 
I wish I could buy one... I guess I'm gonna have to make it to CFA this week to get one... This is an awesome idea! Of the drink holders... Also the key fob...
 
Hello-

I am just off the Dream today and have 2 Gold and several DVC laynards I can send. Would you be able to send me 1 Platnium key fob in return? I am officially Platinum now :)

Thanks!
Suzanne
 
cameron991 said:
Hello-

I am just off the Dream today and have 2 Gold and several DVC laynards I can send. Would you be able to send me 1 Platnium key fob in return? I am officially Platinum now :)

Thanks!
Suzanne

Suzanne, I will PM you (finally deleted a few messages- mailbox fills up fast) :) Thanks

And CONGRATULATIONS on PLATINUM!!!!

Sent from my iPhone using DISBoards
 
Just wanted to let you know-I did receive my package. Thank you so much!!
Sorry for the late reply-life has just been crazy busy
 
For those that have asked how I made the drink holders using a cardboard drink carrier from Chick-fil-a and duct tape- This is for you pixiedust:


Here goes-:mic:

How to Make a Cruise Ship Drink Holder​

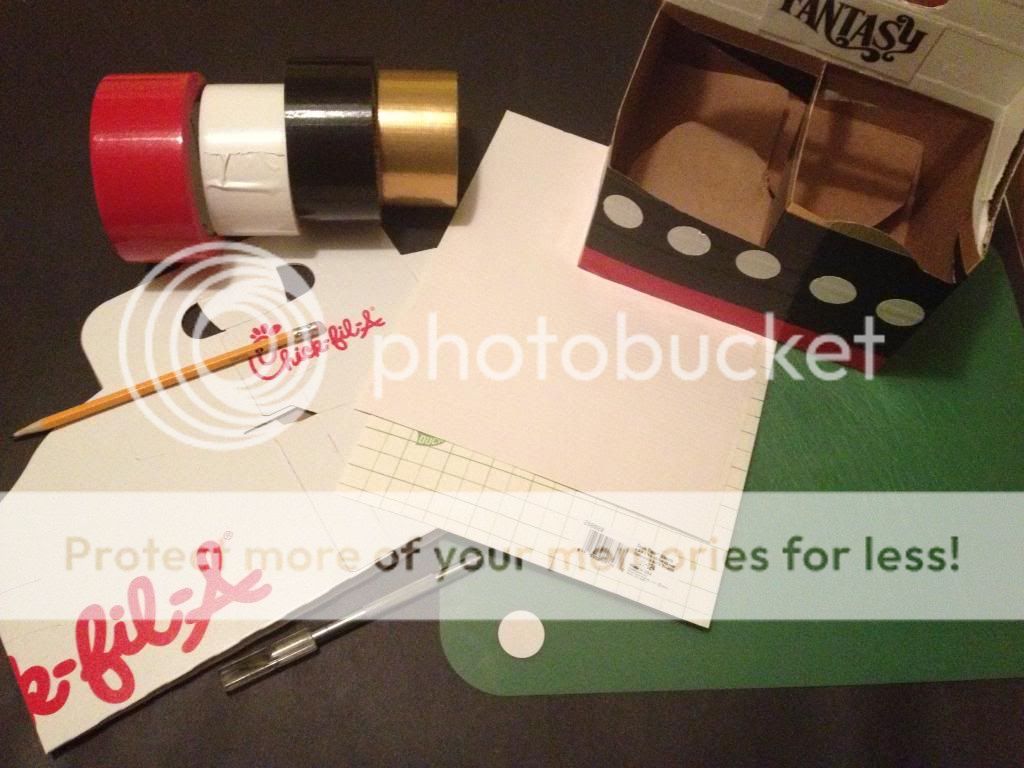
IMG_4439_zpsc3adfac1.jpg


Supplies: Red, white, black, and gold duct tape, white duct tape sheet, a drink holder (I used one from Chick-fil-a), exacto knife, a one inch circle (for stencil), a surface for cutting and scissors. Optional- ruler and pencil

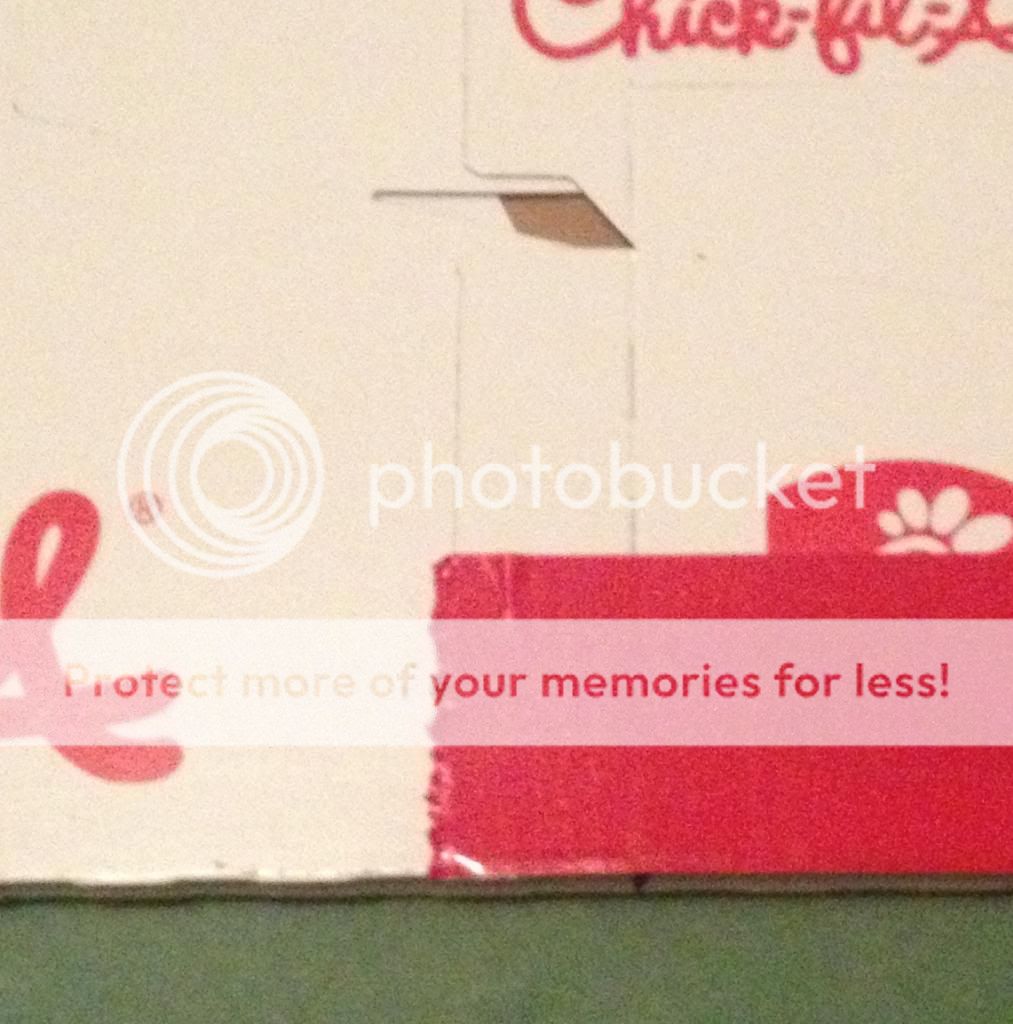
IMG_4443_zps0a21848c.jpg


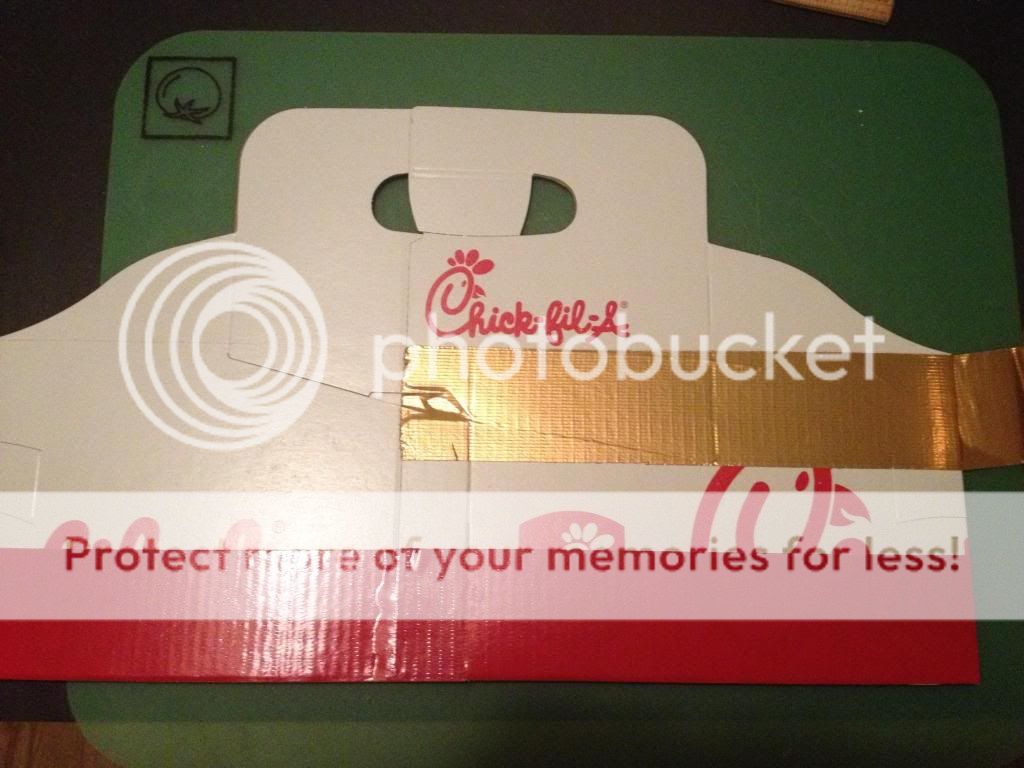
Step One: Starting where the cardboard overlaps, make a row of red duct tape across the bottom of the holder.

74a01577-b220-4475-9def-e3737671b9dd_zpsa504ad36.jpg


Flip over and continue across back.

IMG_4446_zpsd3b79ea8.jpg


Flip back over and overlap the beginning to match the crease in the box. Score with the exacto knife and tear.

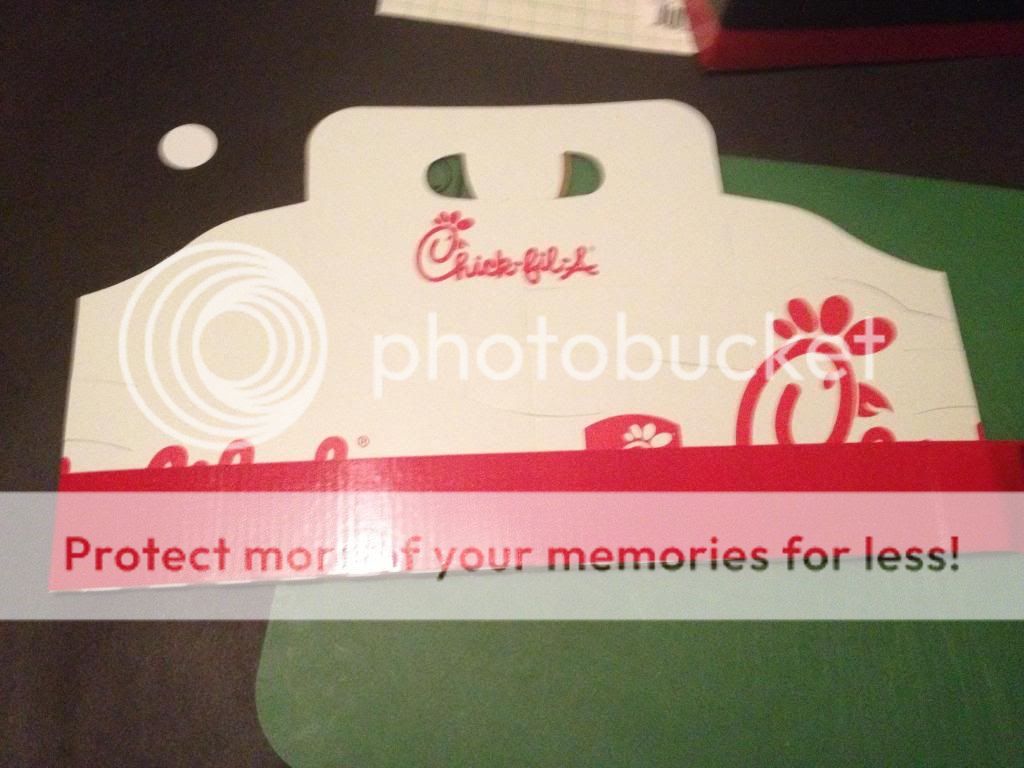
b9505c59-b204-4adb-ac70-43c85e2971e3_zps801d7d91.jpg


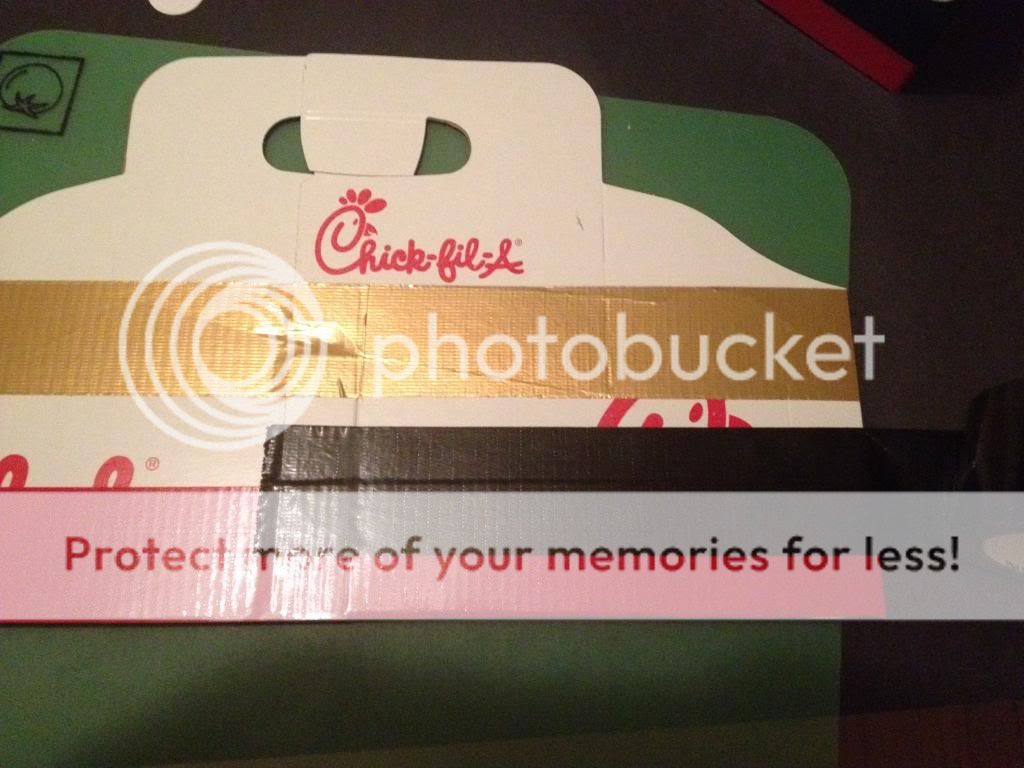
Step Two: (Optional- Use a ruler to draw a line across top from corner to corner.) It is pretty easy to keep duct tape straight and the shiny surface makes it easy to lift and restick duct tape if necessary. So the line is optional Repeat step one with gold duct tape across top of bottom portion of holder. (Tape, flip, tape, flip, tape, score and tear.)

IMG_4453_zpsa65c385d.jpg


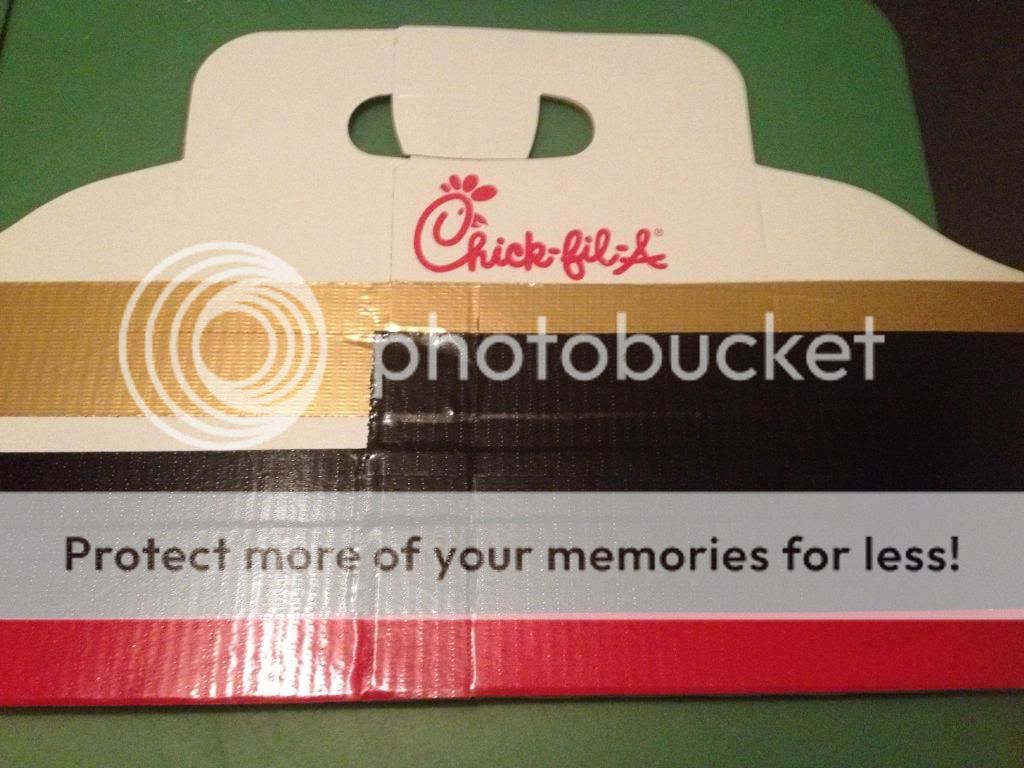
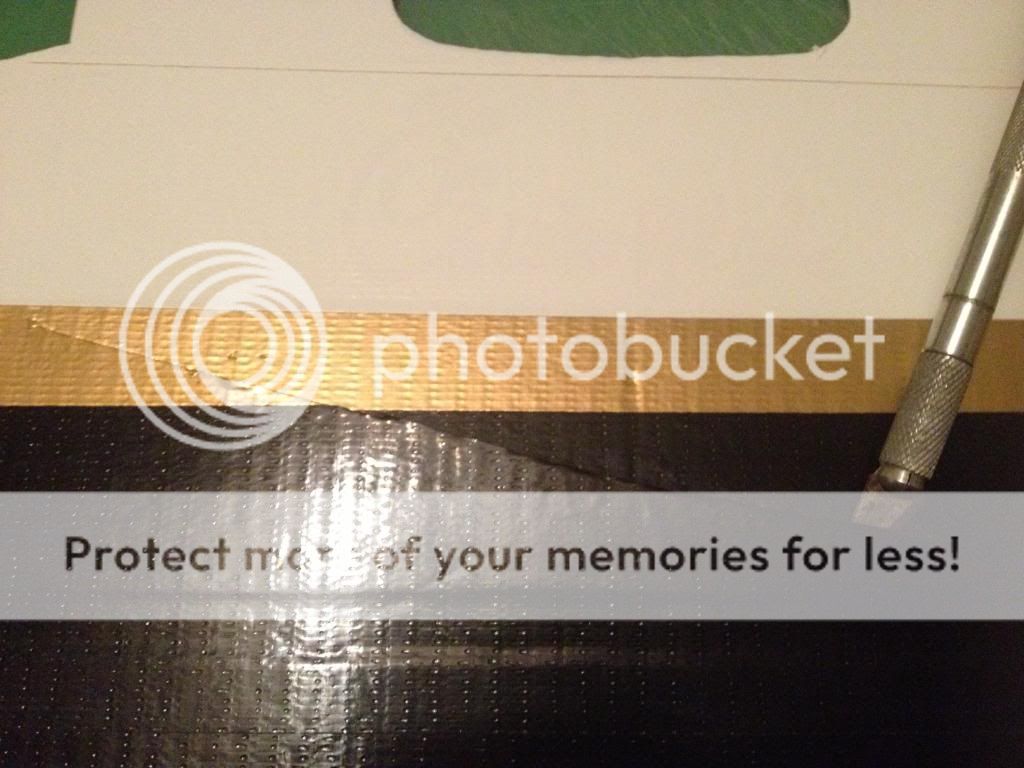
Step Three: (Once again using ruler is optional. You can draw a line about an inch up from bottom across the red duct tape.) Repeat step one with black duct tape about an inch from the bottom. (Tape, flip, tape, flip, tape, score and tear.)

4c1afd11-d0e3-4e13-8ee2-968416c310d2_zps3dde0a11.jpg


Then do a second row of black duct tape about ½ inch below top of gold strip. (You can draw a line if it helps)

1da3b7c2-c455-492c-864a-b936d73e57d9_zps5bee8791.jpg


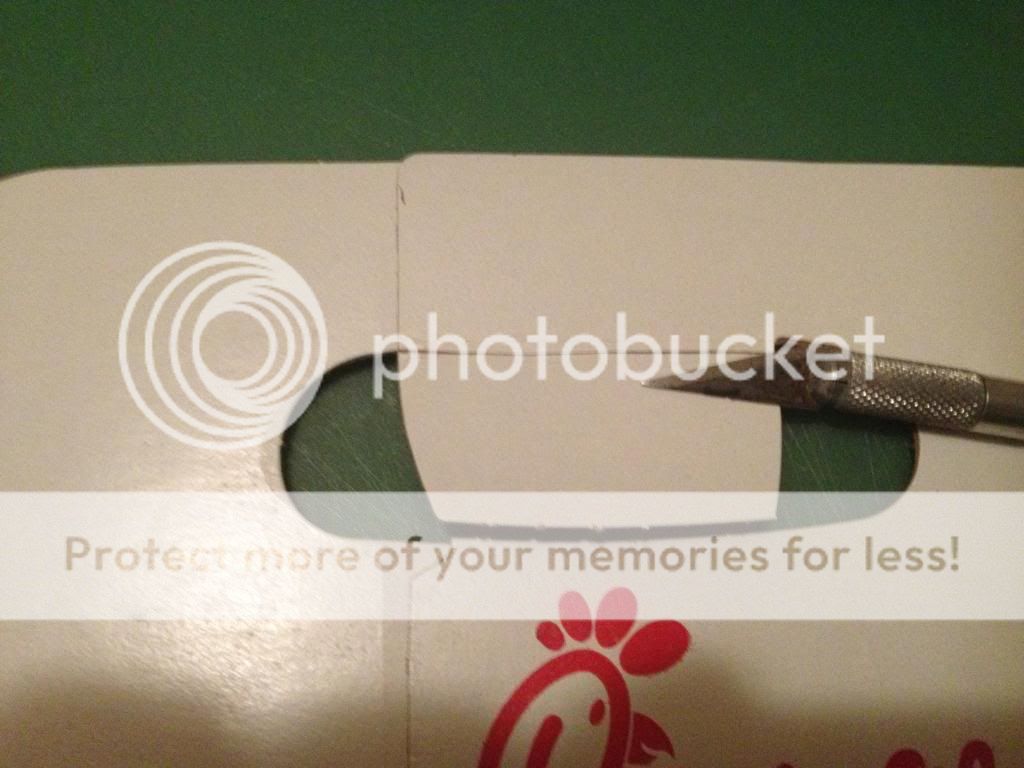
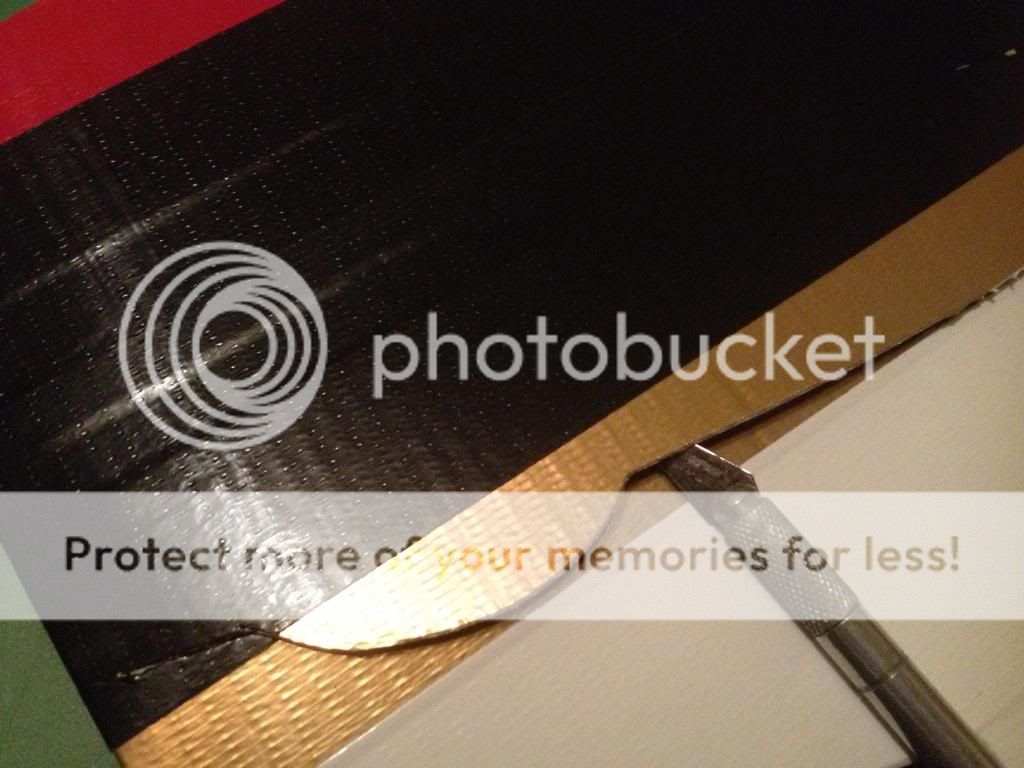
Step Four: Score and remove this little flap.

IMG_4462_zpsb4c031a4.jpg


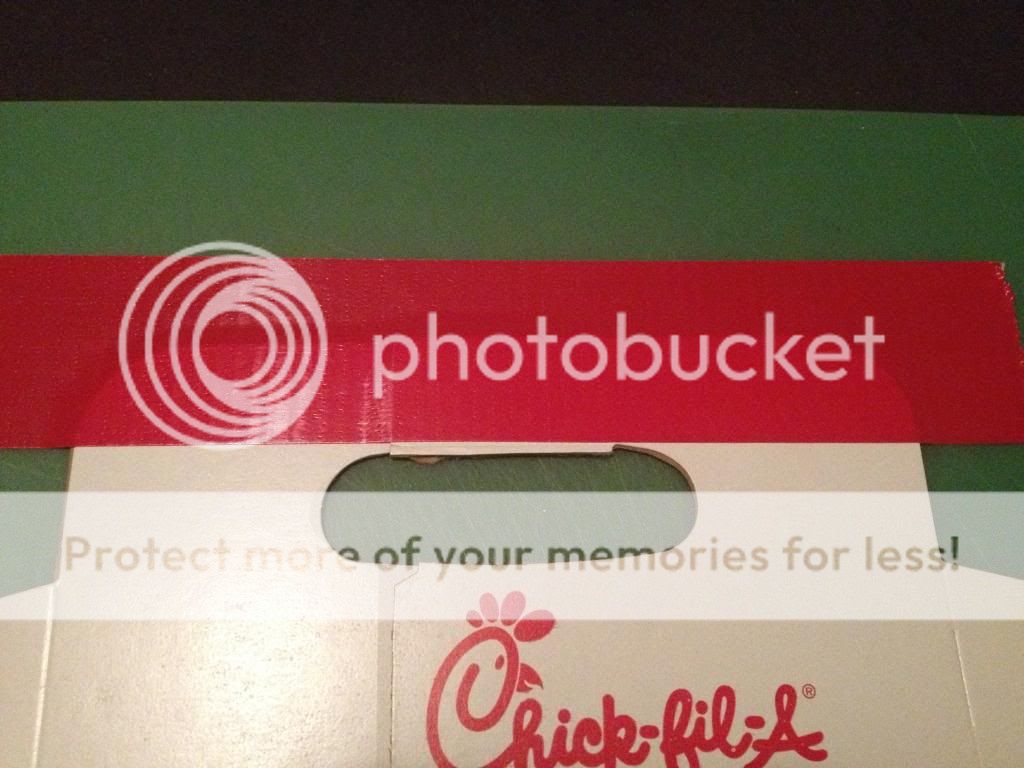
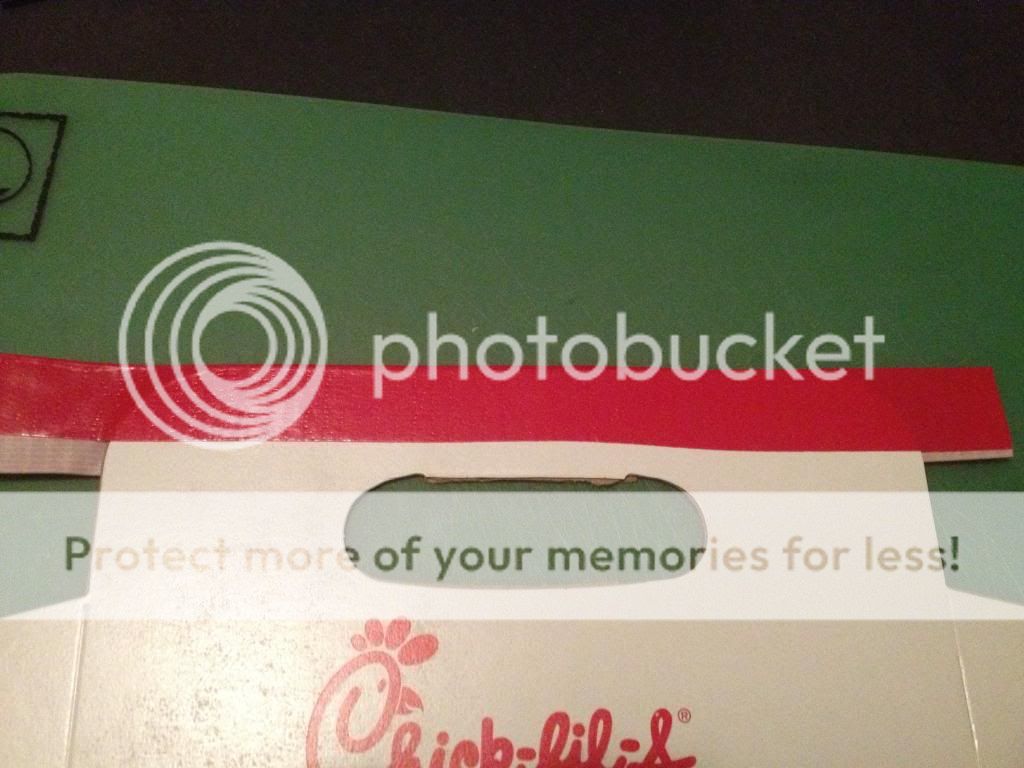
Step Five: (Once again if you want use a ruler to draw a line just above the hole) For this step tear off piece of red tape about 9 inches long. Place across top.

IMG_4463_zps4fdca5e3.jpg


Then flip over holder and fold tape down on opposite side.

15c1b05e-191f-4e6c-aac5-671ff7487285_zpsec192a91.jpg


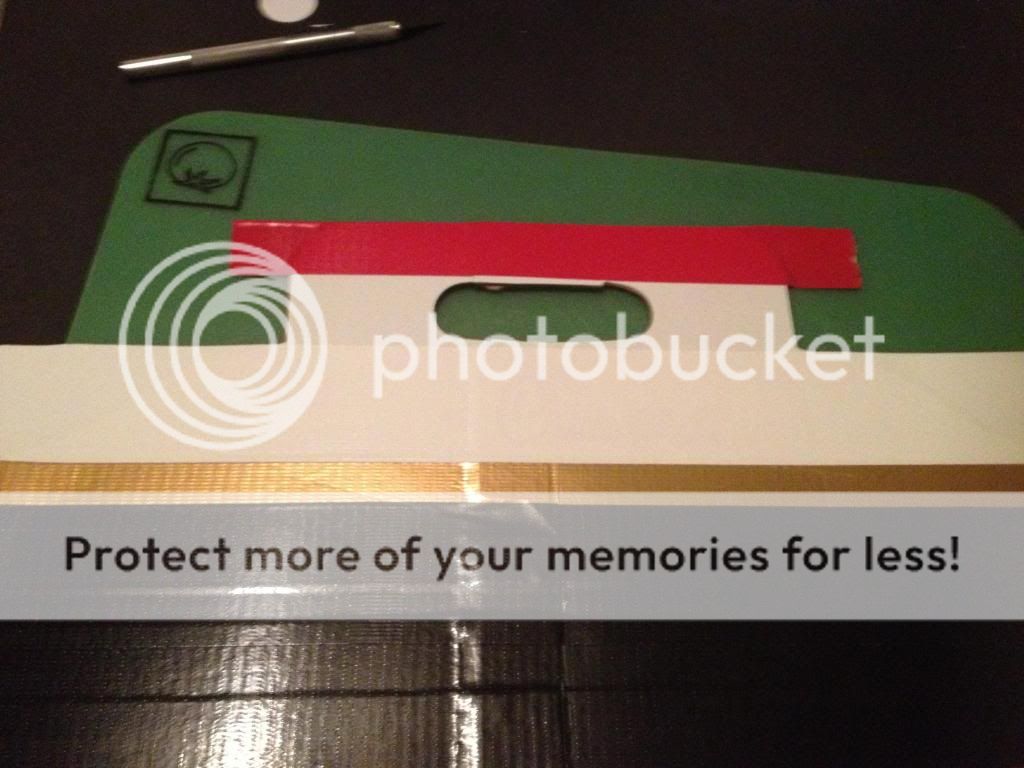
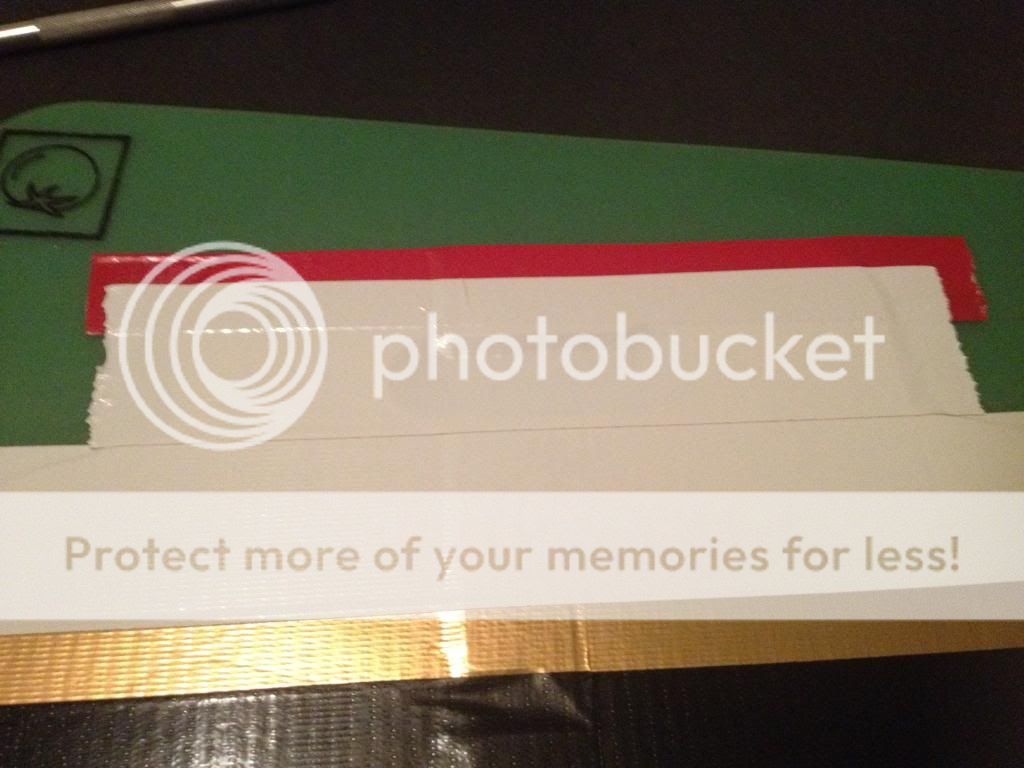
Step Six: Tear off a piece of white duct tape about 18 inches long. Place at top of gold strip.

IMG_4466_zpsac76e3d5.jpg


Step Seven: Tear off a piece of white duct tape about 9 inches long. Place about ½ from top of red. (Once again drawing a line may help)
FLIP OVER AND REPEAT STEPS 6 AND 7

IMG_4469_zpsd65fc0fc.jpg


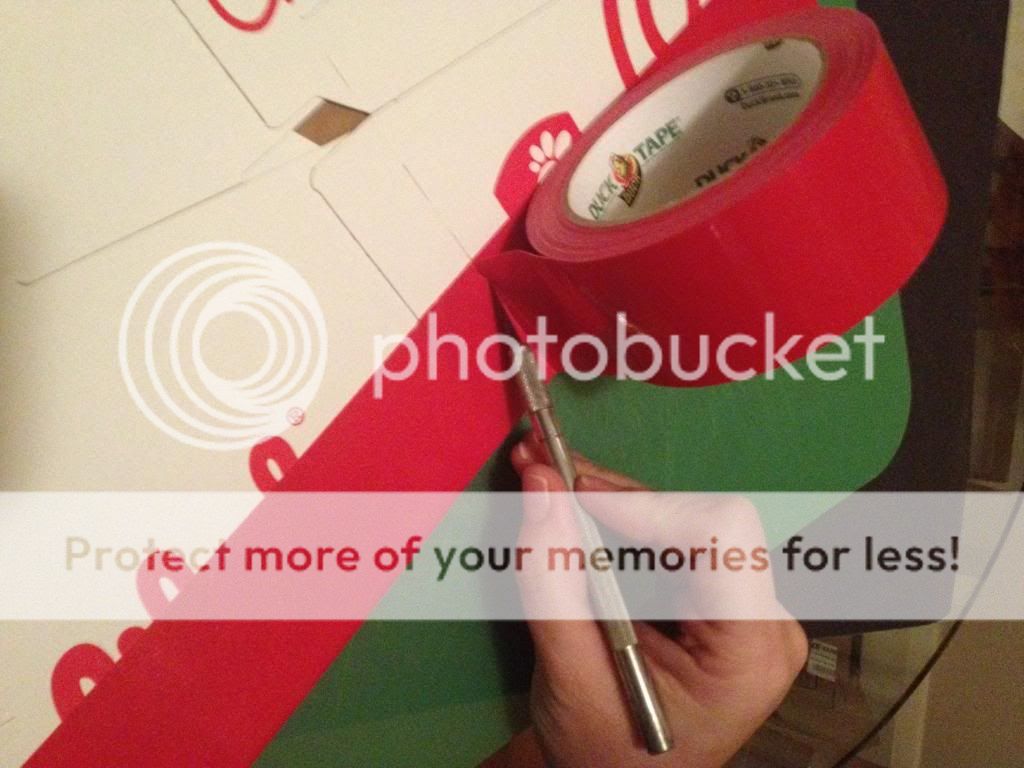
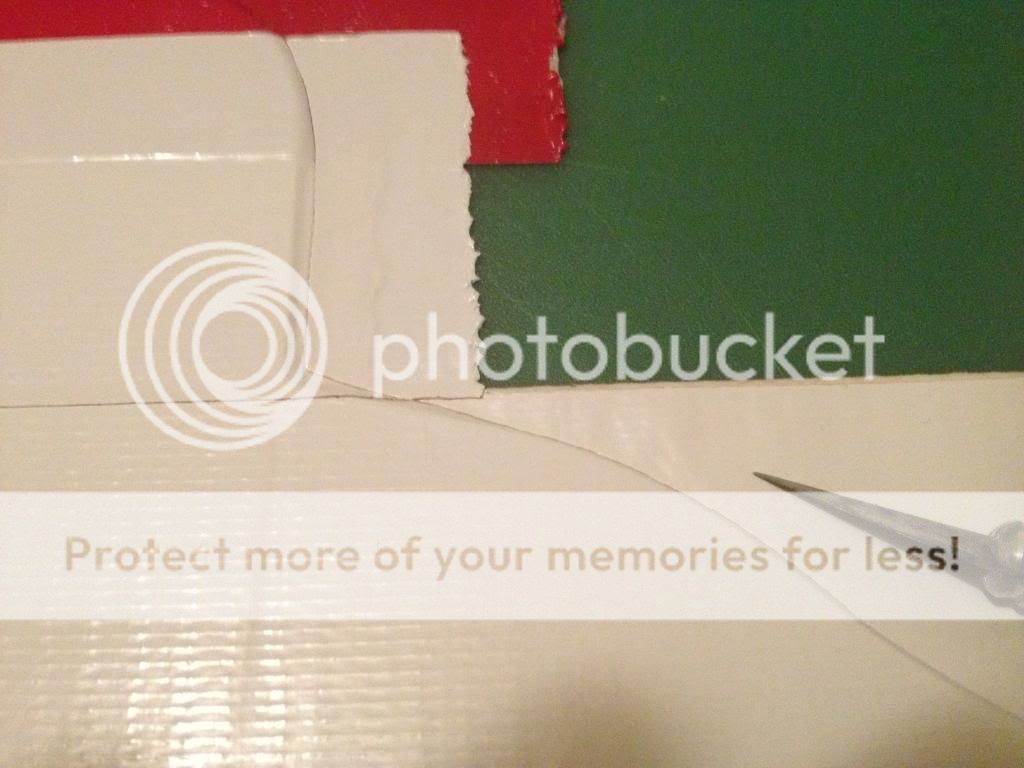
Step Eight: Rub edges well so you can see where to trim using an exacto knife.

IMG_4473_zpsadc70e07.jpg


Step Nine: This step can be the most challenging. You are going to use the exacto knife to cut through the tape on the lines needed to open holder.

IMG_4474_zpsbf1b8439.jpg


To make this easier- rub lines well, have a second holder to make sure how far lines go, and once you start let the exacto knife just slide gently along the line.

IMG_4475_zps76adbd96.jpg


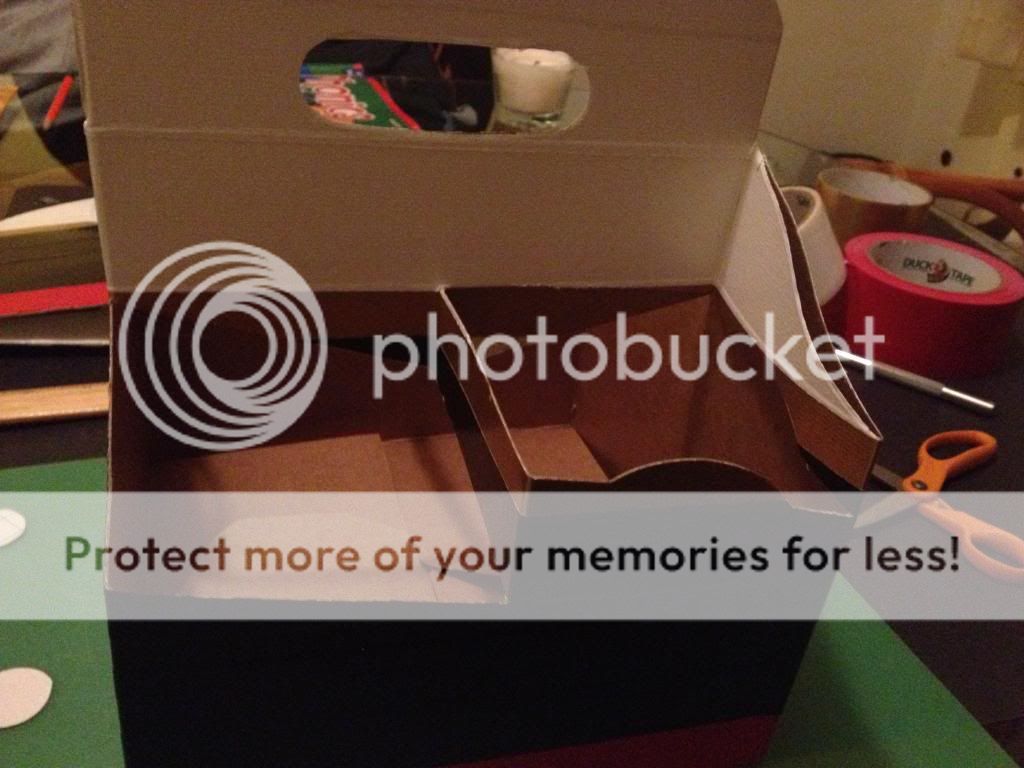
At this point you might want to open up. Make sure all the cuts have been completed. And crease it into shape. Then fold flat again for next step.

IMG_4480_zpse89b542c.jpg


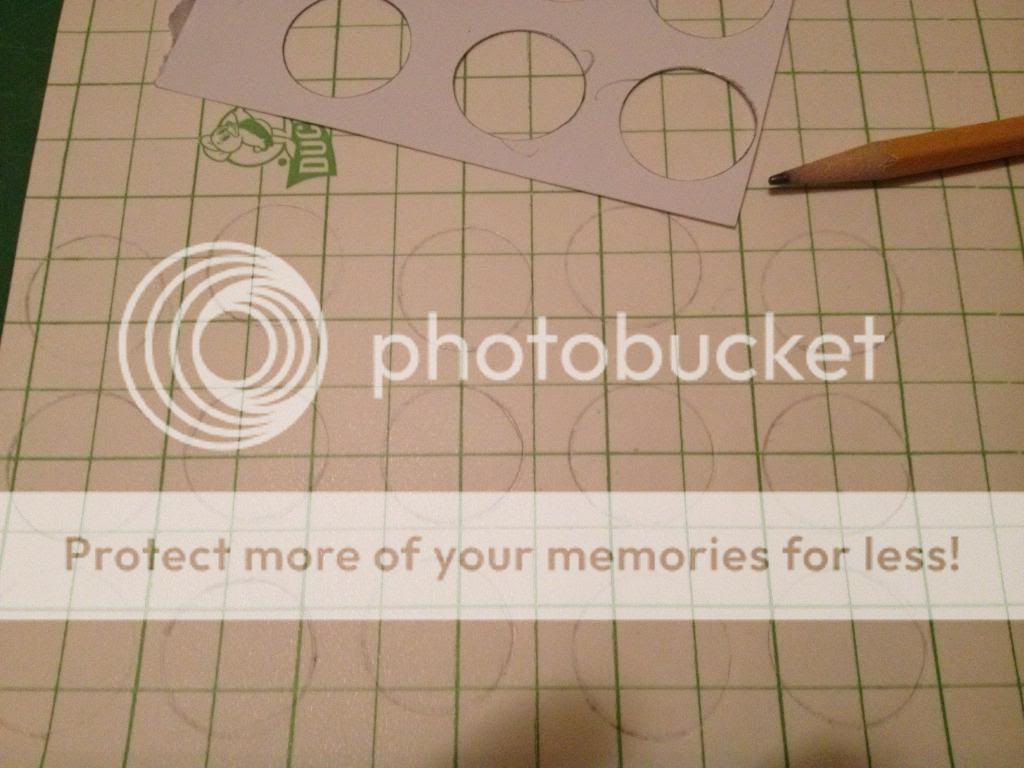
Step Ten: The punch does not work well with the duct tape sheet. So I used a 1 inch punch to make a stencil. Trace 10- 1 inch circles on the paper side of the duct tape sheet. Cut our circles.

IMG_4483_zpsff937c78.jpg


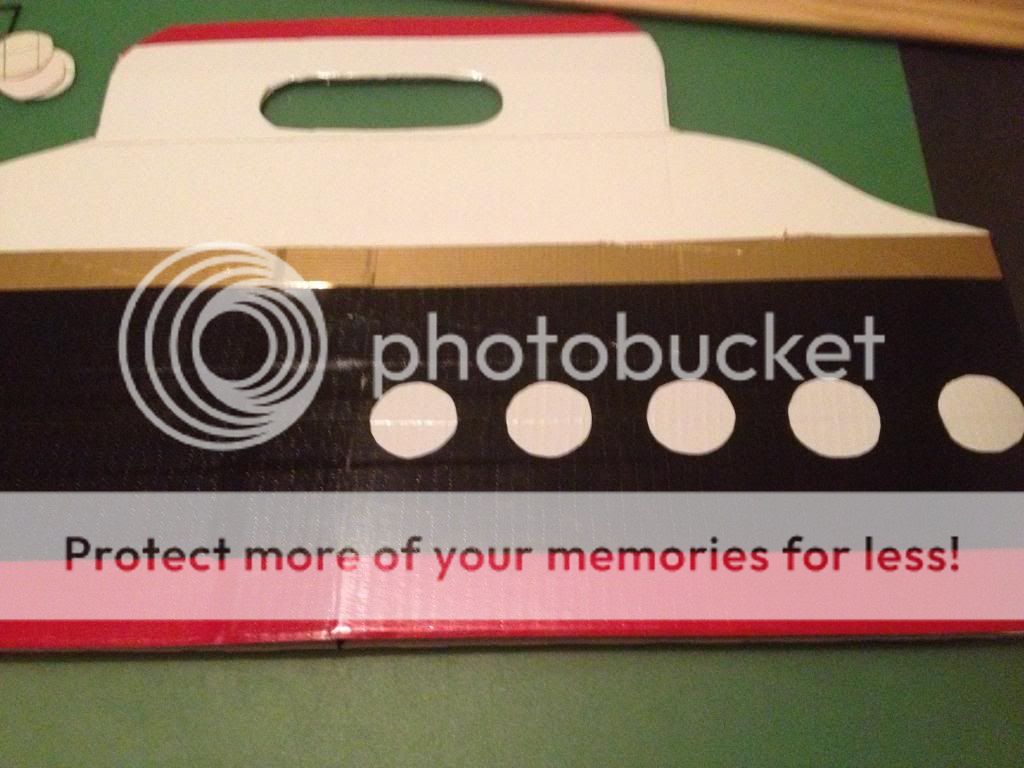
Step Eleven: Starting at the corner where duct tape strips end, peel paper off the back and place circles. Using the line where the two black strips overlap as your guide, place circles so that line is in the middle. Leave about ½ inch gap between circles. These are easy to lift and restick if needed.

IMG_4487_zps76dffcc6.jpg


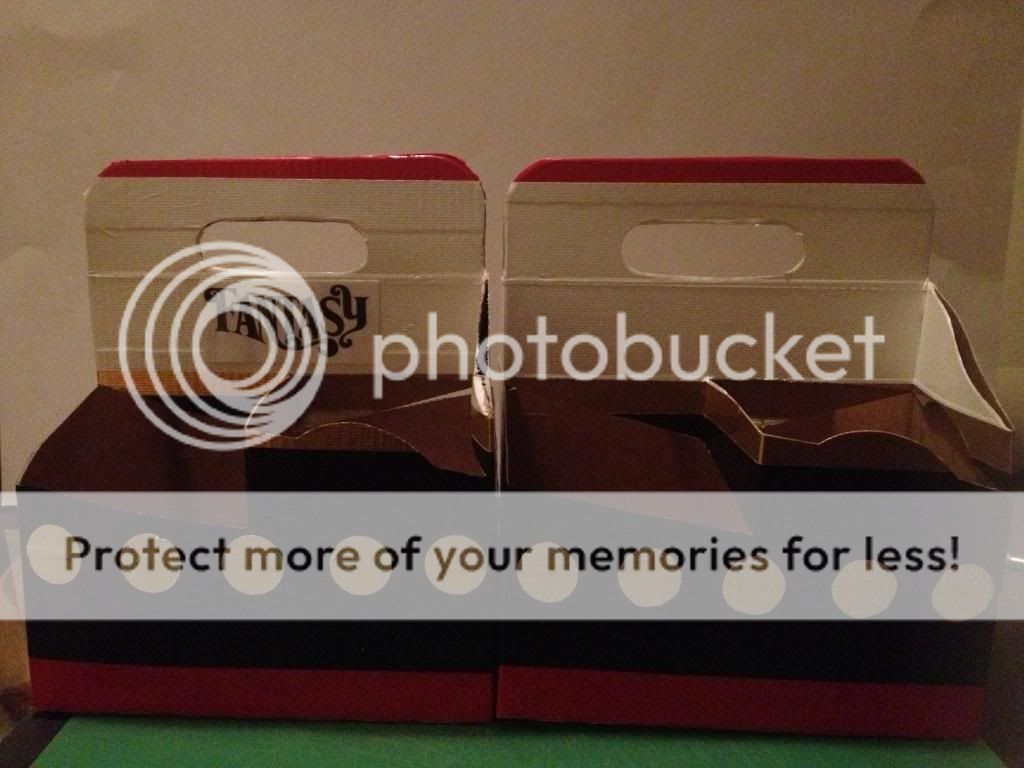
Optional: Print the name of your ship. Laminate and attach with glue dots so you can change in case you use again for a different ship.

IMG_4493_zps47b55cec.jpg


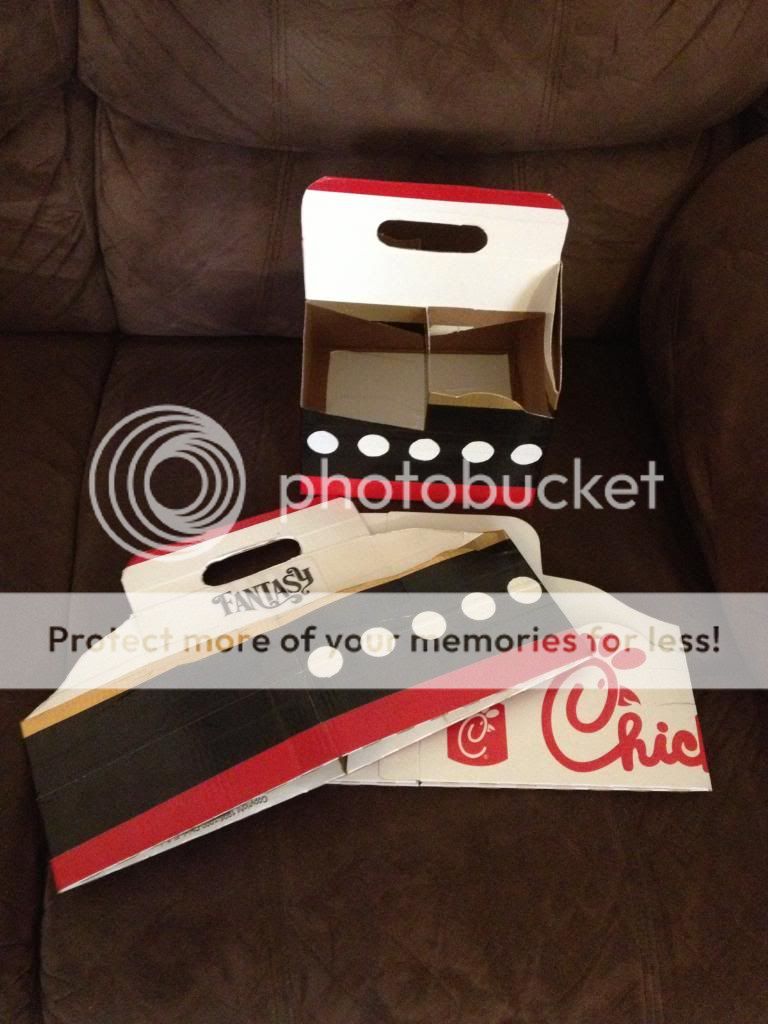
Drink holder folds flat. Great for packing in your luggage :)
Another optional step is bring the extra of the duct tape sheet (or a roll) and reinforce the bottom to protect from spill. Then just remove the tape from the bottom before you pack to come home

Enjoy! You will be the envy of every parent trying to balance 4 cups and a plate of goodies to carry back to the stateroom :)
 
Just got back from a cruise and I have about a dozen lanyards (silver and dvc) if you still need some :)
 
csidisney said:
Just got back from a cruise and I have about a dozen lanyards (silver and dvc) if you still need some :)

I would be glad to make you a key chain or two in exchange. (I will pm you) Thanks to awesome DISers,I have enough lanyards for my FE project. I figure I can donate extra parts to a group that makes crafts for fundraisers/ team building etc.
I have cut up lanyards and have all the parts sorted for repurposing.
This had been one of my favorite recycle/reuse projects. :)
REDUCE/REUSE/RECYCLE :)

Sent from my iPhone using DISBoards
 
csidisney said:
Just got back from a cruise and I have about a dozen lanyards (silver and dvc) if you still need some :)

It wouldn't let me send you a pm. Not sure if it is because I am using iPhone app or not.

Sent from my iPhone using DISBoards
 
gerberdaisy1234 said:
For those that have asked how I made the drink holders using a cardboard drink carrier from Chick-fil-a and duct tape- This is for you pixiedust:

Here goes-:mic:

How to Make a Cruise Ship Drink Holder

Supplies: Red, white, black, and gold duct tape, white duct tape sheet, a drink holder (I used one from Chick-fil-a), exacto knife, a one inch circle (for stencil), a surface for cutting and scissors. Optional- ruler and pencil

Step One: Starting where the cardboard overlaps, make a row of red duct tape across the bottom of the holder.

Flip over and continue across back.

Flip back over and overlap the beginning to match the crease in the box. Score with the exacto knife and tear.

Step Two: (Optional- Use a ruler to draw a line across top from corner to corner.) It is pretty easy to keep duct tape straight and the shiny surface makes it easy to lift and restick duct tape if necessary. So the line is optional Repeat step one with gold duct tape across top of bottom portion of holder. (Tape, flip, tape, flip, tape, score and tear.)

Step Three: (Once again using ruler is optional. You can draw a line about an inch up from bottom across the red duct tape.) Repeat step one with black duct tape about an inch from the bottom. (Tape, flip, tape, flip, tape, score and tear.)

Then do a second row of black duct tape about ½ inch below top of gold strip. (You can draw a line if it helps)

Step Four: Score and remove this little flap.

Step Five: (Once again if you want use a ruler to draw a line just above the hole) For this step tear off piece of red tape about 9 inches long. Place across top.

Then flip over holder and fold tape down on opposite side.

Step Six: Tear off a piece of white duct tape about 18 inches long. Place at top of gold strip.

Step Seven: Tear off a piece of white duct tape about 9 inches long. Place about ½ from top of red. (Once again drawing a line may help)
FLIP OVER AND REPEAT STEPS 6 AND 7

Step Eight: Rub edges well so you can see where to trim using an exacto knife.

Step Nine: This step can be the most challenging. You are going to use the exacto knife to cut through the tape on the lines needed to open holder.

To make this easier- rub lines well, have a second holder to make sure how far lines go, and once you start let the exacto knife just slide gently along the line.

At this point you might want to open up. Make sure all the cuts have been completed. And crease it into shape. Then fold flat again for next step.

Step Ten: The punch does not work well with the duct tape sheet. So I used a 1 inch punch to make a stencil. Trace 10- 1 inch circles on the paper side of the duct tape sheet. Cut our circles.

Step Eleven: Starting at the corner where duct tape strips end, peel paper off the back and place circles. Using the line where the two black strips overlap as your guide, place circles so that line is in the middle. Leave about ½ inch gap between circles. These are easy to lift and restick if needed.

Optional: Print the name of your ship. Laminate and attach with glue dots so you can change in case you use again for a different ship.

Drink holder folds flat. Great for packing in your luggage :)
Another optional step is bring the extra of the duct tape sheet (or a roll) and reinforce the bottom to protect from spill. Then just remove the tape from the bottom before you pack to come home

Enjoy! You will be the envy of every parent trying to balance 4 cups and a plate of goodies to carry back to the stateroom :)

I will absolutely be making this for our upcoming cruise! Probably one for my SIL cruising with us, too- genius! Thanks for the tutorial.
 
I will absolutely be making this for our upcoming cruise! Probably one for my SIL cruising with us, too- genius! Thanks for the tutorial.

You're welcome:) Enjoy! They are fun to make and even more fun to use onboard. :)

Sent from my iPhone using DISBoards
 

GET A DISNEY VACATION QUOTE

Dreams Unlimited Travel is committed to providing you with the very best vacation planning experience possible. Our Vacation Planners are experts and will share their honest advice to help you have a magical vacation.

Let us help you with your next Disney Vacation!


GET UP TO A $1000 SHIPBOARD CREDIT AND AN EXCLUSIVE GIFT!

If you make your Disney Cruise Line reservation with Dreams Unlimited Travel you’ll receive these incredible shipboard credits to spend on your cruise!


facebook twitter
Top