To Infinity and Beyond - Becoming a Better DopeyBadger (Comments Welcome)

Amphibia Costumes - Anne Tennis Racket - Part 1

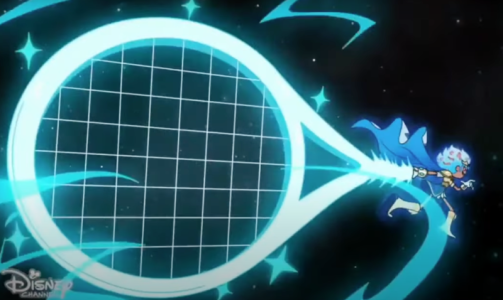
So Anne's weapon of choice in Amphibia is more often than not her tennis racket. For the vast majority of the show, the tennis racket is your normal run of the mill racket with no special power-ups or appearance. But for a mere 3-seconds in the final episode of Amphibia she gets a super powered racket when she's wearing the Calamity armor (the one we're making).


Screenshot 2024-09-23 at 12.37.38 PM.png

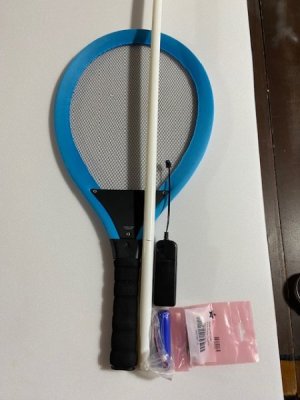
So this is the racket that G wanted to make. Although we're limited on size and it's unreasonable for her to make one that big because it would weigh so much. The goal was a tennis racket that minimally glowed blue.

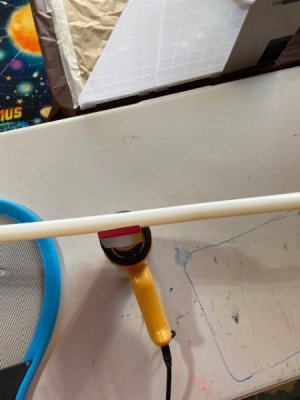
This project actually started several months ago. In fact, it was essentially the very first Amphibia task we embarked on. But we hit a snag with the LED portion of the project, and now since it's coming down to the end it's time to either put it together with or without lights. Given my experience with the first Maui hook and its flimsy nature, I wanted to find a way to make this prop more rigid. So I bought some plastic pipe (it wasn't PVC, maybe PVA? because it was more flexible) to form into shape.


thumbnail_IMG_6875.jpg

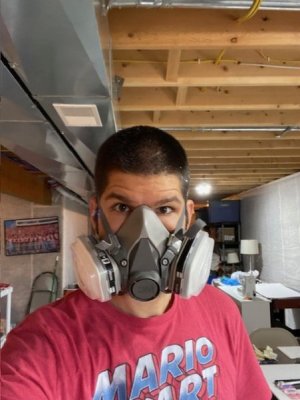
I wore a respirator because I was working with plastic and a heat gun.


thumbnail_IMG_6876.jpg


thumbnail_IMG_6877.jpg

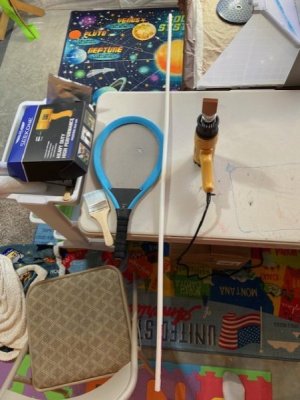
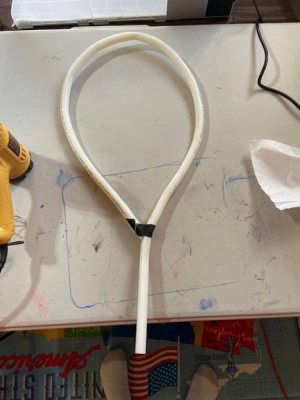
I used the heat gun to form the plastic into shape.


thumbnail_IMG_6878.jpg

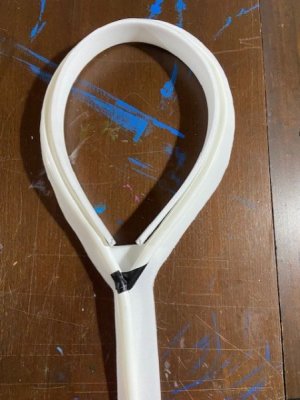
I actually melted the table underneath because I turned the heat gun towards the table at one point. Whoops, don't do that. After a bit of time, I was able to get the plastic bent into a shape that resembled a tennis racket.

thumbnail_IMG_6879.jpg

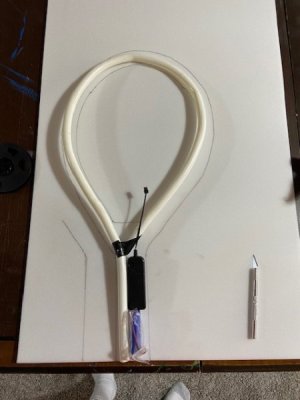
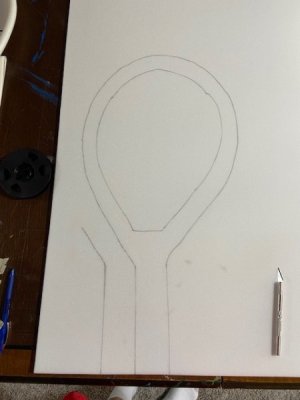
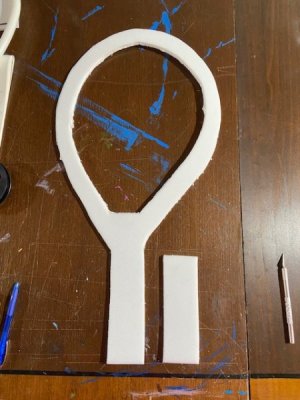
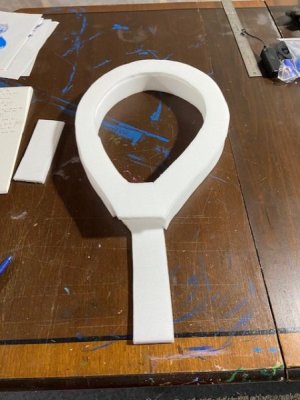
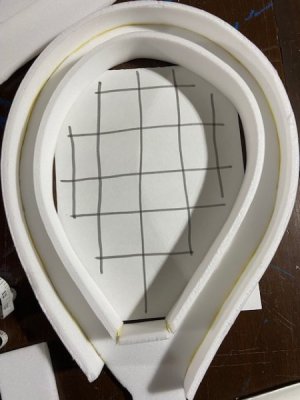
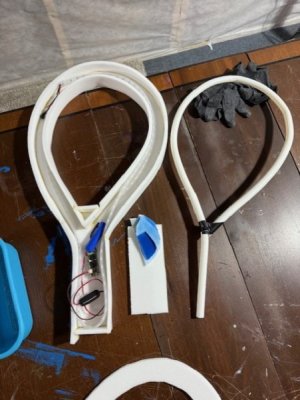
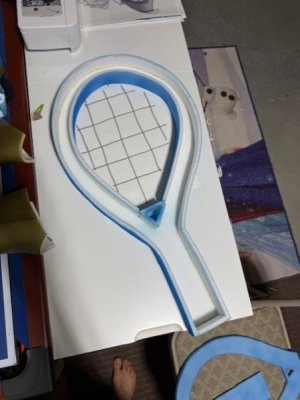
I then laid that plastic piece onto a piece of the translucent Plastzote foam we've used on several different projects. I believe I used either a 6mm or 8mm thickness. I wanted to make sure I had enough room for the electrical components, so I made the base of the racket a little thicker.


thumbnail_IMG_6880.jpg

Traced it out and then cut out the pieces.


thumbnail_IMG_6881.jpg

thumbnail_IMG_6882.jpg


thumbnail_IMG_6883.jpg

Then it was all about making the 2-D piece into a 3-D piece by giving it some height.

Next -Anne's Tennis Racket - Part 2
 
Last edited:
Amphibia Costumes - Anne Tennis Racket - Part 2

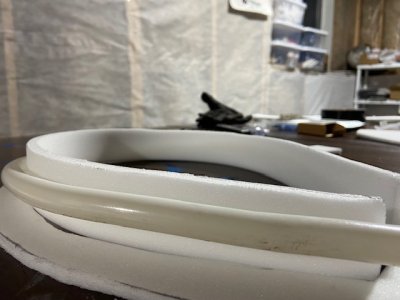
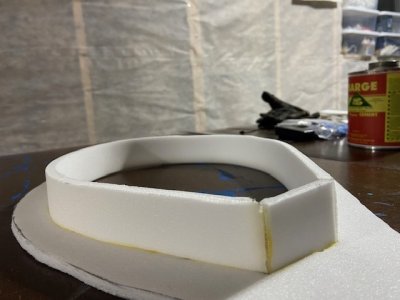
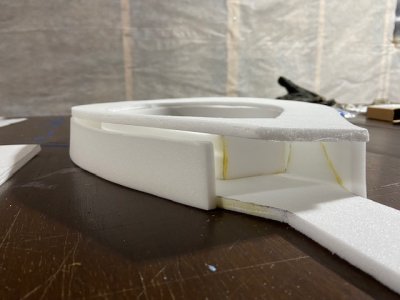
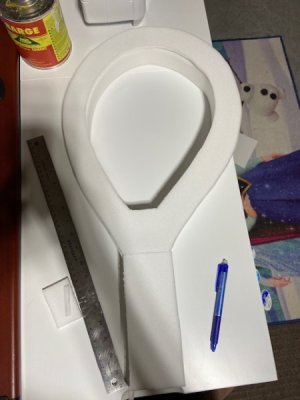
It was as simple as determining how tall I wanted the 3-D structure of the racket to be, and then gluing on additional pieces of translucent foam. I used the Barge All-Pupose cement to hold the pieces together.

thumbnail_IMG_6884.jpg


thumbnail_IMG_6885.jpg

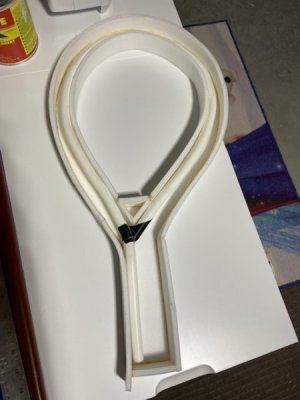
While the bottom was one continuous piece, I needed the handle to be free to work with since there would be electrical components inside. So the top was not one continuous piece.


thumbnail_IMG_6886.jpg


thumbnail_IMG_6887.jpg

Then I placed the plastic inside to ensure everything was going well in the design process.


thumbnail_IMG_7158.jpg

And cut a final piece to size on the handle.


thumbnail_IMG_7159.jpg

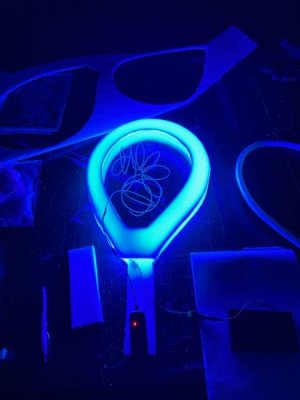
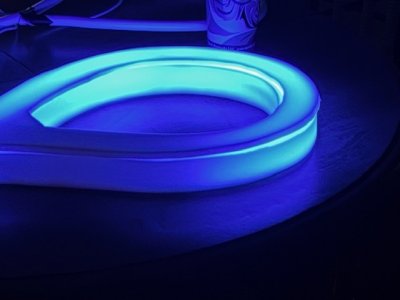
Then just for fun I put the 400+ LED/m blue strip I had available (eventually used in the Anne hairpiece) to see what the racket would look like illuminated.


thumbnail_IMG_6889.jpg

Which it looked great. Problem is that the 400+ LED/m strip requires 8xAA batteries and would be too heavy for this project. So it was just to show a proof of concept, but this is where the programmable LEDs would offer me the chance to get good illumination on a smaller battery that would overall be lighter. The other consideration was the racket strands.


thumbnail_IMG_6900.jpg

G wanted those to glow blue as well. So we went back to our favorite electroluminescent wire which we used in the Shang-Chi and Ms Marvel costumes. The draw back is they're not nearly as bright, but they're a good option for what we're going for.


thumbnail_IMG_6898.jpg

So that would be something we'd weave into place at a later time.

Next -Anne's Tennis Racket - Part 3
 
Last edited:
Amphibia Costumes - Anne Tennis Racket - Part 3

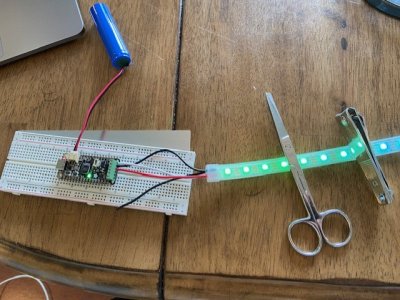
Alright, so everything was going well in the initial phase of the project until I got to the programmable RGB LEDs. This part is brand new to G and I. To date, we've used 5mm single color LEDs lit with a button battery, the EL wire, fairy lights with a small remote (Ms Marvel fist), and the 400+ LED/m single color powered by 8xAA batteries. But this was a whole new level of complicated. We had a few pieces as part of the project:

-RP2040 Prop Maker Feather chip (link)
-Lithium Ion 3.7v 2200mAh battery (link)
-Adafruit Neopixel RGB 60 LED/m (link)
-JST pin on/off switch (link)

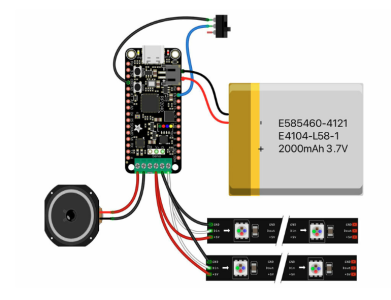
I found other projects on Adafruit's learning portion of the website with diagrams so I knew roughly how to hook up the wires.


Screenshot 2024-09-23 at 2.08.58 PM.png

A big difference between the above's RGB LEDs and mine was that mine had four wires. But after some internet searching I learned that the fourth black wire was a second ground and didn't need to be connected to anything. Additionally I used the JST on/off switch between the battery and the connection point so that I could turn the power on/off from there.


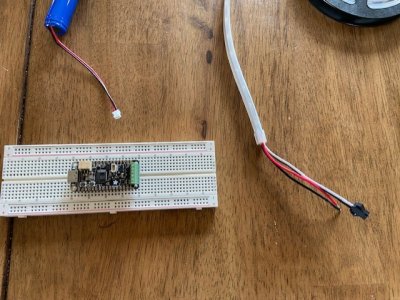
thumbnail_IMG_7149.jpg

The screws on the part where the LED is attached are TINY. And that was a huge problem back in April when I first attempted this. This last weekend I went to Ace and found a set of tiny flat head screwdrivers that were small enough to turn the screws. I think they were 1/32nd inch or maybe 1/16th inch.

So once the battery and LEDs were properly connected, then we turned it on. The LEDs illuminated with the pre-programmed color sequence.


thumbnail_IMG_7150.jpg

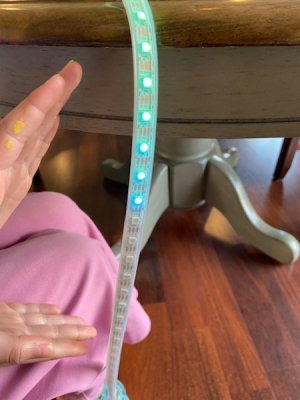
One issue was obvious though, the entire strip didn't illuminate. We had a 2 meter strip with 120 total LEDs.


thumbnail_IMG_7151.jpg

My first instinct was to assume that there was a faulty LED at #61. So we cut the wire, re-soldered it, and then turned it back on. But the fault still occurred, but this time at the next in sequence. It's at this point that I counted the number of "good" LEDs and realized that the factory installed program was like limited to 60 LEDs and that was the problem. So I cut out good LEDs for no good reason and really butchered it. Oh well.

So anyways, we moved to trying to upload new code to the RP2040 prop maker feather chip. That took a little to find a USB-C that actually could transmit data and wasn't only used for charging other devices. Turns out the USB-C that came with my MacBook has that capability, but interestingly the USB-C I just got with my iPhone 16 isn't capable of transmitting data (or at least it doesn't work with the chip). We downloaded the Arduino IDE to run the program. I believe we were using this tutorial guide on the RP2040 prop maker feather to teach us how to use the Arduino IDE as well as download new code (link). At some point, we moved to a "Blink" code which was a two-step. We would download the first part of the new code and it would blink a single LED that's found on the chip board itself. That worked. But when I went to the second part of the project it should have blinked the first LED on the strip and it didn't work. So that's where I got stuck for several hours back in April. I knew the chip worked, I knew the strip worked, and I knew it accepted new code, but for some reason the new code wasn't illuminating the RGB LEDs. After about 8 hrs I gave up and shelved the project for 5 months. And that brings us to this past weekend.

I invited over a neighbor who has worked for with computers and at a major company for several decades. So he knows his stuff. We messed around with the project for about an hour. We went through many of the same things I did back when I was first trying this in April, and admittedly I should have reached out sooner because I couldn't really remember anything I had done the last time around to help troubleshoot the issues we were having. But after a while, I could tell he was getting frustrated as well. So he finally said to me that he was going to call in the big guns and phone a friend. I was really interested to see who he was going to contact. It was chatGPT. He pulled out the phone, gave a prompt of the problems we were having, and after a few short back and forth chatGPT had it solved. Apparently, in chatGPT's opinion, the code was missing a line informing the chip that it needed to send power to the RGB LEDs. So the code needed two additional lines and that should fix it. And lo and behold, but we loaded the code and it worked on all 117 LEDs. It had it solved in under 5 minutes. So then my neighbor had to run some errands and left me to figure out the rest now that we got it illuminated. I said, what if I've got more issues. Just ask chatGPT and it'll figure it out.

So I left the project for a bit, and then came back to it with a prompt describing the situation. Something like, "I'm making a prop using RP2040 prop maker feather from Adafruit, and a Neopixel strand with 117 LEDs, and powering with a 2200mAh battery, and want it to illuminate with a theater marquee style chase in all blue." It took it less than a second and it was spitting out the code. And the code worked (with a few small tweaks that were specific to the RP2040 that we had learned from the first go around). So then I had it make a comet style lighting where it swirls around. And then it did. And then I said I wanted the comet longer, and the blue dimmer, and it to move slower. And then it did. Each time I'd come up with a building request on the last one, and then within seconds it would have a complete code for me to use. It really blew my mind how easy it was compared to me trying to figure it out on my own. And it literally wrote everything in seconds. Like it already knew everything. It was kind of weird really. But it worked. So I just back and forth with it for an hour making small tweaks to the display. I can't upload the video, but right now G's favorite was the comet display where it swirls around the racket.


thumbnail_IMG_8193.jpg

I was thinking about it, and honestly, we could probably get it to program an entire theatrical show in phases with each lasting a certain length of time. The possibilities seem limitless, and it definitely seems like this opens us up to a ton of new ideas on future costumes with how accessible it feels. So I went into this part of the project, programmable LEDs, with a lot of hesitation since it felt like such a big step forward for us. And at least initially it was incredibly frustrating, and not as user friendly as I had hoped. Countless tutorials and youtube videos weren't giving me the answers I was hoping for. But then in minutes chatGPT was able to do everything and more that I asked. So I really feel like this is something that almost anyone can do following the same system I did, and really opens the door to lots of new things.

So we've got some steps left, but we've taken a big step with only three weeks to go. I need to paint the racket blue, string in the EL wire, glue down the pipe, attach the LEDs to the pipe, glue the top of the foam down, and attach the handle with magnets. I may also wrap the handle with either white or blue fabric to add a second additional layer of security on keeping it together. Seems like a lot, but that can be done in a few hours (or at least I hope).

thumbnail_IMG_8200.jpg

ETA - Oh I forgot, here's the code we've initially settled on in case anyone wants to use it as is. Credit to chatGPT for writing it.

#include <Adafruit_NeoPixel.h>

#define NEOPIXEL_PIN PIN_EXTERNAL_NEOPIXELS // Pin where NeoPixel strip is connected
#define NUMPIXELS 117 // Number of NeoPixels
#define NEOPIXEL_POWER_PIN PIN_EXTERNAL_POWER // Power pin for Prop Maker Feather

Adafruit_NeoPixel strip = Adafruit_NeoPixel(NUMPIXELS, NEOPIXEL_PIN, NEO_GRB + NEO_KHZ800);

void setup() {
pinMode(NEOPIXEL_POWER_PIN, OUTPUT); // Enable NeoPixel power pin
digitalWrite(NEOPIXEL_POWER_PIN, HIGH); // Turn on power to the strip

strip.begin();
strip.show(); // Initialize all pixels to 'off'
}

void loop() {
cometEffect(10, 20); // Adjust wait time and comet tail length as needed
}

// Comet-style effect
void cometEffect(int wait, int tailLength) {
// Loop through the pixels
for (int pos = 0; pos < NUMPIXELS + tailLength; pos++) {
strip.clear(); // Clear the strip

// Set the main comet pixel
if (pos < NUMPIXELS) {
strip.setPixelColor(pos, strip.Color(0, 0, 90)); // Main comet pixel in dimmer blue
}

// Set the tail pixels
for (int i = 1; i <= tailLength; i++) {
if (pos - i >= 0) {
strip.setPixelColor(pos - i, strip.Color(0, 0, 24)); // Tail in an even dimmer blue
}
}

strip.show(); // Update the strip
delay(wait); // Wait for a moment
}
}


Next -Darcy's Laser Dagger - Part 1
 
Last edited:
Amphibia Costumes - Darcy Laser Dagger - Part 1

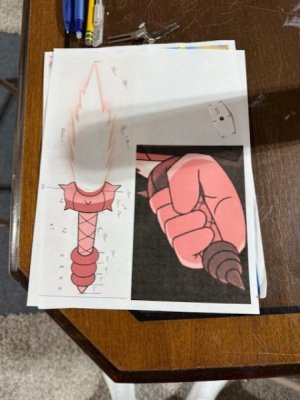
With time dwindling, and the use of RGB LEDs still an unknown, I decided to move forward with making Darcy's Laser Dagger even if we didn't end up using it. So not terribly different than Anne's tennis racket, Darcy's dagger is only on screen for a few seconds during the entirety of the show. It's actually just a smaller version of King Andrias' Laser Sword.


thumbnail_IMG_8175.jpg

So I took some measurement to get a rough idea on the proportions. Given my hand size, I knew the grip of the dagger on the hilt needed to be bigger than the proportions would reasonably allow me to make a dagger. So let's say either Darcy has some truly small hands, or the dagger isn't quite as proportional as it seems.

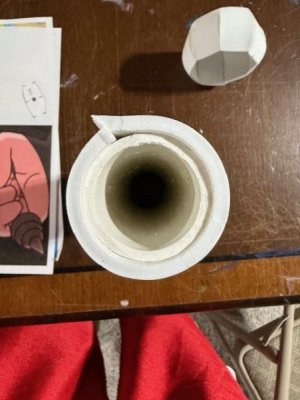
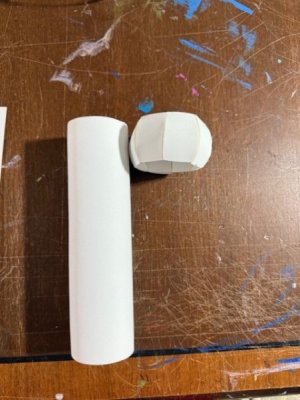
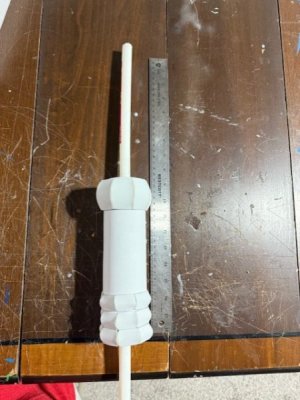
I started by using a core made of a core of paper towel to make the hilt. It wasn't as flimsy as normal paper towel cores though, but I wasn't exactly sure where I got it from. I wrapped it in 2mm EVA foam. But it became apparent that while that core was stiff and light, it might not be safe given I'm putting electrical equipment on the inside. So I pivoted to PVC pipe instead. Still stiff, but not as light. The 1.5 inch inside diameter and 2 ft long pipe I chose was $2 at Home Depot. I cut the pipe down to about 22cm instead based on the proportions I had drawn up. Instead of 2mm EVA foam, I wrapped it in 6mm foam and glued it down with Barge All-Purpose cement. This added depth would give me some room to add magnets to add the tip of the dagger base to, so that I could still have access to the electrical components inside.


thumbnail_IMG_8177.jpg

I shaved it down to make the edges flat. Next up was the sea urchin at the top and bottom of the hilts. I used the sphere pattern from Kamui Cosplay (link) to make the urchin. I printed the pattern at several different sizes. I was looking for something that would give me a circular ring instead of a sphere. Additionally it needed to be just about 7.5-8 inch in circumference based on the hilt's size. So with 8 wedges, each wedge needed to have a top and bottom length of about 1 inch. Then they were separated by about 4.5 cm with a goal of a 4 cm final width. I bowed the edges of the pattern (like the original sphere pattern) to give it the raise appearance. I had made the first one assuming it was going to be the lower 2mm wide piece that is in triplicate, but it bowed less than anticipated and instead was the top piece.

thumbnail_IMG_8176.jpg

I then went back and made the pattern smaller with the distance between the two ~1 inch lines about 2.5 cm to get the final 2cm length from top to bottom. G helped trace the 32 pieces, and then we glued them all together using the Barge glue. I haven't attached them to the hilt base yet, but this is what it'll look like.

thumbnail_IMG_8201.jpg

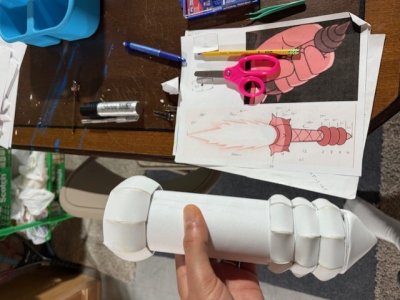
That bottom tip is attached with magnets, but the connection is flimsy at best. So I've got to do more work there. But you can start to see the similarities. I moved to the 6mm EVA foam partially because of the magnets, but also because it would allow me to cut in the criss cross designs on the grip with the dremel. So now I can add some depth to the piece without hitting the core.

I plan for the laser portion of the dagger to be nearly equal in length. It'll have a smaller PVC core with the RGB LED strips attached to it and then the electrical components housed inside. The laser portion will be made with the translucent Plastazote foam. Haven't decided on thickness yet, but probably whatever I've got enough of laying around. Here's a rough idea on total length.

thumbnail_IMG_8199.jpg

Ignore the bottom portion of the PVC as it'll be cut off.

The missing piece of the whole project was illuminating the laser sword. So I got really excited when I was able to make the tennis racket LEDs work, and wanted to test out some theoretical designs before the piece is even ready. I just prompted chatGPT much the same way as the tennis racket, but this time asking for it to give me an illusion of a flickering fire animation. I had previously found code for Arduino in the FastLED library, but it was super complicated, and not something I was going to be able to easily change. But chatGPT was quick to give me a pretty good code.


thumbnail_IMG_8195.jpg

Bit I ended up telling it that it wasn't quite good enough, and it needed to be more complicated. So it wrote an even more complicated fire effect code. And then I told it, it was too red, and the tip was too white, and it was too bright, and on and on and on. We went through several iterations of code, and each time chatGPT told me how it changed the code, what those changes did, and then provided the code. It really held my hand through the whole thing. So now the code is using some random generator or something to determine the probability of the next color in sequence as if it's a flicker of flame or the restart of a new flame somewhere else along the line. I don't really know, but the code looks complicated enough to me:

#include <Adafruit_NeoPixel.h>

#define NEOPIXEL_PIN PIN_EXTERNAL_NEOPIXELS // Pin where NeoPixel strip is connected
#define NUMPIXELS 20 // Number of NeoPixels
#define NEOPIXEL_POWER_PIN PIN_EXTERNAL_POWER // Power pin for Prop Maker Feather

Adafruit_NeoPixel strip = Adafruit_NeoPixel(NUMPIXELS, NEOPIXEL_PIN, NEO_GRB + NEO_KHZ800);

// Heat array to simulate fire
uint8_t heat[NUMPIXELS];

void setup() {
pinMode(NEOPIXEL_POWER_PIN, OUTPUT); // Enable NeoPixel power pin
digitalWrite(NEOPIXEL_POWER_PIN, HIGH); // Turn on power to the strip

strip.begin();
strip.show(); // Initialize all pixels to 'off'
}

void loop() {
fireSimulation(20); // Adjust the delay for effect speed
}

// Function to create a flickering fire effect
void fireSimulation(int delayTime) {
// Step 1: Cool down all cells a little bit
for (int i = 0; i < NUMPIXELS; i++) {
heat = max(0, heat - random(0, 10)); // Cool down randomly
}

// Step 2: Heat diffusion
for (int i = 0; i < NUMPIXELS; i++) {
if (i == 0) {
heat += random(160, 255); // New sparks at the bottom
} else {
// Drift and diffuse heat upwards
heat = (heat + heat[i - 1]) / 2; // Average with the pixel below
}

}

// Step 3: Randomly add new sparks of heat
if (random(10) < 3) { // 30% chance to create a new spark
heat[NUMPIXELS - 1] += random(160, 255); // Add a new spark at the bottom

}

// Step 4: Map heat values to colors and set LEDs
for (int i = 0; i < NUMPIXELS; i++) {
setPixelColorFromHeat(i, heat);

}

strip.show(); // Update the strip
delay(delayTime); // Wait for a moment
}

// Function to set the pixel color based on the heat value
void setPixelColorFromHeat(int pixel, uint8_t temperature) {

uint8_t r, g, b;

// Map heat to color with further reduced brightness
if (temperature > 200) {
r = 150; g = 100; b = 0; // Softer bright yellow

} else if (temperature > 100) {
r = 150; g = 75; b = 0; // Softer bright orange

} else if (temperature > 50) {
r = 150; g = 50; b = 0; // Dim orange

} else if (temperature > 0) {
r = 150; g = 15; b = 0; // Dimmer softer orange

} else {
r = 0; g = 0; b = 0; // Off

}

strip.setPixelColor(pixel, strip.Color(r, g, b));
}

So all the power to chatGPT on getting that figured out. Again, no video, but trust me that it looks pretty cool.

thumbnail_IMG_8190.jpg

With three weeks to go, the hilt needs to be finished/primed/painted, the translucent foam laser portion needs to be made, and then the electronics need to be attached.

Next -Anne's Tennis Racket - Part 4
 
Last edited:
Fantastic that chatGpt was great for you. I don’t need a lot of generative AI but I play with it when I can. Very good use case. My comment on it though, “with great power, comes great responsibility”. That is not directed at you but Open AI.
 
Fantastic that chatGpt was great for you. I don’t need a lot of generative AI but I play with it when I can. Very good use case. My comment on it though, “with great power, comes great responsibility”. That is not directed at you but Open AI.

For sure!
 
Amphibia Costumes - Anne Tennis Racket - Part 4 & Darcy Laser Dagger - Part 2

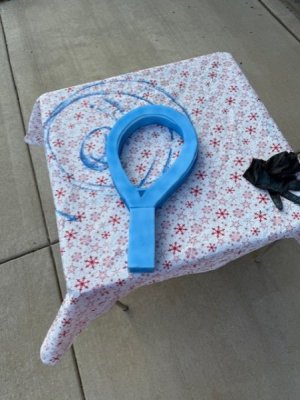
Some brief updates. The tennis racket received no priming before painting. I've found the translucent foam with intent on light passing through tends to look better without the Flexbond coat. I tried out several different blue airbrush paints that I had, and G and I settled on the Alclad II Electric Blue that we just used to paint her shoes. It didn't take much of the paint, and we got a reasonably good coverage.

thumbnail_IMG_8202.jpg

The issue is that after letting it set for 24hrs, the paint comes off to the touch. So I did some testing with the Flexbond primer and Alclad II Aqua Gloss clear coat to see if either prevented the paint from coming off to the touch. Thankfully both did, so I'll use the Aqua Gloss on the entire piece and that should hopefully keep the paint on it. I was hoping for a little more of an even coat, but it's not too bad.

***

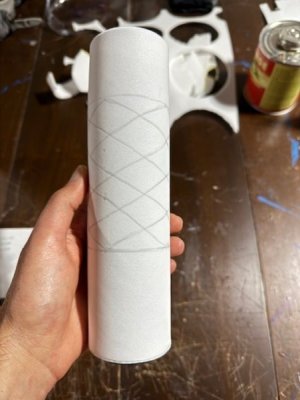
Alright, moving on to the laser dagger. I wanted to give the grip some texture and to best match the cartoon image. So I did some math on the circumference of the circle to determine how I could draw even lines across it. It gave me a nice criss cross pattern.


thumbnail_IMG_8204.jpg

I then used the Dremel detailing tip to carve out those lines. This took some time, and the Dremel was definitely trying to go off and do its own thing several times. After getting the initial carving done, I used a piece of 120 grit sandpaper to wear down some of the bits and pieces. Lastly, I used a different tapered Dremel tip meant for finishing/polishing, and cleaned up the lines.


thumbnail_IMG_8205.jpg

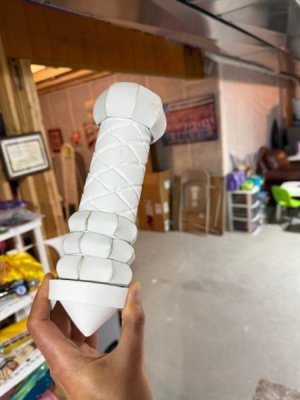
I wasn't satisfied with the cone tip. I had attached three small neodymium magnets to both the cone and the hilt. After my experience with the Ms Marvel fist, I knew that the magnets had a likelihood of being ripped from their place during use. So I put a piece of 2mm foam in-between to prevent that from happening on the dagger. But the 2mm foam x 2 (one piece on each) ended up being too much for the magnets. They could hold the cone in place, but in use, it definitely wouldn't hold up. Especially once the electronic equipment is on the inside. So I needed a different strategy. I decided to try velcro, but one of the reasons I don't like the velcro is because the extra thickness of the velcro itself between the two pieces is clearly visible. I came up with a way to hide it by putting a collar on the bottom of the hilt. The collar was 1/2 attached to the hilt, and the other half is floating off the edge. This way the cone will fit snugly inside that space, and you won't see the velcro holding the pieces together. You can see that in the above image.

Once that was taken care of, I just used the Barge All-Purpose Cement to attach the sea urchins (rings) to the top and bottom of the hilt. The pieces puckered inwards a little more than I wanted them to, but as G pointed out, no single person is going to know any different especially for a piece that only appeared on screen for like 10-15 seconds total.

Next up was the laser dagger itself. This went through several trials and errors. The first step was determining the circumference of the edge of the hilt where the laser portion attached. It was roughly 8 inches. Then I divided that by 3 to know the length of the bottom of the three triangles. I also knew the total length of the laser (24cm) so then I just made three triangles matching that size. I taped them together and got a cone shape. But it didn't look like a flame/laser.

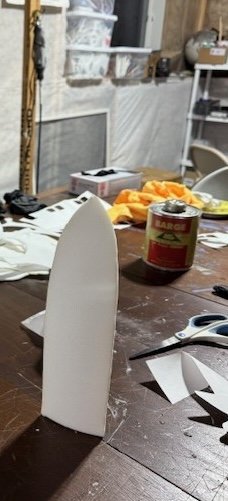
So then I tried again. On the second attempt, I tapered the edges of the laser to give it a more rounded appearance. I also blunted the tip more. I got the size right, but it just didn't look like a flame/laser.


thumbnail_IMG_8207 copy.jpeg

I considered adding some extra pieces to it. So I pulled out the patterns of pieces I used for Anne's hair, the shoulder armor pieces, and the Monsters Inc toes/horns. I tried them all, but nothing looked quite right. Steph said it looked more like a cactus.

So then I tried asking chatGPT. I described what I was looking for, and it suggest I make it myself in Blender and then convert it to a pepakura (paper folding 2-D). I told chatGPT that I didn't have Blender and requested that it make it. So we went back and forth on some specifics, and then it outputted what it thought I wanted. Admittedly it was a bit of a disaster. It essentially just took phrases from our conversation and then put it on a piece of paper with a design of a whimsical fire. It had the words "tab", "7.1 centimeter diameter", "6mm EVA foam", and other phrases in non-sensical places. So it tried, but it was a big miss for sure.

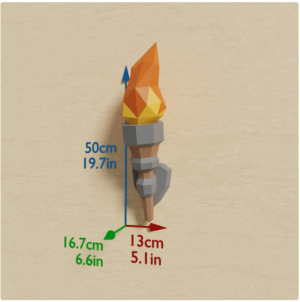
I looked on Etsy and found a pepakura pattern for a torch that looked like it might work (link).

Screenshot 2024-09-25 at 9.00.08 AM.png

So I ended up buying that to try. Turns out my eyes were bigger than my timeframe. It's not so hard when it's connected pieces of paper that can be folded into place, but the 13 pieces on paper are more like 100+ if I cut them out onto foam. And then there's no guidance on how the angles should necessarily be folded when it comes to transforming to foam. Like I wouldn't know exactly how to dremel the edges so that each piece aligned correctly. So that ended up not working. Although it's a cool project potentially for a different day, because it's got a cool look to it. Would make for a good prop for a Minecraft costume.

Then Steph suggested just print out the 2D form of the laser from the cartoon itself. Print it three times, and then attach the edges to form a 3D shape. It was worth a try. I printed it off three times, and then reversed #2 compared to #1. This gave me a matching edge to tape together. The issue was the third one. It matched one edge on #1, but was the wrong edge for #2. So I went back to the original image, and printed off 2 copies instead. For the third one, I took the original image and cut it in half. Then I duplicated the image for left and right. This way it had the same edge on both sides of #3. I printed that one off, and then I could get all edges to align properly. And that gave me this:

thumbnail_IMG_8207.jpg


thumbnail_IMG_8208.jpg

It definitely has the right look. It's not quite fully 3D, but it also does give a good enough appearance to let everyone know what it is. So Steph for the win! It definitely looks better with the edges printed darker. So I'll need to be sure to mimic that when I lightly paint it. The length is about 27cm, so I'll be able to get about 8.5 inches or 13 RGB LEDs along the PVC pipe on the inside. It remains to be seen whether I'll need just a single side of 13 LEDs, or if doubling/tripling it would be necessary.

So lots of troubleshooting, but successfully navigated the potential pitfalls. Less than 3 weeks to go!

Next -Anne's Tennis Racket - Part 5
 
Last edited:
Great job on the costumes! What a journey!

Bringing it back to running for a second ... as I leave my old running life - it seems like people are getting faster faster. Qualifying times are stricter and cut offs are larger. What do you think is causing this? Shoes? Huge net downhill races? Interest? I went for a run with a local running group and they had almost 400 people there! My previous running group exploded from 15 to 200 members.
 
Last edited:
Bringing it back to running for a second ... as I leave my old running life - it seems like people are getting faster faster. Qualifying times are stricter and cut offs are larger. What do you think is causing this? Shoes? Huge net downhill races? Interest? I went for a run with a local running group and they had almost 400 people there! My previous running group exploded from 15 to 200 members.

Here's a start to the question:

https://medium.com/runners-life/fin...rs-are-getting-faster-and-slower-dae3ccadfed2

Since it's behind a paywall I won't pull any of the graphs. But the summary is that the average finisher is slower because the tails are extending. So there are less finishers in the middle of the times, and more runners either finishing faster or slower.

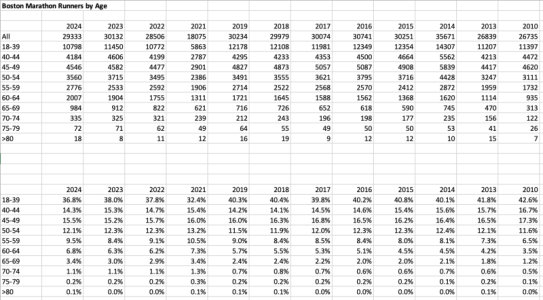
I then looked at all Boston Marathon participants which includes charity. The thought was that younger runners are in general faster than older runners. So are more younger runners meeting the standard and driving the qualifying to faster cutoffs? The answer was no.

Screenshot 2024-09-26 at 1.53.06 PM.png

I also looked at participation rates. There isn't any new new data, but for the most part the data was trending that it was either stagnant or slightly down over the last couple years compared to the last decade plus. So it's not like there's more runners, therefore the percentile of runner capable is remaining the same, but because of more runners that equals more runners in a percentile.

So it goes back to the idea from the first one, we know that runners are faster (and slower) there aren't more disproportionately young runners, and there aren't more marathon finishers in general. So it's the "same" runners at the fast end just getting faster.

I don't doubt the shoes play a role. I can't say definitively they are the sole answer. The Vaporfly was released to the public in 2017, and many other shoe makers followed suit with their own carbon plated shoes.

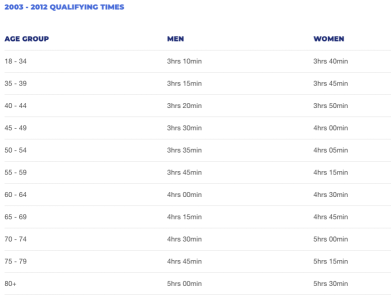
Boston Standards were the same from 2003-2012

Screenshot 2024-09-26 at 2.01.42 PM.png

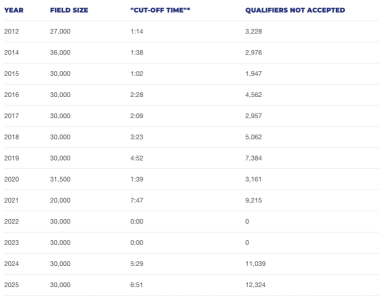
2012 had a rolling enrollment system, and was the first year that not everyone that met the standards was accepted.

They changed the standards in 2013 due to the people not qualifying.

Screenshot 2024-09-26 at 2.04.54 PM.png

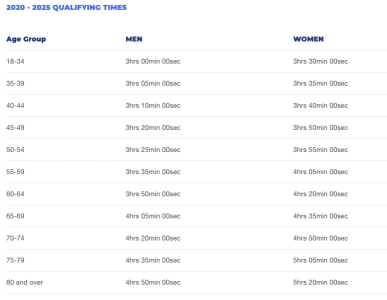
2020 was the second time the standards were adjusted downwards again by 5 min.

Screenshot 2024-09-26 at 2.04.10 PM.png

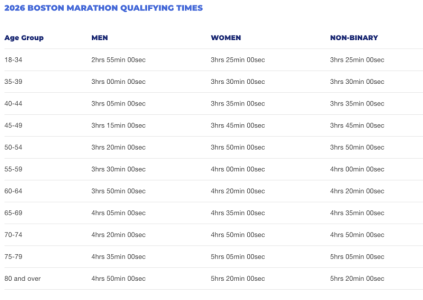
And now for the 2026 race have brought the times down again by another 5 min:

Screenshot 2024-09-26 at 2.06.12 PM.png

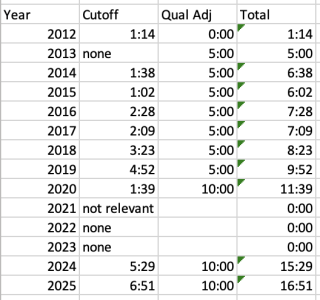
Using these times, we can just equate them back to the original

Screenshot 2024-09-26 at 2.00.44 PM.png

Screenshot 2024-09-26 at 2.09.33 PM.png


Screenshot 2024-09-26 at 2.11.45 PM.png

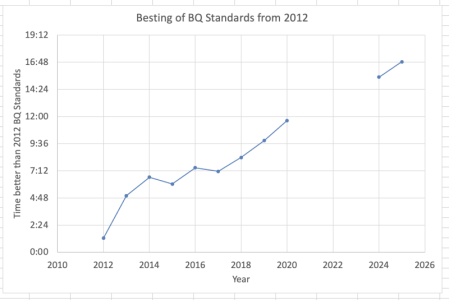
So I look at this and see a definite difference in the trend of pre-2017 and post-2017 data. For five years pre-2017, runners were besting the standard by 5-7 min consistently. But then post 2017 it has risen in a five year period from 7 min to 17 min. I can't say it's the shoes, but definitely shoes, nutrition, better access to training plans, group running, faster race courses, etc. could all be playing a role. I don't think I have the data to parse out the exact reason.

ETA - Also don’t discount runners motivation to hit arbitrary made up numbers. The stats show large % finisher stats around sub 3 or sub 4 or BQ standards for an age group. So an increase in performance could simply be driven by people being motivated enough to hit arbitrary standards. Especially in the age of social media. I don’t know what it was like for a Boston Qualifier in 2000 vs 2024 in disseminating that information to friends and family as a motivator.

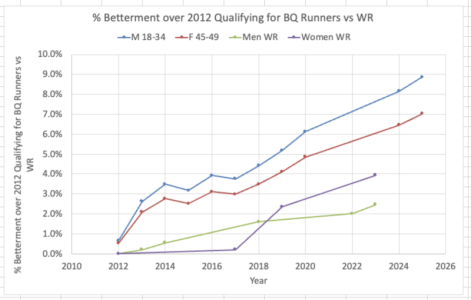
ETA2 - I decided to compare the % improvement we've seen in these BQ runners (using the negative from the cutoffs) compared to how the WR has dropped over the last decade plus.


Screenshot 2024-09-26 at 3.08.47 PM.png

The BQ runners have improved by about 7-9%, whereas the WRs have improved by 2.5-4%. So the BQ runners have lowered their times by more, but not by a huge margin all things considered. Certainly believable that the BQ runners have more room to improve compared to the world class athletes.
 
Last edited:
Anecdotally it just felt like running was booming and faster, it's nice to see it backed up with data. Interesting point that the average finisher is slower because of the longer tail, which makes sense with the growing number of runners. Arbitrary time goals (sub 3, BQs) is also a good point since racing is all about your finishing time. Having running/nutrition plans all over the internet definitely helps too. I also forgot the role social media plays since I have no SM accounts, but I do hear about it a lot. Even waiting to pick up my bib at the Disneyland Halloween Half, I saw a lot of people go up to others who they followed on SM. As much as running can be a personal identity, with SM it can become a larger part of your narrative amongst friends/followers.

I was wondering if the initial surge (circa 2021) was due to being pent up during Covid, but it's still growing. I feel like some of it has to do with wanting to connect IRL especially when you're WFH. Before Covid, the big exercise crazes were spin and Barrys, but maybe running allows more connection and community than classes. Anyways, thanks for digging through the data - that was a quick turnaround!
 
Amphibia Costumes - Anne Tennis Racket - Part 5 & Darcy Laser Dagger - Part 3
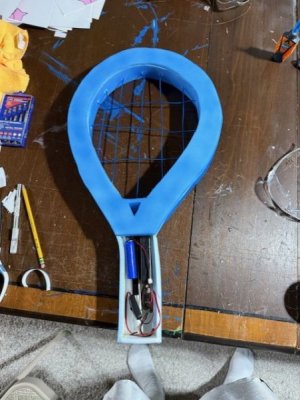
Home stretch! Let's talk about the racket first. Alright, so after the Aqua gloss layer, the blue paint no longer comes off to the touch. So hooray! The next step was weaving in the "wire" of the racket. We wanted it to also glow blue, so we're using the Adafruit Electroluminescent wire that we've previously used for Ms Marvel and Shang-Chi (link). The main draw back to this is it's not all that bright. But since this isn't the main show (like it was for Ms Marvel and Shang-Chi), then it's a nice extra touch. Additionally, since I've still got the battery packs from the other project, the wire itself is inexpensive for 8 feet.

So I lined up a piece of paper underneath the racket and determined roughly how many times I could go back and forth with the 8 feet of wire.

thumbnail_IMG_8211.jpg

I used a small screwdriver to poke small holes in the racket, and then weaved the wire through it. The goal was to choose a weaving pattern that had the least wasted wire on the inside. So I went down to up starting on the right side, and then did all the ups/downs. Then when I made it to the upper left corner on the up, I did a small weave to start going left to right starting from that same corner. This allowed me to maximize my movement. I made sure to weave the left/right wiring through the up/down to make it more secure.

thumbnail_IMG_8216.jpg

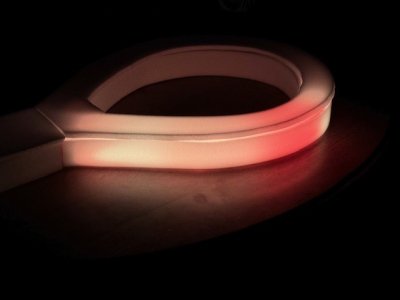
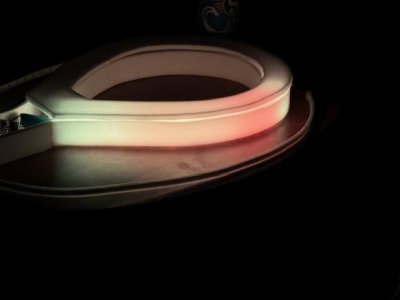
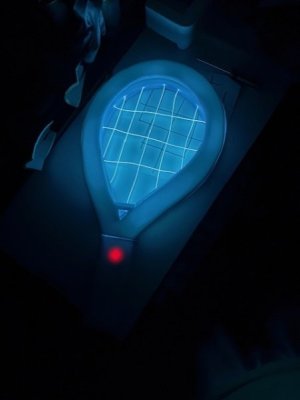
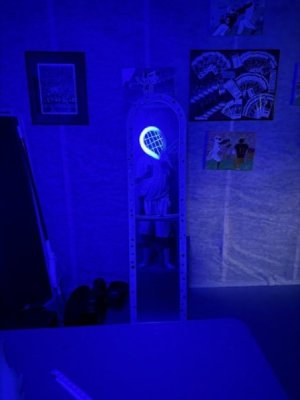
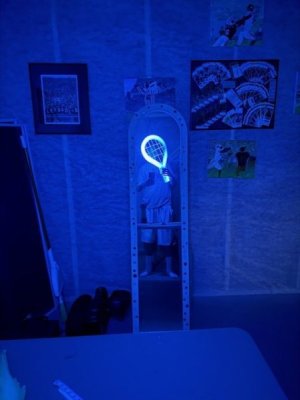
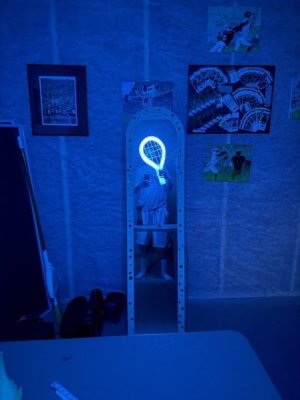
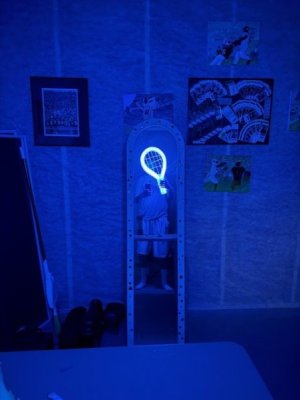
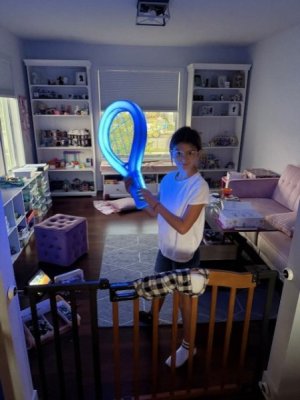
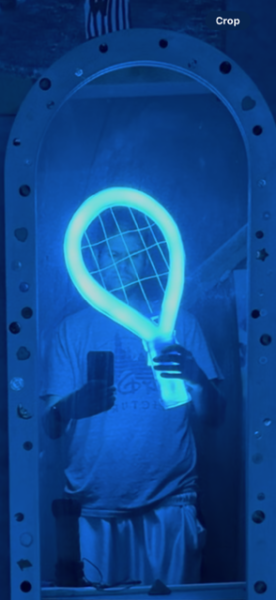
Pretty easy to do, and it's got a good look during the day time. But it really shines when it's dark.


thumbnail_IMG_8213.jpg

Of course, the issue here is the camera always picks up the light more than in real life. So it's not quite as illuminated as it appears in the picture. I also will cover the red battery light with a piece of tape. But as an extra detail for the racket, it looks great. Next up is attaching the PVC frame, and then the LEDs. ChatGPT and I have been hard at work on some more advanced coding. Taking it from a simple light up, to an entire theatrical display. Excited to see how it turns out.

****

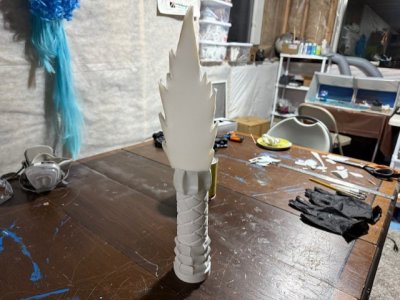
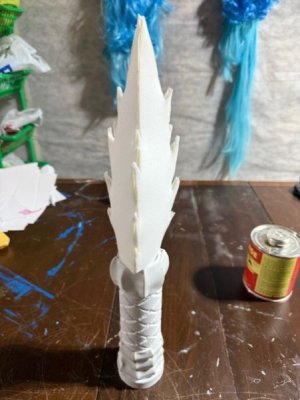
As for the laser dagger, we left off having finally made a suitable flame pattern using the cartoon 2D image and printing it twice as reverse images and a third time with the same image repeated on each half. Next up was taking that pattern and moving to the Plastazote translucent foam. Then, I used the Dremel to angle all the edges to make it easier for them to attach each other in this triangle design. I used the Barge All-Purpose cement glue to attach it.

thumbnail_IMG_8210.jpg

thumbnail_IMG_8209.jpg

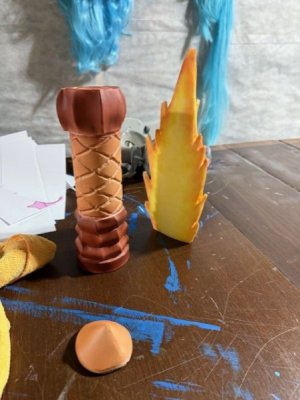
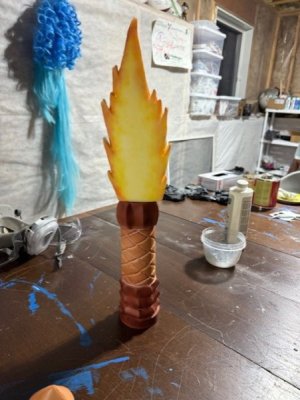
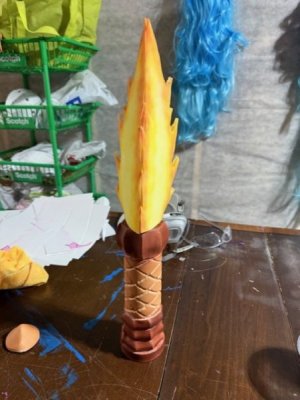
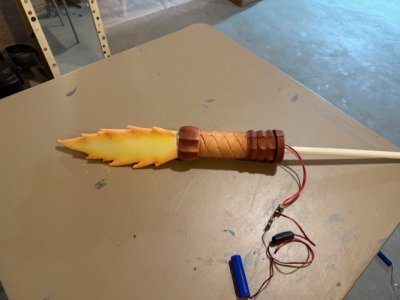
We all liked the look, so I moved forward to painting. I put two layers of Flexbond on the handle, and no Flexbond on the flame. For the flame and the handle, I used the Vallejo Model Air airbrush paints. For the flame, I mixed a copious amount of white with the mild yellow I had to make the center of the flame. Then I used less and less white as I worked outwards to make the flame more yellow. Lastly, I mixed in a bit of red to make the yellow move towards orange. I only did a single layer of light painting so that the LEDs come through without much disturbance.

For the handle, I used mahogany on the upper and lower part of the hilt. The middle grip and cone tip were painted using mud brown. I ended up doing two medium coats to get full coverage.

thumbnail_IMG_8212.jpg


thumbnail_IMG_8217.jpg

thumbnail_IMG_8218.jpg

1727446414837.png

Pretty close to the cartoon image I was working off of. Next up for that is a clear coat of Aqua Gloss, and then putting together the LED show.

Next -Anne's Tennis Racket - Part 6
 
Last edited:
9 Weeks to go

That week where I might have gained a Turkey Trot running buddy.

running-guy.gif


9/23/24-9/29/24
Mon (9/23): OFF
Tues (9/24): 5 miles @ Easy (9:15 min/mile, 131 bpm)
Wed (9/25): 4x30s + 4x1 mile + 4x30s (TDAP-x,x)
Thurs (9/26): 5 miles @ Easy (9:28 min/mile, 133 bpm)
Fri (9/27): 5 miles @ Easy (9:14 min/mile, 132 bpm)
Sat (9/28): 5 miles @ Easy (9:07 min/mile, 132 bpm)
Sun (9/29): 4 sets (30+30+120) (TDAP- 5:40)

Total Run Miles - 33.9 miles
Total Run Time - 5:18 hours
Total Strength Time - 0:00 hours
Total Training Time - 5:18 hours


Tuesday
Conditions - ⛅ Broken clouds, Wind 7mph to ?
Start: Temp+Dew = 69°F + 55°F; FL - 69°F
End: Temp+Dew = 69°F + 55°F; FL - 69°F

I vaguely remember my body feeling pretty beat up. But I don't remember the details. Like my resting HR and Body condition scores are in good places right now, but I'm just feeling beat up.


Wednesday

Conditions - ⛅ Few clouds, Wind 5mph to ?
Start: Temp+Dew = 73°F + 53°F; FL - 72°F
End: Temp+Dew = 68°F + 57°F; FL - 72°F

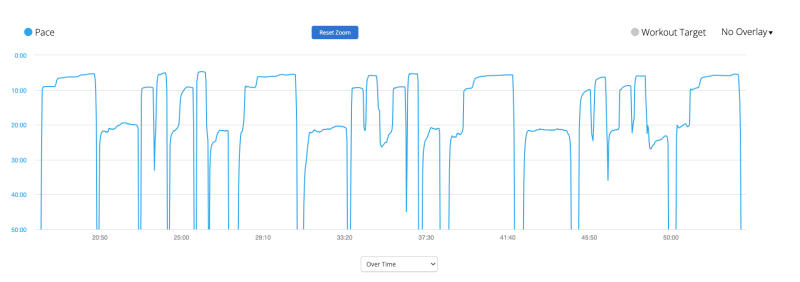
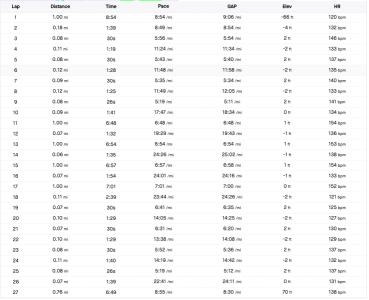
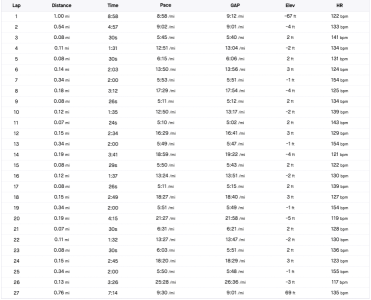
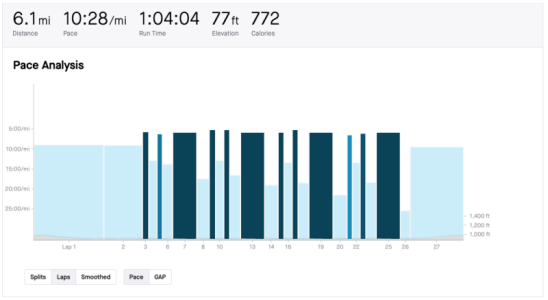
Back to the Daniels T pace. Instead of increasing the duration of the reps from 1 mile, I'm reducing the rest periods compared to last time. So this time around I was aiming for 1.5 min between reps. Pretty sure last time was an extended 3 min rest. Goal was 4x30s + 4x1 mile + 4x30s. The temps weren't too bad, so the adjustment off of the 6:41 goal wasn't too bad at 6:49. Haven't had a good good run since the 800m test run, so I was looking for a good one here.
Screenshot 2024-09-30 at 8.45.05 AM.png

Screenshot 2024-09-30 at 8.45.15 AM.png

Started off with the 4x30s in a controlled manner. Hit them at 5:56, 5:43, 5:35, 5:19. Body was feeling pretty good on the 5:19 and I remained hopeful it would carry over into the Daniels T reps. The first Daniels T started off hot. According to the Garmin output, somewhere in the 6:20s. So I noticed not too long into the rep and was able to pull back such that the rep slowly got slower. Enough so that I finished feeling pretty good with a 6:48. Which is right on target. The next rep, I tried to hold back more so that I didn't come out too hot. That worked, because I opened the rep in the 6:50-7:00 range. I did well maintaining this pace until the last 0.25 mile or so when I kicked it up as the pace dragged a touch and was hitting 6:30s to close. Finished the rep in 6:54. So a little slow, but well within margin. A better rep given the slow start fast finish compared to rep #1. I tried to repeat that for rep #3. Opened a bit too quick at 6:40s, then slowed to 7:10s, then corrected and sped up into 6:40s to close. So finished the rep in 6:57. I was really working for it now. I knew I could manage the fourth rep though. Started off in the 6:50s, then slowed to 7:10s, then tried to pick up pace into the 6:50s. Finished at 7:01. So the Daniels T reps were 6:55 avg or 6:48 adjusted. Only about 6 seconds off pace goal. I was hoping for better because of the lower volume and shorter duration held, but it's a good workout. Not the good good I was looking for though. Afterwards, my body felt pretty tore up. So I eased into the last 4x30s reps at 6:41, 6:31, 5:52, 5:19. The body was a touch springy on the cool down.


Thursday

Conditions - ⛅ Few clouds, Wind 3mph to ?
Start: Temp+Dew = 74°F + 56°F; FL - 74°F
End: Temp+Dew = 73°F + 55°F; FL - 74°F

Body was sore, but not too bad. Saw a neighbor kid on my route named Ben. He just started kindergarten, and he always likes running up to the sidewalk when he sees me and shouts my name. So we always exchange pleasantries as I run by. Asked him what he was dressing up as for Halloween, and he said "Monsters". Got too far past and realized I should have asked for clarification on whether that was Monsters Inc or like monsters monsters.


Friday

Conditions - ⛅ Broken clouds, Wind 13mph to ?
Start: Temp+Dew = 73°F + 53°F; FL - 72°F
End: Temp+Dew = 72°F + 56°F; FL - 72°F

The last couple of weeks this has been a 8 miler at long run effort. But I've been feeling a bit beat up lately on my runs. So I decided to pull this one back to an easy 5 miler. I considered an easy 8 miler, but went with the lesser choice. Saw Ben's parents while on the run and got clarification that it's not Monster's Inc, but rather a villain. But his parents shared that he's been run training at the park recently. His house is right by the finish of the Turkey Trot park where the race finishes. The one I ran last year. So he saw me finish last year, and is intent on running the last loop with me in this year's race. So he's been practicing to try and be able to keep up. Lol, not sure when he was going to let me in on this one. So I'll be sure to keep an eye out for him. Guess I picked up a running buddy for the finish line.


Saturday

Conditions - ⛅ Few clouds, Wind 17mph to ?
Start: Temp+Dew = 64°F + 57°F; FL - 64°F
End: Temp+Dew = 67°F + 58°F; FL - 64°F

Got a later start, so it was warmer than it could have been. But definitely feeling Fall like here. Body felt good. It really appreciated pulling back on Friday's run and I felt fresher. HR and pace were in a good place too. Same HR three days in a row on the same route and pace dropped from 9:28, 9:14, to 9:07.


Sunday

Conditions - ☀️ Clear sky, Wind 13mph to ?
Start: Temp+Dew = 67°F + 60°F; FL - 67°F
End: Temp+Dew = 71°F + 61°F; FL - 67°F

This one was scheduled to be a doozy. The max R pace length of 2 min for 5 reps. I thought better of it and changed to 4 reps before the workout even started. I wanted four good good reps, more so than five good reps. So I was trying to put myself in a place to succeed. 4 sets (30+30+120) goal pace was 5:52 adjusted.
Screenshot 2024-09-30 at 9.02.41 AM.png


Screenshot 2024-09-30 at 9.02.49 AM.png

Screenshot 2024-09-30 at 9.04.49 AM.png

First set I was really trying to ease into the 30s reps. Don't overdo it. Focus on the 2 min reps. So I opened with 5:45 and 6:15. Then it was time for the first 2 min rep. I pumped up the jams and really tried to lock in. I wanted a progressive pace. And I nailed it. I opened at 6:30s and finished at 5:20s. The rep was a 5:53. But maybe that was just opening leg strength. I needed to carry through the whole workout. The 30s reps were 5:11 and 5:10. Alright, too quick. I'll pay for that. Or maybe I won't. I really tried to stay relaxed, breath rhythmically, and get those nose breaths as much as possible. Opened the 2 min rep at 6:10s and finished at 5:30s. Rep in 5:49. Alright, now we're cooking. 30s reps in 5:50 and 5:11. Really should have pulled back on the second 30s rep. Started off at 6:10s and finished in 5:40s on 2 min rep #3. It was a 5:51. Right on target still. Time to wrap it up. Just need one more set. 30s reps in 6:31 and 6:03. I was just trying to hold back for the fourth rep. Started in 6:10s and finished in 5:20s. So nailed the last one in 5:50 pace. Solid, solid, solid. Averaged 5:40 adjusted for the whole thing. So 24 sec/mile better than the run on 9/15 and more like the 800m TT on 9/8. Body felt decent on the cool down as well.

So I was right that I just needed a bit of a reset. It wasn't like the weather was all that much better, but just needed a quick switch up to get back on track. If I do the Hoot Hoot Hustle, then I'm two weeks away. We'll see what the weather looks like. This week is the first Daniels I (6:07), we bump the Friday long run to 10 miles, and then go back to a 90s rep workout on Sunday.
 
Amphibia Costumes - Anne Tennis Racket - Part 6

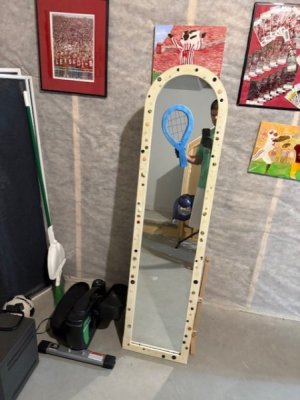
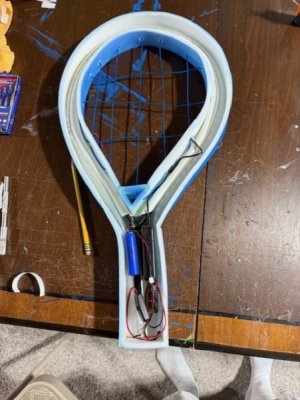
Alright, let's get this tennis racket wrapped up! So after verifying everything worked, it was time to put everything in its place and seal it up. I put some velcro on the EL wire battery pack so that it would stay in place. Additionally, I made sure not to velcro the battery pack closed... Then I also put velcro on the Lithium Ion battery to hold it in place on the PVX pipe. There ended up being 83 LEDs in total, and they were affixed to the PVX core using Barge All purpose and some Gorilla Glue dots.

thumbnail_IMG_8228.jpg

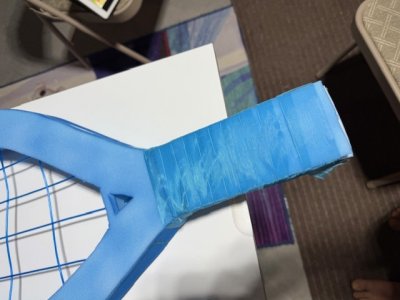
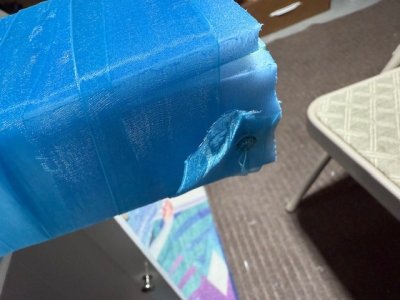
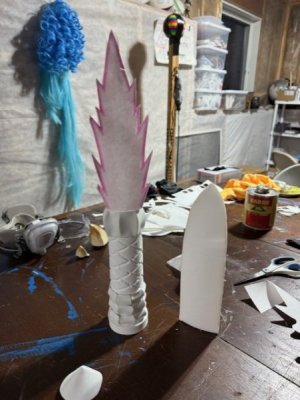
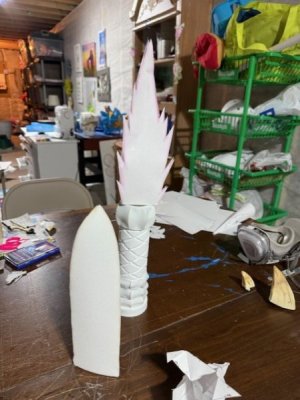
The chip is snuggly placed in the bottom of the piece with the on/off switch. When the handle is held, it's more likely to hold it from the upper end of the handle than the lower end. So the chip should be fairly safe. Once everything was secure and still working, then I used Barge All purpose cement glue to attach the top of the racket on. The shape and changed quite a bit because of the PVX core and EL wire, so it took some convincing for the foam to go into shape. But it's flexible enough that it did it.

thumbnail_IMG_8229.jpg

Next up was finalizing the code. I worked on it with chatGPT for several hours. At one point we had a code that was suppose to have growing fire effects from the handle, that would grow over time towards the middle, and then it would send comets from each fire that when they collide would bounce off and create a spark. It was an ambitious plan, but chatGPT wrote the code. Unfortunately, the code didn't work. It just kind of increased in length from the handle upwards. The comets and spark worked, but the effect didn't seem right. So we ditched it. We ended up having chatGPT write four separate codes. The first was for a single comet swirling around, the second was a sin wave effect that encompassed more of the racket, the third was a fire effect emanating from both sides of the handle individually, and the fourth was a twinkling effect. Here's the code:

#include <Adafruit_NeoPixel.h>
#include <math.h> // For sine wave function

#define NEOPIXEL_PIN PIN_EXTERNAL_NEOPIXELS // Pin where NeoPixel strip is connected
#define NUMPIXELS 83 // Number of NeoPixels
#define NEOPIXEL_POWER_PIN PIN_EXTERNAL_POWER // Power pin for Prop Maker Feather

Adafruit_NeoPixel strip = Adafruit_NeoPixel(NUMPIXELS, NEOPIXEL_PIN, NEO_GRB + NEO_KHZ800);

// Heat arrays to simulate fire for both halves of the strip
uint8_t heatLeft[NUMPIXELS / 2]; // From LED #1 to LED #41
uint8_t heatRight[NUMPIXELS / 2]; // From LED #83 to LED #42

// Parameters for wave effect
float waveSpeed = 0.2; // Speed of wave movement
float waveLength = 10.0; // Number of LEDs per wave cycle (wavelength)
float wavePhase = 0.0; // Phase of the wave (to animate)

// Array to hold brightness levels for twinkling effect
uint8_t brightness[NUMPIXELS];

// Timing variables
unsigned long previousMillis = 0; // Stores last time effect was updated
const long interval = 15000; // Interval at which to change effect (15 seconds)
int currentEffect = 0; // Effect index

void setup() {
pinMode(NEOPIXEL_POWER_PIN, OUTPUT); // Enable NeoPixel power pin
digitalWrite(NEOPIXEL_POWER_PIN, HIGH); // Turn on power to the strip

strip.begin();
strip.show(); // Initialize all pixels to 'off'

// Initialize random brightness values for twinkling effect
for (int i = 0; i < NUMPIXELS; i++) {
brightness = random(50, 255); // Start with random brightness
}
}

void loop() {
unsigned long currentMillis = millis();

// Check if it's time to change the effect
if (currentMillis - previousMillis >= interval) {
previousMillis = currentMillis; // Save the last time we changed effects
currentEffect = (currentEffect + 1) % 4; // Move to the next effect (0-3)
}

// Run the current effect based on the index
switch (currentEffect) {
case 0:
cometEffect(10, 20); // BlueComet effect
break;
case 1:
waterWaveEffect(20); // BlueWave effect
break;
case 2:
fireSimulation(20); // BlueFire effect
break;
case 3:
blueTwinkleEffect(20); // BlueTwinkle effect
break;
}
}

// Comet-style effect
void cometEffect(int wait, int tailLength) {
for (int pos = 0; pos < NUMPIXELS + tailLength; pos++) {
strip.clear(); // Clear the strip

// Set the main comet pixel
if (pos < NUMPIXELS) {
strip.setPixelColor(pos, strip.Color(0, 0, 255)); // Main comet pixel in blue
}

// Set the tail pixels
for (int i = 1; i <= tailLength; i++) {
if (pos - i >= 0) {
strip.setPixelColor(pos - i, strip.Color(0, 0, 120)); // Tail in dimmer blue
}
}

strip.show(); // Update the strip
delay(wait); // Wait for a moment
}
}

// Function to create a flowing water wave effect
void waterWaveEffect(int delayTime) {
for (int i = 0; i < NUMPIXELS; i++) {
// Calculate the wave value for this pixel (a sine wave)
float waveValue = sin((i / waveLength) + wavePhase);

// Normalize the wave value to a brightness level (0-255)
uint8_t brightness = (uint8_t)((waveValue + 1.0) * 127.5); // Convert from (-1, 1) to (0, 255)

// Set the LED color based on the current wave value and brightness
setWaterWaveColor(i, brightness);
}

strip.show(); // Update the strip with new colors

// Move the wave forward by adjusting the phase
wavePhase += waveSpeed;

// Add a delay to control the speed of the effect
delay(delayTime);
}

// Function to set the LED color to a blue tone based on brightness
void setWaterWaveColor(int pixel, uint8_t brightness) {
uint8_t r = 0; // No red
uint8_t g = brightness / 3; // Slight green tint for water effect
uint8_t b = brightness; // Full blue based on brightness

strip.setPixelColor(pixel, strip.Color(r, g, b));
}

// Function to create a flickering fire effect from both ends towards the center
void fireSimulation(int delayTime) {
// Step 1: Cool down all cells a little bit
for (int i = 0; i < NUMPIXELS / 2; i++) {
// More aggressive cooling for LEDs 1-10 and 83-74 for flickering effect
if (i < 10) {
heatLeft = max(0, heatLeft - random(0, 20)); // Faster cooling for first 10 LEDs
heatRight = max(0, heatRight - random(0, 20)); // Faster cooling for last 10 LEDs
} else {
heatLeft = max(0, heatLeft - random(0, 10)); // Normal cooling for rest
heatRight = max(0, heatRight - random(0, 10)); // Normal cooling for rest
}
}

// Step 2: Heat diffusion for both halves
// Left side (from LED #1 towards LED #41)
for (int i = (NUMPIXELS / 2) - 1; i >= 2; i--) {
heatLeft = (heatLeft[i - 1] + heatLeft[i - 2]) / 2; // Average heat diffusion
}

// Right side (from LED #83 towards LED #42)
for (int i = (NUMPIXELS / 2) - 1; i >= 2; i--) {
heatRight = (heatRight[i - 1] + heatRight[i - 2]) / 2; // Average heat diffusion
}

// Step 3: Randomly add new sparks of heat at the bottom of both halves
if (random(10) < 3) { // 30% chance to create a new spark
heatLeft[0] = random(160, 255); // New spark at the start of the left half
heatLeft[1] = random(160, 255); // Diffuse to next pixel

heatRight[0] = random(160, 255); // New spark at the start of the right half
heatRight[1] = random(160, 255); // Diffuse to next pixel
}

// Step 4: Map heat values to colors and set LEDs for both halves
for (int i = 0; i < NUMPIXELS / 2; i++) {
setPixelColorFromHeat(i, heatLeft); // Left half
setPixelColorFromHeat(NUMPIXELS - 1 - i, heatRight); // Right half
}

strip.show(); // Update the strip
delay(delayTime); // Wait for a moment
}

// Function to set the pixel color based on the heat value (blue-based color scheme)
void setPixelColorFromHeat(int pixel, uint8_t temperature) {
uint8_t r, g, b;

// Map heat to color using shades of blue
if (temperature > 200) {
r = 0; g = 100; b = 255; // Bright blue
} else if (temperature > 100) {
r = 0; g = 75; b = 255; // Softer blue
} else if (temperature > 50) {
r = 0; g = 50; b = 150; // Dim blue
} else if (temperature > 0) {
r = 0; g = 25; b = 100; // Dimmer soft blue
} else {
r = 0; g = 0; b = 0; // Off
}

strip.setPixelColor(pixel, strip.Color(r, g, b));
}

// Function to create a blue twinkling effect
void blueTwinkleEffect(int delayTime) {
for (int i = 0; i < NUMPIXELS; i++) {
// Larger random changes in brightness for more aggressive twinkling
int change = random(-50, 50); // Bigger brightness changes
brightness = constrain(brightness + change, 20, 255); // More range for flickering

// Set the LED color based on the current brightness
setBlueTwinkleColor(i, brightness);
}

strip.show(); // Update the strip
delay(delayTime); // Faster delay for aggressive effect
}

// Function to set the LED color to a blue tone with variable brightness
void setBlueTwinkleColor(int pixel, uint8_t brightness) {
uint8_t r = 0; // No red
uint8_t g = brightness / 2; // Slight green tint for the blue
uint8_t b = brightness; // Full blue based on brightness

strip.setPixelColor(pixel, strip.Color(r, g, b));
}

It's hard to capture in pictures each of the four displays. They run for 15 seconds each because G wanted everyone to be able to see each of the different four.

thumbnail_IMG_8232.jpg

thumbnail_IMG_8233.jpg


thumbnail_IMG_8235.jpg


thumbnail_IMG_8234.jpg

thumbnail_IMG_8236.jpg

And then a still from a video which kind of shows it most realistically.


thumbnail_IMG_8261.png

That's what it looks most like in real life.

Once we were happy with the code and all, then it was time to make a way to affix the removable panel. We still needed to be able to access the insides when we wanted to. We considered a few different options, but ended up going with some sewable snaps. I picked up some blue sheer fabric from JoAnns, and then sewed the snaps on. One snap onto the removable piece, and then the second snap onto the base of the handle.


thumbnail_IMG_8250.jpg

thumbnail_IMG_8249.jpg

This fabric will help hold it closed, but also help keep the paint off of G's hands in case it tries to come off more.

And that's it! Anne's tennis racket is finished!

Next -Darcy's Laser Dagger - Part 4
 
Last edited:
Amphibia Costumes - Darcy Laser Dagger - Part 4

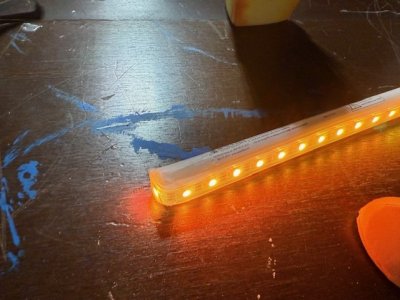
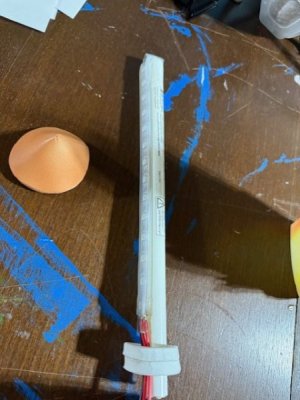
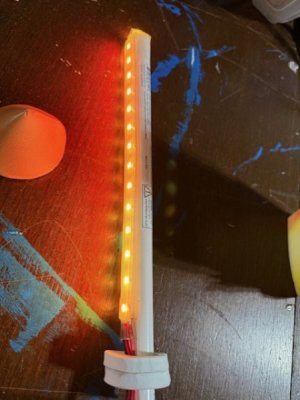
Alright, so the painting was finished, it was time to finish the LED insertion. I ended up keeping the code previously written, except that the length of LEDs ended up being 15. The goal was to affix the LEDs to a PVC pipe, and then insert that into the dagger PVC. So I attached the LEDS to the pole with some tape to test it out. It's hard to get a good picture of it.

In dark

thumbnail_IMG_8219.jpg

LED on with lights on


thumbnail_IMG_8226.jpg

LEDs off


thumbnail_IMG_8227.jpg

Once I was happy with the length, then I attached the LEDs to the PVC pipe permanently. I used the Plastic Bonding System glue from Loctite because it was a plastic to plastic. I also bent the final LED so that it aimed upwards to illuminate the tip.

thumbnail_IMG_8242.jpg

I then made two 8mm EVA foam rings to stack onto each other. I used the PVC core remnants to get the size of the inner diameter perfect. Then I stamped some remnants of the PVC thin pipe in the center to get its size right. I wanted a tight fit. Once the rings were attached to each other, then I cut them from one side to the center. I wrapped that ring around the LED core, and then glued it together. This would keep the wires from moving, and would allow the LEDs to be attached to the dagger.


thumbnail_IMG_8240.jpg


thumbnail_IMG_8241.jpg

I put some Barge All-purpose around the 8mm EVA foam rings, and then down inside the dagger PVC as well. I forced the piece together. After about 3 min, I added some drips of gorilla glue along the seams on the inside for complete adherence. After giving it an hour or so, I could wave it around with no movement.

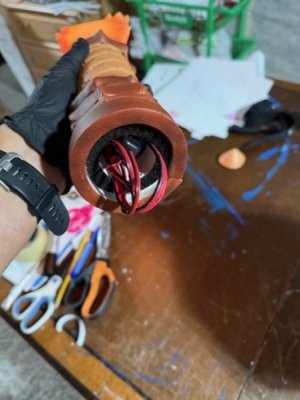
Then I slowly packed the chip, battery, and on/off into the core of the dagger. The chip went first, then the battery, and then on/off last. It was a tight fit, which is good because now nothing will move around.


thumbnail_IMG_8243.jpg

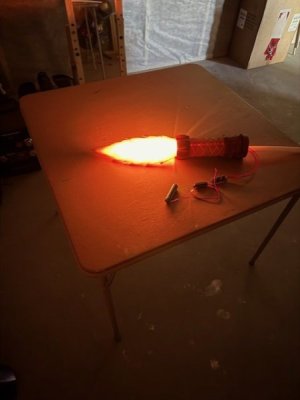
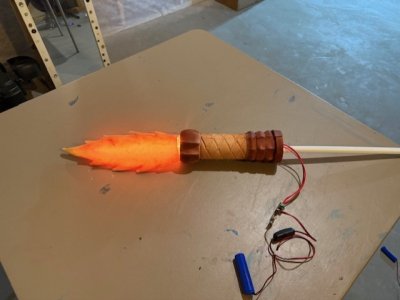
The tip worked perfectly.


thumbnail_IMG_8244.jpg

So that left us with this!

thumbnail_IMG_8246.jpg

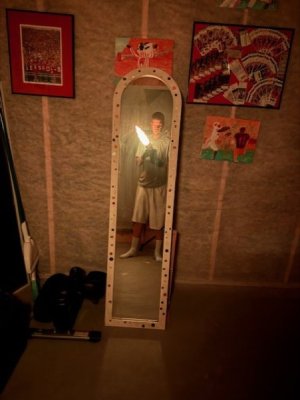
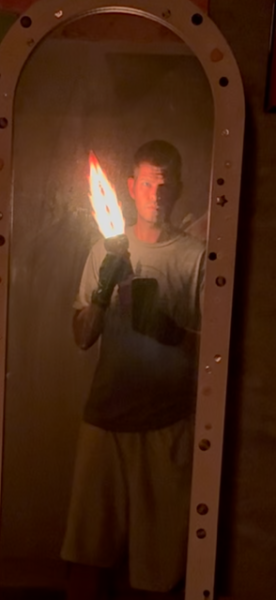
This one is a still from a video and gives the best look of it I can capture.


IMG_8260.PNG

It does capture the illusion of fire quite well. But not so much that you'd mistake it for being real. It's definitely a prop.

And that wraps up the laser dagger!

Next -Packing
 
Last edited:
Amphibia Costumes - Packing! :scared1:

Admittedly, packing is something I should have taken into stronger consideration for this project. For the Monster's Inc costumes the ability to get the large hat, and large costumes to Disney was a major consideration in designing them. For the Amphibia costumes, I made them how I wanted to, and would "figure it out" when the time came. Well guess what past you, that time is now, and it's definitely a thing...

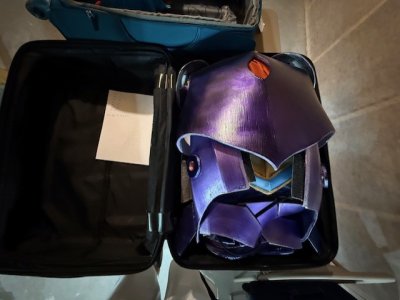
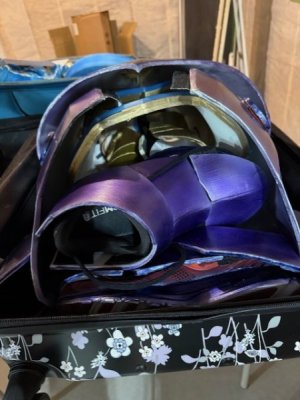
The first step was having enough luggage. We're traveling Southwest down, and Breeze Airways back up. So the size of checked luggage is the same, but carry-ons are different. So had to keep that in mind. Also due to the delicate nature of some of the items, I wanted somethings in hard luggage vs others in soft. Some items are very large. The Darcy helmet was easily the most difficult to pack. It's 22x22x13.5 inches. Which is nearly the max size of a piece of luggage on its own (62 combined inches). I had one hard luggage that was close. But the helmet wasn't tall enough to fill the whole thing. So I built some supports out of cardboard to secure the piece as best I can. Then I'll fill the rest of the space with excess batting and foam. But as I learned from long term storage of the Darcy leg/arm armor the purple paint can stick and rip off. So I got some non-stick parchment paper to wrap the helmet to keep it from touching anything. As I told G, the best we can do is prepare, and then hope for the best. Whatever happens, happens. Surprisingly, I didn't take a picture of this one.

Alright, with the helmet figured out. I was left with two more checked bags, and two more carry-on bags. We will put all our clothes for the 8-day trip in small backpacks that fit in the underneath of the seat ahead of us. We do have a in-room laundry machine, so we'll be taking advantage of that.

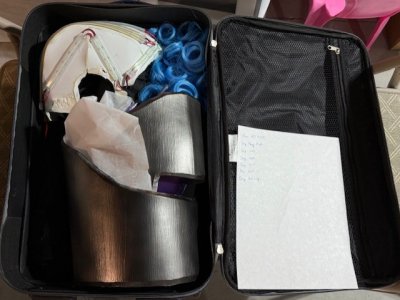
The next challenge was the Darcy and Anne chest armors and the Darcy leg armor. These were the next most cumbersome. It took an hour or so, but I finally found a good fit for them. The inner of the Anne armor would hold the Anne legs, then Anne chest, then Darcy legs unfolded, then Darcy chest. The Darcy shoes would sit at that base.


thumbnail_IMG_8256.jpg


thumbnail_IMG_8257.jpg

When I do this for real in a week or so, then I'll also add parchment paper in between each layer to keep things from touching each other.

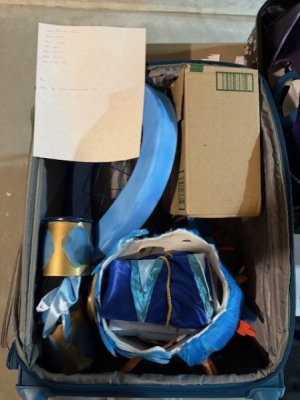
The next challenge was the Anne hair and tennis racket. These went in the 3/4 hard sided luggage. The last side I'll put a piece of cardboard in to stiffen it up. I stuffed the Anne hair with some of the Anne clothes. Then the Anne hands are tucked in with the tennis racket. Lastly, the box holds the emergency soldering equipment in case something goes wrong in transport and I can try and fix it. I'll fill the remaining space with extra batting.


thumbnail_IMG_8259.jpg

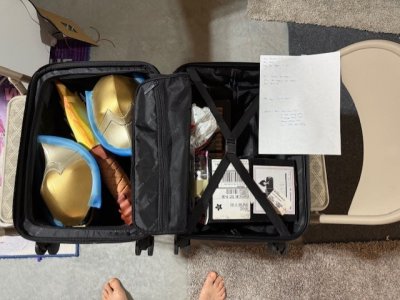
That left me with two carry-ons. In the hard side carry on, I put the Anne shoes, laser dagger, and Anne shoulder pieces. In the other side is all the batteries, and emergency fixing equipment. This luggage has an "UP" side so that the heavy side never comes downwards on the foam side. Only foam on top. Since it'll be in my possession I'll have that control. All of the lithium Ion batteries, and Darcy eye LCD screens will be removed and placed into this bag as well.


thumbnail_IMG_8254.jpg

Lastly, the other carry-on will have the Anne LED skull cap, extra blue wig, the Darcy thigh armor, Darcy arms, and Darcy clothes.


thumbnail_IMG_8255.jpg

Not much extra room all around, but we did pretty good. Funny that costumes take 3 checked and 2 carry-on, and the three of us plan to just use small backpacks for our actual clothes. This took a lot of effort to get it to this point, but I'm happy I don't have to leave anything behind. For a moment there it was a tennis racket or Darcy leg armor decision because I was struggling to find the space to bring both.

The last thing to do is unpack everything and do a dress rehearsal with everything. Just to make sure there's nothing obvious we're missing before we pack everything away. Only two weeks!
Next -
 
The Darcy helmet was easily the most difficult to pack. It's 22x22x13.5 inches. Which is nearly the max size of a piece of luggage on its own (62 combined inches).
Nice job getting all that in there! FYI, if you think it might be safer in packaging closer to the size of the helmet, you CAN check a sealed shipping box as luggage. I've done it before a few times.
 
Nice job getting all that in there! FYI, if you think it might be safer in packaging closer to the size of the helmet, you CAN check a sealed shipping box as luggage. I've done it before a few times.

We considered it. Ended up deciding the hard sided luggage + cardboard core was better than just a cardboard box. I did find a wood traveling musician box (for like band equipment) that was a perfect size, but the box alone was pricey and really heavy.


Save Up to 30% on Rooms at Walt Disney World!

Save up to 30% on rooms at select Disney Resorts Collection hotels when you stay 5 consecutive nights or longer in late summer and early fall. Plus, enjoy other savings for shorter stays.This offer is valid for stays most nights from August 1 to October 11, 2025.
CLICK HERE


DIS Facebook DIS youtube DIS Instagram DIS Pinterest

Back
Top