To Infinity and Beyond - Becoming a Better DopeyBadger (Comments Welcome)

Moana Jr Costumes - Hei Hei - Part 5

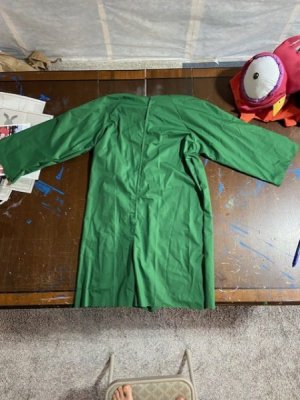
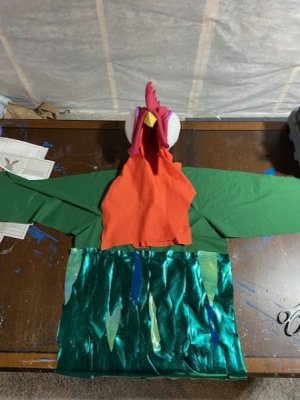
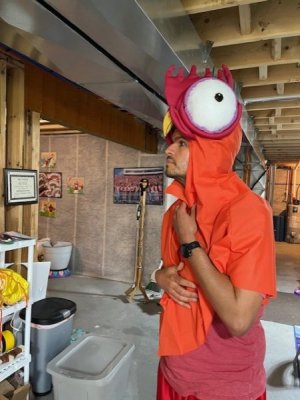
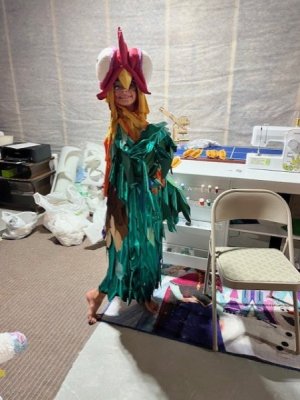
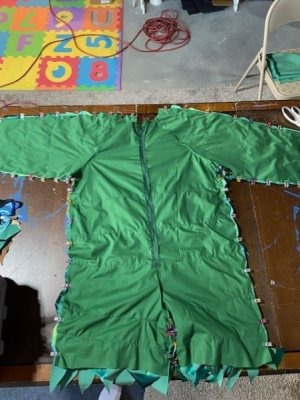
Alright, so I got to do a fitting with the girl playing Hei Hei on Monday. I was a little worried because according to Steph her measurements were an adult medium per the Simplicity pattern, but I felt like the base costume was way too long. I wasn't too far off though. The fit is pretty good, but the length was a bit long. But that's ok because it's a jump suit at the end of the day. So we found the places were the costume as is would hit her wrists and knees and then I cut the fabric off. I did the same for the head piece as well. She had a good idea about needing something more substantial to keep the headpiece on. So I'm going to either add a headband, or possibly some strap system like a bicycle helmet to help keep it stable. But all in all, things are headed in the right direction.


thumbnail_IMG_7970.jpg

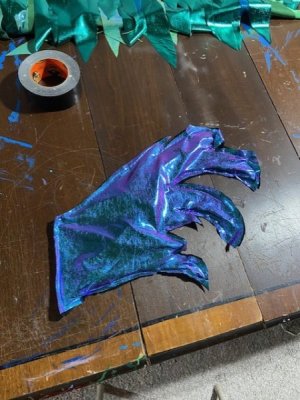
So with that out of the way, I could move from this stopping point onto what I think will take this costume over the top. Bantam roosters have long, narrow, shiny, pointed feathers. But when I look at Hei Hei costumes, I feel like they're missing that shiny reflective nature. So my goal for the feathers was two fold. They needed to be shiny, but they also needed to not fray when cut. So I felt like satin was shiny, but would fray. And I didn't want to have to sew each individual feather's edges. Felt wouldn't fray, but it wasn't shiny. That's when I found a series of 80-90% polyester and 10-20% spandex fabrics. They're shiny, and they don't fray. A little on the pricy side though, but I felt like it was worth it in order to nail the look I was going for.

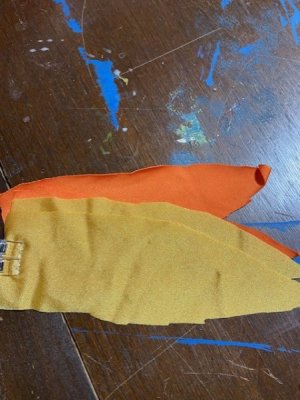
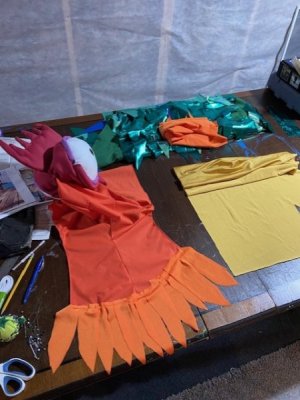
So I needed orange and gold for the heckle (link and link):

thumbnail_IMG_7968.jpg

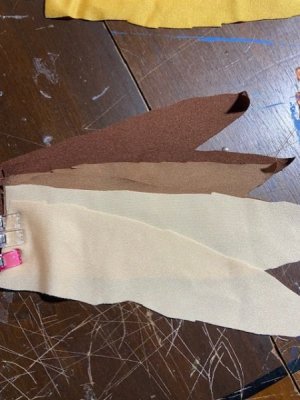
I needed a series of browns and beiges for the saddle (link):


thumbnail_IMG_7967.jpg

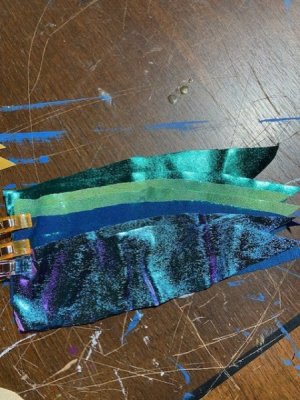
And I needed a series of greens, blues, and purples for the main body (link, link, link, link):

thumbnail_IMG_7969.jpg

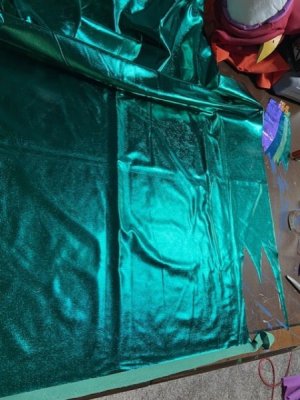
The vast majority of the costume was going to be in this emerald green shiny material (link).


thumbnail_IMG_7971.jpg

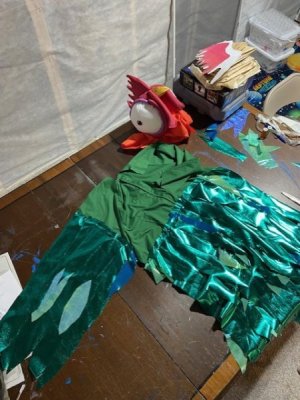
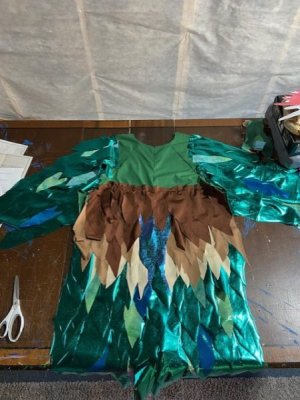
I'd guess that I had gotten about 2 yards of it, and that's probably going to end up being a little short of what I need. I went through and cut out feather shapes that were long and narrow with flat ends. The ends didn't need to be feather shaped, because I was going to sew layers onto the costume that would cover up the seams. I also cut out a few pieces of the other greens/blues to act as contrast and break up the look of all the metallic emerald.


thumbnail_IMG_7972.jpg

I felt like the key to making this work, and being able to machine sew the whole thing, was to attach as many feathers to each side of the costume (front and back) before attaching the two sides together. Then I could cut away any troublesome pieces at a later time. Conversely, if I attached the front and back together, then I'd always be fighting with the machine sewing trying to keep the two halves away from each other. And at least initially, this feels like the right strategy. Because even only working on one half at a time has still been a little challenging.

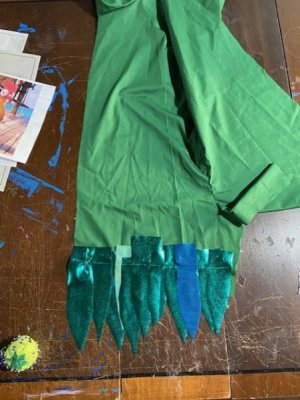
I started at the bottom of one pants leg first. I left myself enough room for a hem, and adding elastic. I layered the feathers, and tried to vary the tip lengths a little. The layering was done so that it wasn't always in the same direction. Once I had them laid out as desired, then I pinned them on, and then sewed across the tops of them.


thumbnail_IMG_7973.jpg

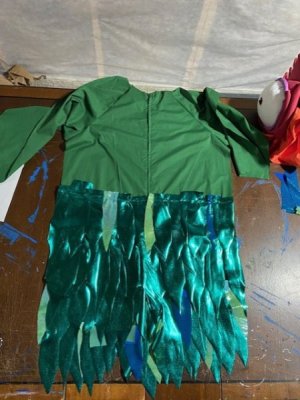
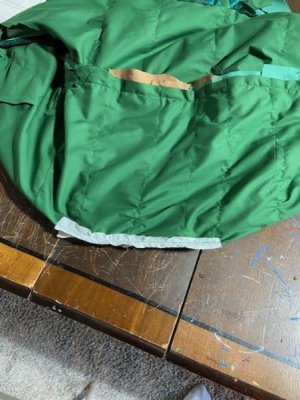
I repeated this for the other pants leg until the feathers made it to the crotch of the front. Then I aligned all the feathers across the front together. I made sure to note where the zipper was, and tried to layer the feathers just over the zipper to help hide it.

thumbnail_IMG_7974.jpg

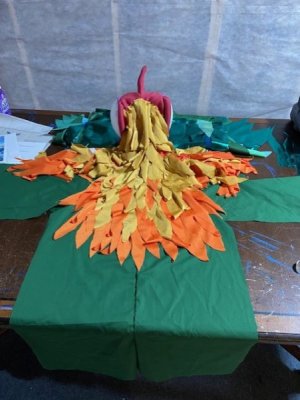
You can see a few pieces of fabric flop over because there's too much excess at the top above the seam, so I'll have to cut some away. I kept going up the piece until I made it roughly where the heckle will be and it'll transition into orange and gold/yellow feathers. There's no point in wasting green feathers on areas that'll be covered by the heckle headpiece anyways.


thumbnail_IMG_7975.jpg

Then I started working my way up the arms. We discussed the possibility of wings, but decided to just go with arms. I used the same technique of layers the feathers and then working my way up. The key difference is they don't always lay vertically like the feathers on the body, so they have a higher tendency to flop over. So I haven't done it yet (this was the stopping point last night), but I think I'll sew the arm feathers down completely and not just at the top. They'll be static unlike the body feathers, but they also won't flop all around.

thumbnail_IMG_7976.jpg

I'm pleased with the look. It's the vision I had in mind when I started this project, and it's really coming together!

Next - -Hei Hei - Part 6
 
Last edited:
Moana Jr Costumes - Hei Hei - Part 6

I used way more metallic emerald fabric than anticipated, so I had to pivot to the headpiece feathers until I could get back to Joann's to finish off the back of the costume. But no worries, because it kept me plenty busy.


thumbnail_IMG_2592.jpg

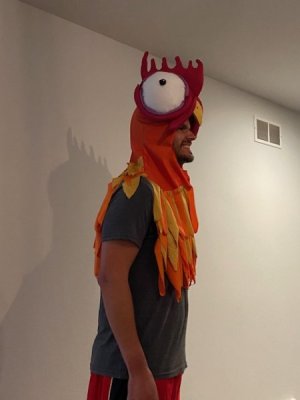
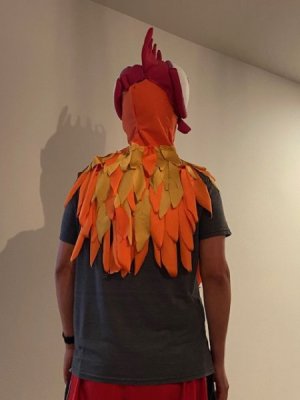
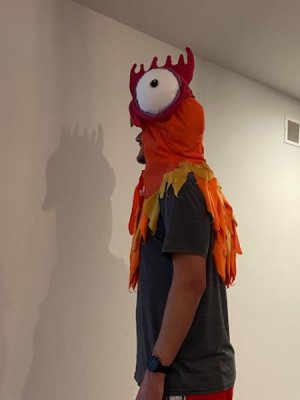
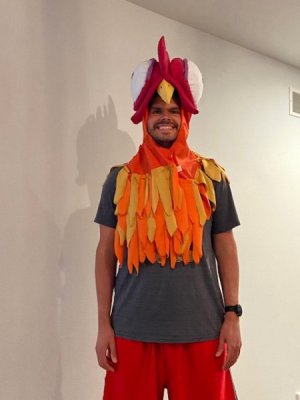
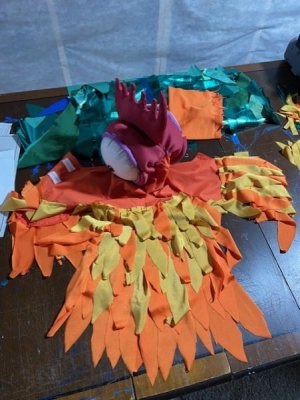
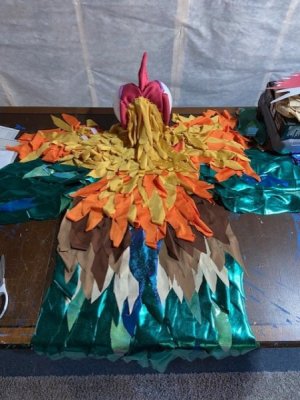
Much like the feathers along the body, the heckle feathers are narrow, long, pointed, and shiny. I used the orange and golden fabric detailed earlier (80/20 polyester and spandex to reduce fraying). I pinned each feather on individually in a line, and then machine sewed them down.

thumbnail_IMG_7977.jpg

The plan was to blend the oranges and golden color in together. So, the feathers are mostly orange at the ends, and then the closer you get to the eyes the more golden they are. As I got closer to the eyes and such, it became more and more challenging to do the machine sewing (just not enough room to maneuver. I made it to about here, before I had to move to hand sewing.

thumbnail_IMG_7984.jpg


thumbnail_IMG_7982.jpg


thumbnail_IMG_7980.jpg

thumbnail_IMG_7978.jpg

thumbnail_IMG_7986.jpg

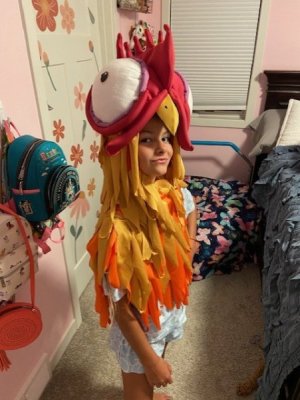
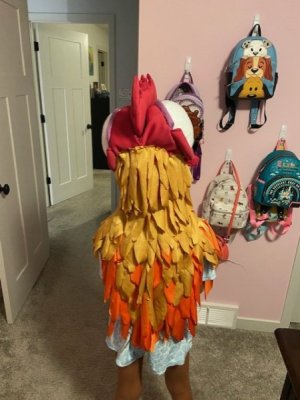
In all, I'd estimate it took about 10 hrs to sew all the feathers onto the headpiece. Which honestly is a lot longer than I was anticipating. To be frank, working with feathers even with machine sewing 80-90% of them is a lot more tedious than I had originally thought. I thought it was going to be a quick thing, but that's not the case. I definitely reconsider my timeframe if I do another costume with feathers. That being said, the final product is the look I was going for. So there's that.
thumbnail_IMG_7988.jpg


thumbnail_IMG_7990.jpg

thumbnail_IMG_7991.jpg

Next - -Hei Hei - Part 7
 
Last edited:
I definitely reconsider my timeframe if I do another costume with feathers. That being said, the final product is the look I was going for. So there's that.
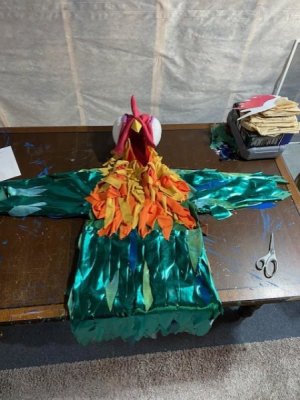
It looks amazing!
One trick I've seen done with fringe is to use strips of material and sew it on in layers. So each row (or two) of feathers would go on one strip of fabric (or sandwiched between two layers of it), then that whole strip gets sewed on in one giant seam. I've also seen it done with bias tape if the pieces are small enough.
 
Moana Jr Costumes - Hei Hei - Part 7

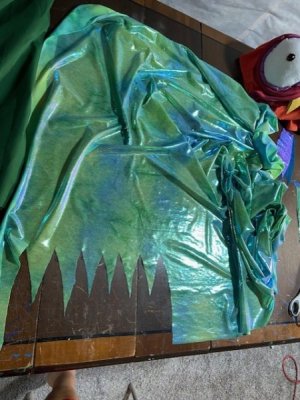
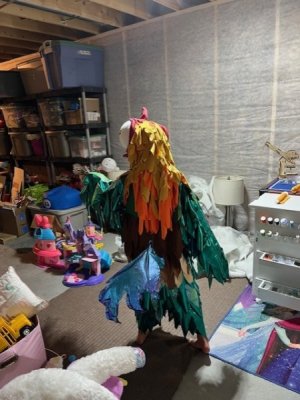
I didn't end up taking a ton of pictures through making the back of the costume. Mostly because the process was so tedious and was taking forever. Based on pictures, I'd say it took about 6-7 hrs to attach all the back feathers. The back has a lot more variety going on compared to the front. The front was mostly the emerald green with a few contrasting feathers thrown in. But the back of the costume has the saddle and tail. Hei Hei's saddle appears to be a mix of browns, and then the tail is iridescent.


thumbnail_IMG_7993.jpg

When I did a fitting with the girl playing Hei Hei, I had marked approximately where the tail should go based on when she's sitting in the costume. I then made sure not to overlap any feathers over that area. The plan was to finish off the front/back, sew them together, and then put the tail in. The Simplicity pattern suggests attaching the tail to the back when you start assembling the panels. But because the tail is somewhat rigid, I didn't want to have to maneuver around that during the whole assembly process. I used the same system with putting on the back feathers as the front, which was to start at the bottom and then work my way up. I had marked at the top approximately where the headpiece would cover.


thumbnail_IMG_7994.jpg

Once that was finished, it was time to sew the front and back pieces together.


thumbnail_IMG_7995.jpg

I did my best to lay the right sides together with all the feathers on the inside seams laying flat. I'd say I was 95% spot on with a few feathers that got pulled in funny directions. The sewing itself was easy and quick. I made sure to put a much larger needle on the sewing machine because there were a lot of layers of fabric to go through. And based on the sounds it was making, it was needed.

thumbnail_IMG_7996.jpg

So I didn't do the greatest job taking pictures of the tail process, but it went through two iterations. I had originally made a set of three tails. They were made by just free drawing some tail structures. The goal was to keep them compact and to make the edge that was attaching to the bodysuit relatively long so that it could be strong. The inside of the tail was made with the Pellon sewable foam I used during the Pua hooves. I also used the same technique of attaching the needlepoint plastic as a stabilizer. But when I held the tails up, they just weren't as sturdy as I needed them to be to keep them from flopping over. So I hot glued a small PVC pipe to add some rigidity. But the combination of the three of them was just going to be too heavy and cumbersome. So I ditched that design and restarted.

On the second go around, I traced the fabric, and then on the inside I put 2mm EVA foam with the plastic needlepoint. This was a little stiffer compared to the Pellon+needlepoint, but still a little too floppy. So I used a piece of plastic spoon from the Moana necklace (not yet detailed) that was long and super light. Hot glued that on, and it "might work". We'll see.

thumbnail_IMG_7992.jpg

So to attach it, I went to my markings on the body suit, and poked two holes in the middle seam. I turned the bodysuit inside out, and then I used the seam ripper to open the gap between the holes. I stuck the tail into the inside of the costume, and had the base of the tail stick through the seam gap. I double triple checked I had the tail facing the correct direction. And then I sewed over the middle bodysuit seam plus tail base about five times. Then I grabbed some Pellon interfacing just to stiffen up and reinforce the area, and sewed that on as well.

thumbnail_IMG_7997.jpg

The tail is about 85% of what I had hoped for. It does have a little droop to it, but not too bad. Not sure if I'll want to do anything to try and remedy that, or just move on. I had G try on the outfit. As a note, she's about 5-6 inches shorter than the other girl as the other one is a few years older. So the outfit doesn't fit G, but it does give me a little look at it.


thumbnail_IMG_2608.jpg


thumbnail_IMG_2611.jpg

Once I get the other girl in it, then I can see if there's any bare spots that need some help. Otherwise, it's in a good place. With the majority of the costume finished, the only part remaining were the feet.

Next - -Hei Hei - Part 8
 
Last edited:
Moana Jr Costumes - Hei Hei - Part 8

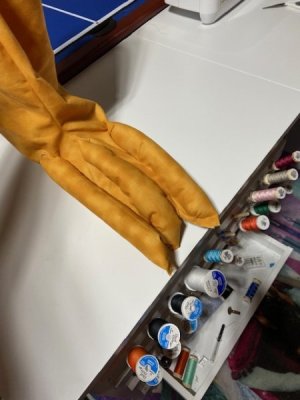
Looks like I didn't take any pictures of the start of the process. I don't have the exact fabric written down, but it was a golden yellow cotton that had some orangish discolorations on it. We felt like it was the closest to rooster feet. When I measured the girl, we marked the feet to start just below the knee. I used the same Simplicity pattern as Pua and the base of the Hei Hei costume, but I lengthened the shoe cover to be quite a bit longer. Again, a challenge of not making the costume for my own kid was sizing the shoe cover correctly. The mom was clear she didn't want her kid's shoes ruined, so I had her bring them to the fitting, and then I took measurements of the shoe to map out the elastic that goes on the bottom of the shoe to hold it in place.

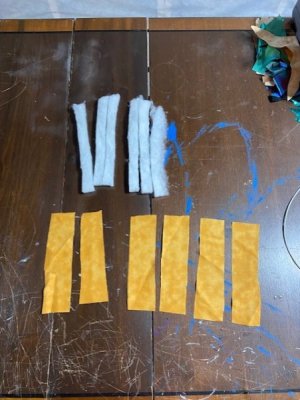
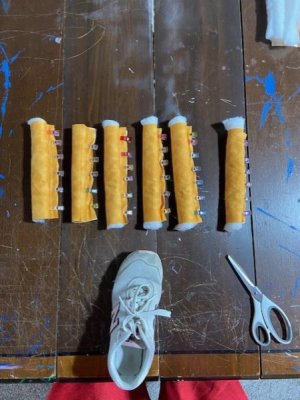
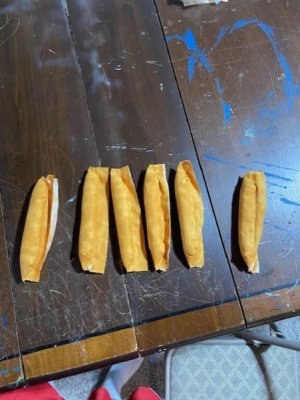
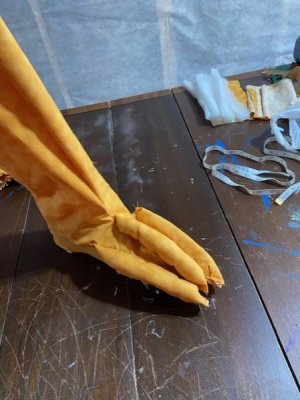
To make the toes, I used pieces of fabric and then burrito wrapped a piece of batting in the middle. I made sure to leave extra fabric along the seam as I'd use this to sew the toe to the foot.

thumbnail_IMG_7998.jpg

thumbnail_IMG_7999.jpg

thumbnail_IMG_8001.jpg

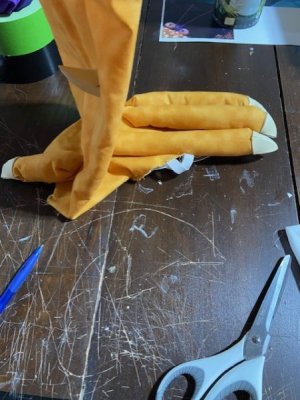
The pattern already has a seam down the front middle, so that toe had a good place to go. For the other two, I laid the fabric piece in half, and then cut up from the sole of the pattern to roughly the same length as the middle toe (approximately 8 inches). I then sewed each toe on the inside. For the toe piece that was going to be on top of the foot, I tried to hide the seam as much as possible.


thumbnail_IMG_8003.jpg

thumbnail_IMG_8002.jpg

I had G come down and count out the toenails as a joke because roosters have that back toe nail that hangs off the middle back of the foot, but that's when we realized that we totally forgot the back toe! Lol, so I had to go back and add that one in as well.


thumbnail_IMG_8005.jpg

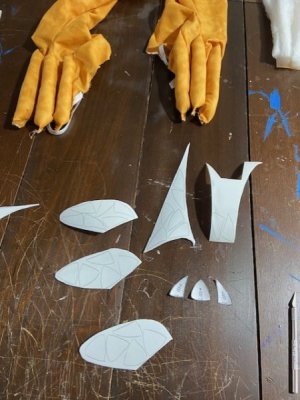
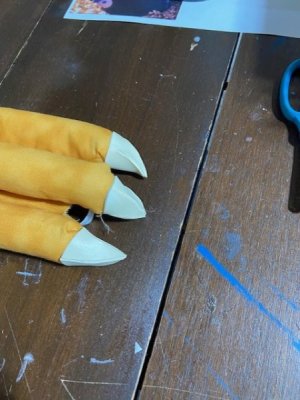
For the toenails, I used the horn pattern (same as the beak) but in a smaller size. I traced and cut them out of 2mm EVA foam.


thumbnail_IMG_8004.jpg

Glued them together with Barge All-purpose cement, no caulk (because I didn't think the small seams needed it), Flexbond, and then painted with Unbleached titanium acrylic paint (same color as Maui's hook). I attached the toenails to the feet in the same manner as we did for the Monster's Inc toes, using Liquid stitch. I just put some Liquid Stitch into the EVA foam toenail, and then pressed it into the toe. The bond is plenty strong since it survived all of the Monster's Inc costumes thus far. We'll see if it hold up to dancing and theater as well.

The last steps were to add elastic to the top of the foot (where it will be just below her knee) to hold it in place. I didn't add any elastic on the arms or legs of the bodysuit to try and allow air flow. So unlike G's Pua feet, these needed the elastic to help keep them up. I left a small opening along the hem just in case the elastic isn't the right width. Because I measured G's, Steph's, and mine under the knee size and we're all quite different. So I just split the difference on a guess of around 12-13 inches. I also added 6 pieces of elastic along the bottom to help secure the piece to the shoe.

Surprisingly I didn't take any pictures of the finished foot. So I'll have to do that later, but sufficed to say that I'm pleased with them. EDITED TO ADD

thumbnail_IMG_8029.jpg

thumbnail_IMG_8028.jpg

And with that, I think Hei Hei is complete. Like I said, that one took a lot longer than anticipated. Pua was about 1.5 weeks, and 35-50 hrs of work. This costume took about 2 weeks, and 75-85 hrs. It's also quite a bit more expensive than Pua was. We're donating the costs of this one and not charging the theater because the main character costumes are supposed to cost no more than about 20-30 per, and I'd say Pua was close to $100 and Hei Hei was closer to $200.

So all I've got left for the Moana Jr play is Moana's necklace. Oh wait, they want a second Te-Fiti rock and Moana necklace. Alright then, just two necklaces and a second Te-Fiti rock. Oh wait, they've got another character that might need some help. Any guesses?


thumbnail_IMG_8016.jpg

Next - Final
 
Last edited:
It looks amazing!
One trick I've seen done with fringe is to use strips of material and sew it on in layers. So each row (or two) of feathers would go on one strip of fabric (or sandwiched between two layers of it), then that whole strip gets sewed on in one giant seam. I've also seen it done with bias tape if the pieces are small enough.

Thanks! Yea, I saw that trick as well. But that's what didn't make sense to me. So I'm suppose to pin the feathers onto a strip of fabric, sew them to the strip, and then sew the strip onto the base of the costume. Whereas, I just pinned the feathers straight to the base in a line, and then sewed them on directly in one seam as I moved across the entire piece. That's where I was confused on how it would save me time since it seemed like it was just an extra step. I will say it probably helps keep you from making mistakes if the feathers try to move on you. Because if you sew direct to the base and a mistake happens, it's harder to fix than if it happens on a strip of fabric. But then I justified those flubs as, "feathers aren't perfect anyways". Or at least that's how I justified it to myself as I was screaming at the feathers to stop moving... :ssst:
 
Moana Jr Costumes - Moana's Necklace Prop

What good is the Heart of Te-Fiti (link) without a matching Moana necklace!

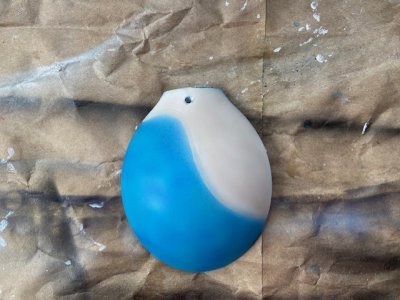
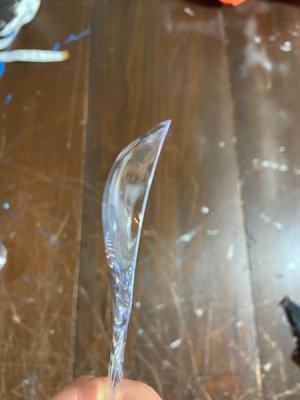
This one took a lot of thinking. When I made the Heart of Te-Fiti, it hadn't been decided as to whether it actually needed to fit into Moana's necklace. But after they saw the heart, and how it glowed, then they wanted it inside the necklace as well. Which meant I needed to create the centerpiece of the necklace large enough to fit the heart I had already made. The heart measured 2.5 inches x 2 inches. I mentally troubleshooted through multiple design options including using the translucent EVA foam, but I knew getting that curved shape in a clean look was going to be really hard to accomplish. One evening I was making Mac and Cheese for G, and got out the spoon to stir the pot, and then took a good long look at it. That's when I had a eureka moment and thought a serving spoon is roughly the size I'm looking for. So I jumped on Amazon to find a match. Weird thing though, it doesn't seem like anyone will tell you the dimensions of the spoon head itself. So I had to use some ratio math to estimate it. I knew I needed something a little more than 2.5 x 2 inches. I found this spoon which was 10 inches long, and by using the known length and measuring the other distances on my computer screen I could estimate that the spoon head should be just a little bit bigger than that (3.1 x 2.25 if I remember correctly). So I ordered these set of severing spoons from Amazon (link).

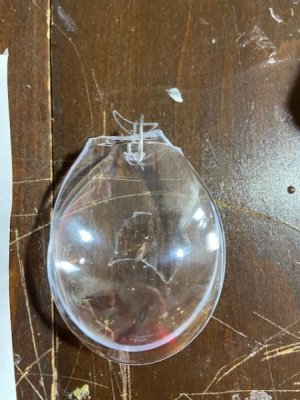
Once they arrived, I cracked the package open and put two together, and it was perfect. Just like these were made for it. This would now give me that clean look I was going for.


thumbnail_IMG_7951.jpg

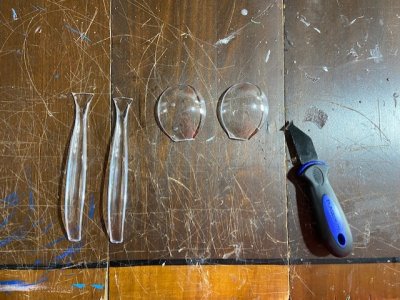
I used my plastic cutting tool that I used from the Monster's Inc laugh canister to cut the heads off the plastic spoons.


thumbnail_IMG_7952.jpg

I then used my drill to make a small hole at the top of the spoon head where I could weave a piece of steel through.


thumbnail_IMG_7957.jpg

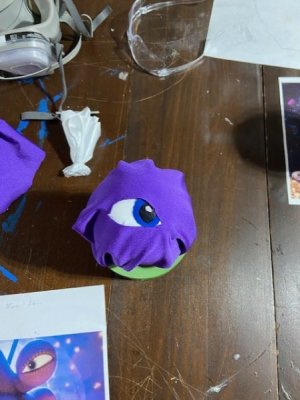
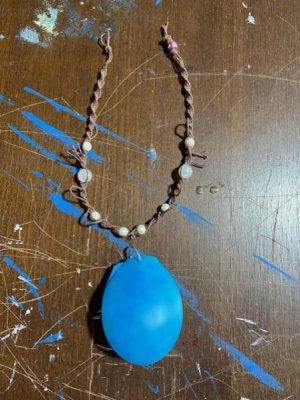
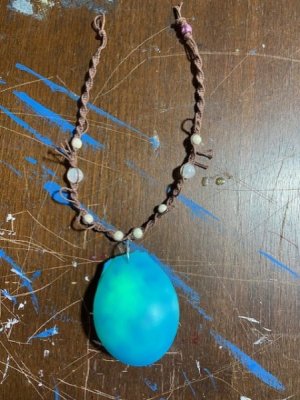
To keep the translucent appearance of the plastic, I decided to use airbrush paints. For the base blue, I did three layers of three different colors.


thumbnail_IMG_7963.jpg

Steph did the weaving of the necklace itself. She used twine, and some fake pearls.


thumbnail_IMG_7959.jpg

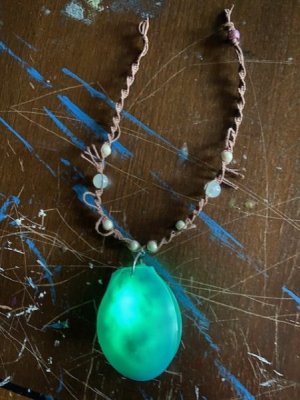
I put the Te-Fiti rock inside and turned it on with all the lights on in the room.

thumbnail_IMG_7960.jpg

And then again with all lights off, but some daylight coming in.


thumbnail_IMG_7962.jpg

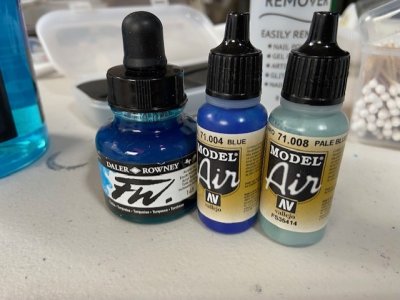
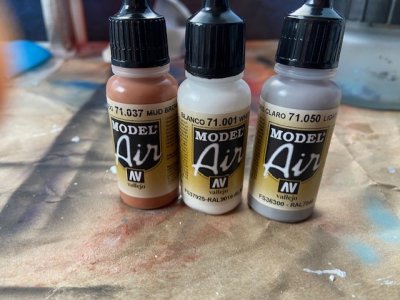
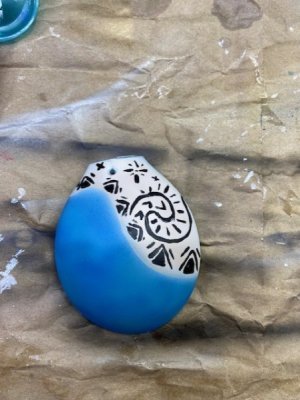
Then it was time to move to the other half of the design. I had originally planned on using modeling clay (like I saw in some Youtube videos), but we didn't have any in the house. So I just ended up airbrushing it instead. I used a combination of these colors to get the clay look.

thumbnail_IMG_7964.jpg


thumbnail_IMG_7965.jpg

Then I hand painted with black arylic the details of the necklace.


thumbnail_IMG_7966.jpg

And that's it! Probably took less than 30 minutes of work to make the entire piece (at least my part of it as the weaving of twine took Steph longer than 30 min). Cost wise, it was really only the cost of the spoons which would make it about $3.5 per necklace. I'll add a small magnet to the inside of the shell and to the Heart of Te-Fiti to get them to stay attached. Now I just got to make a second pair of the two since the director feels little Moana and big Moana each need one.

Next -
 
Moana Jr Costumes - Moana's Necklace Prop

What good is the Heart of Te-Fiti (link) without a matching Moana necklace!

This one took a lot of thinking. When I made the Heart of Te-Fiti, it hadn't been decided as to whether it actually needed to fit into Moana's necklace. But after they saw the heart, and how it glowed, then they wanted it inside the necklace as well. Which meant I needed to create the centerpiece of the necklace large enough to fit the heart I had already made. The heart measured 2.5 inches x 2 inches. I mentally troubleshooted through multiple design options including using the translucent EVA foam, but I knew getting that curved shape in a clean look was going to be really hard to accomplish. One evening I was making Mac and Cheese for G, and got out the spoon to stir the pot, and then took a good long look at it. That's when I had a eureka moment and thought a serving spoon is roughly the size I'm looking for. So I jumped on Amazon to find a match. Weird thing though, it doesn't seem like anyone will tell you the dimensions of the spoon head itself. So I had to use some ratio math to estimate it. I knew I needed something a little more than 2.5 x 2 inches. I found this spoon which was 10 inches long, and by using the known length and measuring the other distances on my computer screen I could estimate that the spoon head should be just a little bit bigger than that (3.1 x 2.25 if I remember correctly). So I ordered these set of severing spoons from Amazon (link).

Once they arrived, I cracked the package open and put two together, and it was perfect. Just like these were made for it. This would now give me that clean look I was going for.


View attachment 883273

I used my plastic cutting tool that I used from the Monster's Inc laugh canister to cut the heads off the plastic spoons.


View attachment 883272

I then used my drill to make a small hole at the top of the spoon head where I could weave a piece of steel through.


View attachment 883271

To keep the translucent appearance of the plastic, I decided to use airbrush paints. For the base blue, I did three layers of three different colors.


View attachment 883267

Steph did the weaving of the necklace itself. She used twine, and some fake pearls.


View attachment 883270

I put the Te-Fiti rock inside and turned it on with all the lights on in the room.

View attachment 883269

And then again with all lights off, but some daylight coming in.


View attachment 883268

Then it was time to move to the other half of the design. I had originally planned on using modeling clay (like I saw in some Youtube videos), but we didn't have any in the house. So I just ended up airbrushing it instead. I used a combination of these colors to get the clay look.

View attachment 883266


View attachment 883265

Then I hand painted with black arylic the details of the necklace.


View attachment 883264

And that's it! Probably took less than 30 minutes of work to make the entire piece (at least my part of it as the weaving of twine took Steph longer than 30 min). Cost wise, it was really only the cost of the spoons which would make it about $3.5 per necklace. I'll add a small magnet to the inside of the shell and to the Heart of Te-Fiti to get them to stay attached. Now I just got to make a second pair of the two since the director feels little Moana and big Moana each need one.

Next -
Wow! That is really cool.
 
So, I guess thanks to all of you that are reading this, and taking an interest in what I'm saying and doing!
As others have said, you're a wealth of knowledge and have given so much of your time to helping many of us achieve our assorted running goals and dreams. You've personally talked me off a few running cliffs so to speak and patiently knocked some sense into me when I got too worried about something or other.

When I was in the hospital last year and got clearance to run the marathon, I knew that the missed time would not be possible to recapture, but I also felt confident that you would come up with a plan to have me in "good enough" shape to pull off 71 miles in 11 days. Which I did.

So I think we're excited and grateful to share in what you are doing and we hope you accomplish your hopes and dreams.

39bc389e8a833bb313931d56f96fd5d0.jpg
 
Moana Jr Costumes - Tamatoa

Well, Tamatoa hasn't always been this glam. Steph and the costume team made another request for a costume. But they wanted this one toned down a bit. So instead of a full fledge costume, they just wanted a simple cost efficient headband.

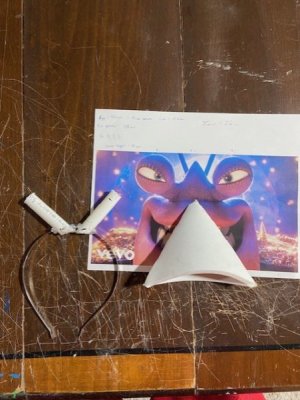
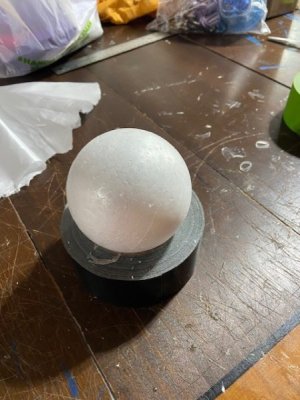
I started by taking measurements of an image of Tamatoa. I determined that his eyes and center triangle are an even 1/3, 1/3, 1/3 split. So using that I determined I wanted to go with a 4 inch sphere for the eyeballs. I ordered some styrofoam balls from Amazon.

thumbnail_IMG_8006.jpg

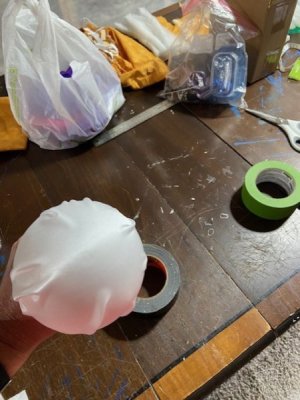
Since I wanted the eyeballs to be shiny, I wrapped them in a white satin material. I used the Liquid Stitch to glue the foam ball to the fabric.


thumbnail_IMG_8007.jpg

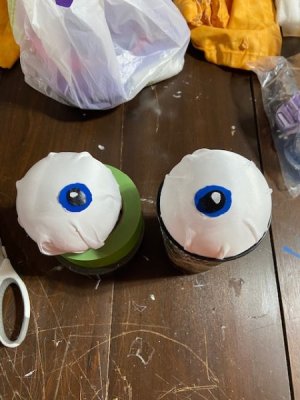
I let that sit for a few hours, and then I added on a few other pieces of scrap fabric to make the iris/pupils. I again used Liquid Stitch to adhere the pieces together.


thumbnail_IMG_8008.jpg

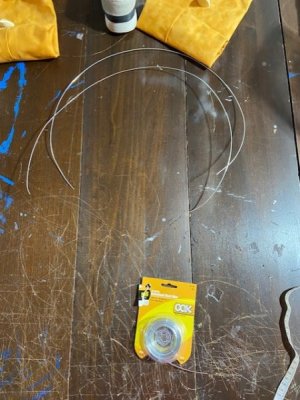
For the antenna, I used some steel wire gauge. This would give it flexibility, but wouldn't droop down too much.


thumbnail_IMG_8009.jpg

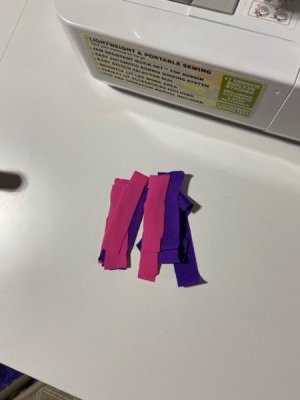
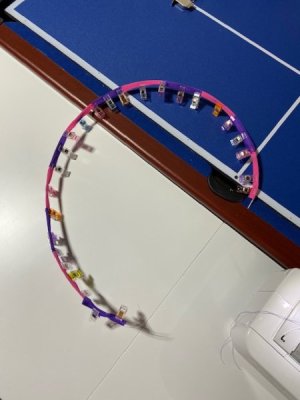
I bought some purple 80% polyester/20% spandex fabric because it doesn't fray and has a shine to it for the base of the costume. Turns out Tamatoa's antenna are purple and pink at all times. Not just when he does his blacklight fluorescence scene. So I got some pink fabric for the antenna as well. I cut each of the purple and pink into small strips, and then sewed them together sequentially.

thumbnail_IMG_8010.jpg

thumbnail_IMG_8011.jpg

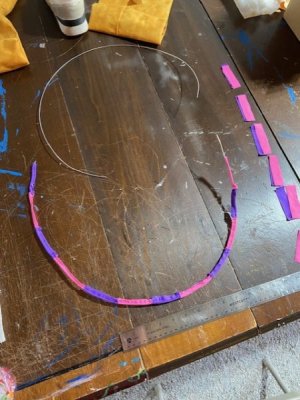
Then I maneuvered the wire through the alternating colored fabric. It was easier said than done, because I didn't leave myself a lot of room to work with. I also attached a small piece of foam onto the tip of the wire to keep from poking anyone's eyes out.


thumbnail_IMG_8012.jpg

At first I was satisfied with the antenna, but then when I got to thinking about it more, even the wire itself could be dangerous. Because the actor could swing their head around on stage and then it would be like tiny metal whips that could slap other people or themselves. So I scrapped them, and pivoted to just making them out of EVA foam and painting them. G did the painting. They don't have as much stability in staying upright as the wire did, but are far less dangerous.

Next - -Tamatoa - Part 2
 
Last edited:
Moana Jr Costumes - Tamatoa - Part 2

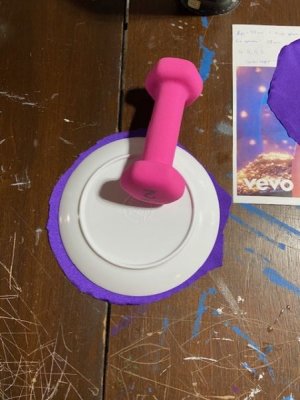
After a day of allowing the fabric to glue to the styrofoam ball, I could move onto making the eyelids. Since the diameter of the sphere was 4 inches, I could use 2 pie r to determine the circumference. If I took half the circumference it should get me close to a piece of fabric that would one half wrap the eyeball, and then I could sew two of them right sides together. So I found the closest sized plate and traced that onto the fabric.

thumbnail_IMG_8030.jpg

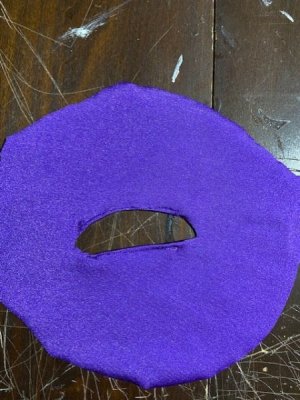
I then cut out a small opening for the eyelids, and then sewed the raw edges back onto itself.

thumbnail_IMG_8032.jpg

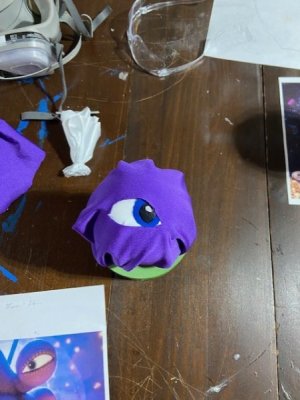
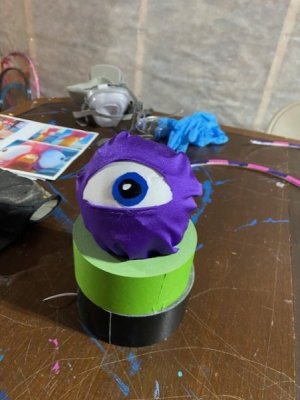
I then sewed the right sides together of the two circles leaving a small gap that aligned with the connection point with the headband and folded them in on themselves so the raw seam was on the inside. Then with G's help we slid the eyeball through the small gap, and arranged the iris/pupil in place.


thumbnail_IMG_8016.jpg


thumbnail_IMG_8031.jpg

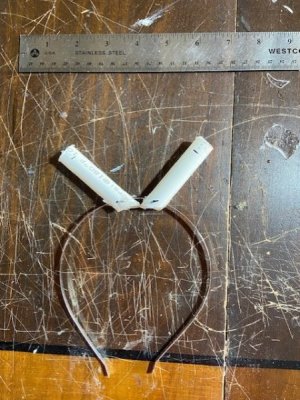
For the headband, Steph got some cheap metal ones on Amazon. For the connection of the eyeball to the headband, I used two small pieces of PVC pipe that I cut to about 2.5 inches in length. I drilled a hole through the PVC pipe, slid it through the headband, and then hot glued it into place.


thumbnail_IMG_8013.jpg

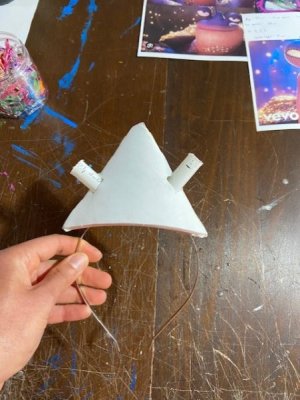
Then I did some measurements on the image to determine that the triangle in the center of Tamatoa's head should proportionally be 6 inches base, 5 inches sides, and 4 inches in height down the center. I made two of these out of 8mm foam. I dremeled the inside edges to allow a more angled glue point. I used Barge All purpose glue to attach them to each other.


thumbnail_IMG_8014.jpg

I cut a small slit in the triangle to get both of the PVC pipes through.


thumbnail_IMG_8015.jpg

I then wrapped the headband in the purple fabric. I used some scrap batting to soften up the metal around the head. It took a couple of rounds, but I got it to a place I was happy with. I used liquid stitch to attach the fabric to itself. For the eyeballs, I used a very large drill bit (like >2 inches) to drill a hole into the styrofoam big enough to stick the PVC pipe into it. Then I wedged the eyeball onto the PVC pipe, and then liquid stitched the remaining fabric from the eyeball to the base of the costume.

I made two small holes just on either side of the eyes for the antenna, and then stuck the EVA foam antennas that G made into them. And that gave us our inexpensive, simple, and quick Tamatoa headband.


thumbnail_IMG_8033.jpg

The eyes were at a slightly more exaggerated angle then I wanted, and the eye openings ended up bigger than anticipated. But all in all a good effort for a low cost project.

Alright, I think Moana Jr. projects are done now. So I can move back to the Amphibia costumes for the halloween party.

Next -
 
Amphibia Costumes - Anne Armor - Part 1

With Moana Jr costumes wrapped up, it's time to move back to the Amphibia costumes for the Not So Scary Halloween party. On the Disney trip note, things are going so well with the costumes, that the family has decided to attend two parties instead of just one. We did a cost comparison, and what we planned on doing, and it just makes sense for us. So we're going both October 17th (Thursday) and October 20th (Sunday).

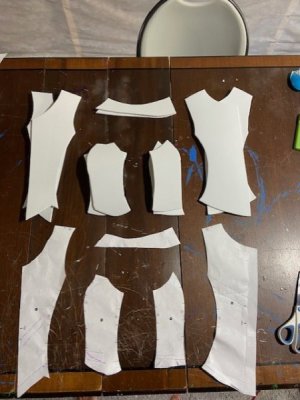
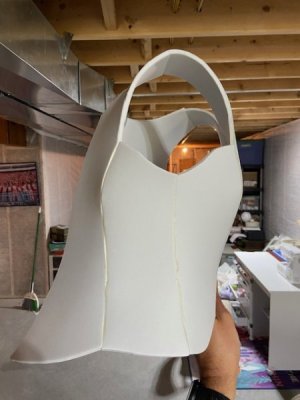
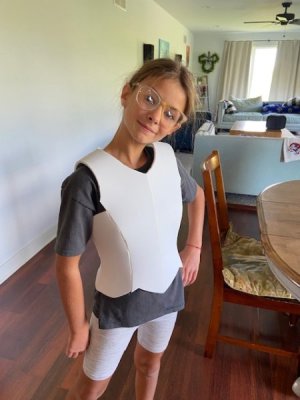
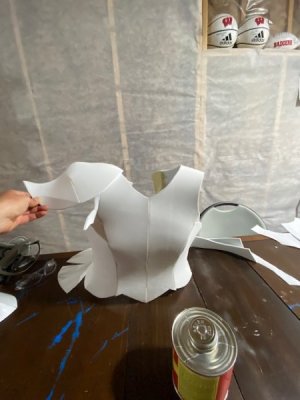
Alright, so I did a decent amount of searching the internet for armor patterns to find the right one for Anne. And lo and behold I came back to Kamui Cosplay again. She really does put out some of the best stuff when it comes to cosplay. I had gotten female breastplate set #1 over a year ago when I first got started with all this, but none of those were quite right. But she had recently published a second set which had two different options that were close. The female Knight (link) and slim (link). Given G's body structure, I went with the slim.

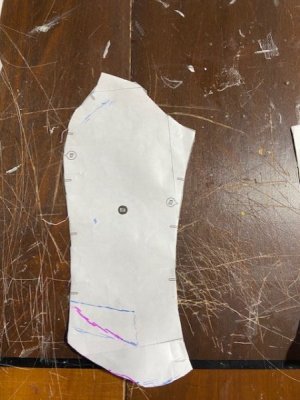
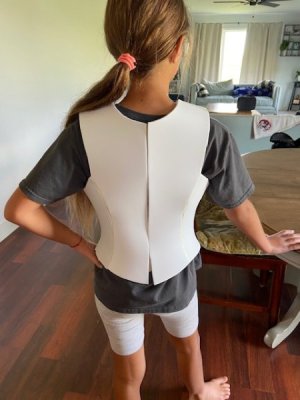
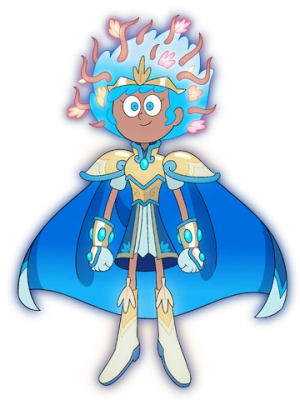
Using the woman's sizing, and comparing it to G's I ended up printing everything at about 85%. I taped all the pieces of paper together, and then had G put it on. The costume itself is a perfect representation of Anne's armor. One of the key places that needed to be edited was along the bottom. I printed off an image of Anne and did some length measurements that I could use to create ratios to scale the image to the length of the pattern I made. Essentially my printed image was 1 cm = 5 cm in real life. With that I could place all the key parts of the costume and trace cut things away as needed.

thumbnail_IMG_8039.jpg

It's at this point that we determined that based on G's size and the ratio of the costume, the turquoise piping that goes all along the costume needed to be about 1 inch or 2.5 cm in width. An important thing to note later.

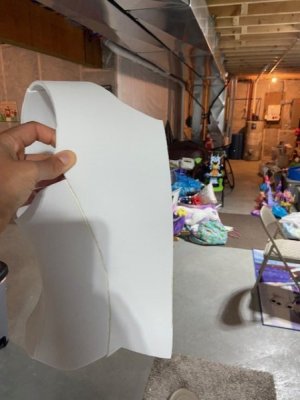
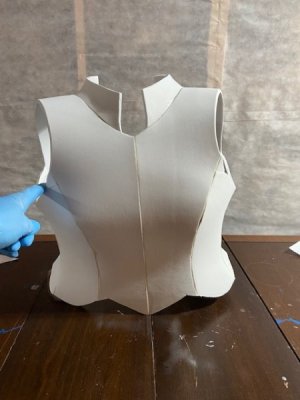
I traced the patterns onto 6 mm EVA foam, and then used scissors to cut everything out. I made sure to leave a little extra room on all the sizing since the 6mm foam doesn't perfectly translate to paper and it fitting on the body.


thumbnail_IMG_8038.jpg

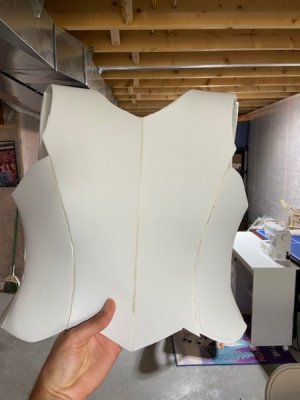
I used Barge All-Purpose cement to glue everything together. I finally got a new jar after all these creations, and man does that make a big difference in the consistency of the glue.

thumbnail_IMG_8040.jpg


thumbnail_IMG_8041.jpg


thumbnail_IMG_8042.jpg


thumbnail_IMG_8043.jpg

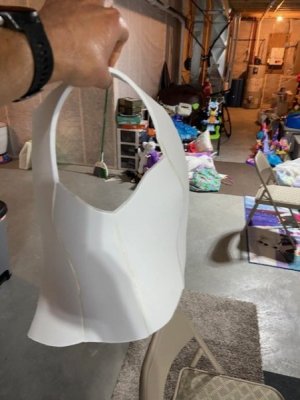
Once the piece was dry, I had G try it on. That extra seam allowance I gave myself from paper to 6mm ended up being excessive and I had like 4 inches of extra foam along the back seam. Which wasn't the worst thing in the world because I forgot we had to stick a battery pack that holds 8 x AAs for the power source on the headpiece. So it's always better to have too much than too little.

thumbnail_IMG_8044.jpg

thumbnail_IMG_8045.jpg

G was pleased with the fit. The battery pack will be inside a spandex travel belt I found on Amazon (link). It's got four pockets (with each being large enough for the 8 x AA battery pack holder, and the XS was close enough to fitting G. Thankfully being pinned inside the Amphibia t-shirt and the skirt will keep it in place.

For the collar, I just cut out a piece of paper while G was wearing the costume, to have something that resembled what Anne has. Then I traced it on foam, and glued it on the same as the others. I also used Kwik seal caulk on all the seams, and then sanded them down as we had done for the Darcy armor.


thumbnail_IMG_8048.jpg

Anne also has shoulder pieces. For that I used another Kamui Cosplay pattern named "Barbarian" (link). Close, but not exactly what we needed. The pattern was the right width (going from front of chest to back of chest) when printed at 85%, but the length was too short (going from neck outwards). But the proportional print was laughably large. According to the image, the shoulder piece is the exact same length as the torso of the armor. So since the torso is 40cm (15.7 inches), then the shoulder pieces should be as well. And while this was "accurate" it just looked excessive. We ended up splitting the difference and making them 30cm (or close to a foot).


thumbnail_IMG_8046.jpg

Next Anne armor update - -Anne Armor - Part 2
 
Last edited:
Amphibia Costumes - Anne Armor - Part 2

So one of the key pieces of the Anne calamity armor in my mind is the turquoise piping that goes all along the costume.

1723488011274.png

We felt this offered us an opportunity to "plus" this costume up by adding in some lights. The theme for these costumes has always been, we want them to look good during the day (like the Monsters Inc costumes were), and good at night (which the Monsters costumes were lacking). So any place we can add in nighttime differentiation details were going for it.

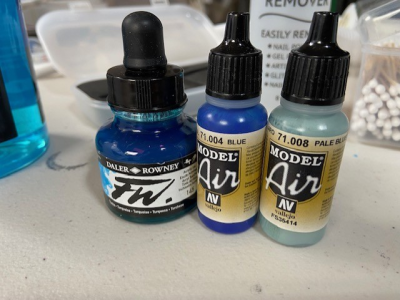
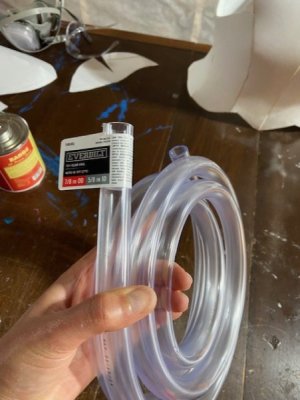
For the piping, I wanted it to be close to accurate in terms of sizing. So based on the image and G's armor, I knew the piping needed to be about 1 inch wide. In testing a few months back, I picked up some Everbuilt vinyl tubing from Home Depot. I think the outer diameter was like 1/4-1/2 inch. I then airbrush painted on the turquoise paint I had recently used for the Moana necklace (far left in the below image).

1723488364730.png

I hooked up a 5mm blue LED to a CR2032 battery, and then placed the light at the end of the tube. And it worked reasonably well. So since it worked in testing, then I planned to more forward with this scheme. But the vinyl tubing was going to be too small, so I picked up another one that was 7/8inch diameter (close to the desired 1 inch) that was clear and not braided.

thumbnail_IMG_8049.jpg

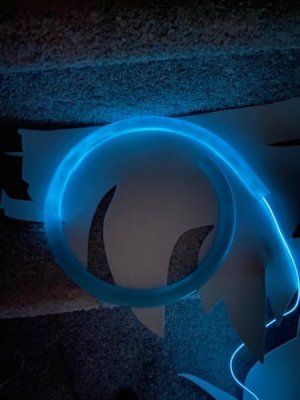
I then cut the piece lengthwise in half. I had to use the more heavy duty scissors since the normal ones didn't budge. I then painted on about 2-3 layers of the blue airbrush paint. I placed the blue LED at the end of the tube, and then turned the lights off.


thumbnail_IMG_8051.jpg

It works, but it's far from illuminating the whole strip (and to be fair the image above makes it way more illuminated than real life). While it didn't illuminate the whole strip when it was the smaller tubing, this seems like it's doing less. Not sure if it's because the inside has more space and so the light can scatter more inside. Less directed light path maybe? In all, the blue LED light travels about 13 cm (or 5 inches). The costume is about 40 inches at the base, and 30 inches around the chest. So it would take 6-8 LEDs along the base just to illuminate the base tip to tip. That seemed like a bit much. So I was back to the drawing board on ideas.

The next one we tried was the blue electroluminescent wire (link). We had previously used this wire for the Ms Marvel chest, and the Shang-Chi rings. We also plan to use it on the Anne tennis racket. It's about 8 feet in length and has a battery pack run on 2 AAs. The biggest problem is it's not overly bright. But we were pleasantly pleased with the look under the painted tubing.

thumbnail_IMG_8052.jpg

It doesn't quite look like this in person, but it's close. But then it stuck me, what does this look like next to the headpiece? Since the headpiece will be on at the same time as the armor. And once we turned on the headpiece, you couldn't tell the armor was illuminated anymore. So once again, we were back to the drawing board.

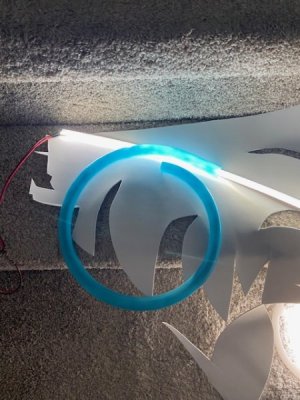
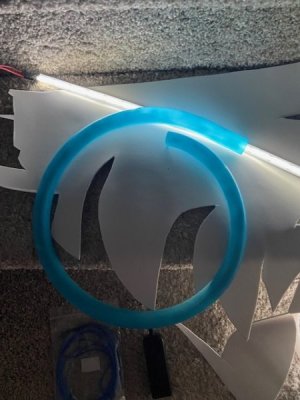
The next idea was to use the same 480 LED/m strips that we were using for the headpiece. Problem was, it would require carrying another 8 x AA battery pack. Which wouldn't be too bad from a weight standpoint, but we weren't sure if the bulk of it would easily stay underneath the armor. So G tried that on, and we both agreed it fit. I wired up some white 480 LED/m that I still had, and gave that a try.


IMG_8053.jpg

IMG_8054.jpg

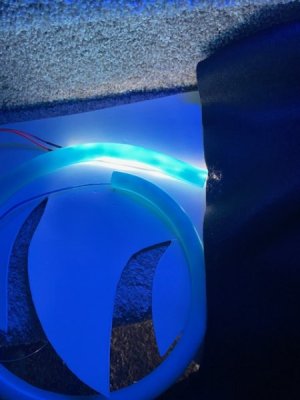
Much brighter. But I felt like the ambient light from the strip in places other than underneath the tubing was making it difficult to get a good read on it. So I took out some black felt, and covered up the majority of the excess.


thumbnail_IMG_8056.jpg

Then we did a side by side with the hairpiece.


IMG_8055.jpg

So we liked the brightness (we do have the option of toning it down by going to the AA rechargeable like we did with the Monsters Inc laugh canister if need be), but G didn't like that the tubing looked more white than blue. So we held up the tubing to some of the blue LED 480/m on the skull cap of the headpiece, and then she was pleased. It was a toned down blue, but still plenty bright. Problem was, I only had 3 feet left of the blue LED, and we needed probably 6-9 feet to do the whole costume (minus the gloves). But the bigger problem was the last time I ordered the blue LED I had the feeling Adafruit was going to discontinue the line. And I was right. It's not available on Adafruit or Digikey anymore. I found a less expensive version on Amazon, but I question the quality in comparison. But I ordered it and we'll see.

So that's where we're at. In the process of making sure this costume looks 10/10 during the day and 10/10 at night. We're going back and forth a little on how to do the detailing. I'm of the mindset that we should 3-D outwards the details, and she thinks we should carve into the 6mm foam and have it go inwards. We'll see if I can convince her, or if she can convince me otherwise.

Next - -Anne Armor - Part 3
 
Last edited:


Save Up to 30% on Rooms at Walt Disney World!

Save up to 30% on rooms at select Disney Resorts Collection hotels when you stay 5 consecutive nights or longer in late summer and early fall. Plus, enjoy other savings for shorter stays.This offer is valid for stays most nights from August 1 to October 11, 2025.
CLICK HERE


DIS Facebook DIS youtube DIS Instagram DIS Pinterest

Back
Top