To Infinity and Beyond - Becoming a Better DopeyBadger (Comments Welcome)

So interesting because I was looking at how to plan my summer runs this morning. Does this mean you're not planning any "long" run during the summer and all runs will be in the same time range?

Correct. I’m not planning on doing anything over 60 min (6.5 miles for me) for the summer. There isn’t really a need to since my next race won’t be until October at the earliest. The focus is on my total body during the summer. The total volume of all running will hover close to that 50% of peak, and this will be sufficient to maintain. I’m restarting training in September and that gives me 6-7 weeks to properly prepare for a “B” race.
 
I was also interested in your approach to summer training. I know you don't have any races coming up for awhile, so that allows you to take it easier on the running. I am curious if you're also keeping summer volume lower (and slower) because of the summer T+D? Personally I've just come to accept that I can't even do a lot of training in the summer because the T+D just wipes me out so badly.

Boy, it's always shocking to get back into weight lifting and how badly you feel when you do.

I laughed at this - oh, yes! This is actually one reason I try not to stop weight training for more than 2 weeks - the return to it is totally killer. A deep sore that just lingers. I kind of wish I didn't know it was coming because it doesn't help me want to start the strength training again! But it does pass.
 
I was also interested in your approach to summer training. I know you don't have any races coming up for awhile, so that allows you to take it easier on the running. I am curious if you're also keeping summer volume lower (and slower) because of the summer T+D? Personally I've just come to accept that I can't even do a lot of training in the summer because the T+D just wipes me out so badly.


I laughed at this - oh, yes! This is actually one reason I try not to stop weight training for more than 2 weeks - the return to it is totally killer. A deep sore that just lingers. I kind of wish I didn't know it was coming because it doesn't help me want to start the strength training again! But it does pass.

At this point in my running journey, I’d say I got what I got. I don’t expect to make any massive gains anymore. So maybe if I was still trying to sting together multiple good plans to increase those gains year over year, but I’m at a place where that’s probably not going to happen. I don’t race well in the heat, and thus have no races planned during this time period. So with increasing T+D brings a good time to dial things down for a bit for me. If I’m only looking to maintain, then the volume can be lower and the need for pushing the effort lessens. I’m giving myself plenty of time before the next “A” race to get some good hard training in.

If I were earlier in my running career, then I’d be stringing a new plan along behind this without concerns about the T+D. Because even a small gain during the summer puts you that much further ahead for the next plan.

And let’s not forget though that week to week I’ll still be doing 6-8 hrs of exercise. So it’s not like I’m going completely sedentary during the summer. Just focusing elsewhere for a period of time during which I wouldn’t race well even if I tried.

It’s so interesting how the first week back at weight lifting feels. And then 2-3 weeks later you can be doing much heavier weights and not have that same post lifting feeling. Still sore, but not that level of sore.
 
As a non-frequent journal reader, I am often out of the loop with many things. I had no clue that G was an aspiring/budding actress. She sure seems to have the personality for it.


As a non-frequent journal reader, I am often out of the loop with many things. I had no clue that G was an aspiring/budding actress. She sure seems to have the personality for it.

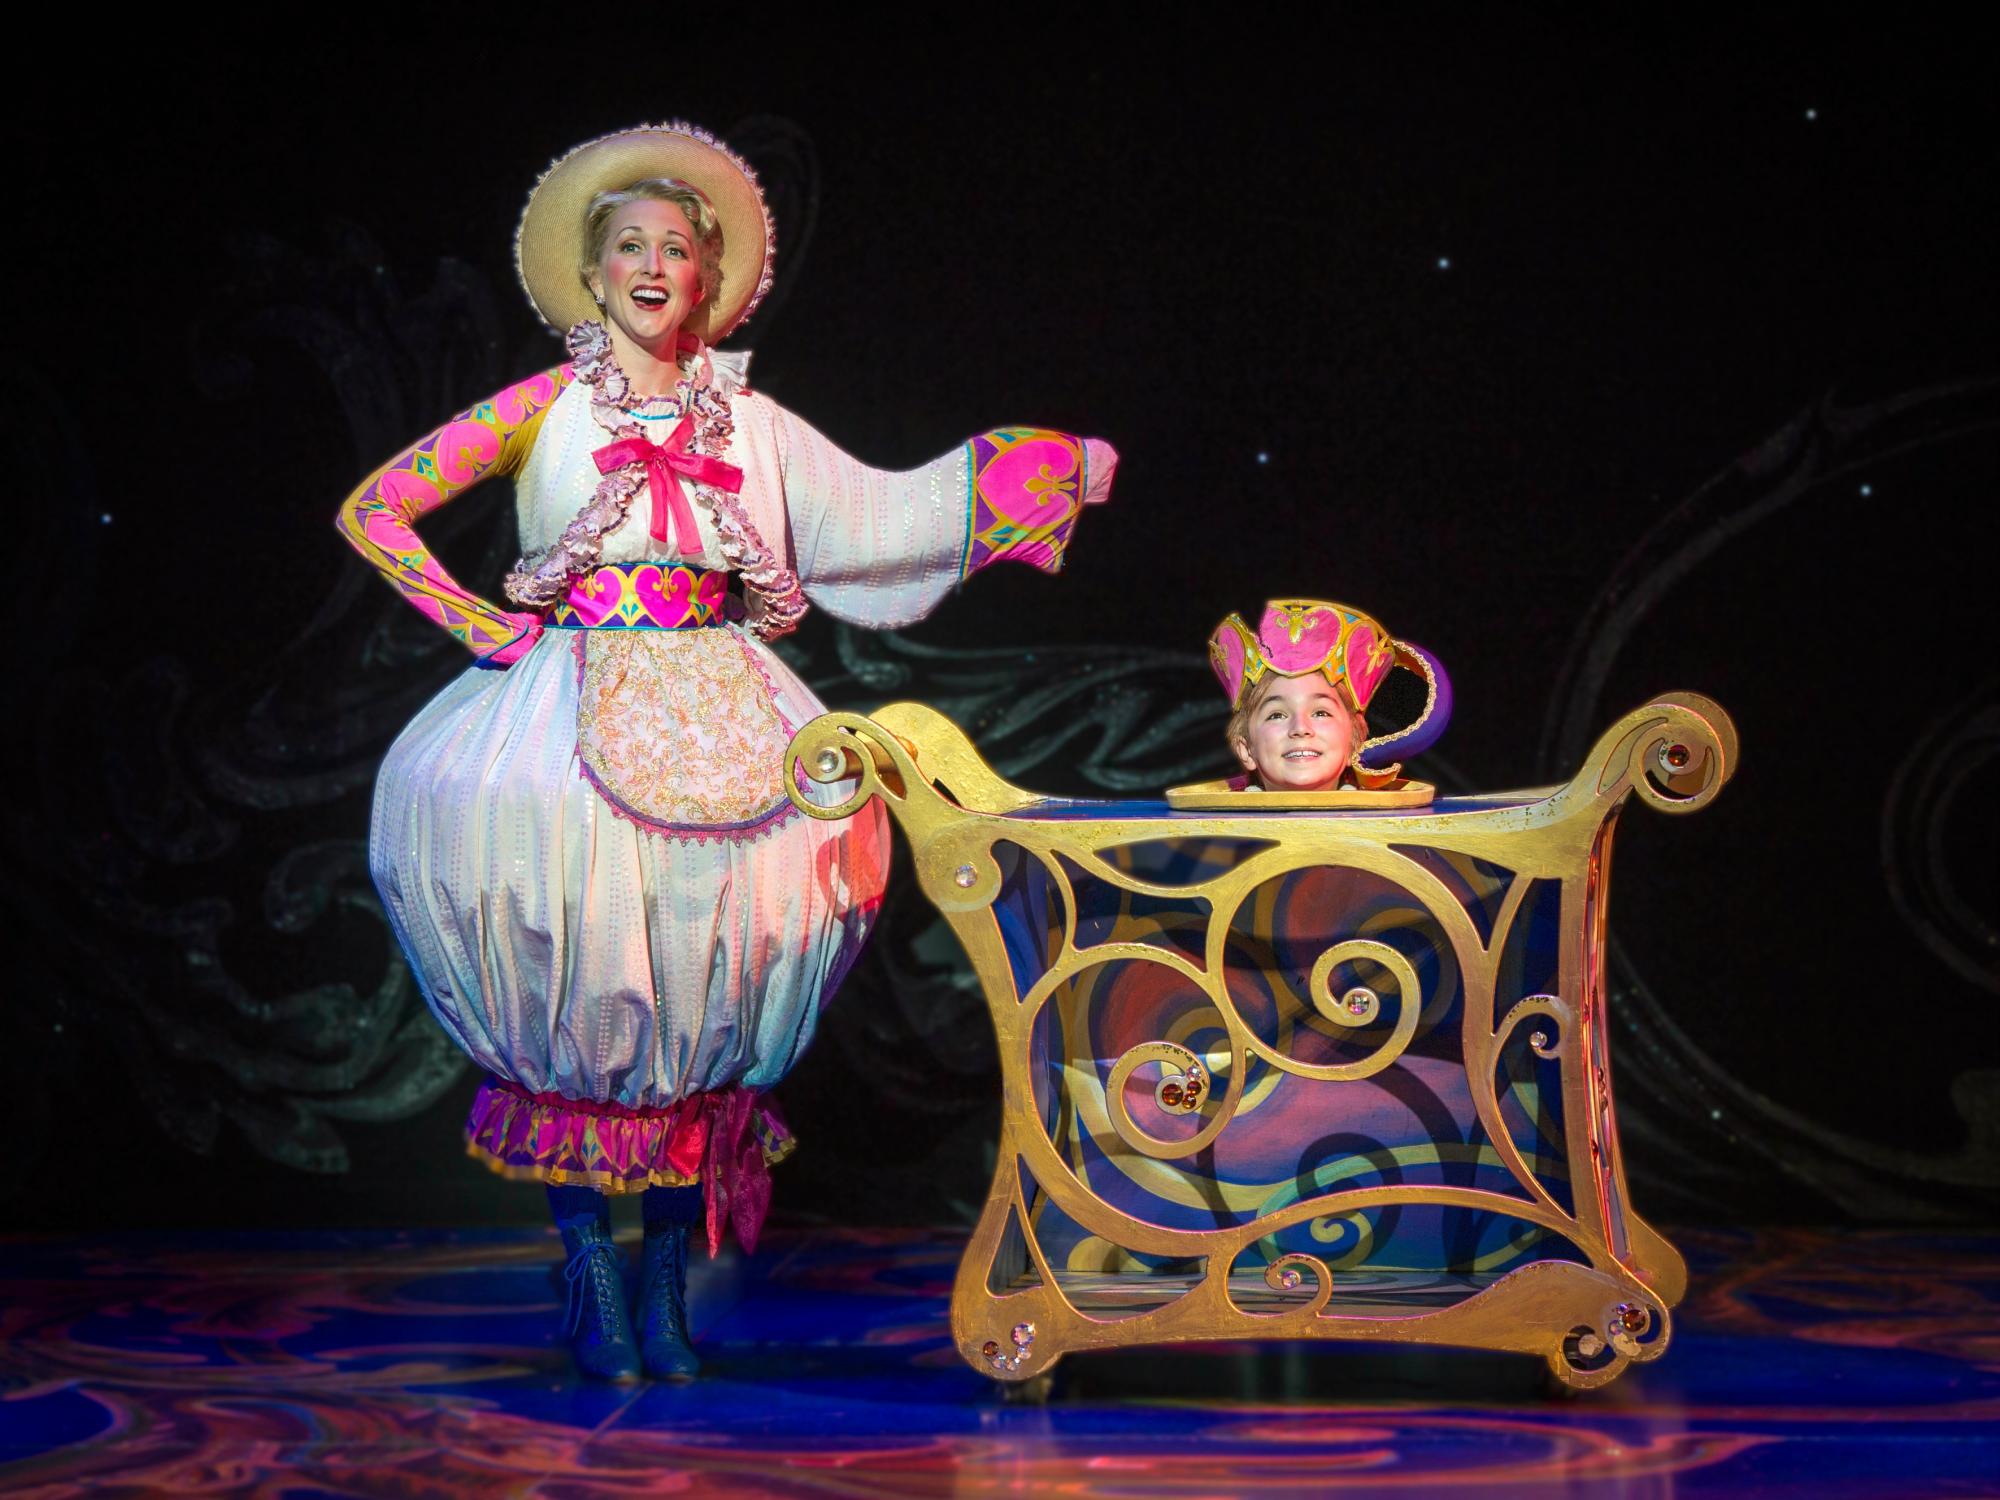
She loves it. Off the top of my head, she's done advertisements (print and media) for the UW Bookstore, Kid Trax, Associated Bank, General Electric, Amazon Football (didn't end up filming), and Clarios. There are probably more I'm forgetting. She was also in "Joe Pera Talks to You" as an extra, and has done the Addams Family and Frozen Jr. stage plays. She's in Beauty and the Beast and The Little Mermaid Jr this summer.
 
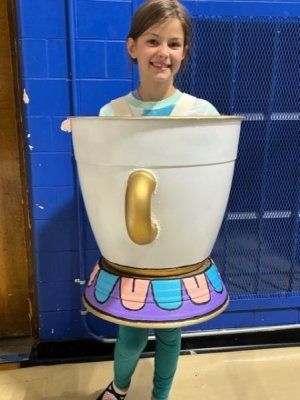
Beauty and the Beast - Chip (Theatrical Costume) - Building the cup
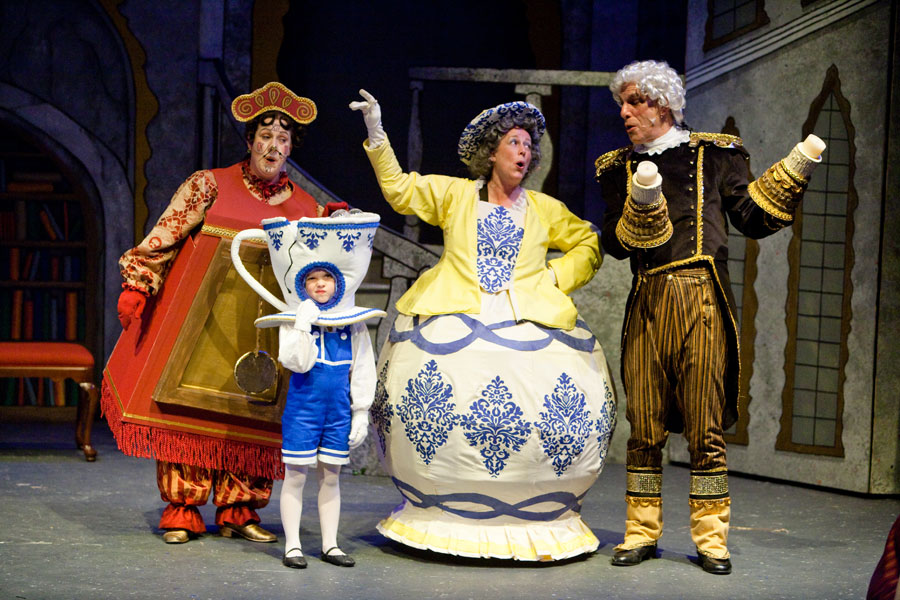
As I mentioned earlier, G was cast as Chip for the upcoming local theater's stage performance of Beauty and the Beast. She participated in this same theater group's plays last year in The Addams Family and Frozen Jr. So over time we've shown off some of the costumes I've made for our runDisney adventures. When it came to come up with costume ideas for G's Chip performance, I offered my services in making her costume. With the Beauty and Beast stage show, the Chip character is usually in a cart that is wheeled around where only their head is showing:

BeautyBeast.jpg


Or in a fabric costume:

4465246_orig.jpg


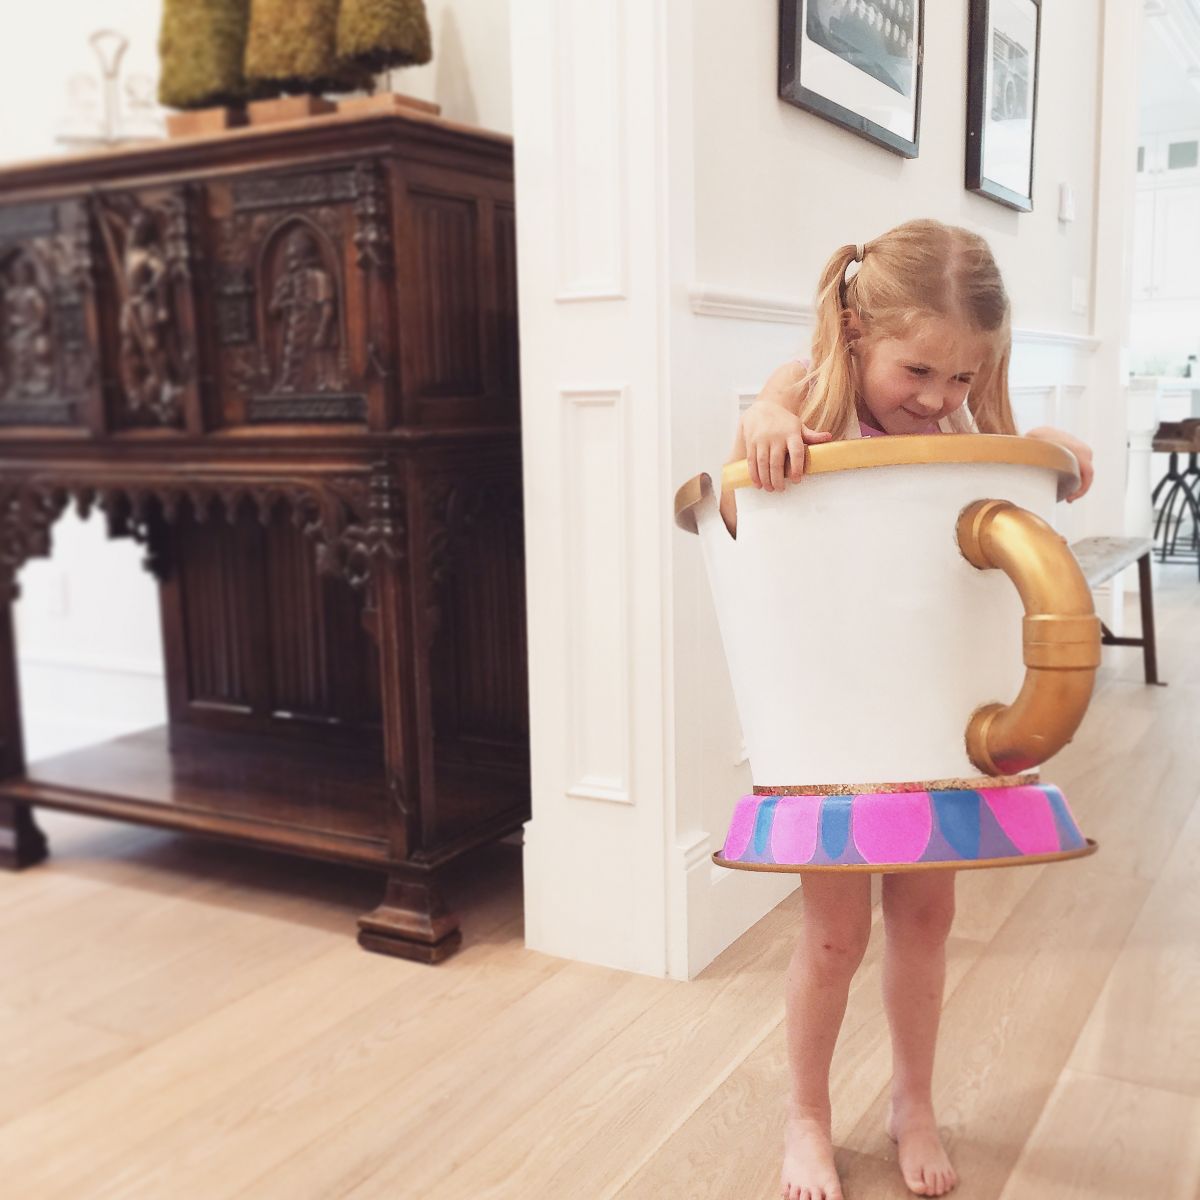
But I had a different idea that I saw elsewhere in a one-off:

image-asset.jpeg


What about making the costume out of a large flower pot? When discussing these options with G, she was not fond of the cart idea. Additionally, it didn't make a ton of sense given how the stage is setup. So it was fabric or flower pot, and the costume committee liked the idea of the flower pot. So I was going to give that a go.

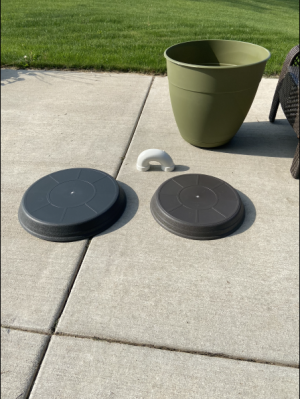
I perused online for different options and many times the limit in size I could find for a plastic lightweight planter was 20 inches. With that in mind, we headed over to Lowe's to check out our options. They had a few 20 inch pot options with different grooves and different heights. We ended up choosing the tallest one because we felt like it would cover her the most. We also found two planter bases that could be stacked to form a larger base. One was 17 inches and the other 15 inches. We also found a pvc pipe known as a "p-trap" that has a nice curve to it that was flatter curved on one end and a stronger curve on the other.

Screenshot 2023-05-22 at 6.16.32 PM.png

I started off the process by cutting out the base of the planter.

Screenshot 2023-05-22 at 6.16.23 PM.png

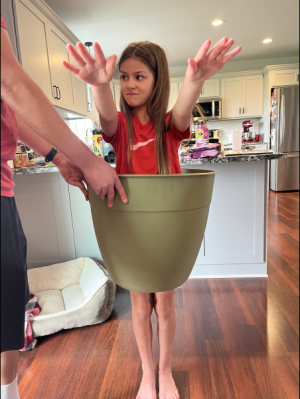
This was more difficult than I anticipated. It took several types of scissors and saws to find a pair that was strong enough to cut through. After some hard work, I was able to remove the bottom. I found an old piece of sandpaper to try and sand down the edges to be smoother, but it cut right through the paper. So I ended up using my dremel with the sandpaper attachment and that worked reasonably well. Then we popped G into it and tested it out.

Screenshot 2023-05-22 at 6.16.14 PM.png

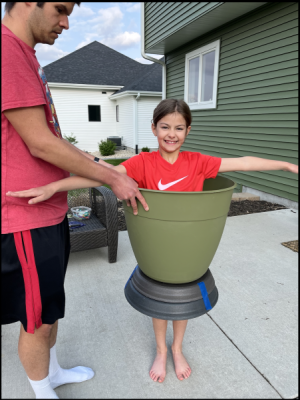
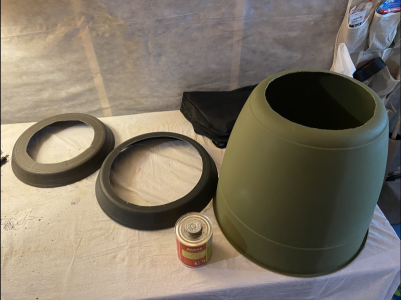
For reference, the top of the planter is 20 inches across and the hole we made at the base is 10 inches across. So enough room for G to get in it, but not a ton of maneuvering room. Next up was cutting out a matching 10 inch hole in the smaller base that will affix to the planter.

Screenshot 2023-05-22 at 6.16.06 PM.png

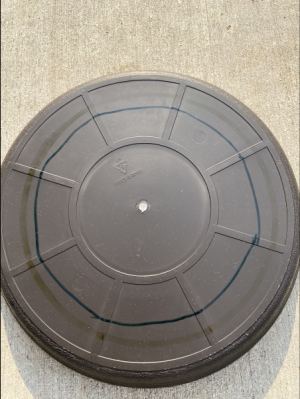
To make the first cut, I used a seed planting tool that has a cylindrical point that allowed me to puncture the center of the base. This made a hole that I was able to widen into the matching 10 inch size.

Screenshot 2023-05-22 at 6.15.58 PM.png

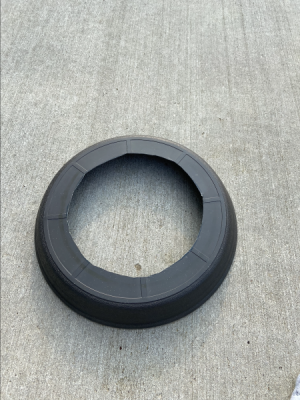
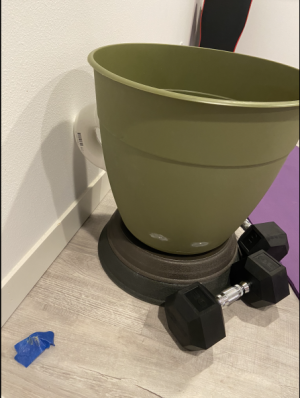
I sanded this down with the dremel. I then moved to the larger base. This one didn't have to be cut to a 10 inch hold since the connection point to the smaller base was around the rim. So I ended up making that hole about 14 inches wide. I taped them together just to test it out and it looked like this:

Screenshot 2023-05-22 at 6.15.31 PM.png

With a proof of concept in hand, it was time to test it out on G.

Screenshot 2023-05-22 at 6.15.15 PM.png

Thankfully, it was a good fit. So we gave ourselves the green light to move forward.

Next Post - Gluing it together
 
Last edited:
Beauty and the Beast - Chip (Theatrical Costume) - Gluing it together

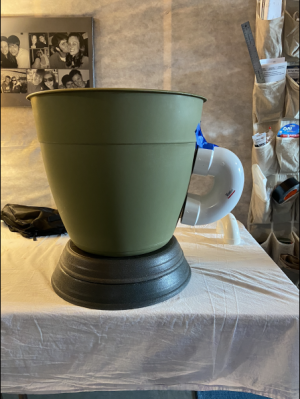
Next up was gluing it down and figuring out the nose.

Screenshot 2023-05-22 at 6.15.41 PM.png

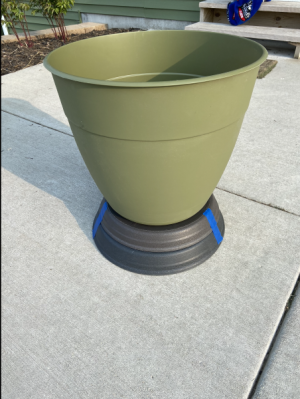
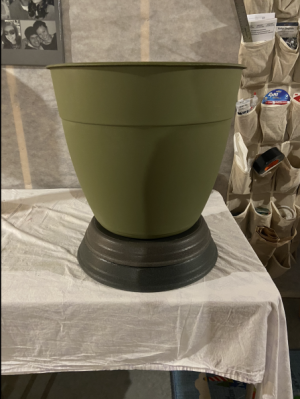
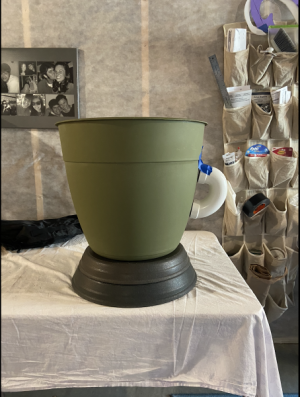
I used the Barge All Purpose Cement to hold it all together. It was actually really easy because I made sure the lip was big enough on the planter to align with the other base pieces. So I didn't even need to hold it in place. Instead, I just flipped it upside down and stacked the pieces onto each other. Lastly I put a board over the whole thing to add some weight to the top one and left it overnight.

Screenshot 2023-05-22 at 6.15.51 PM.png

Success as everything held together well.

Next up was choosing a nose for Chip. We had originally purchased a 2 inch p-trap pvc pipe, but I was curious to see what a 3-inch p-trap looked like.

Screenshot 2023-05-22 at 6.44.46 PM.png

Screenshot 2023-05-22 at 6.44.53 PM.png

The 3-inch looked a little too big. It was also much heavier than the 2-inch pvc, so we all decided we preferred the 2-inch.

Screenshot 2023-05-22 at 6.44.38 PM.png

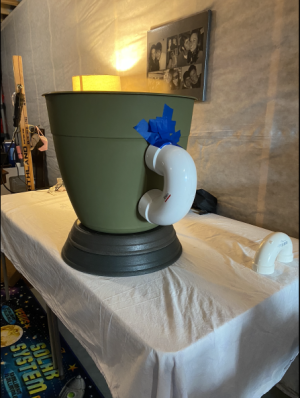
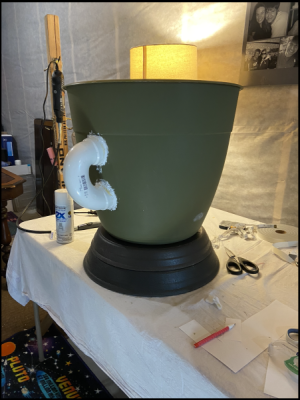
The gap between the pvc pipe and the planter was an issue. You can see above that it didn't lay flat. I tossed around a few ideas, and settled on using the dremel to cut some rainbow holes in the planters to move portions of it closer to the rest of the planter. I tried holding the pvc pipe in place while the glue settled, but it didn't work after holding it for 20 min. I tried bracing it up against the wall for the gluing.

Screenshot 2023-05-22 at 6.46.57 PM.png

And then after a bit of time, I then also added some Kwik-seal white caulk to fill the gaps. Moment of truth was the next morning, and it held!

Screenshot 2023-05-22 at 6.44.21 PM.png

I was really pleased with it overall. Next up was making the costume comfortable.

Next Post - Making it comfortable
 
Last edited:


Beauty and the Beast - Chip (Theatrical Costume) - Making it comfortable

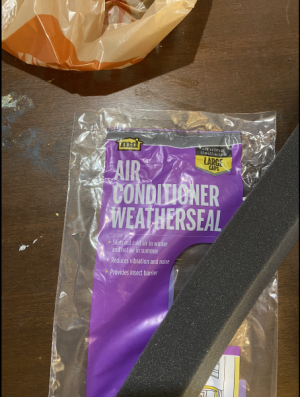
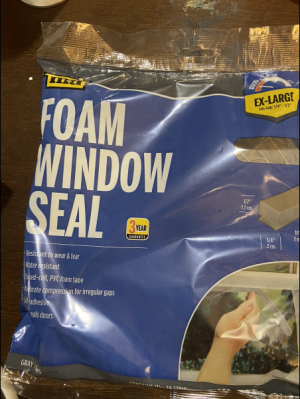
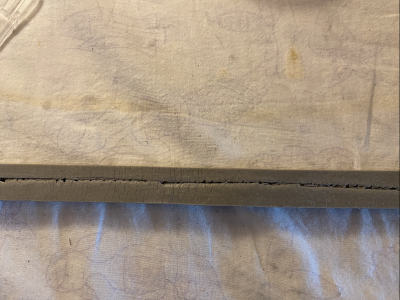
Next up is figuring out a way to make it practical and comfortable to wear. It is a plastic planter after all. The first task was trying to find something that I could put around the 10 inch holes I made in the planter base plates. While they were sanded down with the dremel, they still were exposed plastic. So I tried a few things:

Screenshot 2023-05-22 at 6.45.01 PM.png

This was a good attempt. The foam was thick and light. The problem was it was too thick and took up too much of the limited space available in the hole. So this didn't end up working, but maybe I'll find a use for it sometime else.

Next was this thinner rubber material.

Screenshot 2023-05-22 at 6.45.07 PM.png

It was thinner and reasonably soft. I cut it down the middle to try and split the plastic on either side.

Screenshot 2023-05-22 at 6.45.55 PM.png

Problem is, it just didn't want to stay on there. As soon as G got in the costume it would fall off despite it being glued down pretty well with the Barge All Purpose cement.

I ended up just gluing a piece of backing on it for now. It works as something soft to the touch, but I'm thinking more work remains to be done here.

Next up was trying to find a way for this to stay on G. We settled on a two-path approach. The first path was to use shoulder straps meant for a cross-body bag. We'd hook two straps into the planter and criss-cross them to alleviate some pressure. Those haven't arrived yet, so that remains to be seen how that'll go.

The second was a set of handles on either side on the inside base.

Screenshot 2023-05-22 at 6.46.20 PM.png

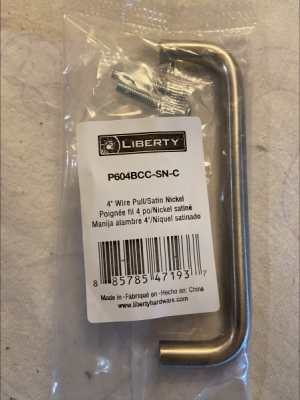
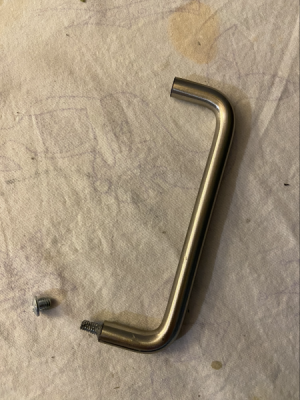
I went with these really simple ones from Home Depot because G will be grabbing them blind. So not having any ridges or anything other than simple piece of metal was ideal. I tried attaching one a few inches away from the inside base of the planter, but the angle was too much for the handle and it actually snapped off at the screw.

Screenshot 2023-05-22 at 6.46.43 PM.png

So instead, I stuck with just on the bottom itself.


Screenshot 2023-05-22 at 6.47.22 PM.png


In the above picture, you're looking down into the cup. You can see my failed attempt on the left hand side being a few inches above the base. You can see the fabric lining the bottom of the cup. You can see towards the top of the picture the cutouts for the nose and the caulk helping hold it in place. And on the right side of the hole you can see a handle bar at the base. So if G's shoulder get tired she can relieve some pressure by pulling up on the handle a bit and putting the weight in her hands instead. Additionally, if she does any complex moves in the cup, then she can grab the handles and have better stability. I think it'll also help if she has to do any stairs too. So these handles could see a lot of use.

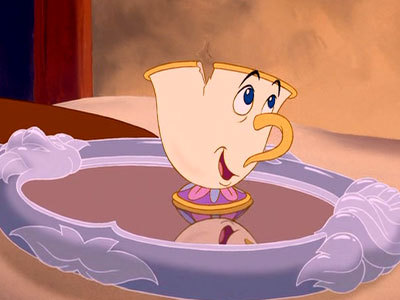
I then cut out the iconic "chip" from Chip. Interestingly, almost every image I found of Chip had the chip on the right side of his face.

chip-cup-animation.jpg


But oddly, I found this singular image where Chip's chip is on the left side of his face.

really-internet-chip-is-really-the-beasts-son.jpg


Not sure if this was a mirror image and not taken directly from the movie (or set of movies). Regardless, we went with the chip on his right side.


Screenshot 2023-05-22 at 6.44.30 PM.png

Screenshot 2023-05-22 at 6.45.15 PM.png

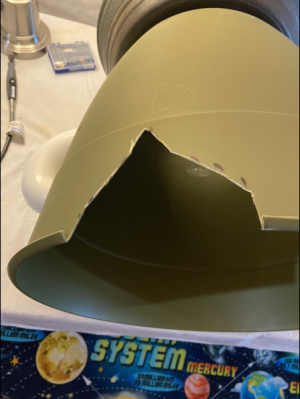
I used the same pair of scissors from earlier to make the cuts. Finally, we were getting to the fun part and would truly see everything start to come together!

Next Post - Painting!
 
Last edited:
Beauty and the Beast - Chip (Theatrical Costume) - Painting

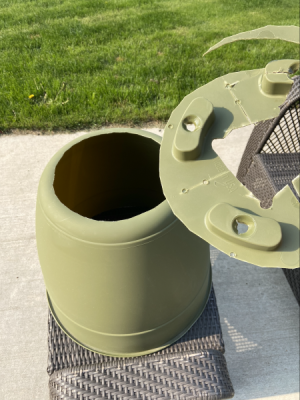
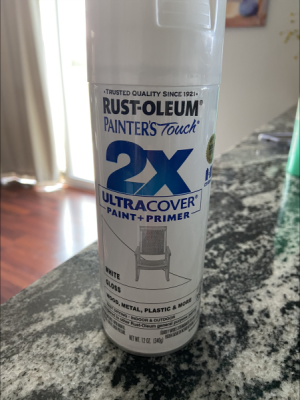
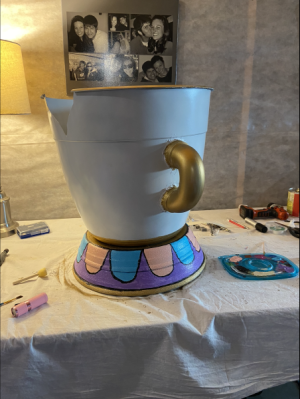
This was the part G was most excited in participating in. For the outer base white color, we used Rust-Oleum 2x Ultracover glossy white. We were hoping for a nice shine!

Screenshot 2023-05-22 at 6.47.05 PM.png

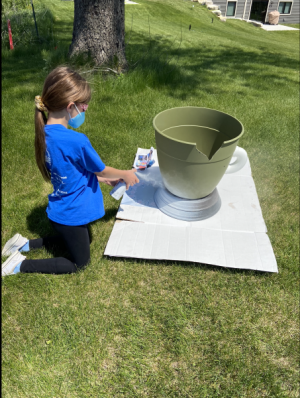
The wind outside was doing us no favors, but we found a good spot away from the house to let some spray paint loose.

Screenshot 2023-05-22 at 6.45.23 PM.png

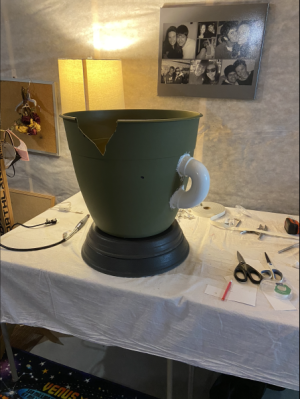
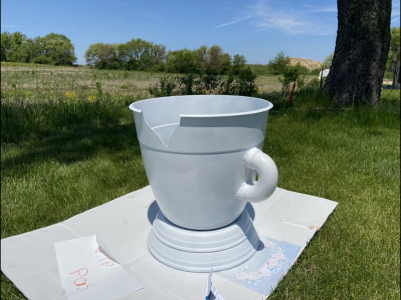
This is when things really started to look like Chip!

Screenshot 2023-05-22 at 6.45.30 PM.png

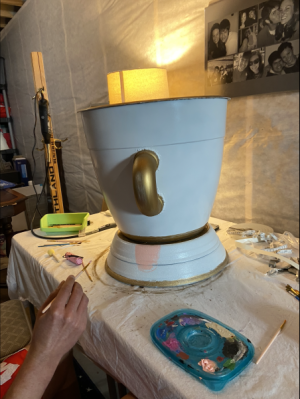
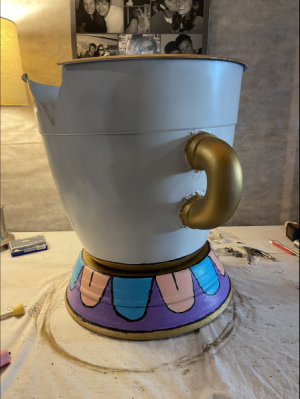
We gave it a few hours to dry, and then carried it into the basement for some Rub n Buff Gold Leaf paint, and some acrylic paint. For the Rub n Buff gold leaf paint, we used the same method as we did for the Ms Marvel fist. Put our hand inside an old sock, and then put a dab of the rub n buff on the sock. Then rub it in. For some of the crevices we did end up having to use a paint brush because our hands couldn't reach some spots.

Screenshot 2023-05-22 at 6.45.38 PM.png


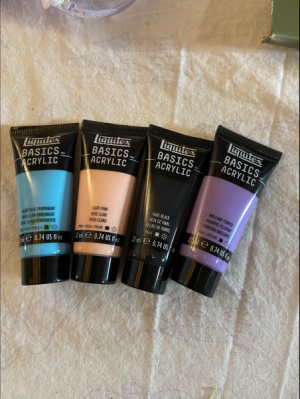
The costume committee and sent me the link to the Mrs. Potts costume that they purchased. So it was a matter of trying to do some color matching on my end. I ended up going with the following acrylics from what I own from that set of 48 colors.

Screenshot 2023-05-22 at 6.46.11 PM.png

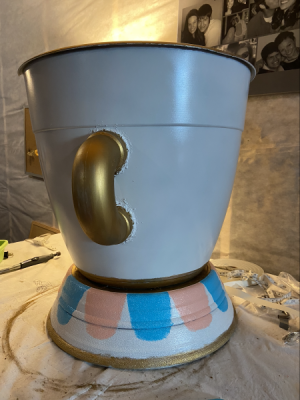
This paint actually goes a long way. So I was thankful I didn't splurge when at Michaels and end up buying any more paint. With the gold out of the way, it was time to use the acrylics to match the design on the base of Chip.

Screenshot 2023-05-22 at 6.46.26 PM.png

He has an alternating blue and pink pattern. It got tricky there at the end because I was like in between the size I wanted for the U-shaped designs. So as I was coming around to back where I started I either needed to make 3 that were like 1.25-1.5x the size I had been using or do 5 of them at like 0.5-0.75x the size. I ended up going with the slightly larger ones and it blended well.

Screenshot 2023-05-22 at 6.45.47 PM.png

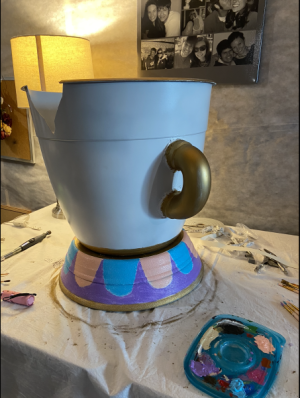
I added the purple to the base after that.

Screenshot 2023-05-22 at 6.46.02 PM.png

I then went around the base and added outlines in black. The other planter based costume I had found an image for didn't do this, but the cartoon chip has some outlines on it. I felt like the black would really help make the color pop, and I'm happy with how it turned out.

Screenshot 2023-05-22 at 6.46.34 PM.png

When Steph gave it a once-over she felt like the purple needed another coat. So I went ahead and added that in.

Screenshot 2023-05-22 at 6.46.50 PM.png

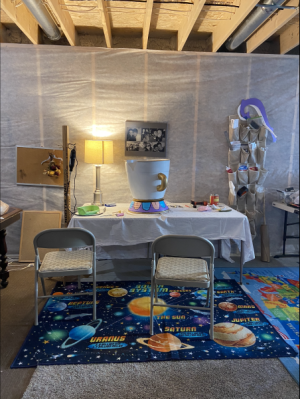
It looks pretty stinkin' cute from a distance. I realized that the stage sits above the crowd, so they may be able to see some of the bottom, so I did a layer of gold rub n buff on the inside of the base too.

And that's all the way up to date as of tonight. The only thing remaining is to add the straps and test out some walking and stairs in it. But I think we're getting pretty close to being done. All in all the costume has been a breeze thus far. Only a single weekend to go from concept to near completion. Far easier than some of the other things we've put together. I'll hopefully wrap this project up in the next few days.

Next Post - The Straps and Finished?
 
Last edited:
2023 Brat Fest 5k w/ G (G takeover! :rockband:)
G is back again to take over her dad's journal to write about the 2023 Brat Fest 5k.

***

It was fun.


GrossMediocreGoldenmantledgroundsquirrel-size_restricted.gif

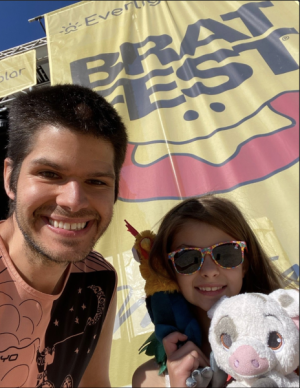
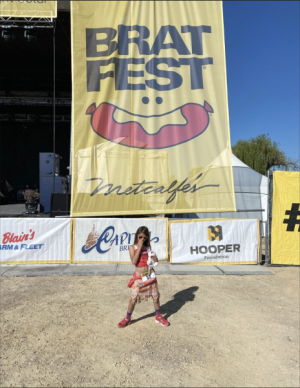
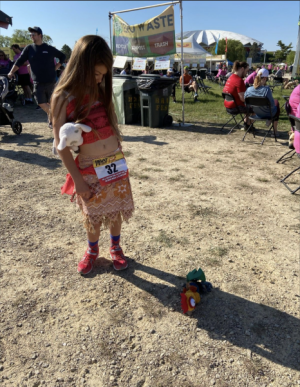
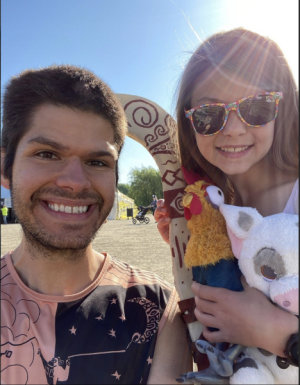
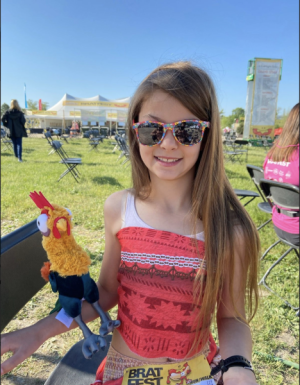
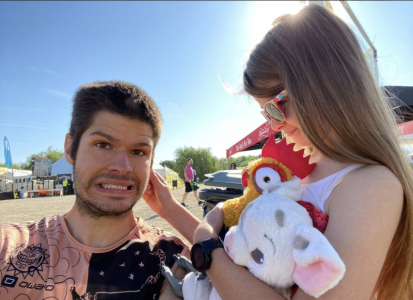
Gotcha! You thought that was all I was going to write. Jokes on you. Alright, alright, let's get to it. I woke up pretty much at the same time I normally do for 3rd grade (around 6:10am). I ate a nutella waffle sandwich for breakfast. It's the breakfast of champions. Pro tip. It's smart to make your waffles into a sandwich because then they don't drip at least that's what my dad says, but what does he know. I decided that we were going to wear our Moana and Maui outfits for the race. Mom had to work, so we dropped her off. We left the house around 7:15am, then dropped her off, and made it to the race site (Brat Fest grounds) at around 7:50am. It was a little chilly so we kept our jackets on as we headed to get our bibs. People sure look at you funny when you dress as Moana for a local race. We got the bibs and then headed back to the car to put them on. Dad used the porta potty but I'm not doing that. It's gross. Am I right people?!?! We headed towards the start and before long it was 8:30am for the Kid's race. Dad and I headed over to the start/finish line so we could cheer on the little kids. I held up Hei Hei and Pua stuffies for everyone to see.

As we were standing at the start/finish to cheer on the kids, a photographer guy started talking to us. His name was Len. He was in charge of photography for Brat Fest and was there to photograph the kid's race. We talked about cosplay and he thought the hook was "sick". But why would the hook be "sick"? Does it have germs? It's foam, it can't get sick. He said he wasn't confident enough to do cosplay, but we told him he just has to go for it. Then we talked about video games. He asked us what our favorite game is right now, and we said "Fall Guys", "Human Fall Flat", "Lego Star Wars", and "Garden Story". He said the rag-doll physics of Human Fall Flat makes it too crazy for him. I like it because they're so floppy. He took a couple of pictures of us, and then had us do some extra hard cheering for some kids that were finishing for a video he took. He was nice. After the kid's race was over, my dad and I took some pictures.

Screenshot 2023-06-02 at 7.32.17 PM.png
My dad and I with the Brat Fest sign!

Screenshot 2023-06-02 at 7.32.27 PM.png
Power pose!

Screenshot 2023-06-02 at 7.32.06 PM.png
Hei Hei don't eat that rock!

Screenshot 2023-06-02 at 7.32.45 PM.png
Selfie with the whole gang!

Screenshot 2023-06-02 at 7.32.54 PM.png
Hei Hei balancing on my arm!

Screenshot 2023-06-02 at 7.32.36 PM.png
We all know who's actually in charge here!

It didn't take long after taking some pictures that it was almost time for the race. We had a few people come up to us and compliment us on the outfits. Even had a group of ladies say, "Hey, I didn't know there were going to be character stops at this race too!". They run Disney races too! They were doing Wine and Dine next, and we said we were doing Disneyland as Mike and Marty! Dad was looking over the 10k racers and said he felt like he could have been competitive. The 5k runners looked a little quicker. The 10k started first, and then a few minutes later it was our turn. We started towards the back! Our goal before starting was to maybe beat last year's time of 42:30, but we were willing to go slower if we felt like it. We were just out there to have some fun together!

When the race started, there were a lot of other people around us. We were running around, but before too long the road got wider and it was easier to run. I kept looking back from my dad, but he's tall and could always see me. We considered doing 30/30, but decided to do run when we want and walk when we want. I was carrying Pua, and dad was carrying Hei Hei and the hook. We pretended to be Moana and Maui when we ran. We talked about returning the stone to Te Fiti. We talked about the village. We talked about how Hei Hei was NOT a snack. When we started to see other runners head back we cheered for them. Mostly cheered for the girls though. Girl power! One lady said "Ow way Ow way" when she ran by. That means she recognized our outfits! We saw some pretty fast dogs out there too. They were faster than us. At one point dad said we were going a little slower than last year, and I said that's ok. It's hot. This race is an out and back. That means we run out, and then we run back. It's a good choice because then you know you're halfway to the finish. When we got to the halfway mark there were people passing out water. That's when we decided we should have brought a rock that we painted green and given it to a volunteer and pretended they were Te Fiti. Once we passed the rock to her, then it was time to make the journey back to the village. That's the finish line for those that don't get it. At one point dad was running backwards, and being coo-koo banana. He said he thought maybe he could run the rest of the race backwards, but I didn't think he could do it. A random lady by us said she believed in him. Whatevs. We goofed off for the remainder of the race, and then when we got close to the finish I super boosted. There were people chasing me (10k runners) but I wasn't going to let them catch me. They said, "Moana, I'm coming for you." But they never caught me. Boo-yah!

giphy.gif


Official Time - 47:13

Not our fastest, but it was fun. A fun part about this race is the free brat afterwards. Yum! It's a good race, but I'll admit I don't like running in the heat. I'd like to run more often when it is a bit cooler out. Of course, our next race is Hot2Trot, and not Warm2Trot or Cool2Trot. So... yea.... We might be reconsidering our race choices next time around. Anyways, thanks for reading. I'm off to see Taylor Swift ya'll.

giphy.gif
 
Sounds like a fun time!! Love the race recap G! Hope you had the best time at TS! I watched part of someone’s live stream of the show while I was sitting on the couch. Would much rather have been there in person!
 
First of all, G is 110% correct about port-a-potties. Gross.

Second, I hope you had the best time at Taylor Swift! I went to the show when it poured rain the whole time and had a blast anyway! What were the special songs you got?
 
First of all, G is 110% correct about port-a-potties. Gross.

Second, I hope you had the best time at Taylor Swift! I went to the show when it poured rain the whole time and had a blast anyway! What were the special songs you got?

G had a fabulous time.

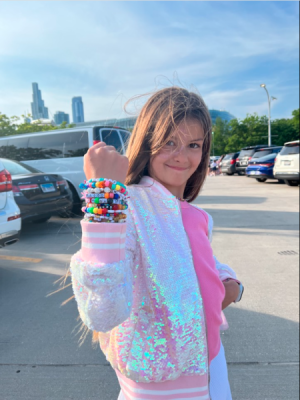
Screenshot 2023-06-12 at 3.45.45 PM.png

I didn't go with. Steph, her mom, her sister, and sister's SIL/daughter went to the show. I'm not a big concert fan, and Taylor Swift didn't mean that much to me to make the trip. Steph said the secret songs were "the 50 shades of grey song, and some song from a duet album she did before TS was TS that she's never sung live before". The video of G when TS first comes out on stage is hilarious. She's swapping between pure joy and crying faces every few seconds. LOL! I think the anticipation of the event just overwhelmed her in that moment.

Oh man, wasn't that the show that was super delayed too? Swift is pretty amazing at what she does.
 
G had a fabulous time.

View attachment 767191

I didn't go with. Steph, her mom, her sister, and sister's SIL/daughter went to the show. I'm not a big concert fan, and Taylor Swift didn't mean that much to me to make the trip. Steph said the secret songs were "the 50 shades of grey song, and some song from a duet album she did before TS was TS that she's never sung live before". The video of G when TS first comes out on stage is hilarious. She's swapping between pure joy and crying faces every few seconds. LOL! I think the anticipation of the event just overwhelmed her in that moment.

Oh man, wasn't that the show that was super delayed too? Swift is pretty amazing at what she does.
Love the bracelets! I didn’t trade and wish I had, so maybe for the LA show I’ll make some.

Tough night for secret songs. 😅

We were lucky - no lightning so no delay. Nashville got the delay due to bad storms.
 
Love the bracelets! I didn’t trade and wish I had, so maybe for the LA show I’ll make some.

Yea, they set up a table in the parking lot and invited people to make some additional ones and then did trades as well.

We were lucky - no lightning so no delay. Nashville got the delay due to bad storms.

Ahh ok. Thank goodness. Steph and them didn't get to the hotel until 2:30am, so I can't even imagine what time the Nashville people would have gotten out of there.
 
Beauty and the Beast - Chip (Theatrical Costume) - The Straps and Finished?

We last left off with the Chip theatrical costume almost completely finished. The final component was the strap system. We considered multiple options when designing the strap system. One was where we would drill small holes underneath the lip of the top of the cup and weave through some fabric. This would sit across her shoulders and keep the costume at a static height. We decided not to go with that system for two reasons. One, the costume would have the perchance of slipping off her shoulders during times of vigorous movement (and knowing my child, that would be all the time). Secondly, we wanted the costume to be customizable in the event this costume gets passed to a different theater group after us. So it can't be just good enough for G, but also must be good enough for a different child at a different time. So with that in mind, we went with a different option.

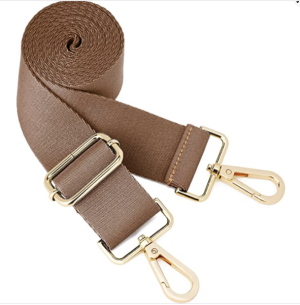
We went with a canvas cross body strap (link). The strap has well made snap hooks and rings for adjustments.

Screenshot 2023-06-12 at 7.07.18 PM.png

This picture is off Amazon, but is not the color we went with (Beige). They don't have our color in stock at the moment.

I drilled four holes on the inside of the costume next to the handles (2 in the front of the costume and 2 in the back).

screenshot-2023-05-22-at-6-47-22-pm-png.762280


An old image looking down into the costume. But along where we put the white fabric for softness we drilled the holes for the snap hooks. It was tough to get the hooks into place, but once we did I doubt they're going anywhere. We snapped them such that the straps go diagonally across the costume. Such that in the front it will appear as two straps, but in the back it will be in the shape of an "X" as they cross the back. This will help keep the straps from falling off of her during vigorous movement.

As we tested the costume, it became apparent that the front of the costume weighed more than the back (because of the nose). So after a few steps, the front of the costume would dip forward. She could fix this by holding the handles on the inside, but the goal was for that not to have to be done. So we bought a 3M hook (link) to attach to the inside front of the costume and we'd look a strap around that as well as her two straps to hold everything in place with a triangle tie.

I wasn't sold on the tie, and right before we put the costume together with it, I had a different idea. What about just a simple piece of Gorilla Tape with a shoe string taped to the inside front of the costume. Then use the taped down shoe string to make the triangle tie with the straps. We tested it out, and Voila! it held in place. Chip's nose was no longer dipping down. The Gorilla Tape is very strong and had little movement, so I feel pretty confident that it's not going anywhere.

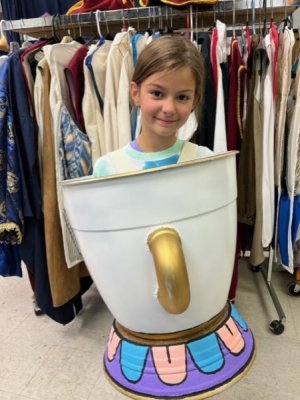
And with that, we felt like we had a completed Chip theatrical costume!

thumbnail_70830339548__88805E12-697C-443E-914E-A49B1DCC4D7B.jpg

thumbnail_70830355362__4F64D82E-CF69-4211-87E7-B046F4A5B6A3.jpg

She'll wear a white turtleneck (to protect her neck from the straps), long white tights, and white ballet flats. And just like that, my job was done. I passed off the costume to the theater group, and will await any desired changes based on how it works in practice. But I feel pretty good about it! G was so so so SO SOOOO excited to show it off to the other cast members.
 
Beauty and the Beast - Chip (Theatrical Costume) - The Straps and Finished?

We last left off with the Chip theatrical costume almost completely finished. The final component was the strap system. We considered multiple options when designing the strap system. One was where we would drill small holes underneath the lip of the top of the cup and weave through some fabric. This would sit across her shoulders and keep the costume at a static height. We decided not to go with that system for two reasons. One, the costume would have the perchance of slipping off her shoulders during times of vigorous movement (and knowing my child, that would be all the time). Secondly, we wanted the costume to be customizable in the event this costume gets passed to a different theater group after us. So it can't be just good enough for G, but also must be good enough for a different child at a different time. So with that in mind, we went with a different option.

We went with a canvas cross body strap (link). The strap has well made snap hooks and rings for adjustments.

View attachment 767253

This picture is off Amazon, but is not the color we went with (Beige). They don't have our color in stock at the moment.

I drilled four holes on the inside of the costume next to the handles (2 in the front of the costume and 2 in the back).

screenshot-2023-05-22-at-6-47-22-pm-png.762280


An old image looking down into the costume. But along where we put the white fabric for softness we drilled the holes for the snap hooks. It was tough to get the hooks into place, but once we did I doubt they're going anywhere. We snapped them such that the straps go diagonally across the costume. Such that in the front it will appear as two straps, but in the back it will be in the shape of an "X" as they cross the back. This will help keep the straps from falling off of her during vigorous movement.

As we tested the costume, it became apparent that the front of the costume weighed more than the back (because of the nose). So after a few steps, the front of the costume would dip forward. She could fix this by holding the handles on the inside, but the goal was for that not to have to be done. So we bought a 3M hook (link) to attach to the inside front of the costume and we'd look a strap around that as well as her two straps to hold everything in place with a triangle tie.

I wasn't sold on the tie, and right before we put the costume together with it, I had a different idea. What about just a simple piece of Gorilla Tape with a shoe string taped to the inside front of the costume. Then use the taped down shoe string to make the triangle tie with the straps. We tested it out, and Voila! it held in place. Chip's nose was no longer dipping down. The Gorilla Tape is very strong and had little movement, so I feel pretty confident that it's not going anywhere.

And with that, we felt like we had a completed Chip theatrical costume!

View attachment 767255

View attachment 767256

She'll wear a white turtleneck (to protect her neck from the straps), long white tights, and white ballet flats. And just like that, my job was done. I passed off the costume to the theater group, and will await any desired changes based on how it works in practice. But I feel pretty good about it! G was so so so SO SOOOO excited to show it off to the other cast members.
You are incredibly talented. This turned out amazing!
 
Marty and Mike Wazowski - Laugh Canister Part 1 - Construction
The Concept
I have to admit, while the Ms. Marvel hand may have been a harder foam construction that took several months to complete, this Marty and Mike Wazowski costume is shaping up to be the most ambitious costume yet. It's no laughing matter. :rolleyes1

We've officially codenamed the Laugh Canister the "Gathering Intact Giggles Instrument".
thumbnail_IMG_5704.jpg

As a reminder, the goal was G wanted me to create something with light and sound. She keeps wanting to raise the bar, and with each passing prop/costume we make she wants something more. So I needed to figure out a way to incorporate both lights and sound into this new prop.

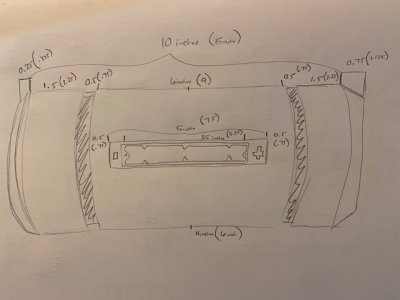
The very first step was determining the size of it. It's important to keep in mind that this can't be so large that I can't fit it into a suitcase. So while the actual canister in the movie ranges in size from 1.5-2x the size of Mike Wazowski to half his size, that isn't going to fly for this creation. My large suitcase had a max length capacity of 24 inches, and my small suitcase maxed out at 14 inches. In addition to the length, it was important to take into consideration the space inside the canister. I have two battery packs that I'll detail at a later point, but one is 8-AAs and the other is 4-AAs. The 8-AAs is about just over 3 inches wide. So that became the first limiting factor for inside space. Additionally, there is also a speaker for the sound generation. The speaker itself is 3 inches across, but with the housing it ends up being just a shade under 4 inches. So I minimally needed something with a four inch diameter. Steph and I tossed around a few ideas of things that are 14-24 inches long and 4 inches wide.

We thought about making it out of foam like we've done other projects to date. But I remembered how many issues we had with the foam and trying to maintain a shape when making the Ms. Marvel bracelet. I was also concerned it might not be rigid enough for what we were going to be asking of it.

We thought about deconstructing a bird house, but I was worried that it might be too flimsy. A thin soft plastic might have too much movement when I ran, and at the end of the day this is suppose to be a metal canister.

We thought about using some plastic tubing like you place on the end of your home downspouts. A little more rigid, but still has some movement to it. But I thought it was going to be difficult working around the ridges those things have.

Ultimately, we settled on using PVC pipe. It was very rigid, had good self support on its own, and I could find it in a 4 inch diameter. However, at first I was having difficulty finding the 4 inch diameter in a size I could use. They had small attachments that were 4 inches diameter, and they had a 10 foot piece, but nothing in-between. But after some digging through multiple websites, I was able to find a reasonable option at Home Depot (link). So I headed over to my local home depot and picked one up... Or at least that's what I thought would happen. Despite having 7! listed as being in stock and another 25! available for delivery, they were no where to be found when I got there. After about an hour of walking around and picking up other supplies (which we'll get to later) I finally asked for some help. Problem was, the help wasn't helpful. Home Depot uses the shelving above the eye-level items as overstock. But the organization system is simply they overstock in the same aisle as the item, but nothing more specific. Well when the shelving is like 30 ft tall and like 100 ft long it makes for a headache when you're looking for a specific item. At the end of the day, despite that item apparently having a lot of stock as well as smaller diameters of 2 ft PVC, none of the overstock for them could be found. I'm convinced either their on-hand inventory is WAY off, or there was some other location these were being held since they were a unique shape. Regardless, I got home and ordered a 2 ft PVC from Home Depot and it was delivered a few days later.

thumbnail_IMG_5705.jpg

The 2ft by 4in diameter PVC weighed in at 5 pounds. The dimensions of it proportionally to the tank from Monsters Inc was that it needed to be a little shorter. It also would help with the weight of it too to cut some off. I used an image of Mr Waternoose holding a tank to get some proportional dimensions. I uploaded the image to Powerpoint, then I created small box images of known length to get distances in inches units using a 10 inch length as the basis for end to end. So then if I wanted to scale up or down, I could just do everything off the base 10 value. Based on seeing the PVC in person, as well as the calculations from the proportions, I decided to go with an overall length of about 17 inches. Not too big, but also not too small. As you can see in the image above, I used some Gorilla tape just to tape off different portions of the tube to get an idea what it would look like.

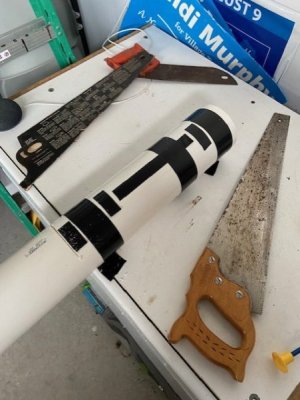
I did some reading online and determined my best bet for cutting the PVC pipe was using a handsaw. Thankfully I had a few laying around from when we bought our first house in 2011 (as part of the deal of buying that house we bought all of the tools, ladders, lawn mowers, chairs, furniture too). Since we were new home owners having all this equipment was a big boon for us, and it was different times back in 2011 in terms of sellers/buyers. We were the first people to tour their home in over 1.25 years on the market. So when we came around, they were really looking to sell, and off loading some equipment was no biggie to them. I had a plethora of saw options, but ended up going with the one with the biggest teeth.
thumbnail_IMG_5706.jpg

I don't have any clamps, and I didn't trust G to be my side-kick when cutting this off. So instead, I used some Gorilla tape and strapped the tube down to the table. Then I leaned the edge of the pipe off the edge of the table and went at it. I'm no sawing expert, but apparently it's easier if you angle the saw downwards and away from you. It was slow going, and for a little bit I didn't have a level cut. But I noticed before I got too far into the cut and corrected it. Once I got going, then it got easier. And within a few minutes of hard labor, I had a PVC pipe cut to desired size.

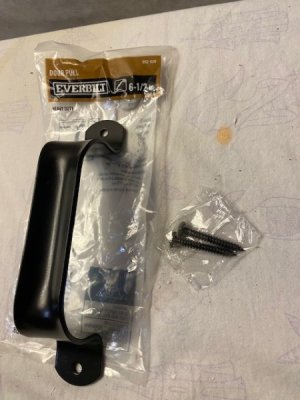
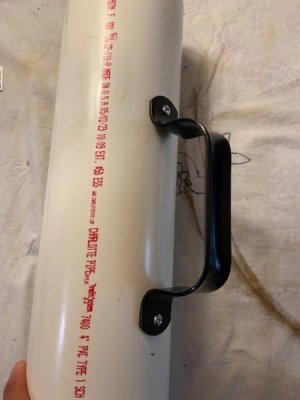
Now that the pipe was cut to size, the next item on the list was, "how am I going to carry this thing?" While my hand could fit around the diameter and I could carry it that way, I don't have the greatest hand endurance. My fingers and hand strength is pretty poor actually. So I wouldn't last long if I tried to carry it with my fingers splayed out. Which meant I knew I needed a handle. I looked over several handle options when I was at Home Depot. I considered drawer handles, door handles, and gate handles. The drawer and door handles ended up being too small. The gate handles were a better size. I took a few options over to the PVC pipe area and placed each on the 10 foot pipes. I was most concerned with, "Can my hand fit around the handle without touching the pipe, and will the handle attach despite the curvature?" Only one handle ended up satisfying both of these criteria. It was big enough to get my hand around without obstruction, and had a single screw hole on the bottom and top. It was this Everbilt 6.5 inch door pull (link).

thumbnail_IMG_5707.jpg

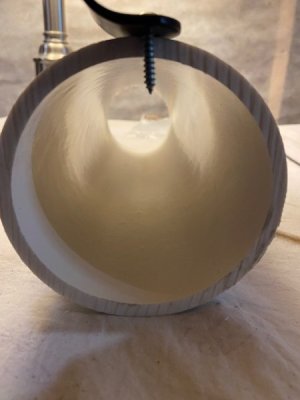
Added bonus was that it came in black, and it was comfortable to hold the handle. One drawback was that the screws that were provided were quite long. I didn't want to use the provided screws because then it may have made it more difficult to work inside the tube with the electronic components. So G and I searched through our "home purchased" tools and were able to find some matching width screws, but shorter. We were also able to find some nuts for added support in making sure the screws didn't go anywhere.
thumbnail_IMG_5709.jpg

This left us lots of room for other activities!
thumbnail_IMG_5710.jpg

I was very pleased with the handle choice. And a super added bonus is that when the canister is held in the vertical position, there's a groove at the top of the handle for my thumb to rest. So it really ended up being the perfect choice for this project. Next up, drilling a hole for the sound button!
thumbnail_IMG_5711.jpg

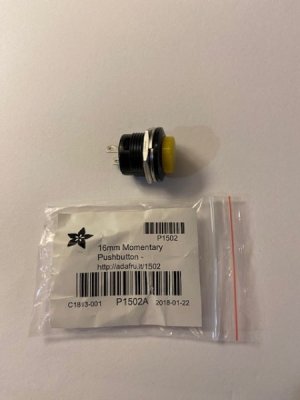
For the sound button I wanted something robust so that it would be easy to push in the moment. Something I wasn't going to miss. I went with this 16mm Momentary Pushbutton (link). It being a momentary button means that when I stop pressing the button down, it will come back up on it's own. Compared to a "latching" button which when pushed will stay down upon being pressed. For our purpose, we wanted a momentary pushbutton. It also came in an illuminating option that could have been powered by the sound board. However, the instructions on how to wire it weren't explicitly clear, and I didn't feel that was a challenge I wanted to take on for this project. Not necessarily hard, but not something I felt was necessary for what we were doing.

Based on the size of the pushbutton, I needed a drill bit that was at least an inch. So that was a new purchase, because I didn't have anything nearly that large. But now I've got several new drill bits from 1/2 inch to 1 inch in size. I'll admit, the 1 inch drill bit is scary to handle since it's so huge. But it did the job!
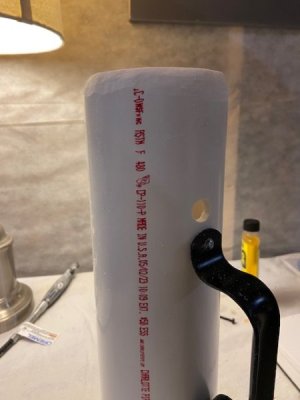
thumbnail_IMG_5713.jpg

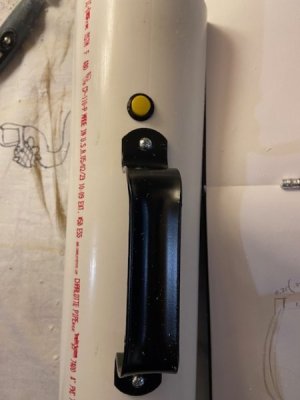
And I was able to place the button inside the hole.
thumbnail_IMG_5712.jpg

The button comes with a washer and screw for the backside to help hold it in place where we're good to go. But we've got a ways to go before that needs to be finally held in place.

Lastly on the construction side of things, was beveling the edges of the canister. According to the online images, the canister doesn't have a flat top/bottom, but rather has a slanted edge. So I took out my trusty Dremel 4000 (link) with rotary flexshaft (link) and sanding bit and went to town on it. It's important to note. This is plastic and not something you want to be breathing in. So I wore a respirator as well as eye protection when I did this. It created an ABSOLUTE mess. But two images up you can see the slanted edge on the top of the tube. But yea, a mess!
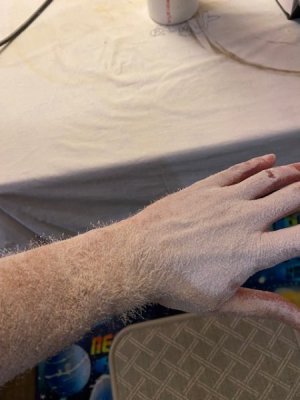
thumbnail_IMG_5714.jpg

I had to take a shower afterwards I was so covered in dust. I also threw away the mermaid sheet that had been acting as my cover to the table because it was just too far gone. So a lesson learned here. If I shave down some PVC again, it's happening outside!

And that brings us to the end of the construction part of the Laugh Canister. Next up is the lighting!

Next Post - Lighting!
 
Last edited:

GET A DISNEY VACATION QUOTE

Dreams Unlimited Travel is committed to providing you with the very best vacation planning experience possible. Our Vacation Planners are experts and will share their honest advice to help you have a magical vacation.

Let us help you with your next Disney Vacation!


facebook twitter
Top