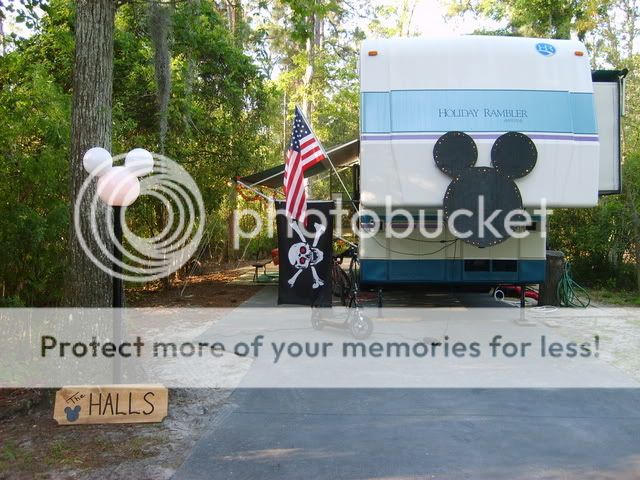
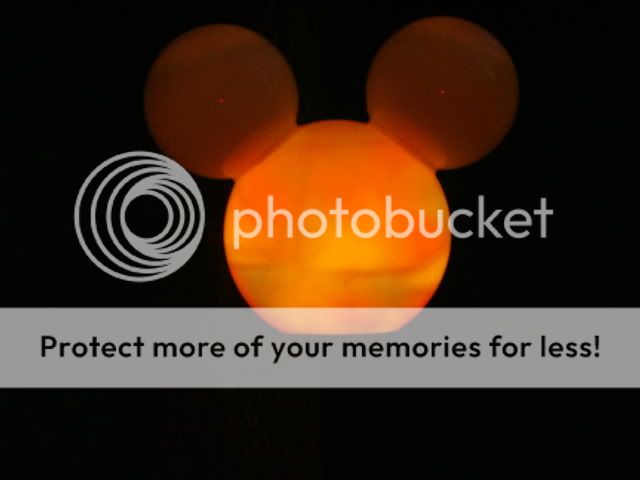
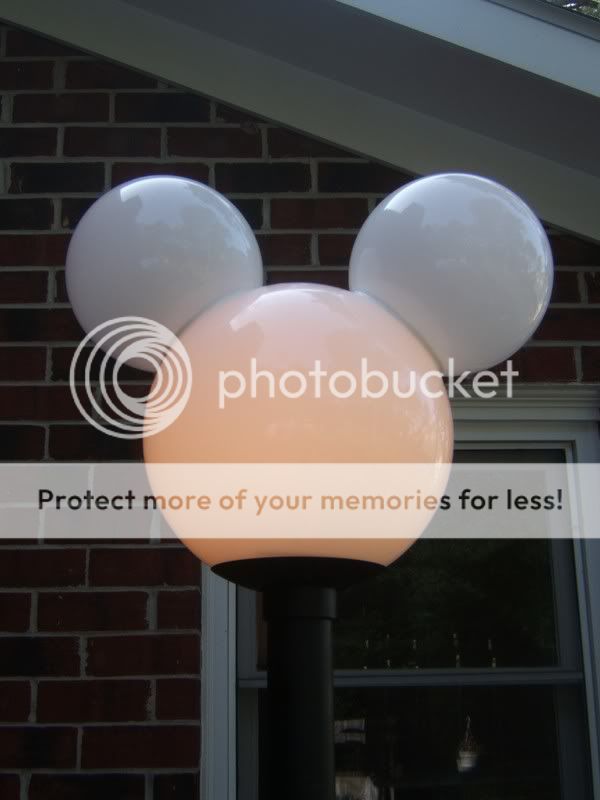
Mickey light post directions

Thanks so much!! Now, I just have to find the globes so dh can get started!!
 
We found a 12 inch post mount globe and two 8 inch plastic globes at Home Depot.The 12 inch was $26.00 and change but it already had the light fixture in it. The 8 inch were $11.00 and change. We bought 2 inch PVC with a coupler for post. There were three screws in the base of the globe to atach it to a post. I replaced one screw with a longer one tho make it secure to the coupler.We bought the expensive silicone to attach the ears ( $ 5.00 plus ). This was all about $50.00 with enough silicone and PVC pipe to make a second one.Wal Mart had a 40 foot extension cord for the power at less than 8 dollars.I may put some pics up when I take some ( and figure out how to get them up here ).Also the 12 inch globe is acrylic. I used a flat blade type tip on my soldering gun to melt thru the 12 inch globe to attach the ears ( I didn't know what that tip was for anyway:confused3 ) lol.
 
Ok, so had to search for this thread, DW thinks we need a Mickey light post now, so, How are you holding the light post in the ground? I see the one in the planter, but not sure how you are holding the others, Thanks, Ray:banana: :banana:
 
Ok, so had to search for this thread, DW thinks we need a Mickey light post now, so, How are you holding the light post in the ground? I see the one in the planter, but not sure how you are holding the others, Thanks, Ray:banana: :banana:


I strap mine to the tongue of our travel trailer with strong bungee cord when camping. When at home it is strapped to our fence. Very secure, yet easily portable.
 
This may be hard for me to explain without pictures but, I will try. I cut a square piece of plywood for the base.Then I put four wood screws about 3inches long through the bottom so they would stick up around the post and right up against it. I then put a hose clamp around the screws and the post.When you tighten the hose clamp the threads on the screws keep the post from moving. I'm not sure if I will have any problems with this setup in the future but for now it allowed for a lighter base.you cut a small groove in the bottom of the post for the cord to come out the back. Just make sure the base is square not rectangle for stability at all directions unless you intend to place something on the base for stability. One you paint the base to match the pole you don't notice the scews and clamp. Remember that I have only seen these as made by Disney Fans and although the concept stays the same, use your imagination and you may be able to come up with something better. I made mine the way I did to reduce the weight of the base...What do you know, it wasn't that hard after all...
 
We use a toilet flange that we bought at Lowe's. Our lamppost is made from PVC Pipe so the pipe sits nicely in the flange and we secure it with spikes driven through the holes in the flange. You can't tell it's a toilet flange...just looks like a circular base.
 
We used a white bucket (to match the white globes) and cut a hole in the top of the lid and slid the pole down into it. We put sand in the bucket to weigh it down and then return the sand when we are done...
 
I second the toliet flange, that is what I used and then put an 90 degree elbow on the bottom of the flange and used that to run the cord out of the bottom of the base. I used a cheap plastic flower pot as the base and cut a hole in the side of it for the elbow to come out for the cord and then filled the pot with mortor mix to give it weight so it wouldn't blow over. It has worked great so far we have used it several times. We use one of those timers so it will come on if we are not around and will turn off by itself.
base2.jpg

base.jpg

light.jpg
 
We use a toilet flange that we bought at Lowe's. Our lamppost is made from PVC Pipe so the pipe sits nicely in the flange and we secure it with spikes driven through the holes in the flange. You can't tell it's a toilet flange...just looks like a circular base.


That is what I did to :cool1:
 
I found this thread too late before leaving on our way to FW, so I couldn't find the 12" globe in time. Instead, I used an 8" one. 4" globes looked like they would be too big for the ears, so I found cheap toy softballs at Wal-mart for the ears - not as big as I would have liked, but I was in a time crunch and needed something.

The post is 3" PVC with a 3"-4" conversion I rigged up and painted gold with thumb screws to hold the globe. The base is an old Christmas Tree holder that we haven't used in years.

I used a 25W bulb to light it.

It's not as classy as some I've seen, but we still got quite a few good comments on it.

100_1487.jpg
 
I went to Home Depot today to check on the supplies to build one of these. The guy showed me the globes and then after he was gone I find the kind that already has the light fixture. I was looking at lamp posts ($50) but I forgot about the pvc trick. My ? is will the globe I saw mount right to the pvc? What did u paint the pvc pipe with? I think this is a 12" globe so I'll probably get the 7" globes for ears. Last thing is once you cut the ear holes and mount the ears in those holes do you put the silicone inside or outside?

I like the toilet flange idea so the pole can be taken out. I'll probably put my lamp under the bed for safe storage and put the bucket in the underneath storage. Looks like if I go with the pvc pole it can be done for $50.
 
I'm not sure what size opening the 12" globe has, but the 8" globe had a 4" opening. I used 3" PVC pipe that I already had, so I had to get from a 3" cap to a 4" opening for the globe. I used a 4"-to-something reducer (can't remember the exact size) and cut a hole in the 3" cap to fit the reducer, then glued them together back-to-back.

In the 4" end, I drilled and tapped holes for thumb screws to hold the globe tight then painted it with gold metalic spray paint to dress it up a little.

Then I wired up the light socket with a short pigtail for the plug - the extension cord is fed up through the PVC pipe to plug it up.

I used cheap black spray paint to paint the PVC, but make sure you get spray paint made for bonding to plastic. Mine is scratching off too easily and will have to be repainted eventually.

I used gorilla glue to glue the ears to the globe, then used clear silicone caulking to seal it all up. White would have been just as good, I just had the clear on hand.

Just be veeeerrry careful cutting the holes. I tried 3 different ways to get the holes cut and ruined two of the smaller globes (the awning lights). The only one that worked was the big round hole saw that fits in as a drill bit.

light_upclose.jpg
 
I used 12 inch globes and 6 inch globes from Home Depot. The 12 inch globe was the hardest to find. I had to go to a couple of HD's to find it, but it was worth it.
 
Well, I finally decided to give the Mickey lamp a try. I don't know how to build it for $50, it cost me $90 @ Home Depot, but well worth it. Got a lamp post globe kit, added 2 8" globes, 2"pvc, a plastic planter with some concrete, some black texturized plastic spray paint, and part of an old extension cord......Think it looks good for my 1st try, we'll see tonight when it gets dark.
Picture001.jpg
Picture002.jpg
 
Quote from MBMACS: I don't know how to build it for $50, it cost me $90 @ Home Depot.

I can give you a hint Mac. I priced the globe that already had the bulb and wire. It was $26. The 2 smaller bulbs were around $20. The post was $50 alone so what you do is stick the post under the cart and act like you forgot it. Just kidding. After DD and I priced it all out I started to think why not use black pvc pipe and use that as a post. I bet it's sure cheaper. If you have to have the little bar across the middle I'm sure you could get a piece of wood or something from a crafts store. Just a thought. I'm making one before we see u at the fort Macs.
 

GET A DISNEY VACATION QUOTE

Dreams Unlimited Travel is committed to providing you with the very best vacation planning experience possible. Our Vacation Planners are experts and will share their honest advice to help you have a magical vacation.

Let us help you with your next Disney Vacation!


facebook twitter
Top