To Infinity and Beyond - Becoming a Better DopeyBadger (Comments Welcome)

I too find it interesting to reflect on sorting my races although I would absolutely not choose to do it based on performance. So many of them were for fun, for tourism, for trying something different (ex a HM in the snow), for coaching DD or DH. I guess the definition of success has a different meaning to each of us. How will you rate the 2h+ 5k with G? Unless you keep these out of the rankings?
 
How will you rate the 2h+ 5k with G? Unless you keep these out of the rankings?

If I were ranking, I would definitely take the experience into account, which would put this toward the top for sure if I were Billy. Some of my most miserable races physically were those I'm most proud of finishing, and finishing with friends made along the way. But it's his ranking, so I guess we'll find out!
 
It's funny you should say this, because according to Athlinks, my 5k PR is a race I don't really remember doing. It baffles me how this could be, but I have no reason to doubt the result.

Samesies!

In comparison: I've done 34 races! :)

It will be interesting to see you count them down.

Nice!

I too find it interesting to reflect on sorting my races although I would absolutely not choose to do it based on performance. So many of them were for fun, for tourism, for trying something different (ex a HM in the snow), for coaching DD or DH. I guess the definition of success has a different meaning to each of us. How will you rate the 2h+ 5k with G? Unless you keep these out of the rankings?

Guess you'll find out over the course of the next 34 weeks!

stressed-out-suspense.gif

If I were ranking, I would definitely take the experience into account, which would put this toward the top for sure if I were Billy. Some of my most miserable races physically were those I'm most proud of finishing, and finishing with friends made along the way. But it's his ranking, so I guess we'll find out!

Plenty of time to find out!

200w.gif
 
Marty and Mike Wazowski - Costumes: Part 7

As was discussed here (link) and here (link) and here (link) the Mike and Marty costumes we've been working on may or may not meet the costume guidelines for the upcoming runDisney race season. We'll cross that bridge when it comes. But as of today, we are going to forge ahead on making the "A" costumes and then have a back-up "B" costume ready and prepared in case we need to pivot.

We're kind of all over the place at the current moment in regards to the progress of the costumes. We have several different parts of the project at different points in the completion process. Because I have small bits of time here or there and work on the googely eyes or the hats, or large blocks of time and work on the base of the costume. So for ease of reading, I'll focus only on a single portion of the project all the while keeping in mind that other things are occurring concurrently.

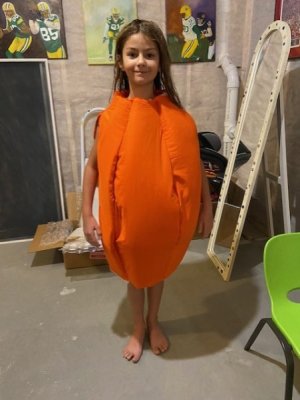
As we last left off, we were happy with how the front of my costume looked (link), but not with G's costume (link). G's costume looked more like a pumpkin and was quite heavy relatively speaking. Mine had a rounded but smooth appearance and was far lighter. The difference was in the batting being used. G's was light weight, but had little to no rigidity. My foam was a little less light, but had more rigidity. So where we had to stuff G's costume full to give it a full appearance, we could instead use the more rigid panels of foam to hold shape in mine. Thereby having to use less, relatively speaking. The issue was, we weren't exactly sure what the brand of foam was that I ended up using because it was scraps from a project my SIL was doing. All she could remember was that they had planned on using it for outdoor furniture. So using that info I tracked down an outdoor furniture batting at Jo-Anns to see whether that would be what we wanted to use for G's costume.

This is the Nu-Foam we ended up going with (link). It comes in a variety of shapes and sizes. Some in roll form, some in squares, a variety of lengths and widths and depths. Based on my costume foam, we went with 1 inch thick. The 24 in width worked, because each of G's panels were 12-13 inches thick at the widest. So we could do two panels side-by-side with this width foam. We removed all the excess foam in G's costume and only kept the two layers of original foam as we had previously designed the costumes. It looked like this.
thumbnail_IMG_6104.jpg

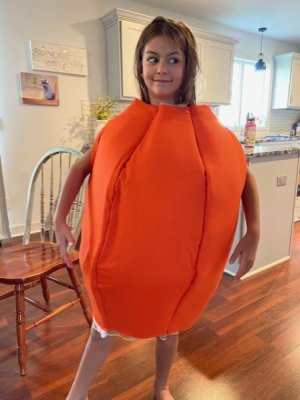
Just goes to show how truly stuffed the costume was, because that looks more like a deflated balloon than a pumpkin at this point. We cut each of the panels to size, and then inserted them into G's costume. This was the result.
thumbnail_IMG_6110.jpg

Quite a big difference. The rigidity of the foam makes all the difference. And this design is much much lighter.

One thing that's important to point out. There's a fine balance on the size of the panel and the look. If you make the foam panel the same size as the cutouts then the foam tends to bow inside the costume. This gives it a weird appearance, and not like the smooth flat structure we're aiming for. So because of that, you need to cut maybe 1-1.5 inches off the width of the panels of foam for it to fit seamlessly.

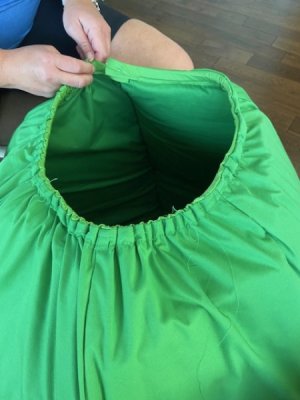
Now it was time to sew the collar and elastic bottom onto each of the costumes. I'll admit it. I didn't fully appreciate just how difficult this was going to be. At issue was, we couldn't remove the foam to sew the collar/elastic on. The foam is quite finicky and my arms aren't long enough (or thin enough in G's case) to flatten it out to maintain that rigid structure. So because of that, we couldn't sew one side shut, then fill with foam, then sew the other side. Both the collar and elastic on while the costume was in it's full state.

As I wrote breifly elsewhere, the total process for my collar/elastic took about 5 hours and was a three person job. The second time around on G's costume I assumed would go quicker because we knew what we were doing, but also hoped easier because it was smaller. But it being smaller actually created additional problems. Her's took me about 3 hours to complete. I didn't take a ton of pictures during this process (admittedly because I was getting very frustrated), so I'll be jumping back and forth between the two costumes to try and give a full picture of what we did.

The first part that was necessary was cutting back some of the foam from the top and bottom of each of our costumes. This allowed some space where it could be sewn fabric to fabric and not have the foam pushing around. Remember, it's rigid, so it doesn't want to stay where it doesn't want to go. Which makes it a challenge when you're trying to not get it in the way of the sew job. The first task was to make the collar.
thumbnail_IMG_6131.jpg

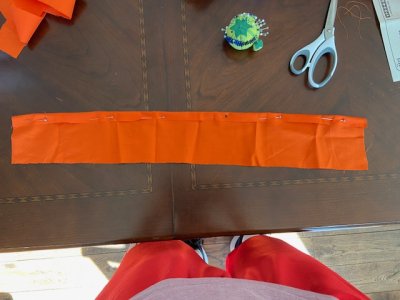
The sewing pattern we bought had the collar has a pattern. So we copied that and used that. We left a little extra on the top so that we could sew the fold down for a clean edge. Turns out that our changes to the foam structure also meant that our collar needed to be slightly longer. So we had to go back and remake the collar piece because it needed to be longer. The frustration came in that this collar piece needs to be small enough that you can tighten the cord/string on the inside to bunch the costume at the top. But it also can't be too small such that the cord/string can be pulled through it. Well I left a little extra room, and others thought that was too much extra. So we went slightly smaller and this burned us later.

The hardest part was sewing the collar to the base costume itself. The collar is a circular pattern on the inside of a foam structure that has a non-zero weight and is somewhat rigid and wants to hold a structure. I initially aimed to do this solo by placing the sewing machine at the far side of the table and then resting the costume on the table itself. All the while rotating the costume and keeping the collar on track. I didn't even get started with this technique before it became quite clear this would never work. So we then pivoted to having a 2nd person hold the costume while on the table and rotating it. This worked some, but the issue was that the angle for the sewing of the collar never really aligned with where the costume was. Towards the middle/end we found that hanging the costume off the table, and having the sewing machine teetering off the edge of the table allowed enough space for the collar to be sewn. Issue was that the second person now needed to hold the costume in a static position while also rotating the costume along at the same pace as the sewing machine operator. If it sounds overly complex, it's because it was. Was there potentially an easier way to do this? Probably. But at least for this rag tag bunch this is what we came up with.

One issue we had was that we were in essence sewing three portions of fabric together on the initial sew. The non-hemmed collar side (the hem was on the outer downside away from the costume opening such that when it was inverted it would show a clean line), and the two pieces of fabric that make up the inner and outer layer of the base costume. Well those three despite being pinned didn't always want to align in the midst of our two person rotating job. Which means the initial sew job had to be done 2-3 times on the Mike costume because we would finish and then fine gaps where all three pieces didn't come together.

While we thought the hard part was behind us when we finally sewed the non-hemmed collar to the outside of the costume, the real challenge was sewing the hemmed collar to the inside of the costume. Because instead of hanging down and sewing at the top of the circle, now we needed to be above the sewing machine and sew at the bottom of the circle. This made for quite the challenge as I was left with limited space to work with on the inside of the costume, while ensuring we left enough space for the cord/string to be pulled through. Ultimately, after 2-3 repeat sew jobs we did eventually get it all sealed up.

Now came stringing the cord/string through. We had purchased a 1/2 in thick green cord to be used (as per instructions). Steph attached a safety pin to one end of the cord to pull it through. She made it about 10% of the way, and then the safety pin and cord became disconnected. And the space inside was so ridiculously tight that the safety pin was stuck inside the collar. After quite a long time, she did eventually get the safety pin out. The issue was the cord would fray and then the safety pin would detach. She tried taping them together, but it didn't work. So we had to ditch the cord and went with a thinner ribbon string that Heidi had laying around as option B. This did eventually work, but I would say it probably took a good 25-30 min of threading it through the collar a good 1/8 in at a time.

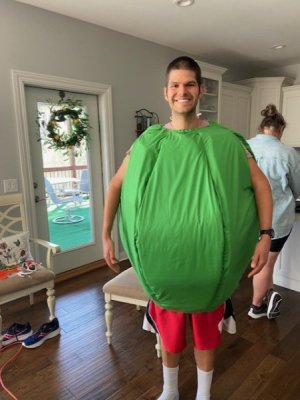
With the collar finally finished, the costume looked like this:
thumbnail_IMG_6133.jpg

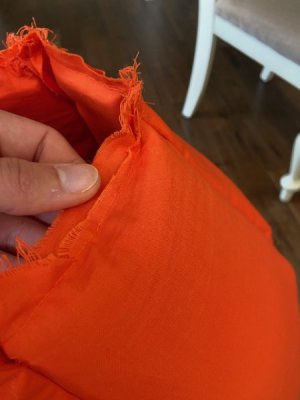
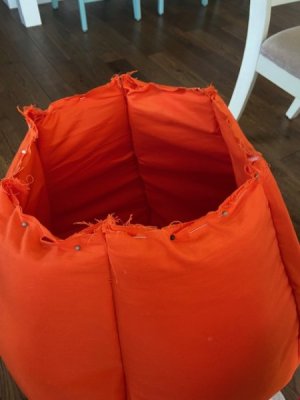
Now it was time for the bottom of the costume. Because the collar gave us so many issues, we troubleshooted whether there was anything we could change for the next part. We ended up deciding on sewing the panels together first as that would enable us only to have to sew two things together instead of three. As you can see here in G's costume:
thumbnail_IMG_6156.jpg

thumbnail_IMG_6157.jpg

This ended up being a big help.

For the bottom layer, we were using Wrights Double Fold Quilt Binding Bias tape 1/2 inch x 3 yard - x3 Kiwi and x3 Orange (link). The debate was whether we should double fold it over for the purpose of sewing, or maybe leave a little extra room to pull through the elastic. On my costume (which we did first) we doubled it over, and the pull job was really tight. On G's we left a little extra and the pull job was slightly easier.

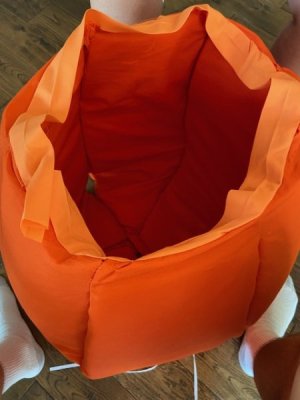
Ultimately, we used the same scheme as the collar. Except this time we sewed the panels together first. Then we sewed the non-hemmed bias tape to the costume, and then folded it over to create the gap for the elastic.
thumbnail_IMG_6158.jpg

Then we pulled the elastic through.

thumbnail_IMG_6135.jpg

While we thought G's costume would be easier because it was smaller, it was actually more challenging in the collar region because it was smaller and there was less space to work with. Where we could drape my costume around the sewing machine, we actually had to sew her costume blind on the inner stitch because I had to work on the outside of the costume instead of the inside. So I only had the pins to guide me as to whether I was actually sewing to anything on the other side. Suffice to say it was tough, but doable. It did cause some tearing in the neck region of her costume because we were stretching it quite hard to get the sew job done on the collar.

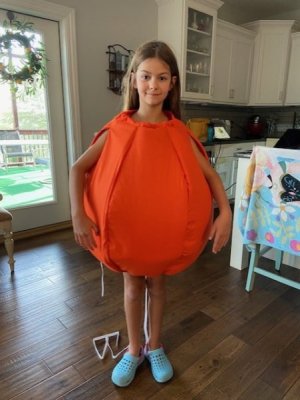
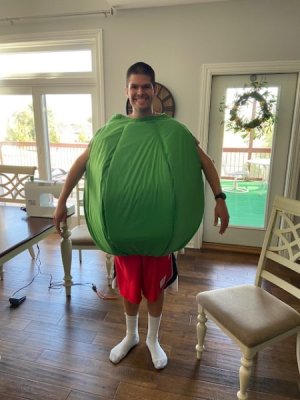
All along the way I was thinking to myself, why did we even do the collar and elastic bottom. Honestly, was the 8 hrs of work even worth it? Why not just sew the two panels together and call it a day. Well, after we saw the final product it became more clear why.
thumbnail_IMG_6160.jpg

thumbnail_IMG_6136.jpg


The collar and elastic really emphasize the rounded shape of the costume. And there's been a lot of progress to make it more Marty and Mike like. So yes. The collar and elastic were very very frustrating and felt like they took forever to execute, but at the end of the day, it was worth it.

So if you squint real hard, are you starting to see a Marty and Mike standing in front of you?

Next up - Part 8
 
Last edited:


I can FEEL your frustration through this post! Having sewed many many costumes in my life, I know exactly how you feel. I think I'd have given up and hand sewed parts of that, but good for you for persevering! You are right, the end result is worth the pain. They look fantastic and I can absolutely tell exactly what you're supposed to be. Your smiles in those last couple of photos say it all.
 
I can FEEL your frustration through this post! Having sewed many many costumes in my life, I know exactly how you feel. I think I'd have given up and hand sewed parts of that, but good for you for persevering! You are right, the end result is worth the pain. They look fantastic and I can absolutely tell exactly what you're supposed to be. Your smiles in those last couple of photos say it all.

Thanks! While I haven't written the updates yet, the costumes are starting to really come together and look pretty awesome. But that sewing was the absolute pits!
 
33 Weeks to go until 2024 Non-Cancelled M - Week 2/35

1694570318196.png


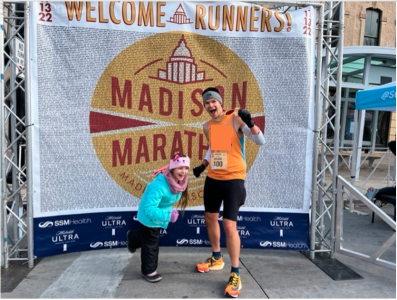
The 33rd best performance was the 2022 Madison Marathon (link). I completed the race in 3:26:26 and had a VDOT of 45.5. Of my 17 marathons, this was my 6th fastest performance. Overall, I finished in 140th place out of 1086 runners. I went into this race with high expectations. I had completed my first run through of a Canova based training plan. It felt like something in the 3:06-3:10 range was possible under ideal conditions. Race day ended up being 27-31F which wasn't all that bad for me. But for a variety of potential reasons, I just didn't have the race day I was hoping for. Be it the pacing, or the shoes, or something off in the training, it just didn't click for me on this day. So after I hit the HM split, I shut it down and more or less coasted into the finish. All in all a decent performance, and I took home with me a life lesson for G and myself. You can train to be the best prepared, but sometimes you don't get your best performance. Treasure the days when everything does click.

9/4/23-9/10/23
Tues (9/5): 7 miles @ 80% M Tempo (8:41 min/mile, 114 bpm) (Treadmill)
Wed (9/6): 7 miles @ 85% M Tempo (8:21 min/mile, 137 bpm)
Thurs (9/7): 7 miles @ 80% M Tempo (8:50 min/mile, 129 bpm)
Fri (9/8): 7 miles @ 80% M Tempo (8:34 min/mile, 116 bpm) (Treadmill)
Sat (9/9): OFF
Sun (9/10): 7 miles @ 85% M Tempo (8:14 min/mile, 136 bpm) + LIIFT More - Shoulders

Total Run Miles - 35.0 miles
Total Run Time - 4:59 hours
Total Strength Time - 0:23 hours
Total Training Time - 5:22 hours


Tuesday

Steph's mom had a doctor appointment, so Steph was at that in the afternoon. Since I was home alone with G that meant I was on the treadmill for the evening.


Wednesday

Conditions - ⛅ Overcast clouds, Wind 8mph to ?
Start: Temp+Dew = 73°F + 65°F; FL - 74°F
End: Temp+Dew = 72°F + 66°F; FL - 74°F

G had a meeting with the 4th grade strings teacher and she's decided she wants to learn to play the Cello. I told G that everytime she walks into a room, I'm going to say, "Cello!". Apparently I'm only allowed to make that joke once per day...

Now that we're into the second week of the training plan, I've added in the slightly faster easy paced training runs at 85% M Tempo. The goal is 8:26 pace, and I'm wearing my >500 miles pair of Next%2 shoes. I was slightly too fast, but I was reasonably close. Hard to hold back as I'm finally allowed to put some faster work in on a structured basis in the last 19 weeks.


Thursday

Conditions - ⛅ Broken clouds, Wind 5mph to 6mph
Start: Temp+Dew = 65°F + 56°F; FL - 65°F
End: Temp+Dew = 64°F + 55°F; FL - 65°F

Nice and easy slow run. Nothing to note.


Friday

We were leaving for my sister's wedding up in northern WI right after G got off school. So no time for an evening run like normal. So I was up at 4:00am, and on the treadmill by 4:35am. Just took it nice and easy and grooved through it.


Saturday

Total brain fart on this one. I figured we wouldn't have any time before my sister's wedding to do any exercises. Then Friday evening when I got the itinerary, there was definitely no need for us to be there before noon. So despite being the "wedding coordinator" for my responsibility, I didn't have to be there too soon. Even more of a bummer that our hotel had a really nice gym with nice treads and sets of dumbbells. So if I was more on top of my game I could have gotten a full workout in. Oh well.


Sunday

Conditions - ⛅ Few clouds, Wind 5mph to ?
Start: Temp+Dew = 65°F + 53°F; FL - 65°F
End: Temp+Dew = 69°F + 57°F; FL - 65°F

We drove back the 3 hrs after the wedding was over, so it was a late night. Got up and did another 7 miler at 85% M Tempo. Not anything to write home about, but the running felt smoother. So starting to feel more normal again.

Next week is mostly more of the same, except that I'm adding in some strides. It's been a busy last few days writing training plans for Marathon Weekend, so I'm just getting close to being caught up again. Although I've only got about 3.5 weeks before the first Halloween event and thus really need to kick costuming into high gear to finish in time.


Thoughts? Critiques?
Food for thought about running 7 days a week. I took a jogging course in college taught by the head coach of the BYU women's cross country program. When I took that course, the program was in the middle of a 4 year period where their worst finish at the NCAA National Championship meet was 2nd. Year 1: 1st, Year 2: 2nd, Years 3-4: 1st in both years.

One of the thigs he shared with us was a conversation with another coach who was dealing with serious injury issues in his own program. As they compared notes such as diet, number of miles run per week, routine, stretching, et all, the only difference between the two programs was that while both BYU and the other school were doing things virtually the same, the one major difference was that BYU was only running 6 days a week. He felt that taking one day off running was critical in helping his runners recover.

So that is something to keep in mind whatever you decide.
G had a meeting with the 4th grade strings teacher and she's decided she wants to learn to play the Cello. I told G that everytime she walks into a room, I'm going to say, "Cello!". Apparently I'm only allowed to make that joke once per day...
Only once? This is an outrage. That pun would make both Rocky and Bullwinkle and the Jungle Cruise skippers proud. It needs to be utilized more. It's too bad a pun to not be used more frequently.
 
G had a meeting with the 4th grade strings teacher and she's decided she wants to learn to play the Cello. I told G that everytime she walks into a room, I'm going to say, "Cello!". Apparently I'm only allowed to make that joke once per day.

My DD took up flute when she was 6 (her interest/her decision). So of course when it was time to do music in school she chose....cello. But never once did I even think to make that joke!
 
Food for thought about running 7 days a week. I took a jogging course in college taught by the head coach of the BYU women's cross country program. When I took that course, the program was in the middle of a 4 year period where their worst finish at the NCAA National Championship meet was 2nd. Year 1: 1st, Year 2: 2nd, Years 3-4: 1st in both years.

One of the thigs he shared with us was a conversation with another coach who was dealing with serious injury issues in his own program. As they compared notes such as diet, number of miles run per week, routine, stretching, et all, the only difference between the two programs was that while both BYU and the other school were doing things virtually the same, the one major difference was that BYU was only running 6 days a week. He felt that taking one day off running was critical in helping his runners recover.

So that is something to keep in mind whatever you decide.

Only once? This is an outrage. That pun would make both Rocky and Bullwinkle and the Jungle Cruise skippers proud. It needs to be utilized more. It's too bad a pun to not be used more frequently.

It’s a fair point. Seven days a week doesn’t leave much of any room for recovery with non-running days. But I’m not wed to having to run each day. I’ll listen to my body and adjust when needed.

My DD took up flute when she was 6 (her interest/her decision). So of course when it was time to do music in school she chose....cello. But never once did I even think to make that joke!

It’s a great joke. One of the other dads at the strings intro said he made the same joke.
 
32 Weeks to go until 2024 Non-Cancelled M - Week 3/35

1695088946505.png


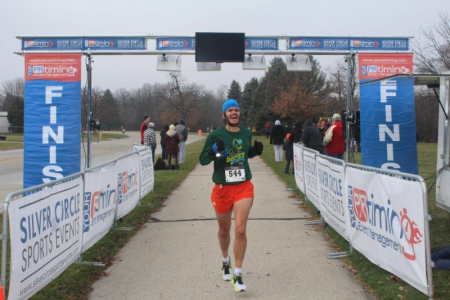
The 32nd best performance was the 2015 Last Call HM (link). I completed the race in 1:38:49 and had a VDOT of 45.7. Of my 24 half marathons, this was my 13th fastest performance. Overall, I finished in 39th place out of 342 runners. This was a watershed race for me. I had just come off my first Hansons training plan and ran a then PR of 1:45:47 in the midst of marathon training in August. Even that 1:45 had represented a 4 min PR over the previous best. So coming off the first sub-4 (3:38) in October, and while getting ready for Dopey #2 I ran an early December HM. This is one of my favorite race courses because it's relatively flat, straight, and is an out-back. The goal for the first half was to stay close to PR pace (8:05) and then let loose for the second half. And I truly let loose on the back half. Not only did I set a HM PR by a whopping 7 minutes (7% improvement from 4 months earlier), but I also PR'd at 1k, 1 mile, 5k, and 10k.

1K - 4:09
1 mile - 6:52
5K - 22:03
10K - 44:36
Half - 1:38:47

What. A. Day.

9/11/23-9/17/23
Tues (9/12): 7.2 miles @ 85% M Tempo w/ Strides (8:29 min/mile, 131 bpm)
Wed (9/13): 7 miles @ 80% M Tempo (8:39 min/mile, 118 bpm) (Treadmill)
Thurs (9/14): 7 miles @ 80% M Tempo (8:38 min/mile, 119 bpm) (Treadmill)
Fri (9/15): 7 miles @ 80% M Tempo (8:24 min/mile, 117 bpm) (Treadmill)
Sat (9/16): 7 miles @ 85% M Tempo (8:10 min/mile, 135 bpm) + LIIFT More - Chest/Biceps
Sun (9/17): 7 miles @ 80% M Tempo (8:46 min/mile, 131 bpm) + LIIFT More - Back/Triceps

Total Run Miles - 42.1 miles
Total Run Time - 5:58 hours
Total Strength Time - 0:45 hours
Total Training Time - 6:44 hours


Tuesday

Conditions - ⛅ Broken clouds, Wind 5mph to ?
Start: Temp+Dew = 66°F + 51°F; FL - 65°F
End: Temp+Dew = 54°F + 52°F; FL - 65°F

Hooray for strides! The run itself was normal, but I could tell I was itching for some strides by the end of it. I found a nice stretch of uninterrupted flat road, and then I let loose for roughly 15 seconds of good form fast running. It felt so so good to finally open up the legs. It felt so smooth and it felt like those months of leg strength workouts were paying off. All 5 reps were in the 4:54-5:25 range. So I was pleased with the pace, and more so how it felt.


Wednesday

More treadmill work. Steph went to a CD Players Theater meeting, so G and I hung out at the house and I hopped on the treadmill. Nothing to note.


Thursday

More treadmill work. Steph's work related golf outing lasted longer than expected and she didn't get home until late. So since I was solo at home, then it was on to the treadmill for me. Nothing to note. I had planned on doing this run outside and do strides, but that got pushed to a different day.


Friday

Steph was working late, and then headed to a show with her friends. So back on the treadmill for me.


Saturday

Conditions - ⛅ Broken clouds, Wind 1mph to 3mph
Start: Temp+Dew = 62°F + 53°F; FL - 61°F
End: Temp+Dew = 63°F + 54°F; FL - 61°F

Finally back outside again, and another 85% paced run with strides. Didn't feel as smooth this morning, but still was hitting 4:43-5:44 pace range during the strides.

I did an abbreviated strength workout afterwards, and then quickly got cleaned up for a full costume day of work. Running out of time before the first costume event.


Sunday

Conditions - ⛅ Overcast clouds, Wind 8mph to ?
Start: Temp+Dew = 57°F + 54°F; FL - 57°F
End: Temp+Dew = 58°F + 55°F; FL - 57°F

Another nice and easy run. Nice cool morning, and the body felt decent the day after a good strides set.

Did another LIIFT More workout afterwards, got cleaned up, and then another full day of costume work.

My first week with a pace workout coming up! I've got two strides workouts (Fri/Sun) and a hill workout on Wednesday of 10 x 15 seconds uphill road steep with 2 min resting intervals. Excited to get back to it. Would prefer to get 100% road miles this week, but I'll do the treadmill when I have to.
 
If you're bored, and for no reason at all, what do you think will be the BQ cut off this year? No cut off for the past 2 years and now a record number of entries ... maybe because of the lack of cut off previously? I'm seeing anywhere from 0:40-8:50
 
If you're bored, and for no reason at all, what do you think will be the BQ cut off this year?

Just a quick look gives me the following. Looks like they received 33,000 applications (link) and usually have about 80% of the field as time qualifiers. So they usually accept around 24,000 or so by time when the field is about 30,000 runners. (link) (link) Based on 2019, it was 4:52 under BQ when there were 30,500 applications. So possibly as much as that, if not more. In 2021 when about 9,000 runners were shut out, the cutoff was 7:47. So I'd expect it to be somewhere around that.
 
Just a quick look gives me the following. Looks like they received 33,000 applications (link) and usually have about 80% of the field as time qualifiers. So they usually accept around 24,000 or so by time when the field is about 30,000 runners. (link) (link) Based on 2019, it was 4:52 under BQ when there were 30,500 applications. So possibly as much as that, if not more. In 2021 when about 9,000 runners were shut out, the cutoff was 7:47. So I'd expect it to be somewhere around that.
eeks! thanks!
 
Marty and Mike Wazowski - Costumes: Part 8
Alright, with the base of the costume in a good place, let's shift our gaze elsewhere. How about the eyes? See what "eye" did there. :rotfl2:

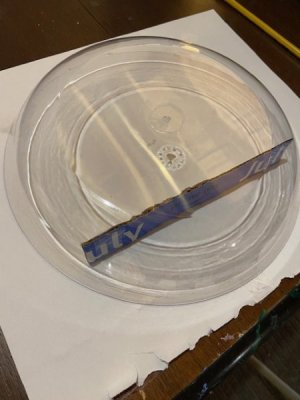
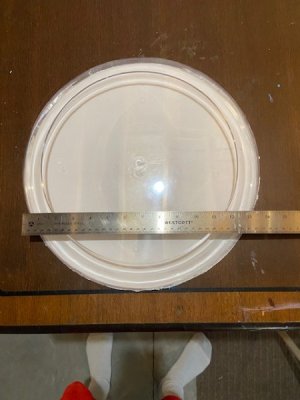
The goal was to make a very large googley eye. We last left off on the eyes having issues coming up with ideas for the plastic transparent side of the eye. I needed something big enough such that it was proportionally correct in size (about 15 inch diameter for me and 9 inch diameter for G). After many failed experiments, I found these from dollar general (link) and this from a garden supplier in New Jersey (link). Thankfully, they were both exactly what we were looking for.

Since we had the size of the eyes down, we could go back and refer to the proportionality conversions to determine the size of the pupil and the iris.

thumbnail_IMG_6074.jpg

We tested out the 2mm foam we built the laugh canister out of, but it was too flimsy. So we ended up using the 8mm translucent plastazote LD50 foam we've used on a few other cosplay projects (link). It's more rigid. The positive is that the cutouts from the Shang-Chi Ten Rings prop was roughly the correct size for G's pupil/iris. The negative was that I didn't have a piece large enough for the correct size of my own. So I either had to order another sheet when I don't need it anytime soon for the current project, or I settle for a slightly smaller one than proportionally correct. Because I've spent a good deal of money on this project to date, I ended up going with a pupil/iris that was about 1.5 inch diameter smaller than it was suppose to be.

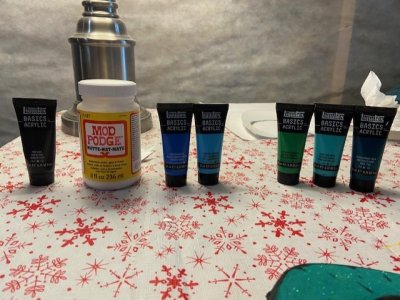
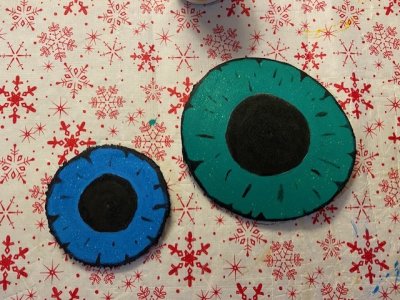
We put a base of Flexbond primer on the pupil/iris. This is especially important for the translucent foam because it's really porous and soaks up a lot of paint. Then, we used the following colors and Mog Podge for a sealer.

thumbnail_IMG_6098.jpg

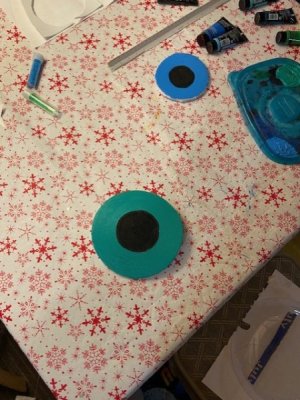
We did our best to color match what we could find online for Marty and Mike's iris color, but didn't have an exact match. So we ended up making our own color by mixing a little bit of each of the above paints together. We were pleased with the colors and moved ahead.

thumbnail_IMG_6076.jpg

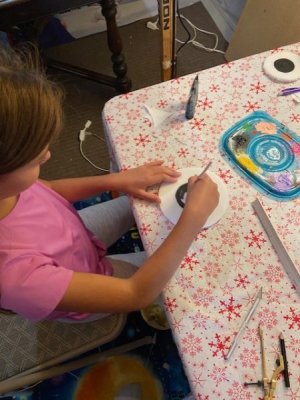
We started with the pupil in black.

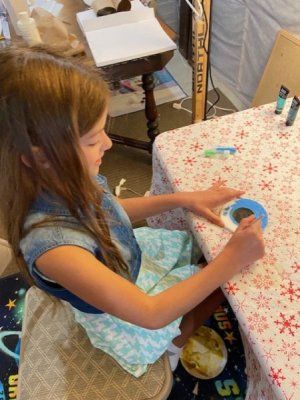
G then painted the iris.
thumbnail_IMG_6085.jpg


thumbnail_IMG_6087.jpg

Then G found some blue and green glitter we had in our crafts and was determined to use that as well. So we did.

thumbnail_IMG_6090.jpg

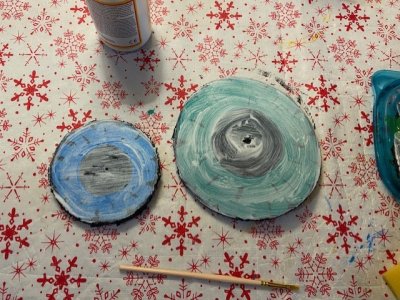
There was some concern that the glitter was going to make an absolute mess inside. Steph suggested we use Mog Podge to seal the glitter to the iris/pupil. Before we got there though, I added some last black detailing in the iris to give it that eye appearance.

thumbnail_IMG_6097.jpg

G's iris/pupil was flat, but mine was a bit wonky. I tried to flatten it out, but didn't make a ton of progress. I figured I'd mess with it more after sealing with the Mog Podge.

thumbnail_IMG_6099.jpg

Trouble is, after the Mog Podge tried translucent it really didn't want the foam to take any other shape than the wonky one. So I should have put more effort in flattening it before sealing it. I put it under a heavy book for a few consecutive days, but a few minutes after taking it out, it had returned to wonky shape. It's a small thing, so I let it slide. It will still serve its purpose.

So with that we had our glittered and painted iris/pupil. Now we needed to build the eye housing to make it googley!

Next - Part 9
 
Last edited:
Marty and Mike Wazowski - Costumes: Part 9
Alright, so we had the plastic housing for the googley eye, but now we needed to actually construct it. I needed it to remain lightweight, but also, I really wanted to have some sort of backing on it. After walking around JoAnn's for a little bit, I settled on a piece of white foam core board. It was lightweight, but rigid enough to make a good backing.

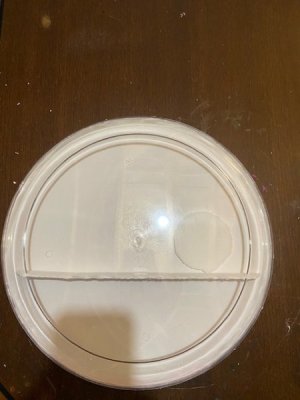
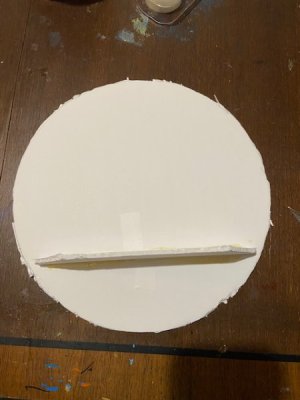
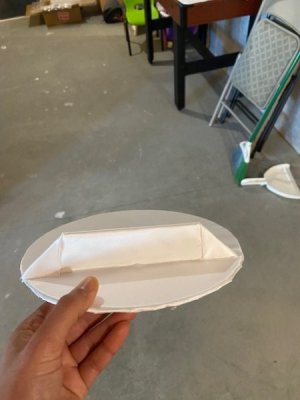
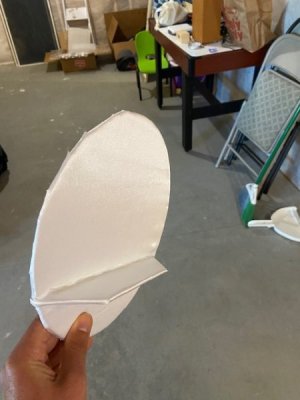
The next problem was that the googely eye was always going to be stuck at the bottom of the eye. So we wanted to make a way such that the eye didn't always look like it was looking down. We came up with the idea of putting a little shelf inside the housing for the eye to roll back and forth on, but leaving enough room that it could go up and down as well.

thumbnail_IMG_6077.jpg

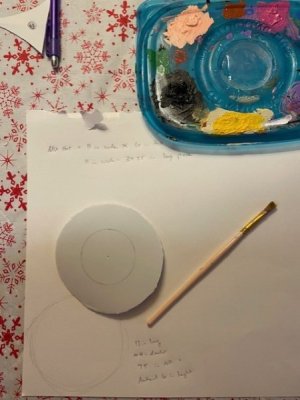
We prototyped it a bit with a piece of cardboard and had a proof of concept. But then it dawned on us to use the foam core board for the shelf as well. We wanted to make sure the pupil was roughly centered, so we built the shelf such that the radius of the iris was equal to the distance to the shelf.

thumbnail_IMG_6089.jpg

So we put in a scrap circle piece of foam just to have a proof of concept.

thumbnail_IMG_6093.jpg

It looked good enough to us, so we moved on.

Next up was making sure the shelf was a perfect cut. If the shelf was too tall, then it would hit the plastic housing and prevent us from getting a good seal. If the shelf was too short, then it would leave enough space such that the iris could sneak past and get stuck in the lower section of the eye. It took a few cuts for G's and mine, but eventually we got it to a satisfactory height.

thumbnail_IMG_6094.jpg

To keep it in place I used the Barge cement glue. But I used a piece of tape on either side to help hold the shelf in place while the glue settled.

thumbnail_IMG_6121.jpg

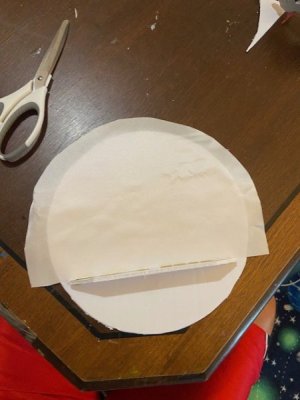
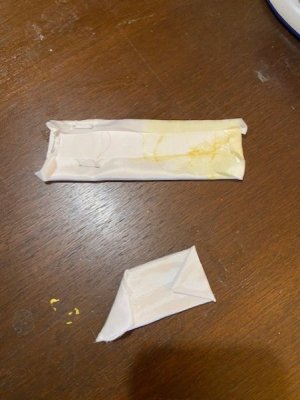
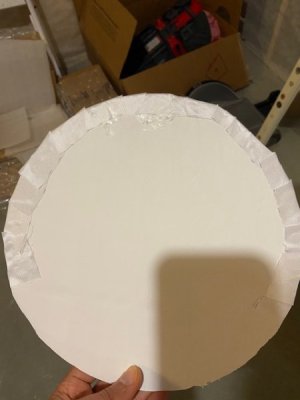
The appearance of the shelf was really unclean. The foam core board doesn't cut perfectly like the foam does. It tends to splinter. So I bought some white fabric that was really slippery (found it in the wedding dress section from memory) and used that to cover the foam core board.

It was a bit tricky to get a good clean wrap. I decided to do it in two sections. Everything above the shelf, and then the shelf+bottom of the eye.

thumbnail_IMG_6142.jpg

The next tricky part was getting the fabric adhered to the foam core board.

thumbnail_IMG_6141 (1).jpg

I tested out using a stapler. That didn't work. I tried using the Barge All Purpose, but it was really messy and clearly showed through. I tried hot glue and was very pleased with the appearance. So that seemed to be the winner for this purpose.

The next tricky part was adhering the circular pattern of the fabric to the foam core board without any disturbances in the clean appearance. To accomplish this, I made small cuts along the fabric's outer edge back towards the foam core, and then hot glued each piece individually.

thumbnail_IMG_6143.jpg

This technique worked quite well.

I then aligned a second piece of fabric alongside the top of the shelf, hot glued it down, wrapped it over the shelf, hot glued it down, and then did the same circular cut pattern hot gluing like the top. The end result was a nice clean look.

thumbnail_IMG_6148.jpg

I folded over the underneaths of the fabric on the shelf and hot glued them into place.

thumbnail_IMG_6149.jpg

So with that we had a very clean look to the backing of the eye. Next up was putting the two together to complete the googley eye!

Next - Part 10
 
Last edited:

GET A DISNEY VACATION QUOTE

Dreams Unlimited Travel is committed to providing you with the very best vacation planning experience possible. Our Vacation Planners are experts and will share their honest advice to help you have a magical vacation.

Let us help you with your next Disney Vacation!


facebook twitter
Top