Dark Ride DSLR Photography for Beginners

I'm still learning about low light photography and I just learned the difference between matrix metering and spot metering at an improv performance.

matrix metering 1/13 sec. f/2.8 iso 1600

DSC_0130_zpsb2bc47e3.jpg
[/URL][/IMG]


spot metering 1/125 sec. f/2.8 iso 1600

DSC_0131_zps8e9e9828.jpg
[/URL][/IMG]

I like the spot metering better.
 
I'm still learning about low light photography and I just learned the difference between matrix metering and spot metering at an improv performance.

matrix metering 1/13 sec. f/2.8 iso 1600

spot metering 1/125 sec. f/2.8 iso 1600

I like the spot metering better.

That really illustrates it well!:thumbsup2 The same will apply for dark ride photography. With matrix I assume you are getting an evaluation of light in the entire scene (it's called evaluative metering on a Canon like I have). So when it sees all that dark, it overcompensates by upping the exposure across the entire scene. So bright spots get washed out. With spot, you can expose for the bright spots and get a much better result, as you have already seen.
 
I'll respectfully disagree on this point. We have been discussing it in the high ISO thread. It is far better to expose to the right -- To overexpose with higher ISO, and then bring it down in post-production.
Increasing exposure in post-production adds a whole lot of noise.
I've done both.... I find it much easier to get a clean final image, shooting at ISO 12800 and possibly bringing it down a bit in post, as opposed to shooting at ISO 6400 and increasing it in post.

In my experience, you want to always want to take advantage of the maximum dynamic range possible. Boosting from the max ISO before digital gain applied in camera always yields the best potential dymanic range. It isn't an issue with setting the black point for the photo, it's more about perserving highlight headroom. For my camera D800e (and from what I've just been reading the same is true with the new sibbling D810), the best headroom to dynamic range option is still ISO 1600. The amount of photons hitting the sensor is the same, and the photosites are energized with the same amount of gain at ISO 1600 as it would be at 12800, it's what happens in the digital darkroom that is different. The camera body vs the external application. The issue is that when the camera body does it, it does two things. First it bases it's exposure values based on what it does and it can and does choose to clip highlights if you aren't metered at the right place. Second, it saves the data it's collected after processing into its RAW file. If anything is clipped, it's gone forever.

Shooting at higher ISOs will yield and quicker easier result (if you are only relying on what is shot in camera); but, since you are wanting to achieve the best possible results - you want to take it into post to work on it anyway. Boosting in post is simply moving the slider bar over and at most adds a couple of seconds to the overall process.

An attempted shot of say, the endless hallway in the Haunted Mansion likely wouldn't yields much if any difference (other than from the candle glow itself) if you compare a boosted image vs. high ISO in body. On the other hand, if you tried a high ISO in Pirates with all of it's hot spots, you would yield much better results using boosted in post taking advantage of the extra highlight headroom.

When I finally get some photos up online, I can post some comparisons. All I know is that since switching to using max dynamic range and auto ISO, my keeper ratio has skyrockted across all dark rides (including those that have extreme dynamic range - like Radiator Springs Racers nighttime scenes with the bright headlight).

I am a firm believer in expose to the right. ETTR does not mean to clip highlights though. ETTR means shoving the histogram as far to the right as possible to preserve shadow detail. When you expose, you need to still make sure you aren't clipping a channel. That's why I use to rely on UniWB to make sure I was seeing via the meter, the weakest link the the exposure chain - the green channel. Prior to switching to the a max of ISO 1600 on my D800e, I would always use UniWB on dark rides as it would allow me to rely on the meter to not clip a channel. The cool thing is that I've found I don't need to worry as much about it anymore since I've got more recovery headroom built in at the point where analog gain stops.
 
There are many situations, especially in low light photography, where you will shoot at 12800 or 25600, without clipping highlights.
Yes-- you will admittedly lose dynamic range.
But at ISO 1600, the shot may be pitch black ( assuming the same shutter speed and aperture).
Increasing 3-4 stops in exposure in post, is simply a disaster. I'm just speaking from my own experience.
Perhaps tonight, I'll post a couple example photos.

The results will vary from body to body as each sensor/camera combination is different. As I mentioned, to get the best results you need to research what are the limits of your particular camera and find where analog gain to the sensor stops and digital gain takes over. It's not a blanket statement of ISO 1600.

For my old body, a D700, that threshold was ISO 6400 and then above digital gain kicked in.

You are correct that an "underexposed" shot taken at a lower ISO may appear as nothing but black straight out of the camera. The secret is that underexposed is simply not the correct choice of words. It's about getting the best native RAW file out of the camera so you can take advantage of it later. All DSLRs meter based on white balance and ISO. If you are walking into a dark room, the sensor can't do any additional magic beyond the point where it stops recieving true signal. Each camera has a point where the sensor stops giving and the processing in the body takes over. For me at least, since I only shoot RAW, I want the best possible exposure in the RAW file as possible.

Anything done digitally in the camera body can be done better in software today and has the potential to be done better in the future as better editing ultilities become available.

As I mentioned in my first post, your time on a dark ride is very finite. There is so much happening in the course of a few minutes that you want to take every advantage in your favor to get good results. The last thing you want to do is to blow out photos because your spot meter was in the wrong place and your camera exposed for the background instead of the animatronics face.

Although I haven't stepped foot onto the Seven Dwarves Mine Ride, I'm already sure that keeping your highlights in check will play huge dividends with the rear projected faces and the gemstones.
 
The results will vary from body to body as each sensor/camera combination is different. As I mentioned, to get the best results you need to research what are the limits of your particular camera and find where analog gain to the sensor stops and digital gain takes over. It's not a blanket statement of ISO 1600.

For my old body, a D700, that threshold was ISO 6400 and then above digital gain kicked in.

I'd be testing it on the Sony A99, which uses a very similar sensor to the Nikon D600.

I'm a bit confused by your statements -- You are suggested that your much newer Nikon D800, has 2 less stops of native ISO than your much older D700?

I find it hard to believe that ISO above 1600 on the D800 is merely a digital boost.

I know that dynamic range on my A99 starts to drop significantly above ISO 1600... But I also know from practice, that I get much better final results when my exposure is "close" right out of the camera. Sure, if I want to preserve the highlights, it pays to underexpose slightly. If I want to maximize shadow detail, it pays to overexpose slightly. But any time I have significant underexposure --- more than 1-2 stops of underexposure, post processing is just a mess.

I'll post samples later to illustrate.
 
ok, the test:
Took the same shot at ISO 1600, 6400 and 10,000. 10,000 was properly exposed.
I made 3 copies of the 1600 image --- I increased the exposure on copies to match the 6400 and 10,000. I applied Lightroom NR to all images, to remove visible blatant noise. The ISO1600+++ shots required extra noise reduction, resulting in noticeable loss of detail.

Here are the results:
ISO 1600, with no post processing boost:

untitled-1.jpg by Havoc315, on Flickr

1600, with a couple stops of boost:

untitled-1-2.jpg by Havoc315, on Flickr

1600, with enough boost to expose correctly:

untitled-1-3.jpg by Havoc315, on Flickr

ISO 6400:

untitled-4.jpg by Havoc315, on Flickr

ISO 10,000:

untitled-5-2.jpg by Havoc315, on Flickr

I don't think it's my imagination that the ISO 10,000 looks the best.


I don't think it's my imagination that the ISO 10,000 looks the best.


So the lesson is; in the vast majority of cases you want the in camera exposure to be correct or slightly overexposed, especially when shooting in RAW.

Boosting exposure in PP is very much like increasing the ISO therefore the IQ will never get better, vs. reducing exposure in PP is the opposite. Is that fair to say or am I overthinking this?

I think that's generally true.

There are times, where you are really valuing the highlights, where it pays to underexpose. Especially at low ISO. The images I tests really just had basic exposure adjusted upward. But increasing shadows in a high ISO image is a recipe for real disaster. On the other hand, a low ISO pic.. You can get away with boosting the shadows.

Here is a low ISO example, intentionally unexposed:

before70.jpg by Havoc315, on Flickr

(ISO 100, so way off topic for this thread).

But it was exposed to keep the maximum dynamic range in the sky...
which let me do this in post processing:

fallsunrise-70.jpg by Havoc315, on Flickr


Overall, I think it pays to expose correctly. But you need to ask yourself if you are putting a higher priority on the shadow detail or the high light detail. At low ISO, shadows are pretty well recoverable on a good sensor camera. But at high ISO, shadows will become a mess if they need to be boosted in post.


Yes - I do that often (bring out shadows) in Low ISO shoots.

thanks for your input! :thumbsup2 Next time I'm shooting High ISO I will slightly overexpose and compare.
 
I really appreciate this discussion. I have a tendency to underexpose my high ISO shots (usually in an effort to get a faster shutter speed). I need to try a new approach and compare results.
 
As I mentioned, to get the best results you need to research what are the limits of your particular camera and find where analog gain to the sensor stops and digital gain takes over. It's not a blanket statement of ISO 1600.

For my old body, a D700, that threshold was ISO 6400 and then above digital gain kicked in.

I am interested in how we find where analog gain ends and digital gain begins. I was looking at some SNR graphs on DXOMark and figured that analog gain would reduce the SNR by 3 dB each time the gain (ISO) was doubled. It holds true until a point at high ISO where SNR decreases more rapidly, that is where I figured digital gain began.

It may even be that a combination of analog and digital gain is used at some high ISO to maximize SNR. The camera engineers would know but how do we find this information?
 
I'll respectfully disagree on this point. We have been discussing it in the high ISO thread. It is far better to expose to the right -- To overexpose with higher ISO, and then bring it down in post-production.
Increasing exposure in post-production adds a whole lot of noise.
I've done both.... I find it much easier to get a clean final image, shooting at ISO 12800 and possibly bringing it down a bit in post, as opposed to shooting at ISO 6400 and increasing it in post.
I couldn't disagree more... mainly from experience.

The important thing is that cameras sensors are DIFFERENT and different implementations are DIFFERENT.

On my K-5, if you blow highlights, you don't have much chance of getting them back. But if you're underexposed, you would be stunned what can be pulled out. Most of my night tripod Disney with the K-5 shots were ISO 80 and fairly seriously underexposed, because I had a massive amount of dynamic range to pull from and could easily go up three full stops or more with little to no visible noise in the image. You could literally get a nearly perfect photo out of what initially looks like total darkness.

I haven't done much night shooting with my K-3 yet but I've learned that it is tuned to allow more highlight recovery, so I suspect that (after some pre-Disney-trip practice) I will expose a little more to the right. But years of shooting with the K-5 in particular taught me to always skew towards underexposure to get the most flexibility when processing the DNGs.

Point being - there is no one blanket rule for all DSLRs even ones using the "same" sensor (K-5/K50/D7000/a bunch of Sonys.)

Regarding this specific topic - IMHO, blown highlights are one of the biggest challenges of dark ride shooting. Overcoming that is a big step towards getting dark ride shots to be proud of.
 
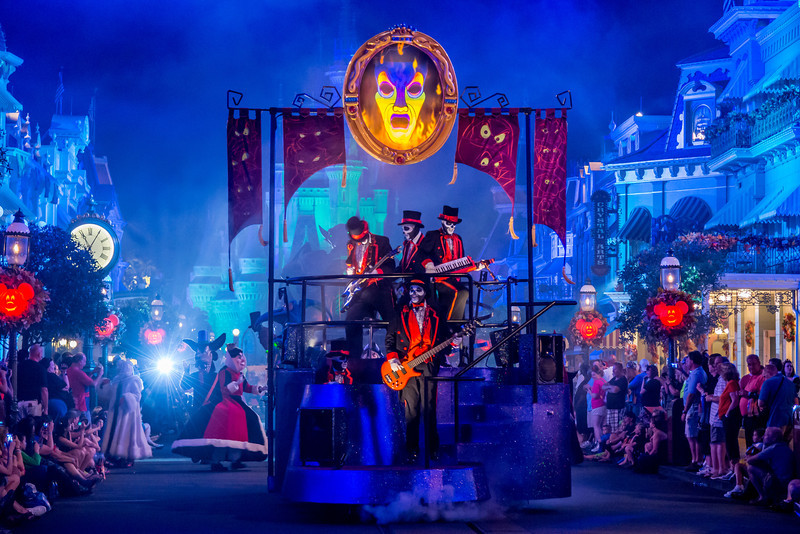
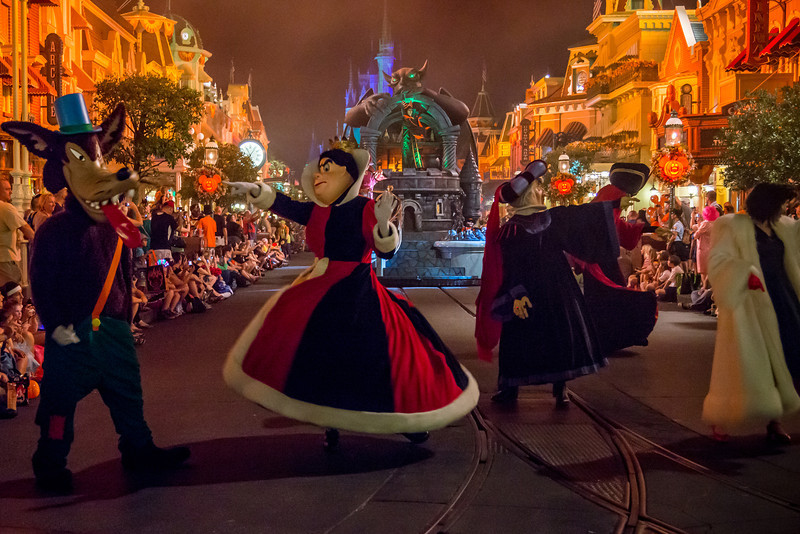
As everyone has mentioned, you will have to play with your settings when you are there. It's mainly based on where you are watching the parade from. The parade route lighting varies greatly, especially if you are in Adventureland. An area could have a super bright spot light, to no lighting at all. And unfortunately, you won't know what the lighting will be like until the parade starts.

I actually prefer shooting night time parades in manual mode, when you are in a well lit spot. Things like a dark sky, parade lighting pointing at you and other people's flash (especially cell phone LEDs) can fool with the camera's exposure. It seems like Disney made some effort to make sure all the characters on the floats are lit with the same amount of light. At least that was my experience on Main Street. You mileage may vary.
(Disclaimer: Manual mode may not be the best mode for a kit lens, since the aperture varies as you zoom in/out)

Both of these were in manual mode; ISO 3200, 1/60, f/4.


Those pics are awesome!!! Whereabouts were you standing for those? One of my things is thinking about where to position myself for parades to get good photos. I know someone mentioned standing at the train station but any advice would be great!
 
godders said:
Those pics are awesome!!! Whereabouts were you standing for those? One of my things is thinking about where to position myself for parades to get good photos. I know someone mentioned standing at the train station but any advice would be great!

This is at the very beginning of Main Street, just in front of the flag pole. The parade will go to the right of the camera and they roped off the left side, so you can stand there.
 
I don't know if this was mentioned, but another tip that illustrated in Pixel Dust's parade shots has to do with the direction of the subject's motion. Motion blur will be significantly less noticeable when subjects move toward or away from the camera, as compared to subjects moving across the frame.
 

GET A DISNEY VACATION QUOTE

Dreams Unlimited Travel is committed to providing you with the very best vacation planning experience possible. Our Vacation Planners are experts and will share their honest advice to help you have a magical vacation.

Let us help you with your next Disney Vacation!


facebook twitter
Top