To Infinity and Beyond - Becoming a Better DopeyBadger (Comments Welcome)

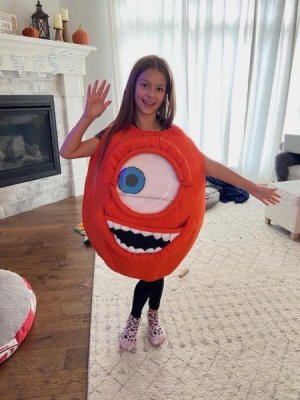
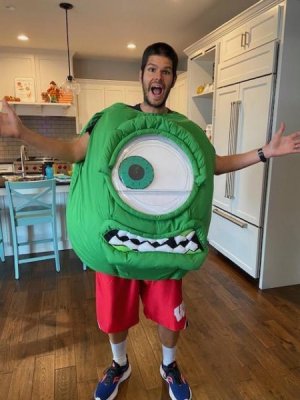
Marty and Mike Wazowski - Costumes: Part 10

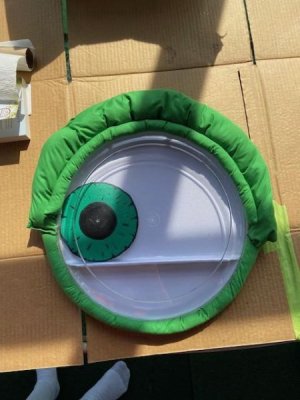
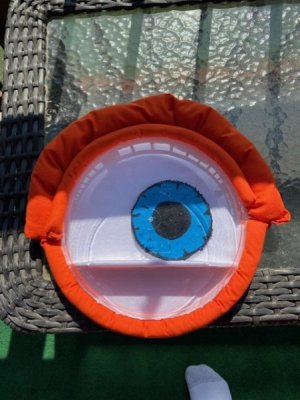
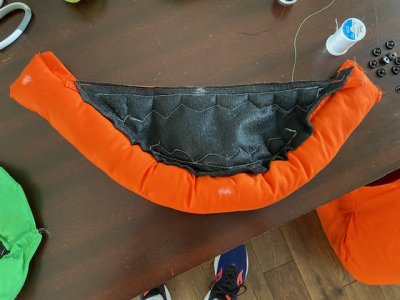
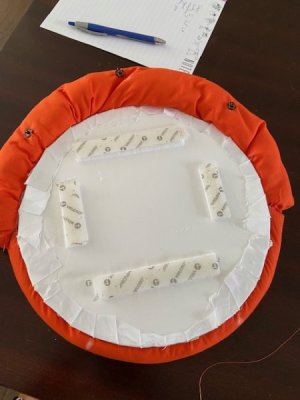
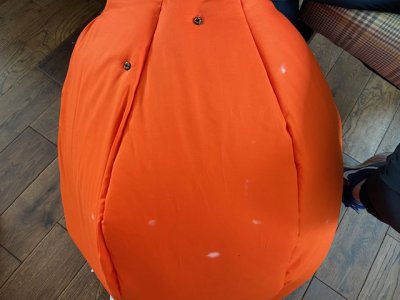
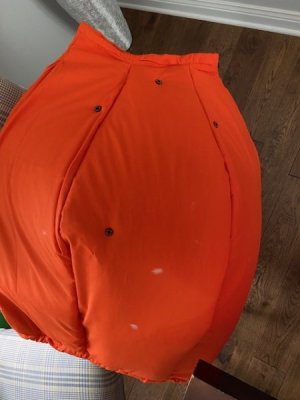
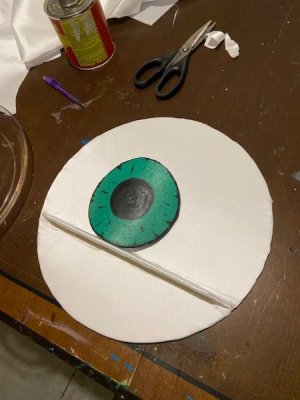
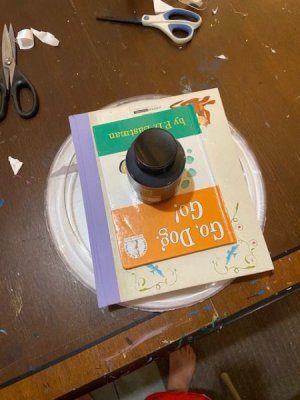
The goal was to adhere the backing with the plastic housing such that it was a solid seal. So I went with hot glue again since it worked well on that fabric the last time. I was concerned it might melt the plastic a bit, but it didn't. The hardest part was how fast the hot glue settles. Thankfully I did the smaller eye first and learned some lessons before doing my own. So I knew I had to move quick.
thumbnail_IMG_6169.jpg

thumbnail_IMG_6170.jpg

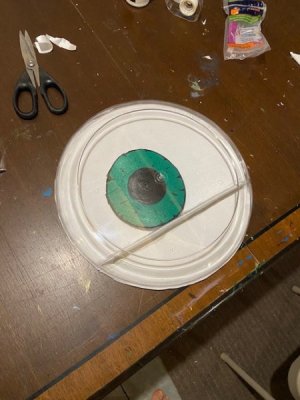
So what I did was place a few beads of hot glue around the edge, then I placed the plastic housing on top into the hot glue. Then I place a weight on top of the two to hold them together.
thumbnail_IMG_6171.jpg

Then I went around the edge of the connection point between the two and put another layer of hot glue that will hopefully hold them together for good.

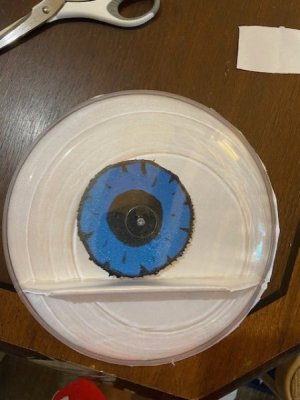
With that, we ended up with this.
thumbnail_IMG_6150.jpg

thumbnail_IMG_6151.jpg

thumbnail_IMG_6103.jpg

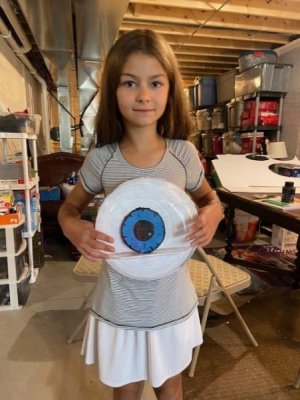
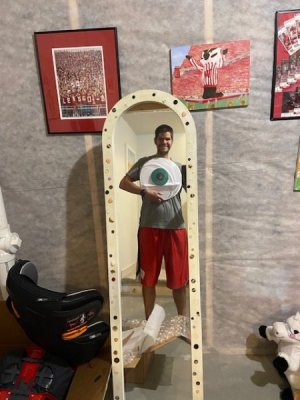
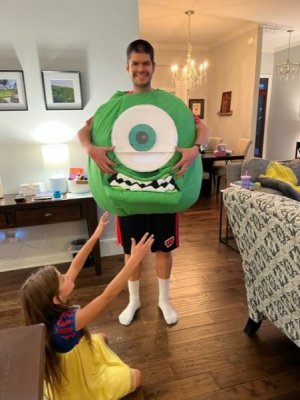
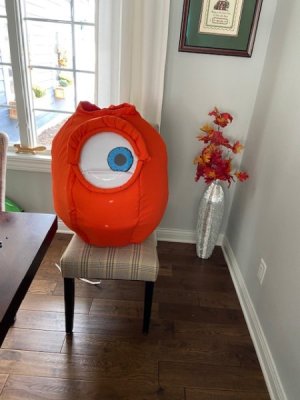
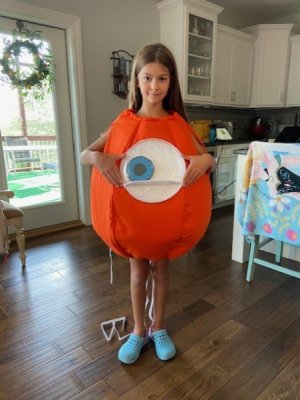
It works quite well. The iris freely rolls around and gives us the opportunity to shift our gaze when we want to. It's a nice added touch to get some movement into the costume as G desired. Alongside the costume itself it looks like this.
thumbnail_IMG_6163.jpg

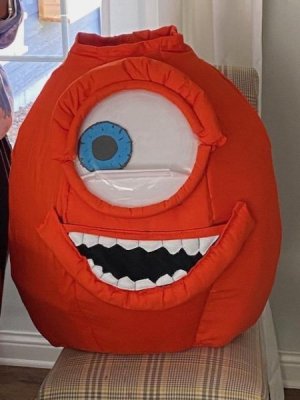
I don't have any picture of my costume with the eye alone. Only with the mouth too, and I'm not quite ready to detail everything about the mouth construction just quite yet (although it is finished).

So the googley eye itself is finished, but the eyelids are still needed to frame the eye in on the picture above. Again, we're much further along than these updates, but time is fleeting these days and its either I'm running, sleeping, working, or doing these costumes. So it rarely leaves time for writing recaps. For instance, the eyes were finished about two weeks ago. But I'll hopefully carve out some time soon to write up more.

Next - Part 11
 
Last edited:
31 Weeks to go until 2024 Non-Cancelled M - Week 4/35

1695603979455.png


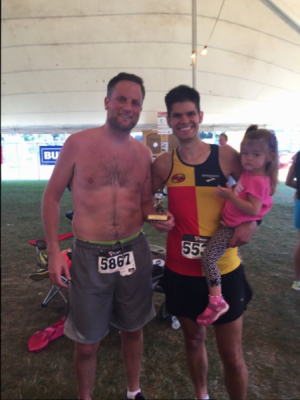
The 31st best performance was the 2016 Hot2Trot 10k (link). I completed the race in 44:31 and had a VDOT of 45.8. Of my 12 10ks, this was my 8th fastest performance. This was a PR at the time. Overall, I finished in 6th (or 7th?) place out of 52 runners, and 3rd (or 4th?) in AG. This was a memorable race only because of the finish. The neighbor pictured above and myself jockeyed in position back and forth throughout the race. He consistently passed me over the same shoulder. Towards the end of the race, I had taken the lead and the finish line was in sight. I looked over the same shoulder and didn't see him as he was passing me over the other shoulder. He beat me fair and square. But during the award ceremony I was announced as the 3rd place AG finisher and he was unlisted. We were both confused so I did the right thing and gave him the 3rd place trophy. I knew he beat me and it was only fair.


9/18/23-9/24/23
Tues (9/19): 10 x 15s @ Max on Paved Uphill (5-7% Grade)
Wed (9/20): 7 miles @ 80% M Tempo (9:10 min/mile, 131 bpm)
Thurs (9/21): 7 miles @ 85% M Tempo w/ Strides (8:16 min/mile, 136 bpm)
Fri (9/22): 7 miles @ 80% M Tempo (8:41 min/mile, 127 bpm) (Treadmill)
Sat (9/23): 7 miles @ 85% M Tempo w/ Strides (8:24 min/mile, 129 bpm) + LIIFT More - Shoulders
Sun (9/24): 7 miles @ 80% M Tempo (8:41 min/mile, 130 bpm) + LIIFT More - Chest/Biceps

Total Run Miles - 42.2 miles
Total Run Time - 6:11 hours
Total Strength Time - 0:51 hours
Total Training Time - 7:02 hours


Tuesday

Conditions - ⛅ Broken clouds, Wind 10mph to ?
Start: Temp+Dew = 67°F + 58°F; FL - 67°F
End: Temp+Dew = 65°F + 58°F; FL - 67°F

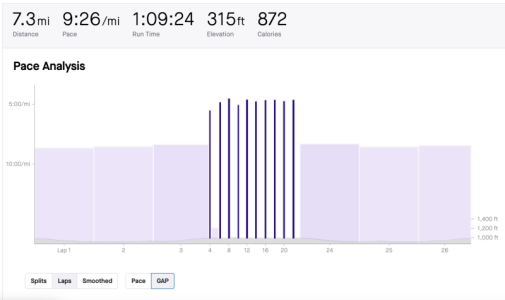
Because of the WI football game on Friday I shifted all the runs this week since I planned to be on the treadmill. First paced run of the training plan. A staple of the Canova training cycle is an uphill run at max pace for about 15 seconds or so. Before I left the house I took a quick check at the schedule and saw the run was suppose to total around 7.5 miles and 70 min. I did a 3 mile WU. Felt good and ready and finished at the steepest safest paved uphill in the neighborhood. I launched myself up the hill multiple times, and then walked down for a 1.5-2 min resting break. As long as the reps still felt good, then I kept going until a max of 10 reps.

Screenshot 2023-09-24 at 8.16.10 PM.png

Screenshot 2023-09-24 at 8.16.46 PM.png

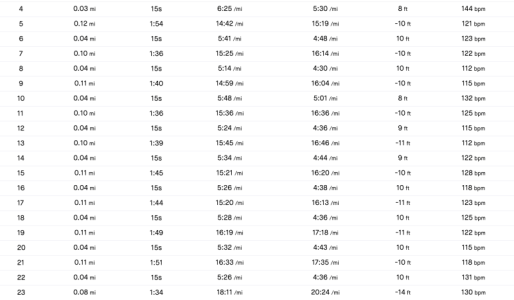
Overall the reps felt clean and challenging. When I felt a slight twinge I made sure to alternate the side of the road I was running up. All in all I was able to complete all 10 reps comfortably. The reps ranged from 5:14-6:25 pace and GAP ranged from 4:30-5:30. Definitely feel like I'm in a good place physically after this one. Certainly not race ready, but a good place.

When I finished the 10 reps, the distance/time left didn't make sense for a 2 mile CD to hit the 7.5 miles/70 min workout. So I knew something was off. So I just decided to extend the CD to hit the goal duration. I actually felt really good after the 10th rep and was able to run at a decent easy pace.


Wednesday

Conditions - ⛅ Broken clouds, Wind 0mph to ?
Start: Temp+Dew = 75°F + 62°F; FL - 76°F
End: Temp+Dew = 74°F + 63°F; FL - 76°F

Just an easy run. Felt a little slower, and post-run realized the temps went up a little compared to recent. So it made sense why it felt a touch harder than expected.


Thursday

Conditions - ⛅ Broken clouds, Wind 9mph to ?
Start: Temp+Dew = 73°F + 61°F; FL - 73°F
End: Temp+Dew = 69°F + 61°F; FL - 73°F

Body was still feeling a little tight. Kept it nice and easy, and then I threw in some strides afterwards. I didn't push it too hard and stayed around the 5:30s.


Friday

WI football game was at 6pm and I'm usually out the door around 5:30-5:40. So there was no way I would finish an hour run in time. So I opted for the treadmill so I could watch the game. Took it nice and easy. Funny enough my HR was noticeable higher during this treadmill run than normal. I wonder why...


Saturday

Conditions - ⛅ Broken clouds, Wind 9mph to ?
Start: Temp+Dew = 65°F + 58°F; FL - 65°F
End: Temp+Dew = 66°F + 57°F; FL - 65°F

A long long late night working on costumes until midnight and then I turned around for an early morning so I could get to my SIL's sooner to do more costume work.

Did a nice easy/moderate run, and then afterwards I did my strides. I did them around the 5:30s again.

We worked on costumes practically all day afterwards. I got home late and had to take a second to convince myself to get my workout clothes on and get in the basement for the strength workout. But I did it. LIIFT More Shoulders workout complete.


Sunday

Conditions - ⛅ Broken clouds, Wind 9mph to ?
Start: Temp+Dew = 61°F + 54°F; FL - 60°F
End: Temp+Dew = 63°F + 55°F; FL - 60°F

Another late night previously working on costumes, and then another early morning so I could get to SIL's quick again. Kept it nice and easy. Felt really good during this one. Starting to feel normal again.

Next week ramps it up again with another hard workout and getting the mileage up to 9/10 next weekend. Wednesday I have another head cyst removal procedure so I'll have to take the day off from running.
 
Marty and Mike Wazowski - Costumes: Part 11

Alright, we left off with the eye housing being complete, and we'll circle back to make the eyelids soon. Before we get there though, let's talk about making the mouths for Mike and Marty.

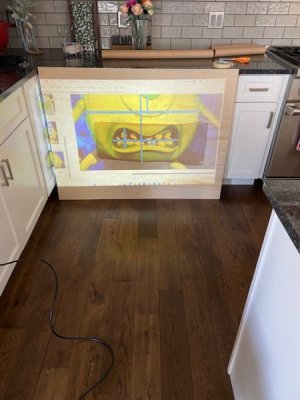
We used a projection machine so that I could get the shapes of the mouth proportionally correct. For G's costume (Marty) we're going with a big smile, and for my costume (Mike) we're going with a nervous/concerned look.

thumbnail_IMG_6164.jpg

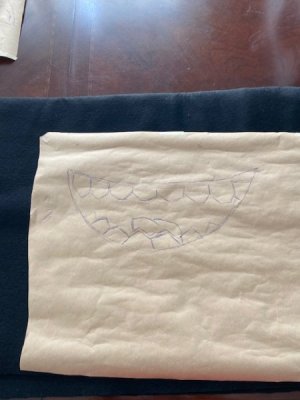
I traced the image onto paper, and then cut out the design.

thumbnail_IMG_6187.jpg

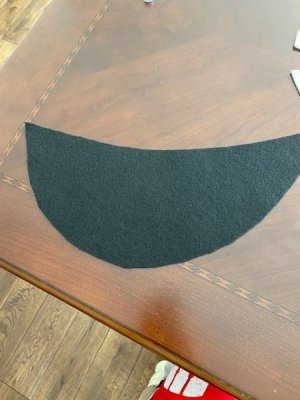
For the base of the mouth we're using a high quality felt material. We WAY over purchased this material way back when. Live and learn. I cut out the entire mouth, and then cut out the teeth.

thumbnail_IMG_6188.jpg

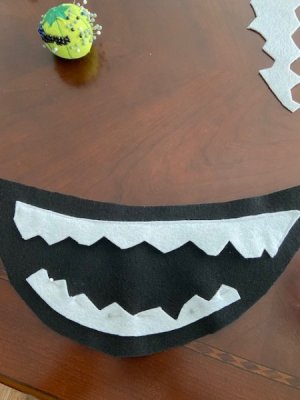
For the teeth, I placed them next to each other unlike the exact picture just to make the whole process easier. We used a high quality white felt for the teeth themselves.

thumbnail_IMG_6190.jpg

I sewed the gum line of the teeth with white thread, and then I had the idea of using black thread to separate the teeth and really help them pop. I got some pushback on this idea, but once everyone saw the final product they were in agreement on it. The apprentice becomes the master on this one.

thumbnail_IMG_6191.jpg

Next up, we used the lessons learned from the pizza practice costume we did a few months ago. The whole reason we practiced on that costume was for this day. I wanted to give the teeth a 3-D effect, so we stuffed them with backing. So each tooth was 3/4 sewn (gum line was white thread and each side was black thread). I stuffed them full and then sewed them off with the black thread.

thumbnail_IMG_6192.jpg

In the above picture, the top teeth have been stuffed and the bottom teeth have not. I feel like it makes a difference.

thumbnail_IMG_6193.jpg

Here you can see all the teeth have been stuffed.

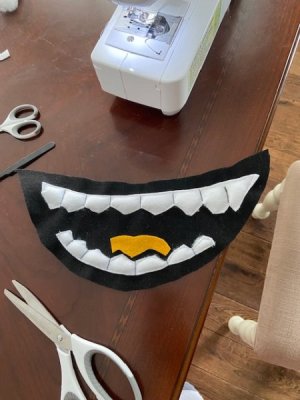
Now Marty is suppose to have a tongue based on one of the few online pictures available, and it's kind of a yellow-ish orange color. When we tested that out, none of us liked how it looked. So we decided to ditch the tongue because it just looked weird.

thumbnail_IMG_6194.jpg

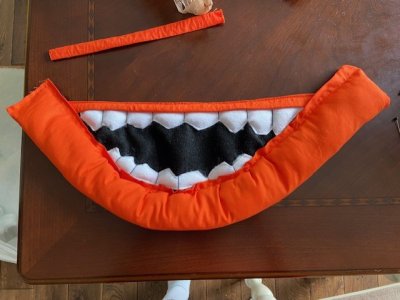
Next up was making the lips. For the smiling mouth, the top lip is really thin. So we didn't plan to put any backing into it. For the bottom lip, it was a little fuller and had a more rounded shape. To make these lips I sewed a single piece of orange fabric (same as the fabric used for the base of the costume) into rectangle shape and sewed the two long sides and only one of the short sides. I then turned the pattern inside out so the messy seam ended up on the inside. I then stuffed it with a sufficient amount of backing and then sealed it shut.

thumbnail_IMG_6233.jpg

All in all we were pretty pleased about where this ended up.

thumbnail_IMG_6231.jpg

Don't worry, Marty's mustache was cut off...

Next up was my mouth design.

Next - Part 12
 
Last edited:


Marty and Mike Wazowski - Costumes: Part 12

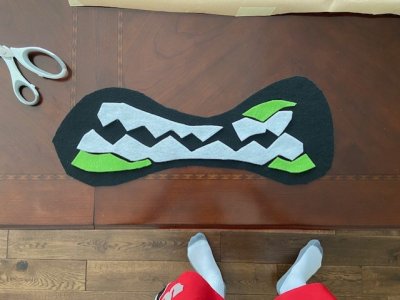
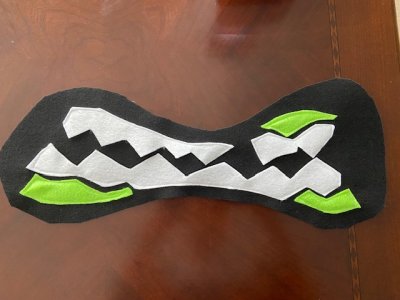
For my Mike costume, instead of a smiling mouth, we wanted to go with something different than the Marty costume. So we either had the surprised Mike or nervous Mike. I went with nervous Mike because who knows what jokes Marty might be telling out there.

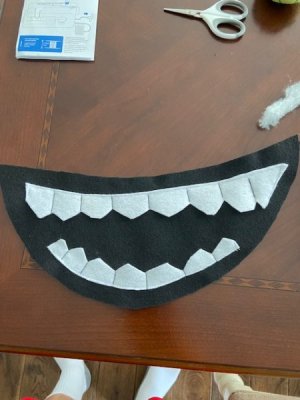
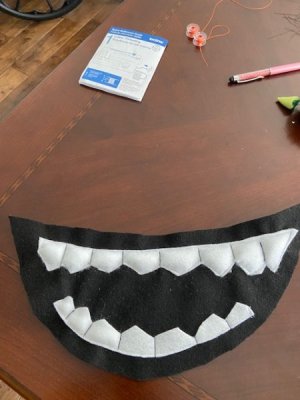
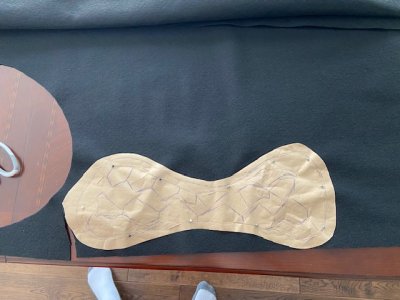
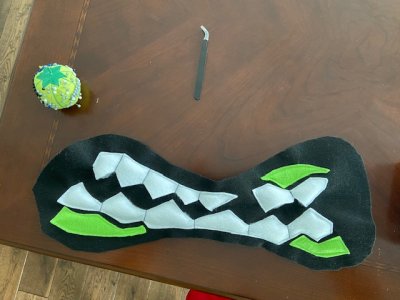
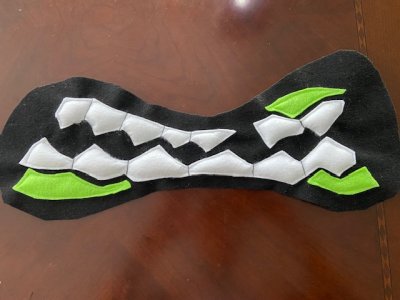
This one started much the same. Cut out the pattern using the projector, and then cut out the base of the mouth on high quality black felt.

thumbnail_IMG_6195.jpg

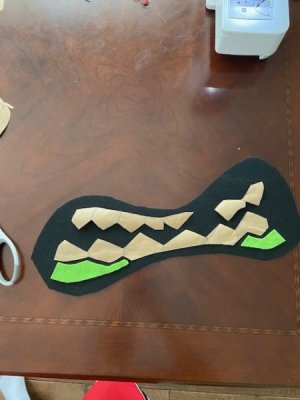
My teeth were a little more complicated, and my design included gums unlike G's smiling mouth.

thumbnail_IMG_6196.jpg

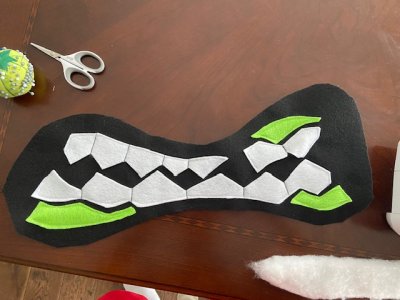
Same process of using white thread for the teeth gum line, black thread for the space between teeth, and green thread for the gums themselves.

thumbnail_IMG_6198.jpg

thumbnail_IMG_6199.jpg

thumbnail_IMG_6200.jpg

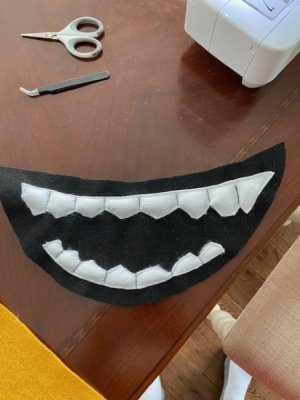
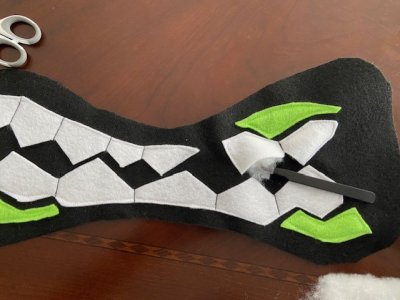
Stuffed them with backing just the same.

thumbnail_IMG_6201.jpg

And then repeated the process for each of the teeth. We did not fill the gums with any backing.

thumbnail_IMG_6202.jpg

thumbnail_IMG_6203.jpg

I liked the overall effect. Definitely got a 3-D effect from them.

thumbnail_IMG_9217.jpg

Sadly, I didn't take any pictures during the lip making process for the Mike costume. The procedure was identical to G's costume essentially. Just that the Mike costume had some more curvature in the lips themselves. He also has different areas that are thin and thick. The top lip was like an hourglass shape and that make it really hard to stuff with backing because I had to get all the stuffing through the really thin portion. But after a good bit if time I got it through. The bottom lip was really full because he's sticking it out like when you make a nervous mouth. Overall, we were pleased with how it turned out. He's really getting some expression on his face.

thumbnail_IMG_9246.jpg

Next up was making the eyelids, and then learning some lessons on how to attach the eye housing and mouth to the base of the costume.

Next - Part 13
 
Last edited:
Marty and Mike Wazowski - Costumes: Part 13
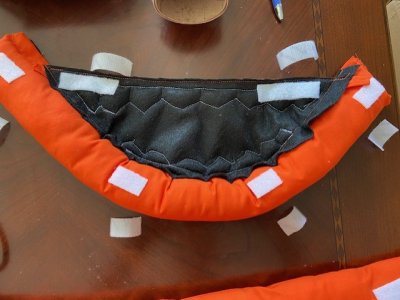
Alright, so the original plan to attaching the eye housing and mouths to the base of the costume was to use velcro. I needed the eyes and mouth to be removable for fitting into the luggage. My eye is about as wide as a standard suitcase, and combine that with the base of my costume, and we'd have issues if they were permanently affixed to each other. So I needed something removable. We though velcro would work reasonably well.

So we took each piece and aligned velcro on either side.

thumbnail_IMG_6240.jpg

We then tested it against the costume and ran into a problem. The velcro despite having a sticky glue on the backside didn't want to stick. So when I ripped off the item off the base of the costume, the velcro came off rendering it useless. Womp womp. So it was back to the drawing board. And let me tell you, I got VERY frustrated at this point. It felt like we were so so close to finishing these costumes only to stumble near the finish line and see everything walk away from us. It was a rough hour or so trouble shooting and us all scratching our heads on how to pull this off.

So on a few test pieces of fabric we tried a few different things.

-We tried using hot glue in addition to the velcro glue. But the hot glue didn't stick to the fabric and easily released.
-I tried my Barge cement glue, but again, it pretty easily pulled apart.
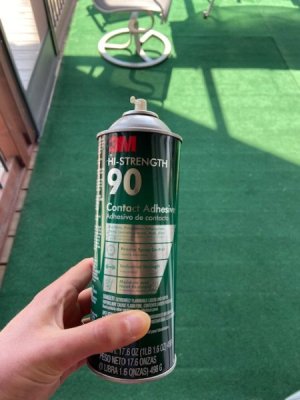
-My FIL pulled out some automotive industrial strength spray glue. And that worked. Problem was it was stinky and not really all that exact when sprayed. But it worked. So it was an opening as to how we could do this.

thumbnail_IMG_6274.jpg

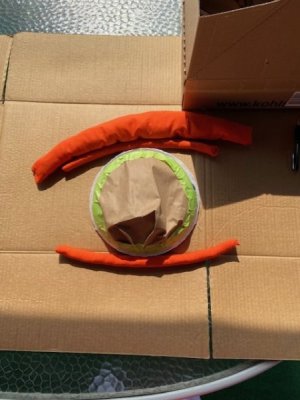
So it was 3M Hi Strength Contact Adhesive for the win? Problem was, no way I could just spray that on the costume willy nilly. We needed an intermediate in the plan. That's when we came up with a two-stage idea. We needed to glue the eyelids to the eye housing, and then we would use sewable snaps to affix the items to the base of the costume. Because we couldn't affix sewable snaps to the eye housing we'd need the eyelids to hold the weight of everything. So the connection between the eyelids and the eye needed to be really strong. We were going to need to go a little off picture for this because technically speaking there's some decent space between Mike/Marty's first and second top eyelid. But I think this was a reasonable compromise to pull it off.

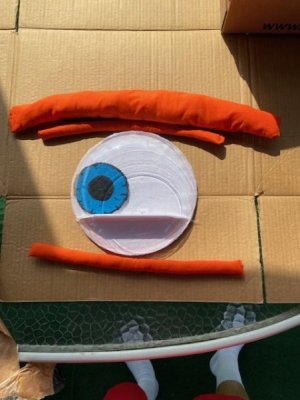
So we made three eyelids for each of the eye housings. One thin bottom, one thin top, and one large top.

thumbnail_IMG_6270.jpg

We used the same technique as the lips. Sew three sides, flip inside out, and then stuff with backing.

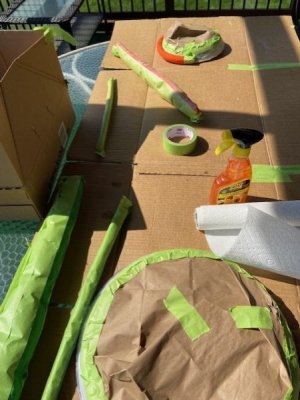
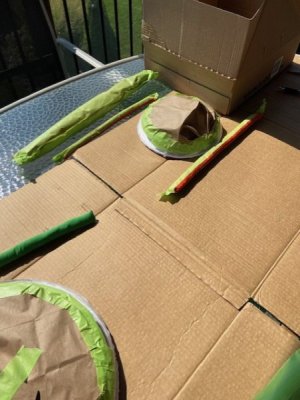
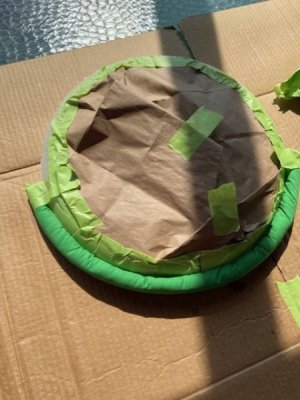
We then had to tape off where the 3M glue would be sprayed. In a test run we determined that any place the 3M glue touches becomes permanently disfigured. So we needed to be accurate with an inaccurate spray. To accomplish this we used 3M Automotive tape to cover the areas where we didn't want the glue to get, and then used a brown paper bag to cover the other areas. 3M Automotive tape is a much higher grade tape than standard painter's tape.

thumbnail_IMG_6271.jpg

thumbnail_IMG_6272.jpg

We then had to tape off the areas of the eyelids that we didn't want to get tape on. My FIL did most of this section as he is more experienced with this type of stuff. He layered the 3M tape such that he could pull it off in one move when needed.

thumbnail_IMG_6273.jpg

We did the bottom eyelid first. My FIL sprayed the eyelid section that wasn't taped off, and then sprayed the housing section that wasn't taped off. He used Goo Be Gone consistently throughout this process to keep the nozzle from clogging and to clean his hands whenever they came in contact with the spray glue (again, nasty stuff). We had to wait like 3-6 min before the glue became tacky on the surface of the items. Once it did, then you could press the two items together to make contact with the glue from both sides. See below for an example.

thumbnail_IMG_6277.jpg

It didn't take long before it had a nearly unmoveable seal. Once the bottom eyelid was affixed, then we repeated the process with the large top eyelid, and then the thin top eyelid.

thumbnail_IMG_6275.jpg

Worked our way through each eyelid individually until we had complete eyes with eyelids.

IMG_6279.jpg

thumbnail_IMG_6276.jpg

I felt like the combination of the 3-D googley eye and 3-D eyelids really made the whole thing pop. We were all very pleased with how this turned out. And we were all hoping that the seal between the eyelids and the eye housing would be strong enough to hold them tight to the base of the costume when attached with the sewable snaps.

Next - Part 14
 
Last edited:
Marty and Mike Wazowski - Costumes: Part 14
Alright, velcro didn't work. But would the combination of industrial strength glue and sewable snaps be the ticket to a completed base costume???

We drew with chalk on the back of each individual item (eye and mouth). We then had myself and G stand in our costumes when we pressed the items into the costume. This left a chalk mark on the costume and then we knew where the sewable snaps needed to be sewn onto each costume.

IMG_6292.jpg

For each of the items we did the following:

-G's mouth = 4 small snaps
-G's eye = 4 small snaps
-My mouth = 2 large and 3 small snaps
-My eye = 3 large and 2 small snaps

I hand sewed the male end of the snap onto the items, and Steph hand sewed the female snaps onto the base of the costume.

For my hand sewing, I was using some sort of double sew technique. I first threaded my needle. Tied a knot on the opposite side of the needle. Stuck the needle through the fabric and up into a hole on the small snap. I then took the needle and went down through the next snap hole and into the fabric. I then went into the fabric and came up through the same hole. I then repeated the process again by going downwards into the next snap hole, back up through the same hole, and then down to the next. The small snaps had four total holes, and I went around the snap three times. On the final time around, I came through the final hole from underneath, left a little loop in the thread and then threaded my needle though that loop. I did this twice and created a slipknot.

For my large snaps, they had six holes, and the holes were larger. So at the start, I doubled up the thread by cutting a long piece and then aligning the two ends. I tied the two ends together in a knot. Then I followed the same procedure as the small snap and went around through each hole three times. After the third pass, I did a triple slipknot.

thumbnail_IMG_6294.jpg

For Steph, she did much the same, except where I was simply going only into the top layer of fabric with a little backing, she was going through the entire costume front piece to inside of the same piece. This created a tighter sewn seal.

thumbnail_IMG_6293.jpg

thumbnail_IMG_6295.jpg

This ended up being really difficult for Steph. In total between the two costumes and 18 snaps and both of us hand sewing (mind you I've never hand sewn before, and BTW good thing my sew job is hidden because it's a mess visually), it took about 7 hours. But ultimately the final product was worth it. But the moment of truth was when we snapped on the first piece to test whether the theoretical plan aligned with a realistic outcome.

thumbnail_IMG_6296.jpg

Success!

And then the mouth!

IMG_6297.jpg

IMG_6298.jpg

Half of me thinks it looks fantastic. The other half of me is truly creeped out by it. It looks straight out of an 80s Jim Hensons creepy movie (think Labyrinth).

All it needed was a child!

IMG_6299.jpg

That's a smiling Marty Wazowski if I've ever seen one.

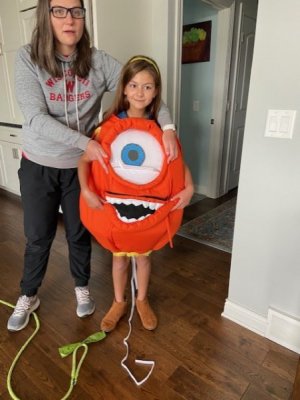
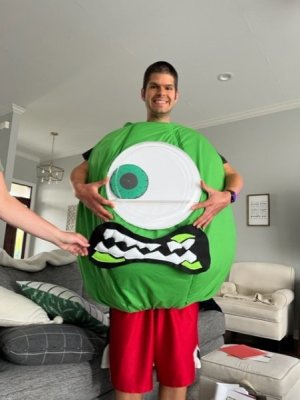
G's costume ended up being much easier than mine. Her foam really filled in well and took up the vast majority of all the available space. Whereas mine because it's so large had some extra space here and there to make it easier to work with. But what was easier to work with a few weeks ago when we were doing the collar was now making Steph's life harder when sewing the buttons on the Mike costume. The fabric and foam kept bunching on her. But even with the headaches, I think the final product turned out pretty awesome!

IMG_6302.jpg

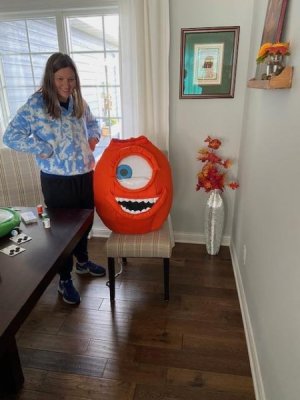
That looks like a pretty concerned Mike!

But we're not quite done yet. We've got some hats to make, some horns to wrap up, some shoes to make (with toenails!), and possibly a microphone. But this was a huge step in finalizing these costumes. They're really coming together and not a second too late as we've only got 1.5 weeks until our first event! Yikes!

Next - Part 15
 
Last edited:

Y'alls costumes are looking fantastic!

Thanks!

Here's a free joke for you: "Why did the runners cross the road? To get away from Roz!" 🥁
Seriously though, great job!

That's a good one for race day! Thanks!

Really amazing attention to detail. Not that anybody is surprised!

Thanks! It's really coming together.

Wow, those look great! And word on the street makes it seem like you should be able to use them for races too 🤞

Thanks! Have you heard anything new, or is this in reference to Ryan's updated email exchange from a few weeks back? Either way, we're hoping so!
 
Wow, those look great! And word on the street makes it seem like you should be able to use them for races too 🤞

Thanks! Have you heard anything new, or is this in reference to Ryan's updated email exchange from a few weeks back? Either way, we're hoping so!
Not the same but……
We were at MNSSHP at the beginning of the month and I saw several costumes that I thought would be turned away with the “new rules”. So I agree you should be safe!
 
Have you tried reaching out to rD by email? I've heard of several different folks sending in costume pics and getting a yes or no.

We plan to wear them at MNSSHP and then send the pics of us inside at the party about whether they are runDisney acceptable as well.
 

GET A DISNEY VACATION QUOTE

Dreams Unlimited Travel is committed to providing you with the very best vacation planning experience possible. Our Vacation Planners are experts and will share their honest advice to help you have a magical vacation.

Let us help you with your next Disney Vacation!


Latest posts


facebook twitter
Top