• Controversial Topics
    Several months ago, I added a private sub-forum to allow members to discuss these topics without fear of infractions or banning. It's opt-in, opt-out. Corey Click Here

"Boutique" shirt ~*Picture update in post 11*~

ms_mckenna

DIS Veteran
Joined
Oct 3, 2006
OK you guys are pretty creative so I will see if anyone can tell me how to make these. I am not wanting to do a lot of iron ons because I have not had good luck with them in the past. Probably because I used the ones for light fabric instead of dark so I will be doing that this time. I have 64 total shirts (16 different designs) for this trip so I definately do not want that many iron ons. I am going to try the one with fabric paint on a few and the new marker ones that were posted as well. I bought some red shirts last night orginally for an iron on but I think they would be adorable with a big mickey head on them ... maybe with a patch over his eye for the boys and a tiara for the girls. Anyway I do not want to paint them on, I want to do the "boutique" style shirt that is done with fabric. I think it is an applique but I could be wrong. I have seen the ones that use a wide stitch and just go around the item .... which is doable I can sew but it is not always pretty. What do you think you would make these with fusable web maybe? Basically I want something I can cut it out of fabric piece it together and stick it together and then stick it on a shirt. Would fusable web hold it all together? Any other options that you can think of? Also has anyone had any experience doing these?
Thanks in advance for any help you can give me.

I have no idea how to do anything with fabric, so I can't help you there, BUT
if you are open-minded, I have an idea for you to do a lot of shirts CHEAP!!!

The process is a little:scared1: scary, but here goes . . . .

I made a couple shirts for my kids using a Mickey head cardboard sillouette cutout and BLEACH!!!:scared1:

Here's what I did . . . I attached the cutout to the centre of the shirt (masking tape behind). The shirt should be laid out flat on an outside table or similar. Then, I sprayed bleach all around the cutout (I held the sides down to get a crisp line). After going all the way around, I sat and watched the colour change. Once it was at a desired colour, I plunged the shirt into cold water to stop the bleach from working. After this, I washed the shirts once again.

The colour of the sprayed area will depend on the shirt's original colour and the amount of time the bleach sits on the shirt. I did a pink one for my DD (long sleeve) and attched a real bow to the head to make a Minnie! I did a black for my DS, which turned out pretty cool for Halloween time because the sprayed area turned orange.

Just thought I'd share . . .:goodvibes
 
We did shirts like this in my Girl Scout troop and leaf prints several years ago. Black turns orange. The other colors we used, dark blue and dark green, just turned lighter. It is very cool. I originally found the idea in Family Fun magazine, so the directions may be on their website. Though as Maria said, it basically is just cover an area and spray around it with bleach. We did ours outside. Have a bucket of water handy to put the shirt in to stop the bleach. Then rinse well and wash.

ETA: Bleach shirt directions

While I was searching I also found this similar idea but with paint instead of bleach: Reverse stencil shirts It mentions using contact paper for the design. I think that would work well for the bleach shirts, too. It would make it less likely to get bleach under the edges of the stencil.
 
Oh, and about your original idea. Fusible web would probably hold for a while, though it does start to come loose and curl at the edges. It depends on how many washes you want the shirts to make it through. If they are just for the trip, you'll probably be fine. I usually use it to hold the fabric pieces together and then stitch around the edges. I haven't appliqued in quite a while, and I was never an expert, though. I do remember a shirt that a friend did where she used the fusible web to hold the pieces together and then went around them with fabric paint. It probably still didn't last as long as stitching, but it would help hold it in place.


Thanks for the heads up. The bleach and reverse paint idea both sound like something I will try doing. Do you not have a problem with the bleach making the fabric rip?
As far as the original idea I think I am going to have to bite the bullet and bring the sewing machine back out. Hopefully it is like riding a bike lol.


I had absolutely no problems with the fabric ripping so far, and the shirts have been washed over and over for a year now.


When I was in college myself and my friends made loads of shirts, pillows, pillowcases, etc by doing what you were originally talking about using iron on material.

The iron on stuff we found that worked best to attach the fabrics together was Heat and Bond Ultra it is available at Walmart or any craft type store. Not regular Heat and Bond and not Heat and Bond lite. Well you could use those but they do not hold up as well as the Heat and Ultra. I made many shirts using this and they held up to many washes.

What I found worked best was to wash the shirt without fabric softener and dry it without dryer sheets. They both put a coating on the fabric which prevents the fabrics from making a complete bond.

Cut a piece of heat and bond to a similar size to the shape you will be cutting out of it. But don't make it the exact size. You will iron this to the wrong side of the fabric you will be using. You can cut the fabric to a similar size of the Heat and Bond or just iron it close to the edge of the fabric. Make sure the fabric is smooth and wrinkle free before you iron the heat and bond to it. As for how long to iron the heat and bond and what temperature follow the directions on the package. I don't remember exact details but the package directions are good. If the fabric is not sticking together you need to iron it more.

The side of the Heat and Bond you iron on has a white surface which you can draw your design you will be cutting out. Remember you need to draw on the heat and bond in reverse as you will see the opposite side. The reason you ironed the heat and bond to the fabric before you cut the design out of the fabric is because it is much easier to cut the fabric with the heat and bond attached plus it keeps the edges from unraveling.

Once the design is drawn onto the white side of the heat and bond, you can cut your design(s) out. Once you have everything cut out, lay out the pieces to get an idea of how things will look.

When you iron the pieces on, you will start with the pieces on the bottom. You need to remove the white paper off the back of each piece of fabric and iron it onto the shirt or item with the good side up. I remove the white backs as I am ready to iron them on, in order to prevent accidentally ironing things on at the wrong place.

Keep ironing on the various pieces on top of each other to create your design. You may want to buy some parchment paper (not wax paper) in order to put over your design as you are ironing it together, this will prevent your iron from getting sticky, if the heat and bond is out of the fabric.

Here are some samples of things made with Heat and Bond Ultra.

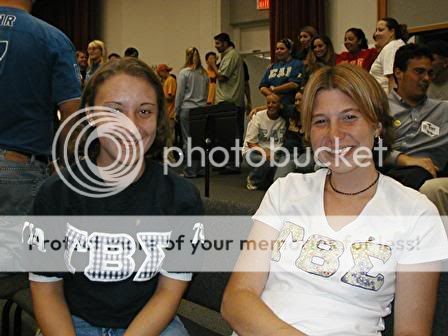
The white shirt was made using the heat and bond, the other is a professional made sorority jersey. The letters on the white shirt were outlined with fabric puffy paint. You can use the fabric paint if you chose. I really don't know that it makes all that much difference as to holding the design together but it covers up the fabric edge.
89963089103_0_ALB.jpg


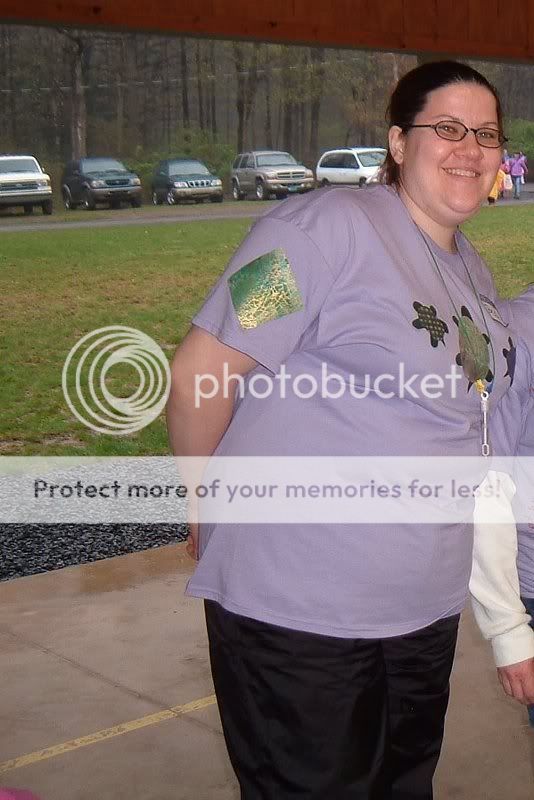
The turtles were pieced together how you would make whatever design you would want. Notice the fabric does not have the fabric paint on the edges.
2005SUCamping61a.jpg


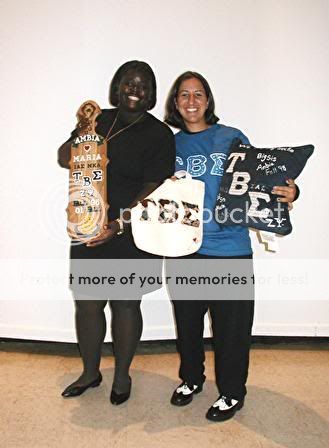
A few other Heat and Bond projects, the woman wearing the black dress is holding a wooden paddle it is not made with heat and bond
74517785203_0_ALB.jpg


Once the item is made you can wash it like normal, however dry it on low in the dryer or hang it up to line dry in order to make the designs last. You can put them in a high heat dryer but they won't last as long, so if you want the designs to last use the low heat or hang them to dry. If you dry in the dryer , especially on high heat don't let them sit in the dryer after the are dry as the designs may take the shape of whatever direction they are lying.

I hope this helps. If you have any questions let me know.
 
Cruiser1969 thanks so much for the info and the idea! I will definately be giving it a go. I am going to try it on a blue shirt I think.
Thanks so much ReAnSt, your instructions are exactly what I was hoping for. As of now I have no questions your instructions seem very complete. Hopefully next week I can get started doing some of these. At that point I may worry you to death in pm asking questions lol. Ok I lied one question. When I wash and dry the shirt before I use the heat and bond ultra do I have to dry it in the dryer? 75% of my shirts don't get dried at all that is why I am asking. I know I can pop it back in after it has hung out to dry for a minute on cool and it will soften up some if that is what we are looking for in texture?
Again thank you so much. I will post as soon as I get some done. Here's hoping all the teachers stay well next week, and I can actually get some things done while the kids are at school. The one thing I did not think about when I planned a suprise trip was when I was going to do all of these kinds of things lol.

You do not need to dry the shirt in the dryer before you iron things on it. Just make sure to not use fabric softener when you wash them. If you were to dry them in the dryer you would not want the dryer sheet, but you do not need to dry them in the dryer.
 
Well here is my first go at it. Tell me what you think. The letters were to small to cut out the round parts in the middle so I used my star punch. I had used a swirl first that was really cute but it was not sharp enough to cut into the fabric. :( 
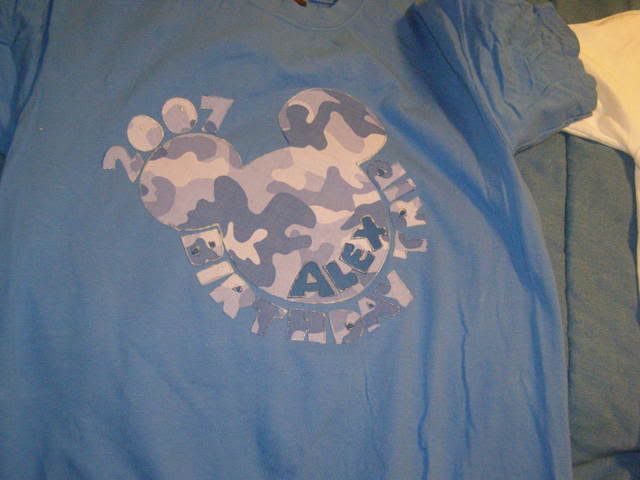
I have not outlined it and and am not honestly sure if I will or not. I also bought beads that I can go back and do beading on the crowns. Not sure if that will happen or not. Depends on how quickly I start getting shirts done and the time in between buying more. These went very slow today I started on them this morning about 11 and did not get done till probably 2:30. I am sure they will get faster as they progress. My next one is going to be the animal kingdom symbol with the tree with the animals in front. I also bought some blue camo fabric that I am going to do the same mickey face with thier names. Trying to think of something cute about hidden mickeys to put on it.
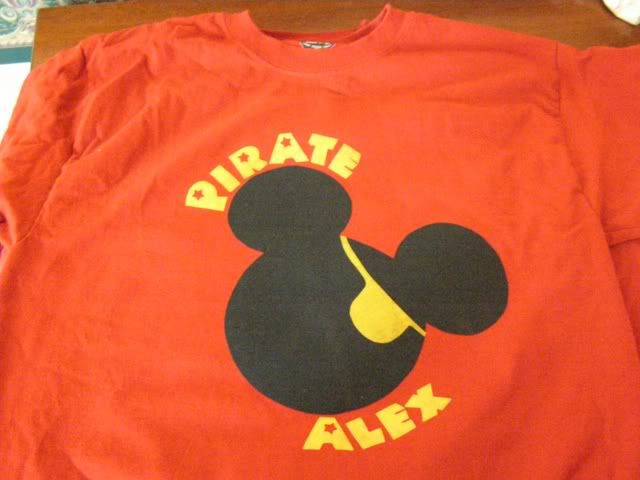
piratealex-1.jpg

Pirate Alex
princessshelby.jpg

Princess Shelby ( was going to use Princess of the Pirates Shelby but I did not have that much patience today ).
I still have mine and my husbands left to do and I am debating on what wording to use. Either Pirate's Dad , Pirate Dad, or Pirate James. Would love opinions.
 
Those look awesome! I love the star punch for the holes in the letters. That was a great idea.

I like either Pirate Dad or Pirate James.

I can't wait to see the rest.

Beth
 
You did a great job. Did you trace out the mickey head yourself? Or did you print a template
 
Thanks for the compliments they actually turned out better than I thought they would. I still have problems but I am pretty happy with the way they turned out. :)
The design of the pirate is Cruiser1969's I modified it to print at 8x10. I hope she does not mind that I am using it for a different purpose than she originally designed. :) http://i66.photobucket.com/albums/h278/ms_mckenna/mickeypiratehead.jpg (if you want the template)
This is what I did to make 2 princess and 2 pirates for those who would like to know.
I printed 2 the first one I cut out mickeys whole head (pretending basically the patch was not there) and traced it onto the ultrabond using rAnSt's instructions from above to cut out 4 mickeys from the black fabric.
Second I used my 2nd printed mickey head and cut the patch out of it. I traced the patch onto the ultrabond and cut out 2 patches. Make sure you are tracing your patch onto the right side of the paper because I had to cut it out a second time because I had flipped the pattern.
I then attatched the patches to the mickeys and set them aside. I used wax paper because I forgot to get partchment paper and had no problem with it but I will be picking up partchment paper for my future ones.
Next I found this crown on google images and altered it to fit Mickeys head. http://i66.photobucket.com/albums/h278/ms_mckenna/crown.jpg I cut it out and used it as a template for the 2 crowns. I cut the 2 crowns out.
Next I typed in my photo program using Junglefever size 100 and cut all my letters out. ( I saved them for later use because cutting out those letters is a pain) I then traced all the letters I needed onto my ultra bond side of my fabric and then cut them all out. I had issues getting my inside parts to line up like I wanted ... probably should have just gone and gotten my little sissors. Instead I decided to use a hole punch for those areas. Be SURE it is a sharp punch or it will not punch thru.
Lastly I put wax paper inside the shirt and laid it down and pressed it out. Then arranged all my words and parts and covered in another layer of paper and ironed.
If you follow ReAnSt's instructions you will have NO problems. She does a really good job of explaining I can definately tell after doing one she has done this a few times. ;)
Hope that helps someone.
 
They look great.:thumbsup2 You hit the nail on the head, I have made plenty of these. My sorority used to have pillowcase and t-shirt making nights using that method.

Not sure if I mentioned it before but wash the shirt inside out with the design in the middle.

Another thought instead of punching holes in the letters, cut out the circle/triangle or whatever shape you need for your letter hole with another color and then iron it on.
 
Another thought instead of punching holes in the letters, cut out the circle/triangle or whatever shape you need for your letter hole with another color and then iron it on.

Did not even think of doing that. Thanks so much will definately be going that route on the next set! Got to be easier than the hole punch lol.
I was actually very suprised how well they seem to have adheared to the tshirts. I will definately wash them inside out. Though I will be more than thrilled still if they only make thru the 1/2 day we will be wearing them lol. Anything else is gravy.:dance3:

They should hold up pretty well. I have had some for several years which have been washed many, many times. If they do start to peel you can use fabric glue to tack them back down.

I have a few ideas which I may make for my cruise in September.
 
Well I made one out of blue camo on a blue tshirt last night. Never again will I write names plus 2007 birthday trip out again on something that I have to cut each letter out with. ;) It took forever! The camo did what I wanted it to has a hidden mickey look to it. DH was not thrilled because in his words it did not "pop" so we went today and bought some tulip paint to outline with. (thought he would be against wearing something with slick paint on it I guess he has mellowed a lot in his old age ;) ) Well I decided to buy some glow in the dark and though it does not really show up in the day it looks REALLY cool in the bathroom in the dark. So they have become one of our nighttime shirts, I have not decided which park though. I think I am going to go back and outline my pirates shirts as well ... they just look more put together outlined.
You can see what I mean by being camoed by the colors I used: They are the same mickey head as the pirates shirts (cruiser1969 designs) and then above the ear it says 2007 each mickey at the bottom has the person who is wearing the shirts name and then below it it says Birthday trip.
P4151151.jpg

This is a picture of it in the dark ... you cannot really see it but in the dark you can read all the letters perfectly and can see Mickeys head it looks really neat at night. :)
P4151155.jpg
 

GET A DISNEY VACATION QUOTE

Dreams Unlimited Travel is committed to providing you with the very best vacation planning experience possible. Our Vacation Planners are experts and will share their honest advice to help you have a magical vacation.

Let us help you with your next Disney Vacation!


facebook twitter
Top